

In class, we built two variations on “Cars that Move.” The Retractable Badge car is a little more of an engineering project that kids might learn more from. This one is easier to build, and a quick route to a satisfying toy.
Tutorial – How to Build a Clothespin Racer
Materials: Clothespins, Pull Back & Let Go Racer Cars (note: If you only want a few of these and you don’t want to buy in bulk, I have seen the same cars sold 4 for a $1.00 at dollar stores), rubber bands, plastic straws and tape.
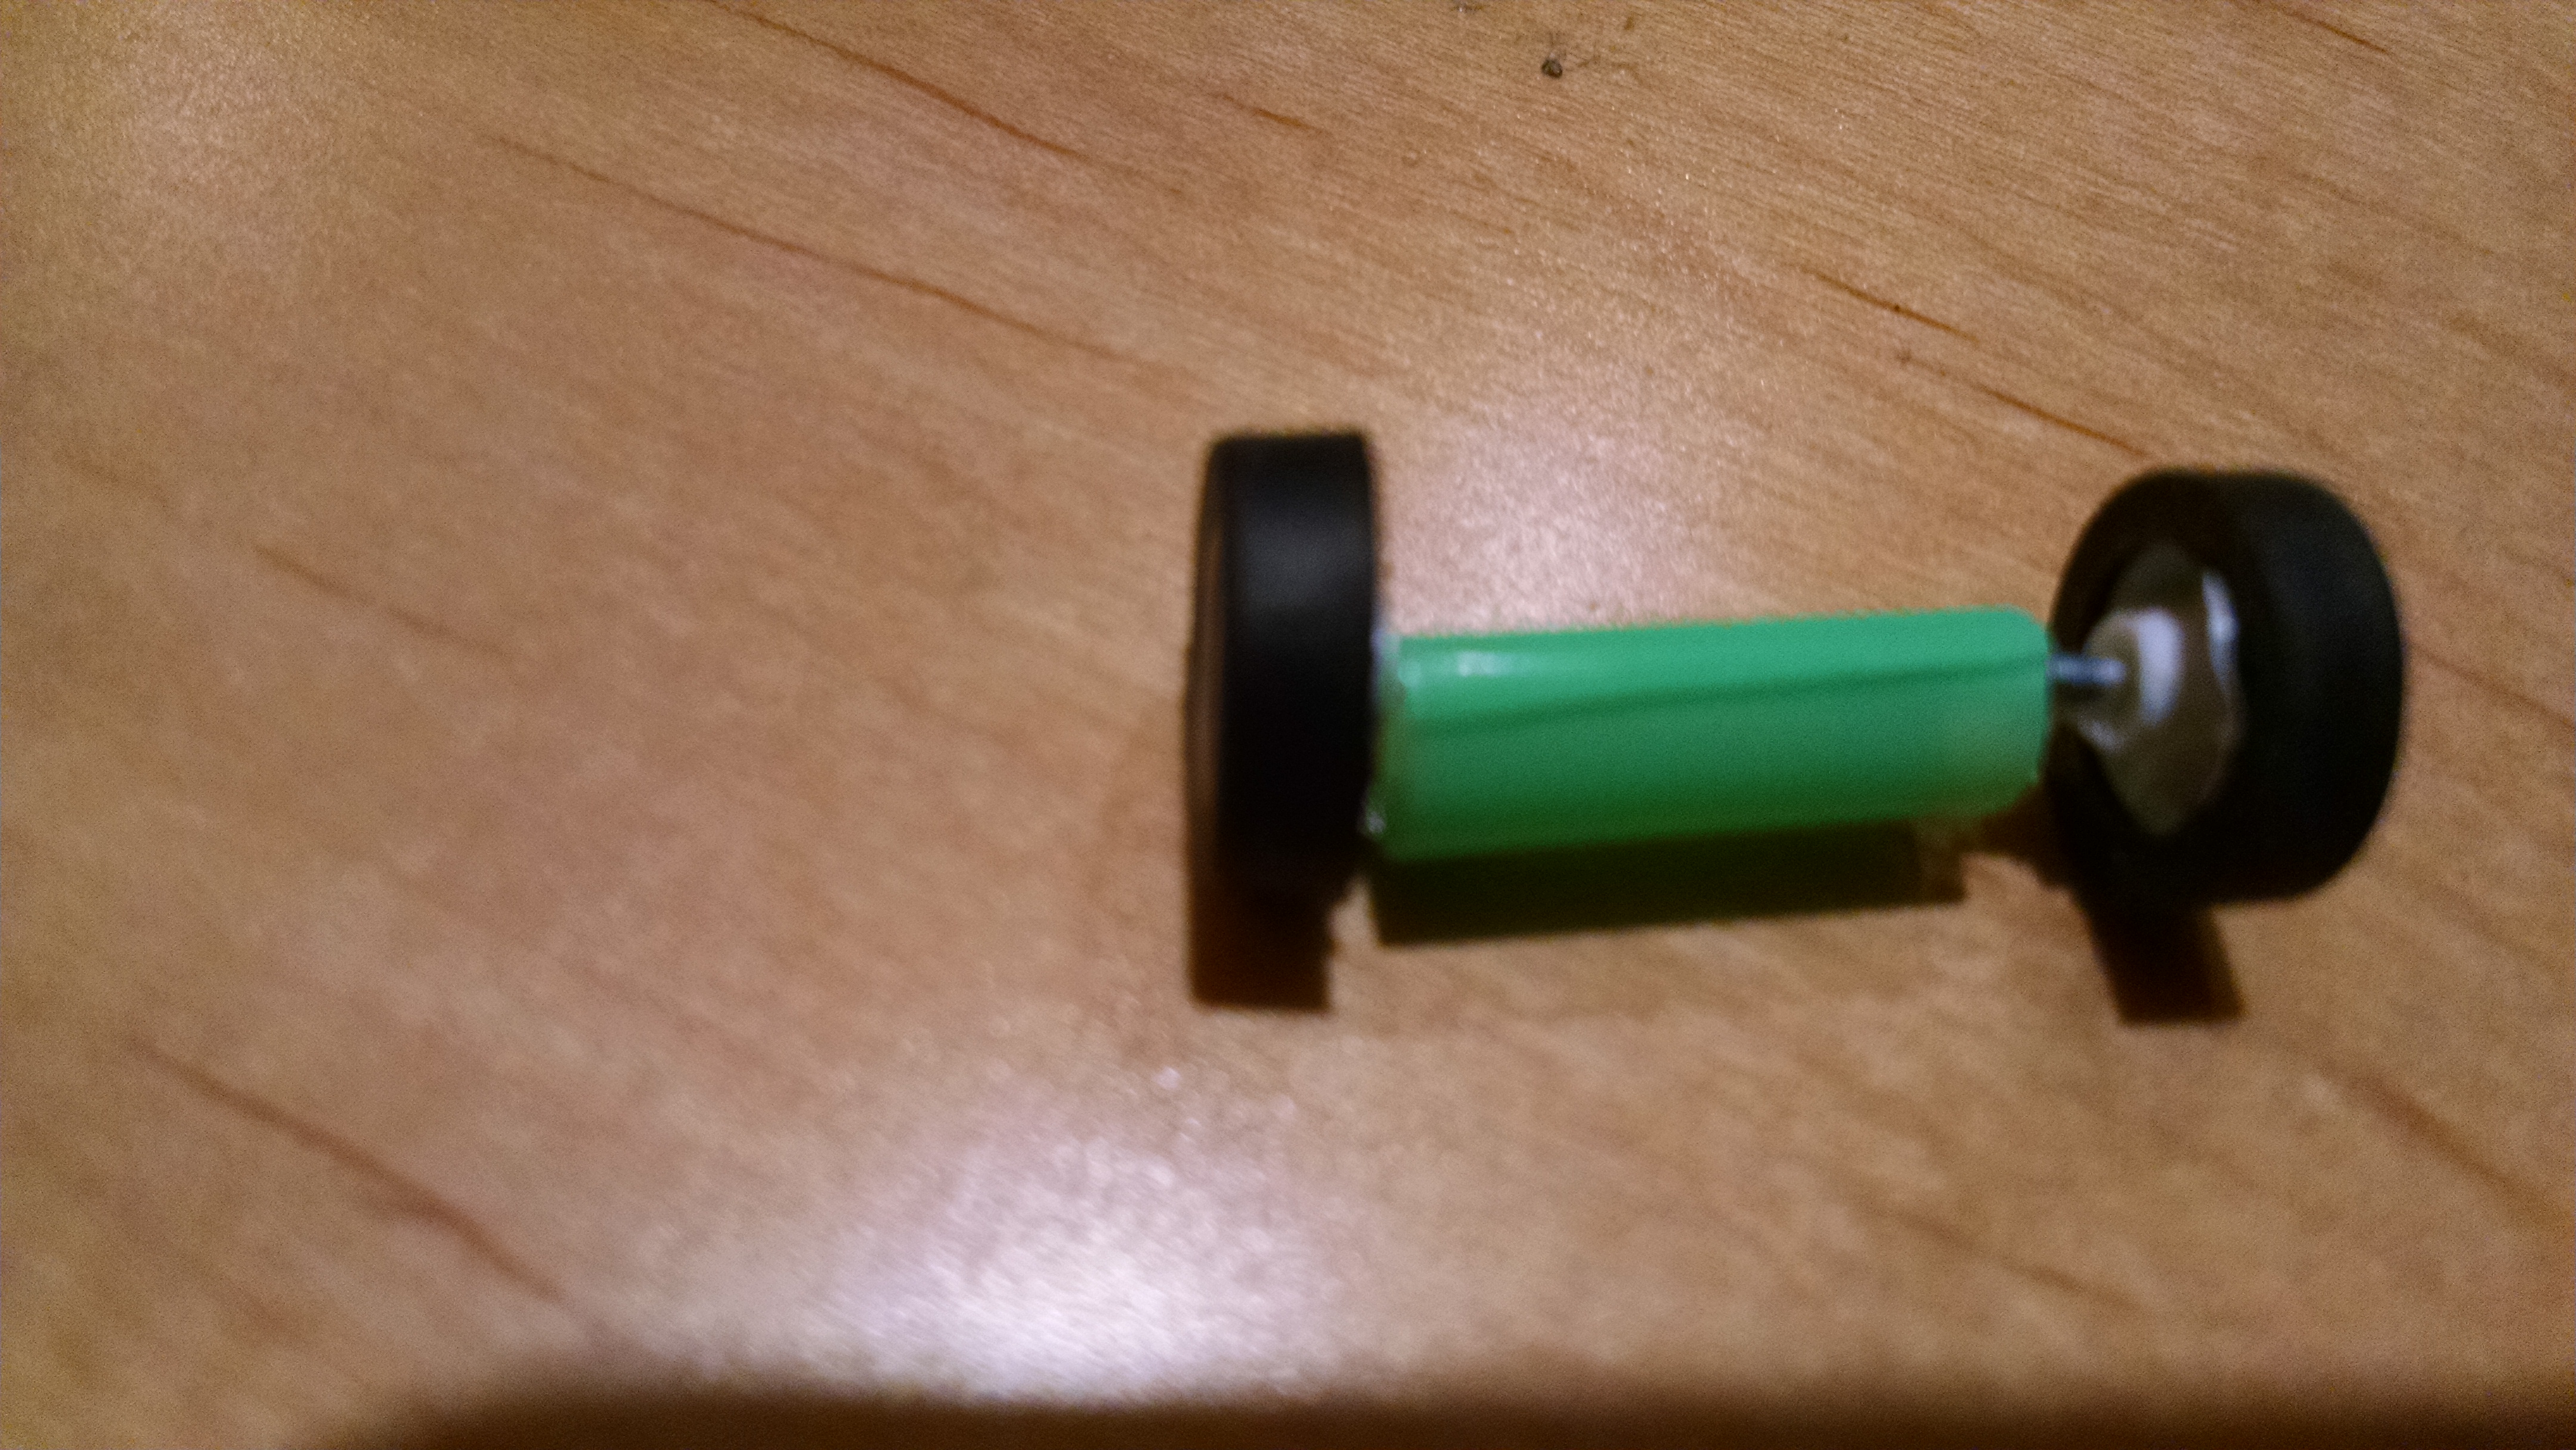
Prep: Cut plastic straw into 3/4″ lengths – these are about the same width as the front axle of your car. Then make a lengthwise cut in each one – you’re making a “sleeve” to fit the axle into. Note: To see a larger version of any image, just click on the picture.

Assembly:
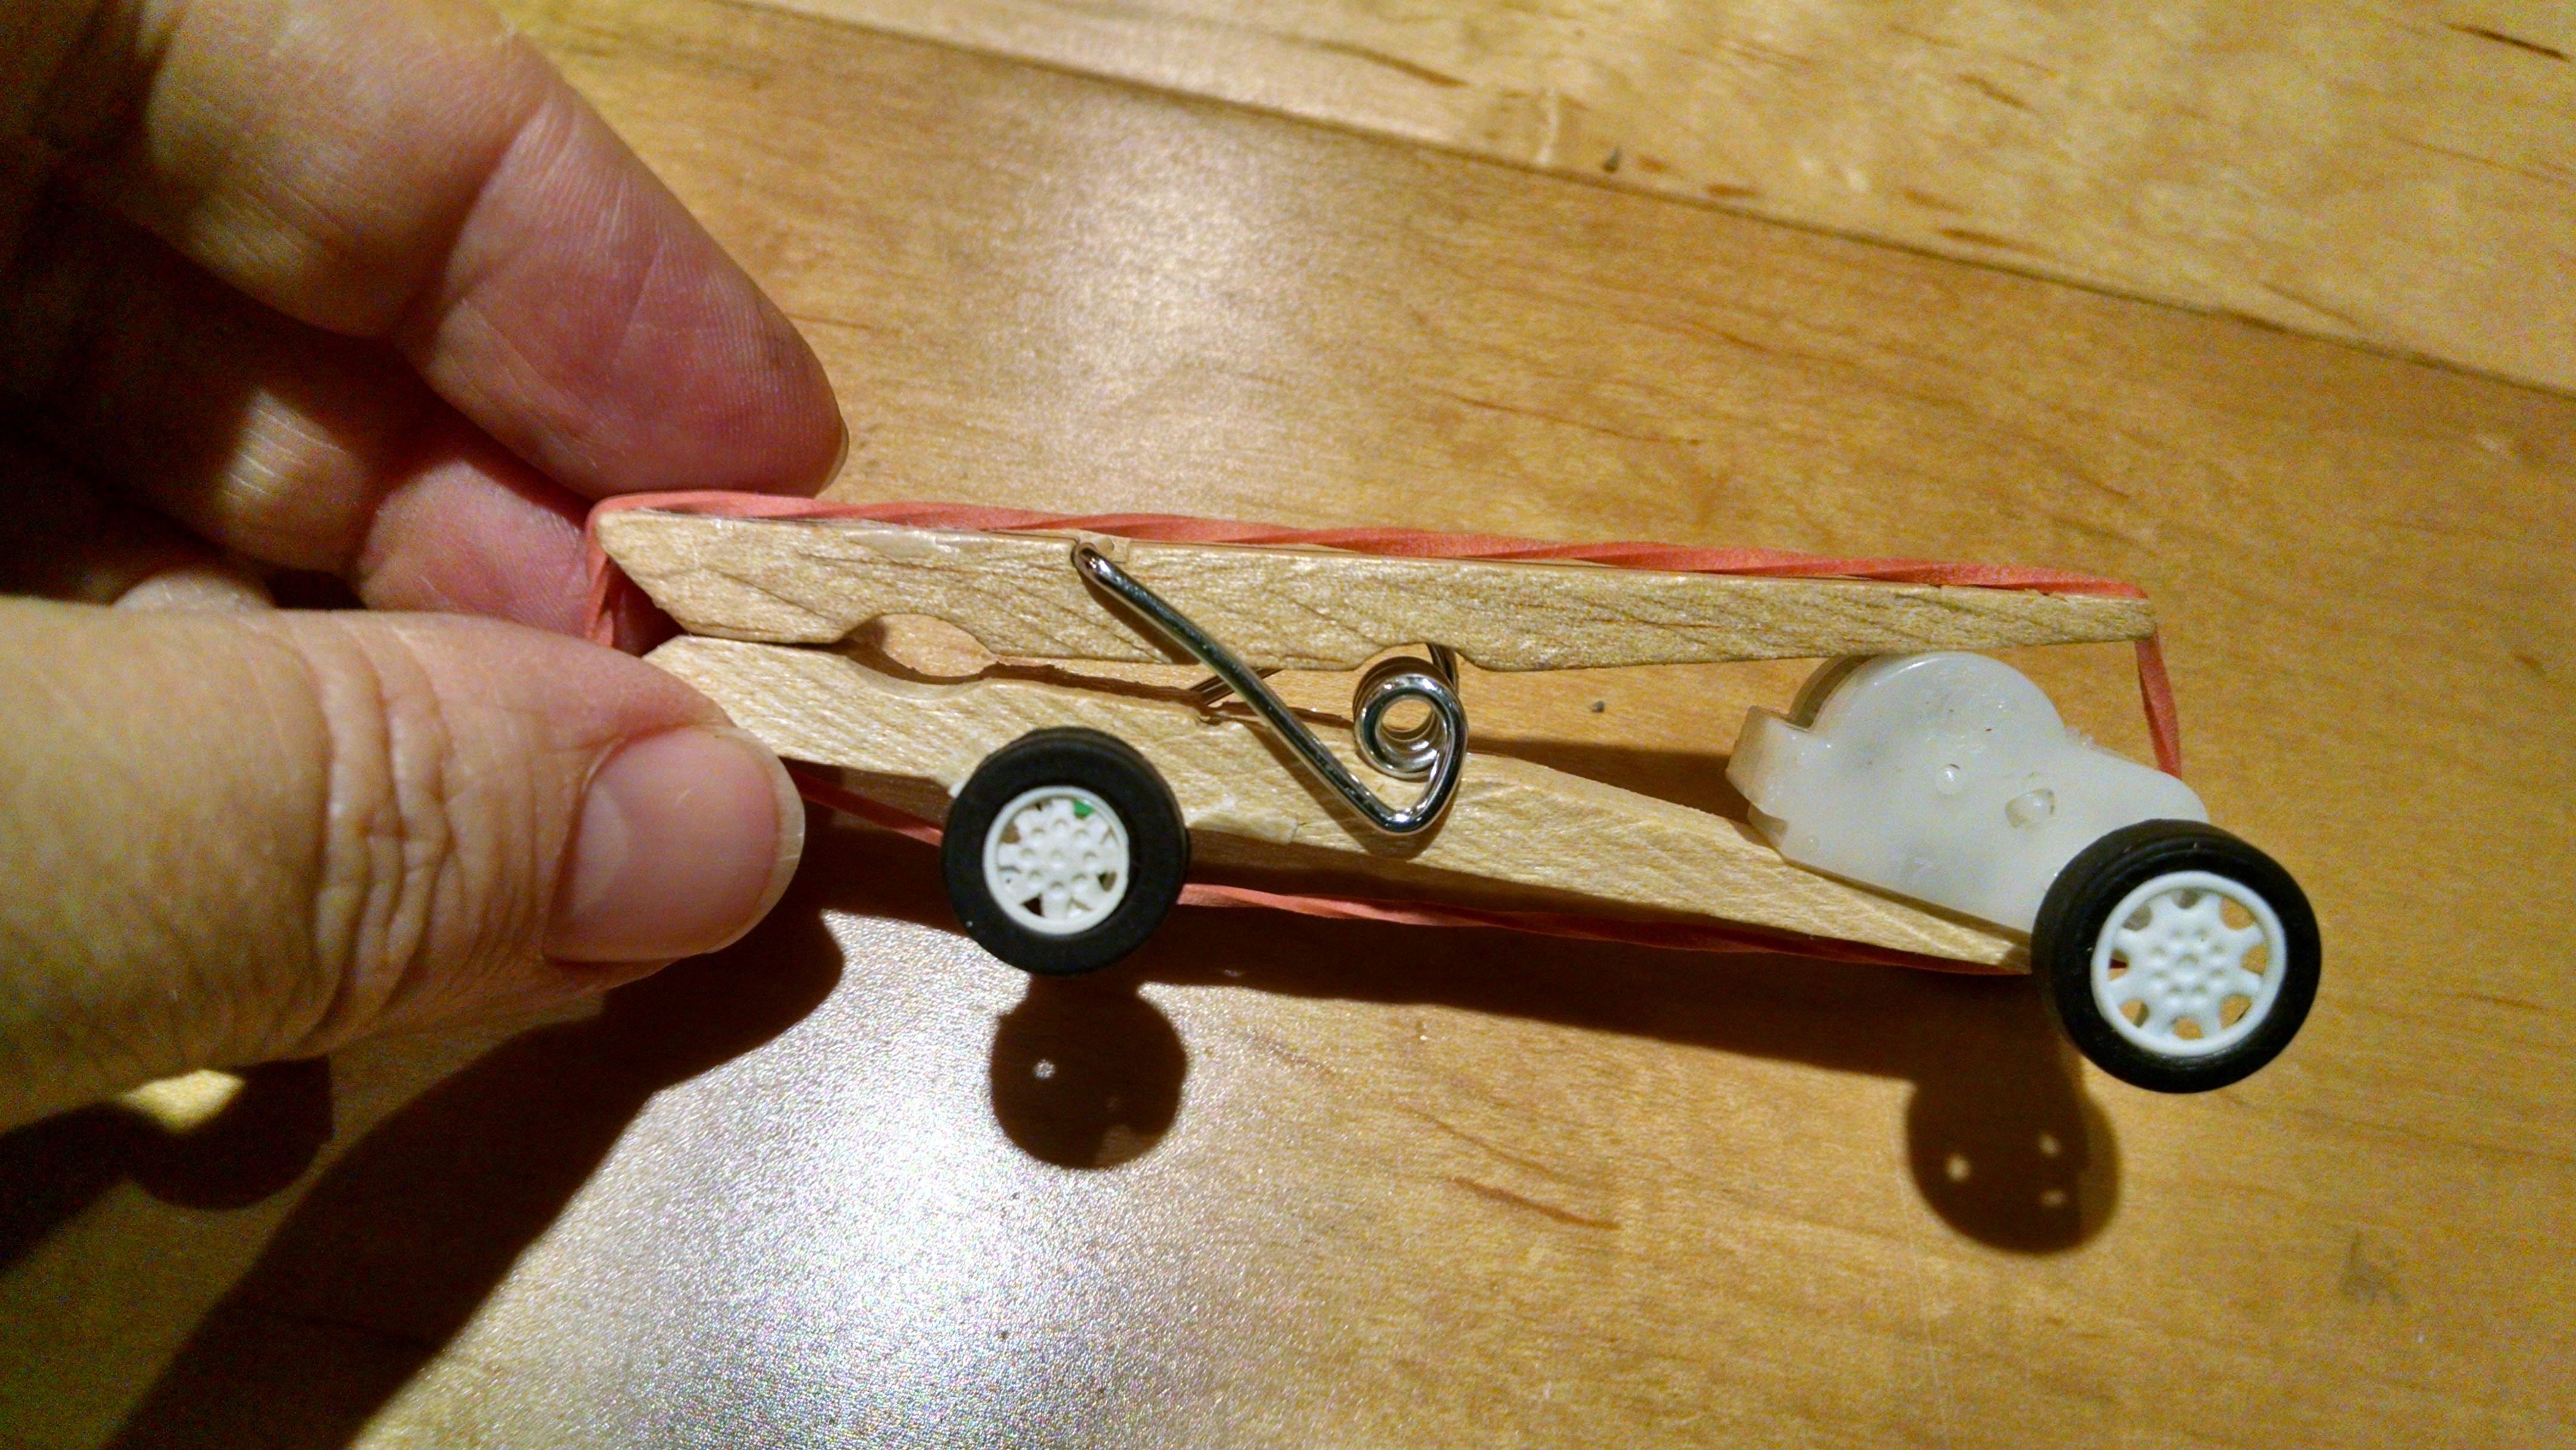
Step One: Disassemble the car – pull the top off, carefully take the two halves apart, then take the front axle out of its plastic frame.


Step Two: Slip the front axle and wheels into the plastic straw. Tape the straw to the clothespin, right on top of the metal clip that holds the spring in place.

Step Three: Insert the rear wheel mechanism into the back end of the clothespin.

Step Four: Slip a rubber band on lengthwise to hold the rear wheels in place. OR use electrical tape to tape the back end and the front end – tape it tight so the tape offers a little tension. (Electrical tape works best, as it has just a little stretch / flexibility.)
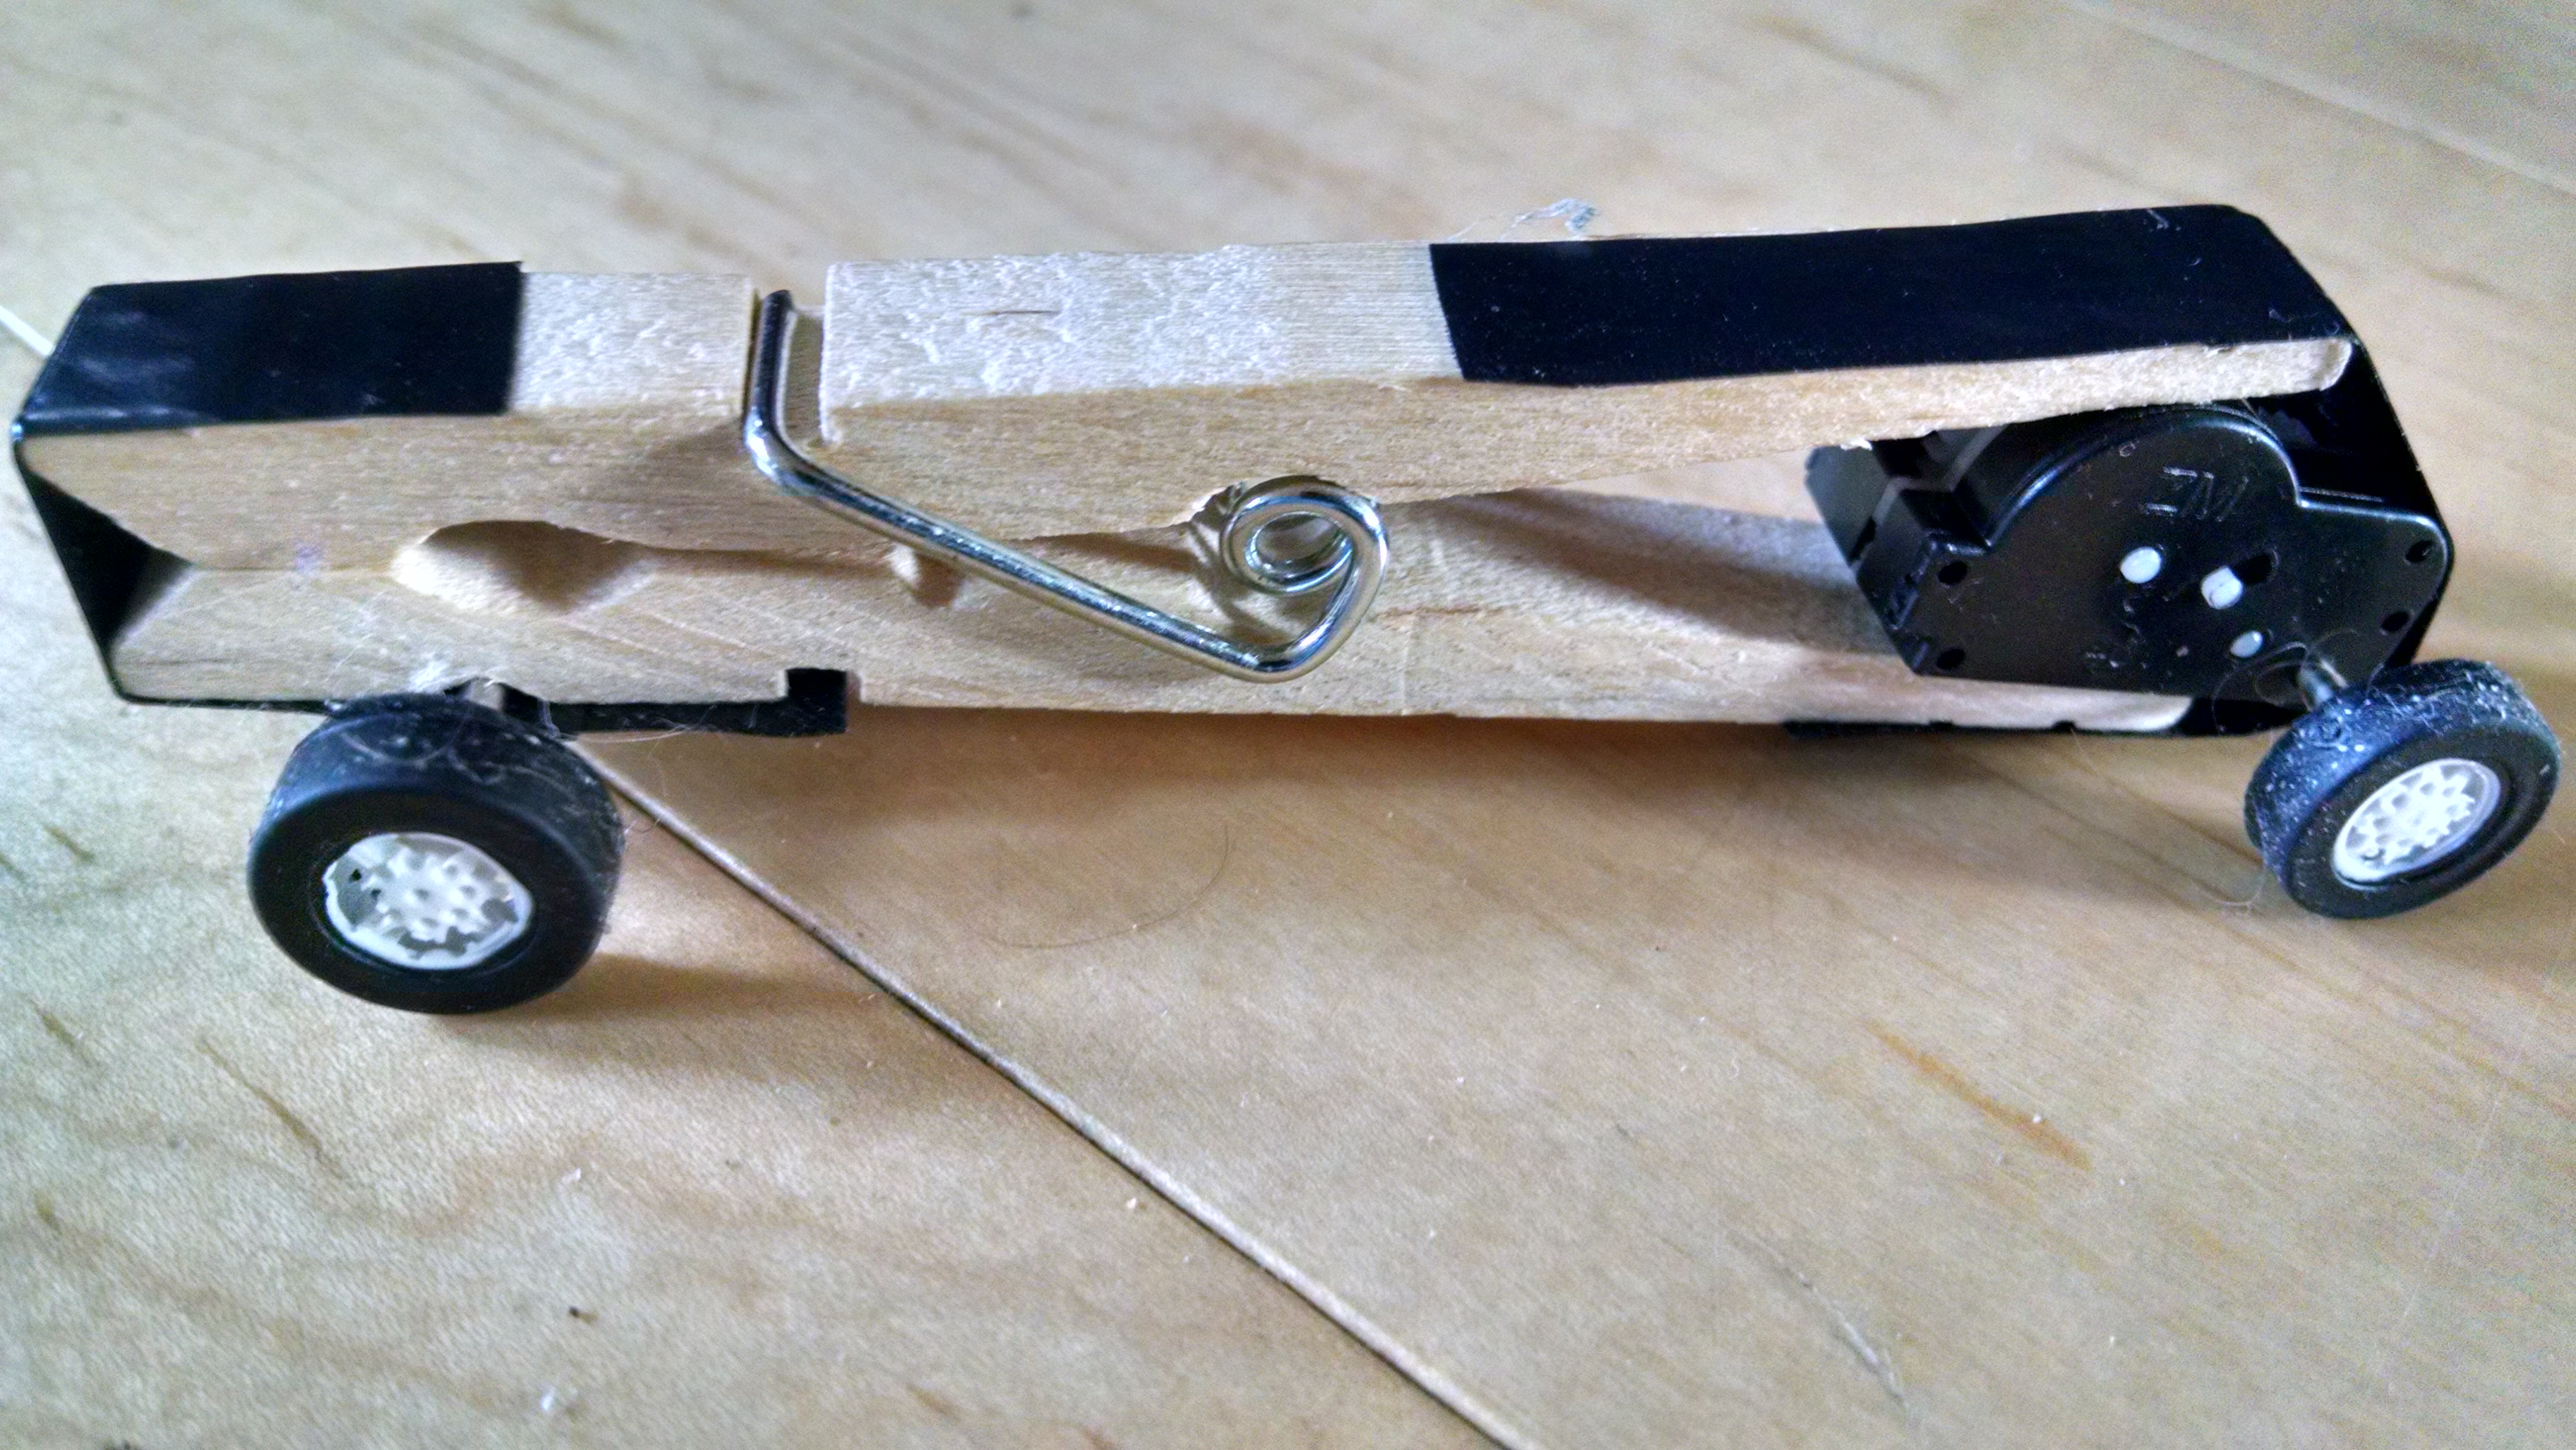
Step Five: Try it out! Set it down, pull it back, release – it should travel several feet. Note: if you’ve used a rubber band to attach them, the rear wheels often slip slightly out of place when you run the car, so just check and re-align with the rubber band before each run.
Variation: Instead of using the straw as a casing for the front axle, with a little more prep work, you can file a groove in the clothespin (right in front of where the groove for the spring is), then place the axle directly in the groove (without a straw) and cover that with a bit of paper or folded tape to create the channel, then tape that in place to hold the front wheels in.

Decorating your Racer: Kids can write their names on their clothespin, or can decorate them. You could use regular markers or Sharpies, but my favorite thing for decorating wood is these washable Chalk Markers. They’re actually designed to use on chalk boards or glass, and warn you not to use them on porous surfaces like wood (because they won’t wash off), but I like the results we get using them on wood.
Note: All the activities described in my posts are from Family Inventor’s Lab, a parent-child cooperative class in Bellevue, WA. We are a play-based, STEM focused class for preschool through early elementary (kids age 3 – 7). We do a wide variety of fun, hands-on activities to learn about Science, Tools, Engineering, Nature, and Art. We also sing songs and read stories. Most of our activities are cheap, easy, and use everyday materials that most families would have in their homes (or their recycle bins!), so that our activities are appropriate for classroom teachers, parents who homeschool, or after school programs.

[…] Building a Clothespin Racer – Engineering for Kids […]
LikeLike
[…] Build a Clothespin Racer – Engineering for Kids […]
LikeLike
[…] Build a Clothespin Racer – Engineering for Kids […]
LikeLike
[…] Build a clothespin racer or marble […]
LikeLike
[…] Clothespin Racer: Take apart a pullback racer car from a birthday party favor, mix that with a clothespin, some tape and rubber bands, and you have a little “car” that really zips! How to build a clothespin racer. […]
LikeLike
[…] Build a clothespin racer or marble […]
LikeLike