
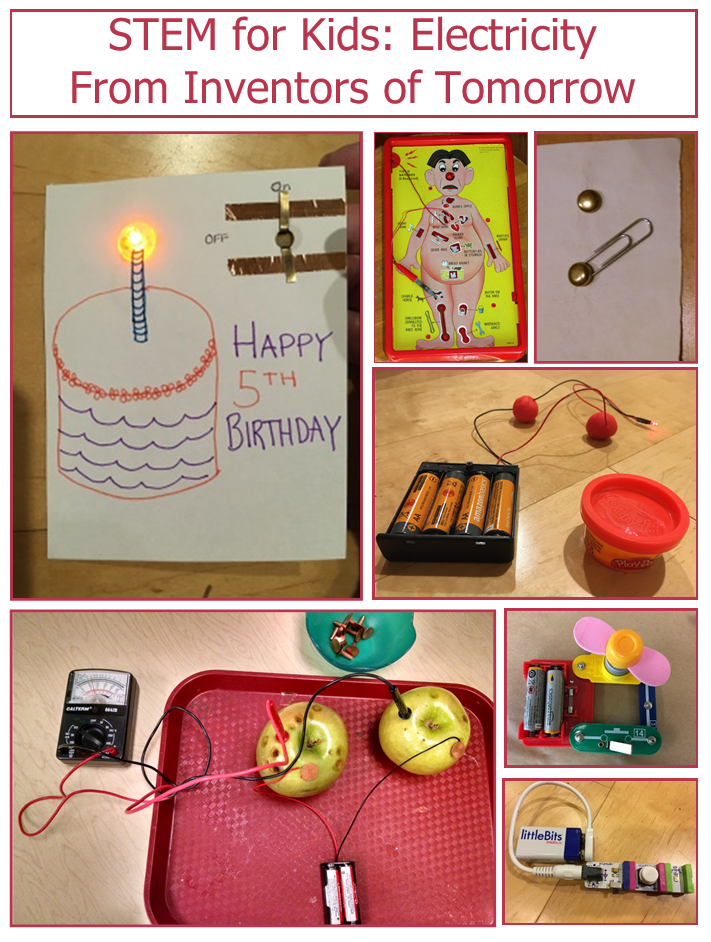
Each year, we explore electricity in our Family Inventor’s Lab, a STEM class for families with kids age 3 – 7. We do experiments with electrical circuits, explore circuit building kits, and play with electrical toys and make an LED card that lights up. We explore static electricity, do some art, and learn about hydroelectricity. We have one group time focused on static electricity, and one on circuits, where we read books and play games to reinforce the learning.
Experiments with Electrical Circuits
Lighting a Bulb:
The simplest, most straight-forward way to illustrate a circuit is to use a lightbulb on wires, and hook it up to a battery.
First, hold up the lightbulb and ask why it’s not lit. They say because it has no power. You hook one wire to the battery, then ask them if it’s lit. Why not? Then hook the other wire up. Now the light comes on. Point out the circuit – the electricity is pushed by the battery into the first wire, then through the light, then through the second wire back to the battery.
We used a 6 Volt Lantern Battery and some old lightbulbs on wires we have in the store room. (I can’t find bulbs quite like this on Amazon or at Radio Shack now, but you could do a similar experiment with LED bulbs and a battery pack. Or you could use a 1.5 – 3V motor and a AA battery pack.)
You can also add in a switch so they can see how the switch interrupts the circuit. We had mechanical switches and DIY switches we could include in the circuit. (If you don’t already own these materials, there are several simple kits that include the basics, such as School Specialty 560962 or the Eisco Labs kit.)

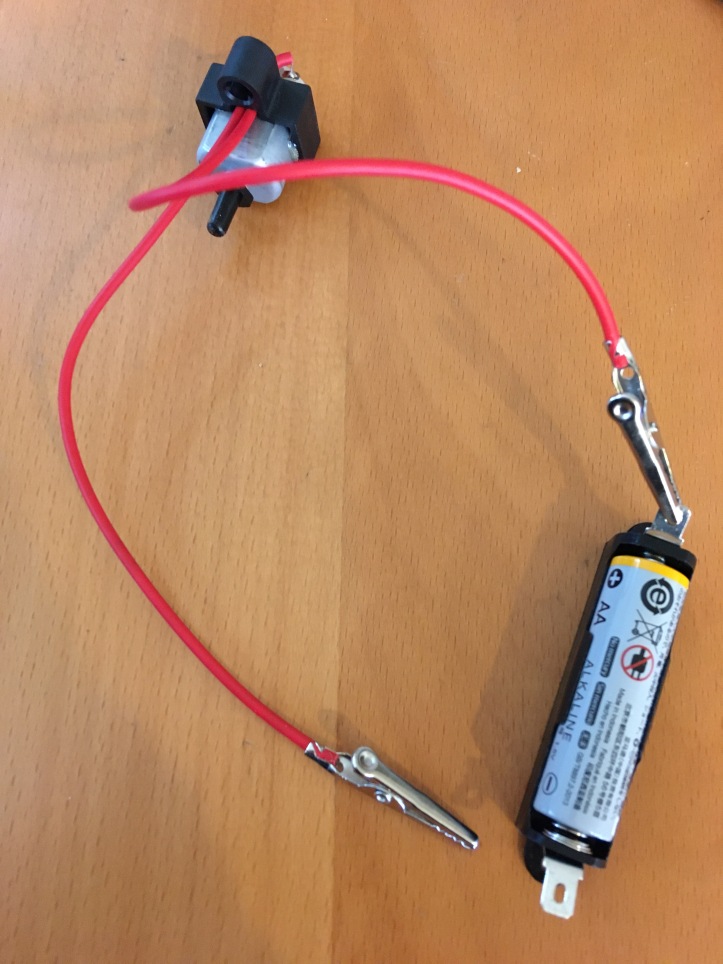
You could also do this exploration with a battery pack and a motor. It can be hard to see the pin on a motor spin (though you can hear it), so you can put a bead or something on the pin to make it more obvious.
Conductive Play-dough (Squishy Circuits)
You can demonstrate circuits using conductive playdough.
You’ll need LED bulbs and a battery pack. You can use Play-Doh brand playdough as your conductive dough, or make your own. We made two batches of play-dough, one conductive (made with salt and cream of tartar) and one insulating (made with sugar and distilled water). See recipes at http://courseweb.stthomas.edu/apthomas/SquishyCircuits/ or www.instructables.com/id/How-to-make-conductive-play-dough/?ALLSTEPS.)
A simple circuit involves taking two balls of conductive dough. Push one wire from the battery pack into ball 1 and the other wire into ball 2, then insert one wire from the light into ball 1 and one into ball 2. Show the children the circuit.
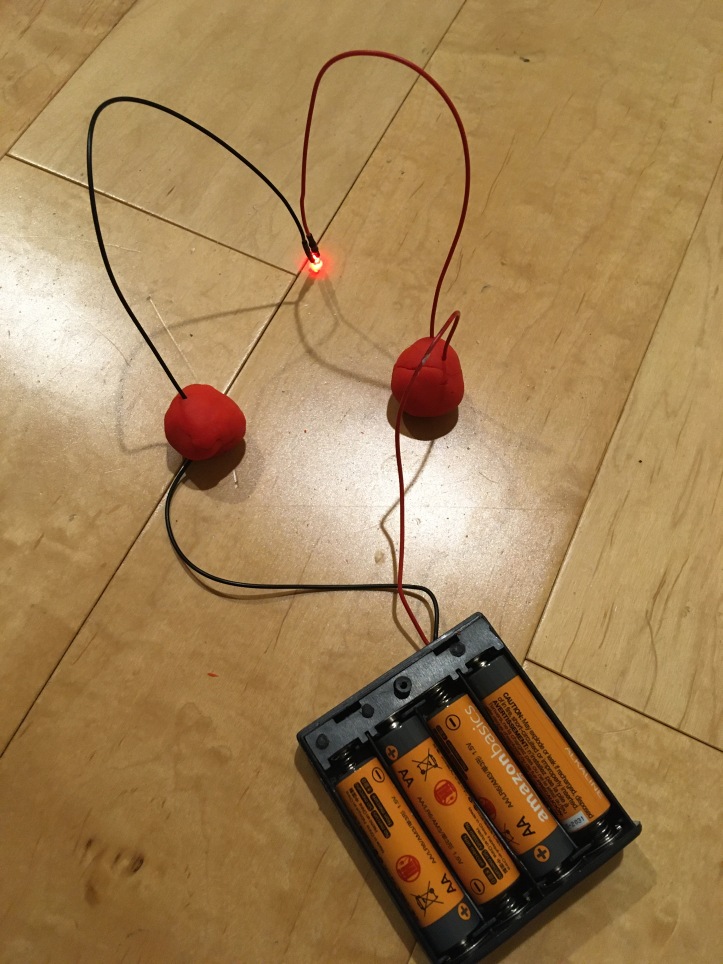
Then play with it from there. What happens if we push the two balls together? We create a short circuit. The electricity just passes through the play-dough, not lighting the light. What if we put a layer of insulating dough between the two balls – light comes back on. Have the children test several lights, and sort them by color. (Note – they shouldn’t touch the wires on the lights directly to the battery terminals – that can cause them to burn out.) Have them build series circuits. There’s a lot more you can do with “squishy circuits” made of play-dough. Here’s a video of a TED talk on why squishy circuits are cool for kids. http://courseweb.stthomas.edu/apthomas/SquishyCircuits/

Lemon Battery:
On many websites, and in many kids’ books about electricity, you’ll find directions for a lemon battery – you put a penny and a zinc screw in a lemon, and use it to light a lightbulb.
The science behind this: What’s happening in a voltaic battery: two electrodes – one copper and one zinc – are submerged in an electrolyte – an acidic solution (lemon juice in this case). Zinc and lemon produce electrons and copper and lemon lose electrons. Electrons pass through the lemon juice from one battery terminal to the other, creating electricity.
The idea for the experiment is: roll the lemon with some pressure to get it juicy, then insert into the lemon one zinc item (screw or eyelet) and one copper item (copper wire, rivet or copper penny – from before 1982 when pennies were more copper than zinc). Be sure the two metals don’t touch. Then take a lightbulb on wires – touch one wire to the zinc item and one to the copper to light the bulb. (Or so several sites / books claim.) We found that the current produced by the battery was way too weak to light our LED bulbs. We did get a voltmeter which could measure the current to show a small reaction was happening.
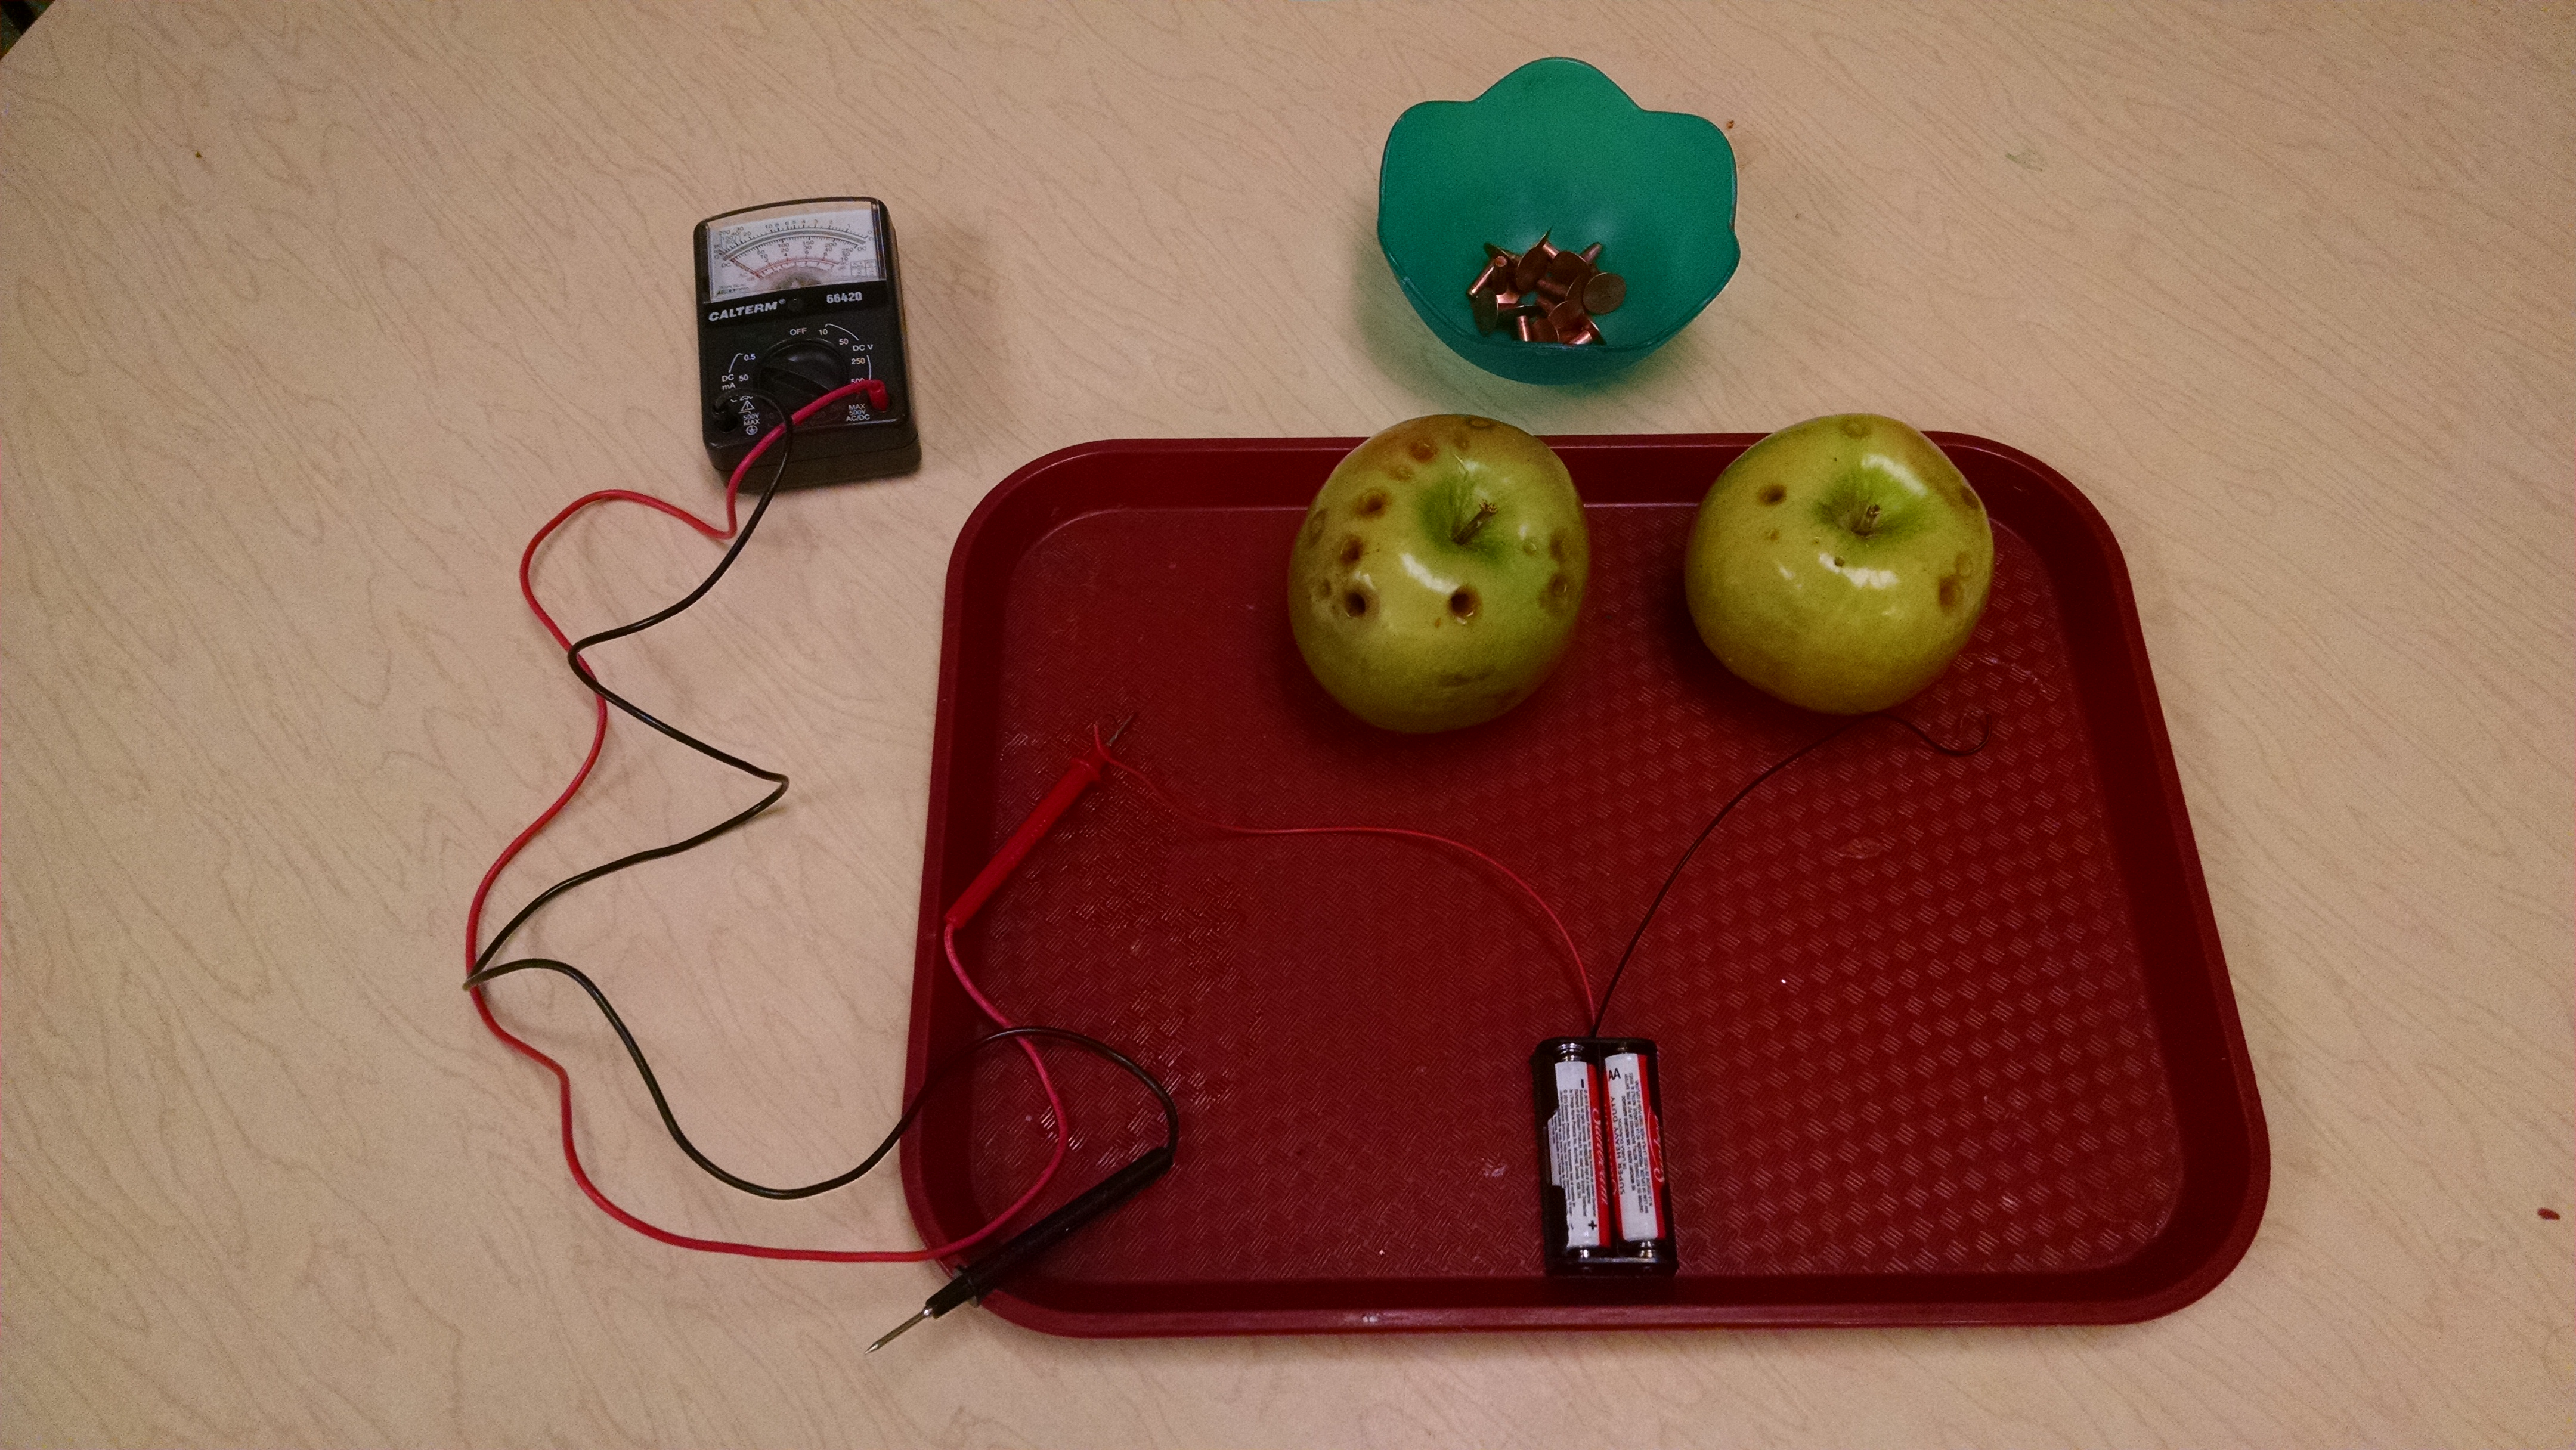
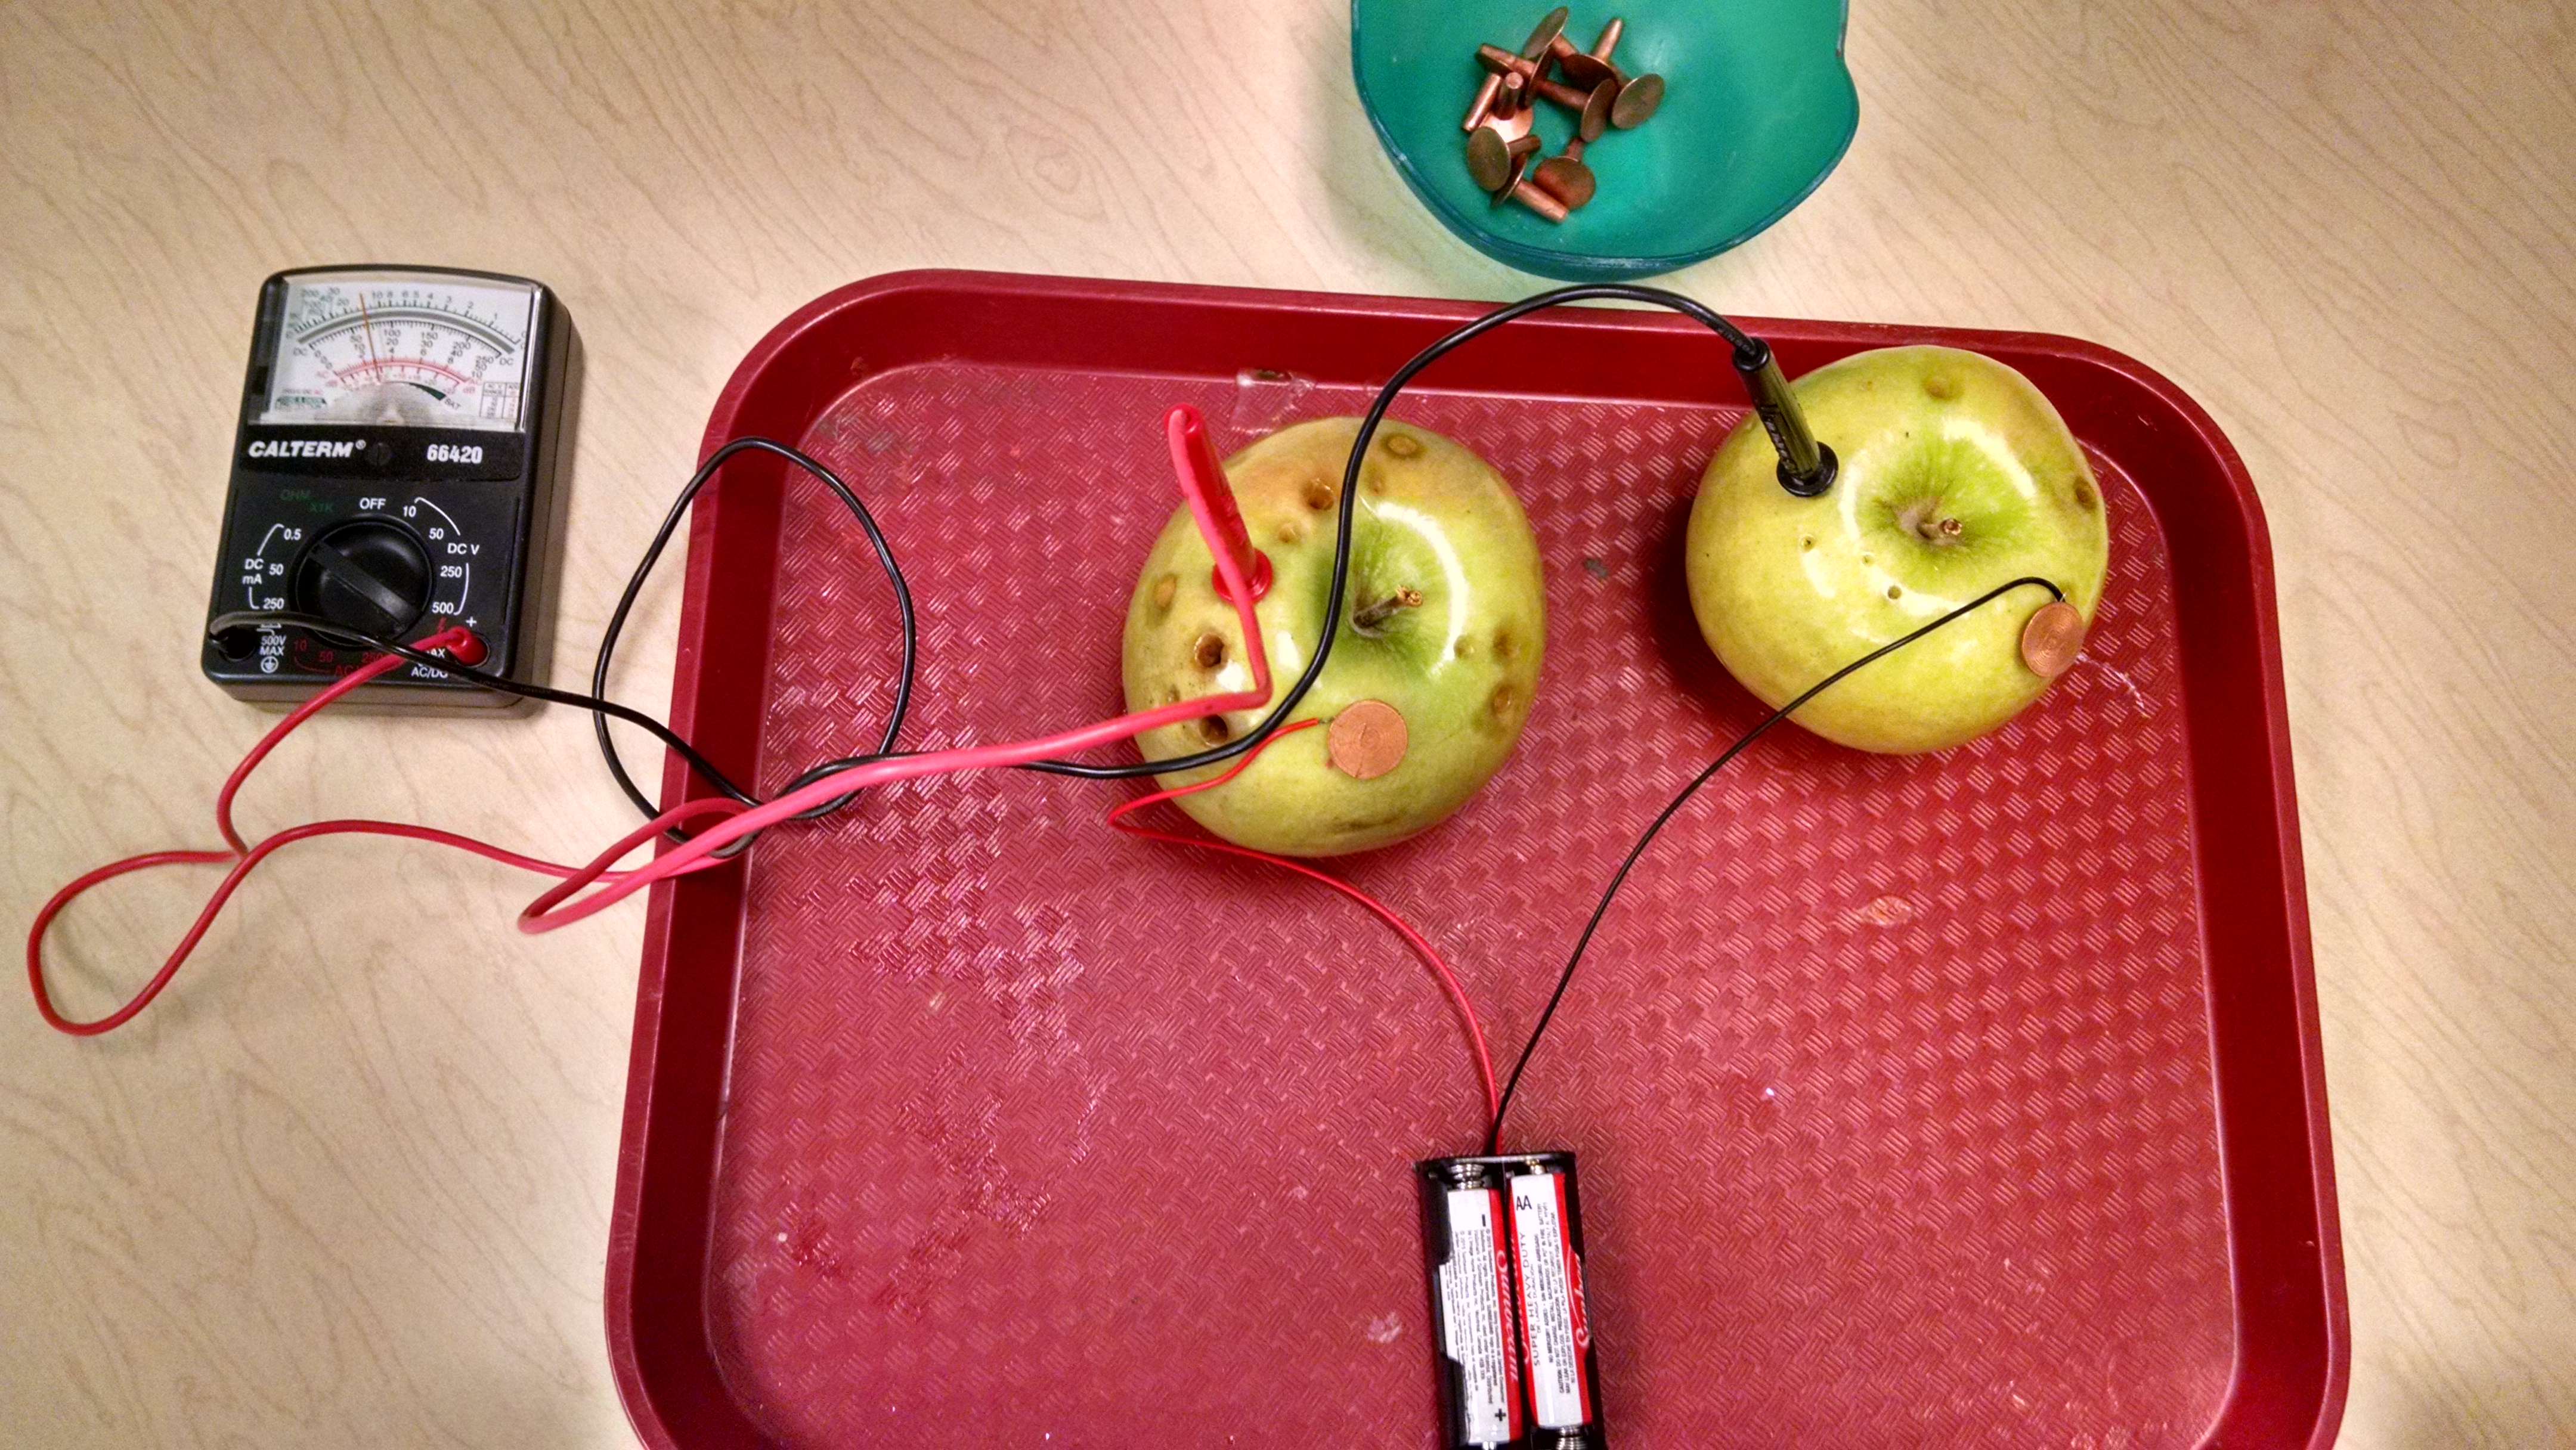
Apple Battery: Another year, we used a Granny Smith apple and copper rivets. You take a wire from the battery pack, wrap it around a rivet, and push it into apple #1. You take the other wire, wrap it around a rivet, and push it into apple #2. Then take the probes for the voltmeter and place them in the apple – be sure to put the red probe into the apple with the red wire, and the black probe with the black wire. The voltmeter will register the electrical current. Our older kids understood that the voltmeter indicated electricity was passing. Our younger kids didn’t understand that, but they liked pushing the rivets into the apple. 🙂
A homopolar motor / spinning wire
There is a fun experiment where you set a battery on magnets, then balance a copper wire on the top of the battery – it will spin around and around. It’s SUPER cool… and it’s hard to make it work well! Learn more: www.exo.net/~emuller/activities/Simple%20Spinner.pdf https://science.wonderhowto.com/how-to/do-simple-experiment-using-copper-wire-and-battery-353194/ and www.wikihow.com/Make-an-Engine-from-a-Battery%2C-Wire-and-a-Magnet
Exploring Circuit Building Kits
littleBits
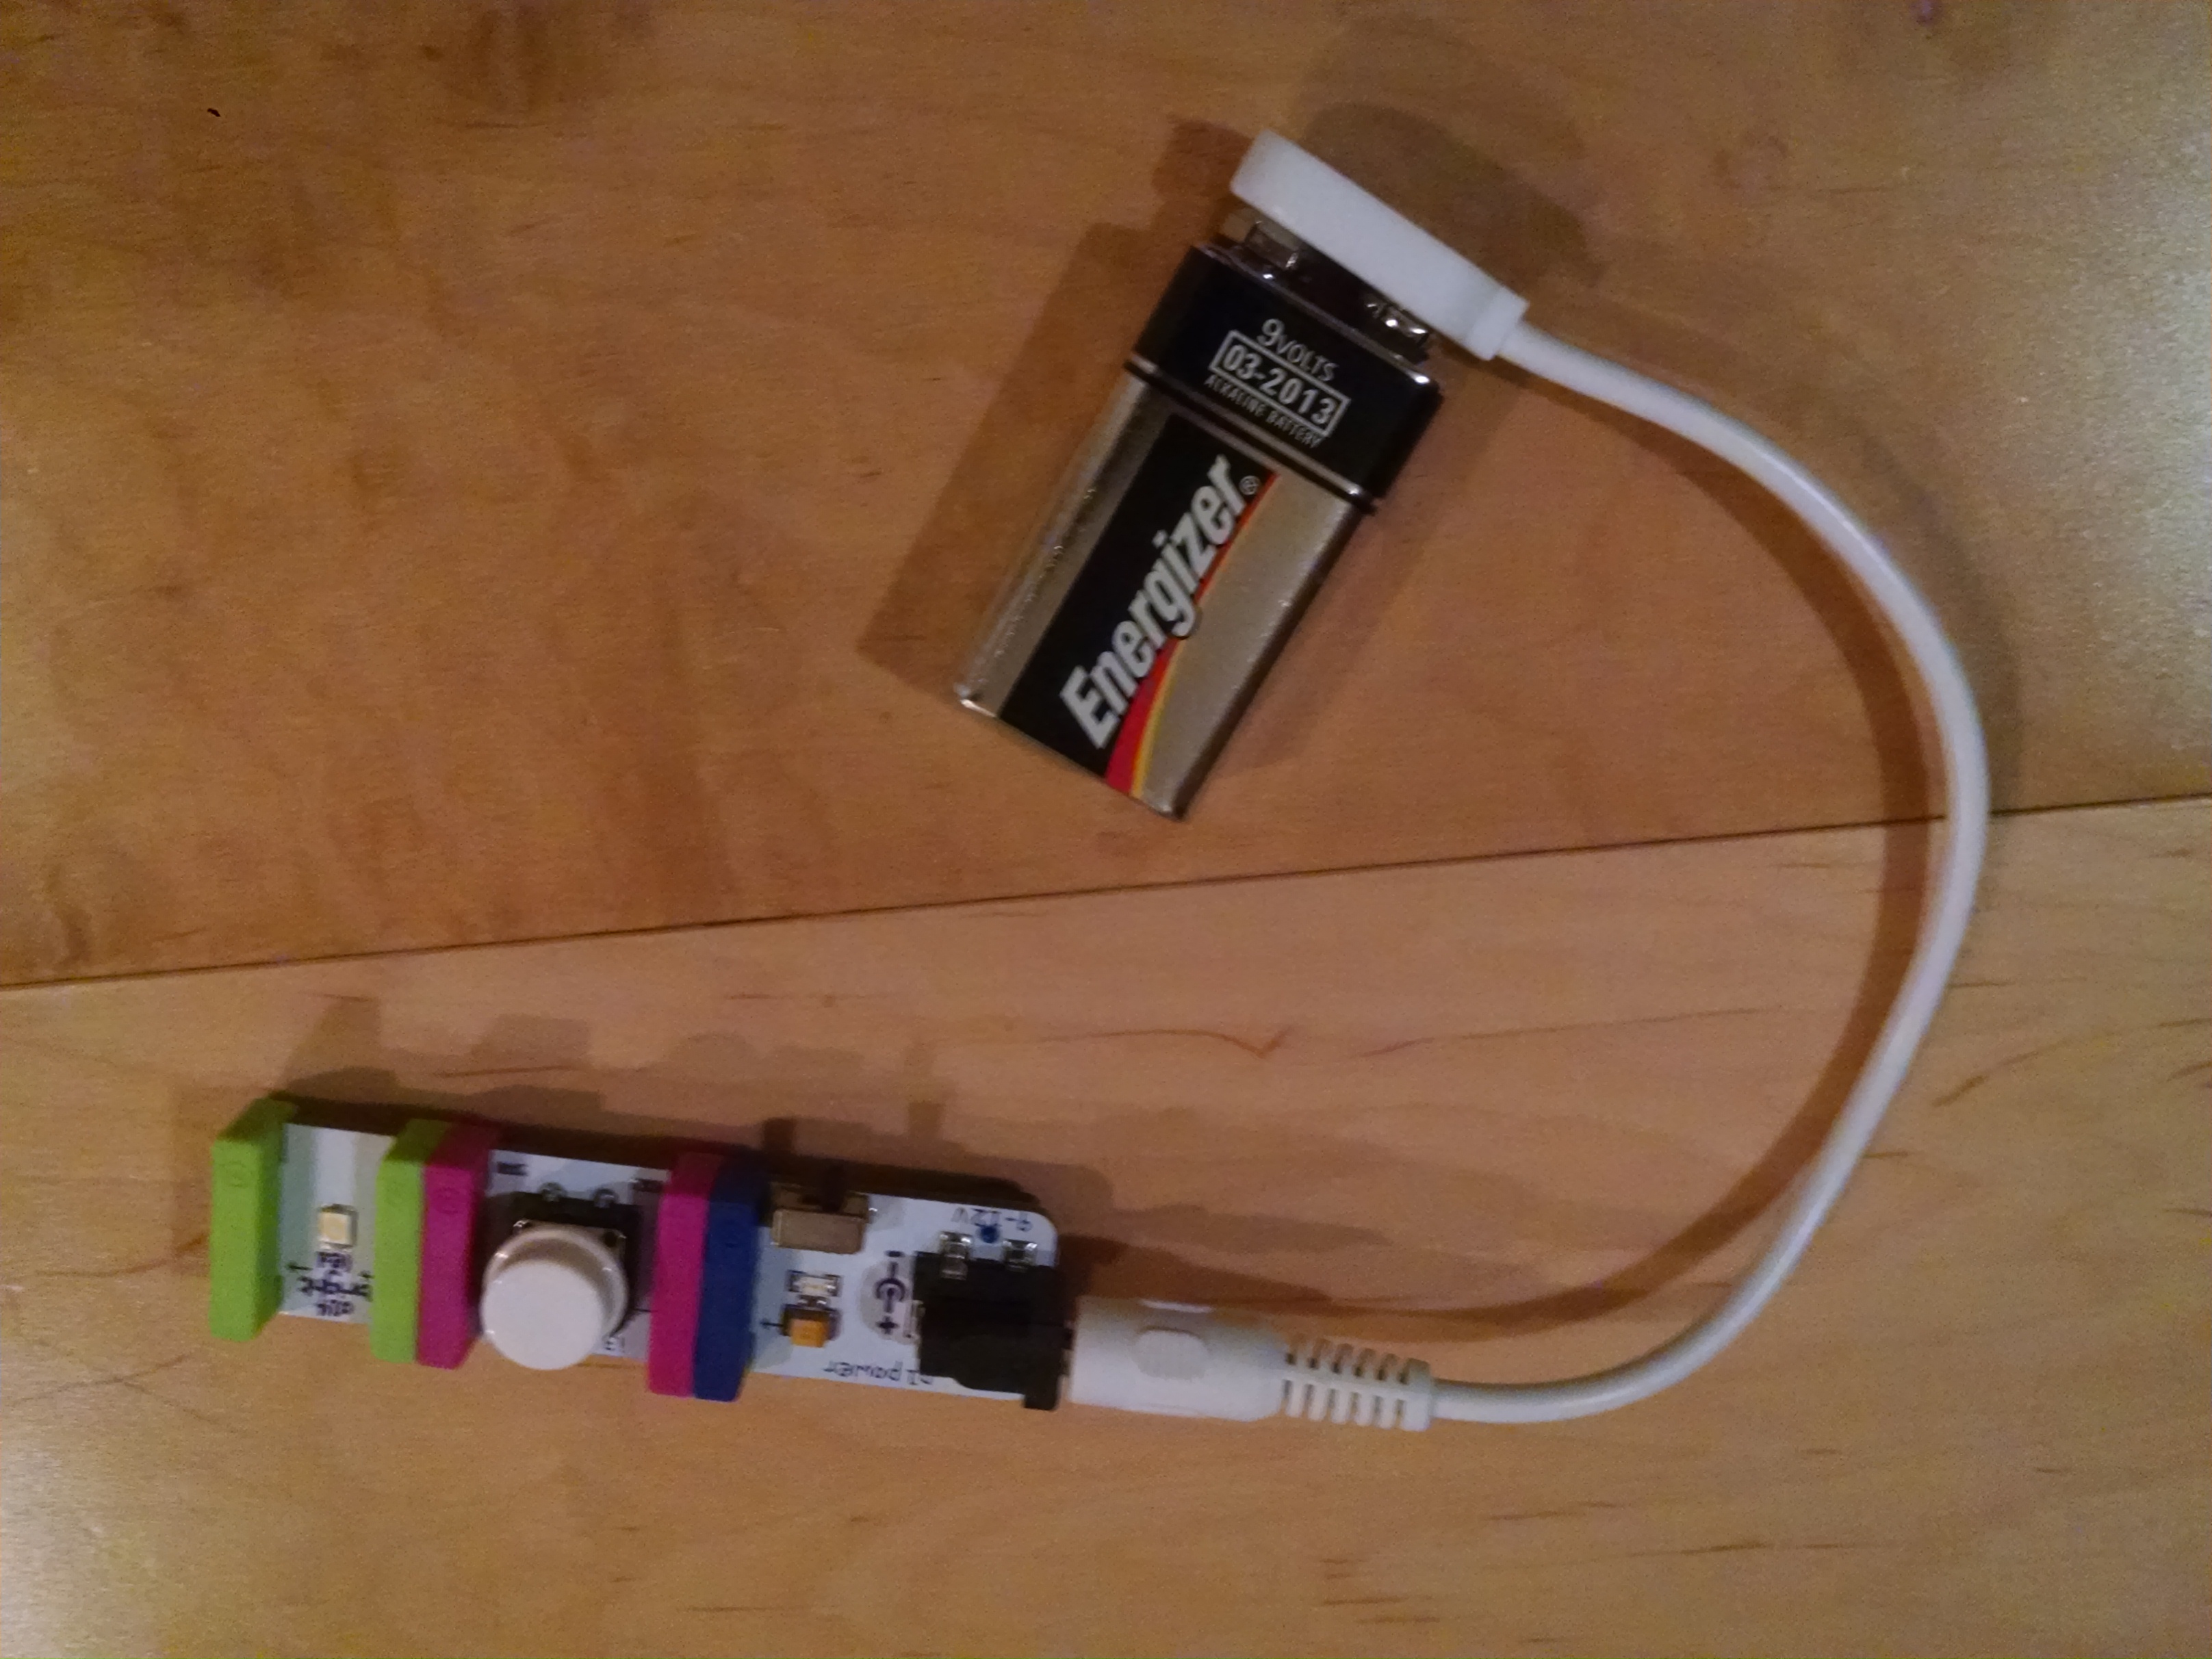
We had the littleBits Base Inventor Kit. littleBits is kind of the Lego of electrical circuits. It’s a modular system, with little bits that click together with magnets, so it’s easy for even small children to assemble them correctly. There are inputs (buttons, dimmer switch / volume control, sound activated switch, etc.), and outputs (lights, buzzers, motors, etc.) The base kit comes with an instruction book to explain the basics, but also “ideas to get you started” on other things you can invent. I have a detailed review of littleBits and Snap Circuits here.
Here is a basic configuration: power cell, input switch (a push button) and an output (a bright LED light.)
Snap Circuits
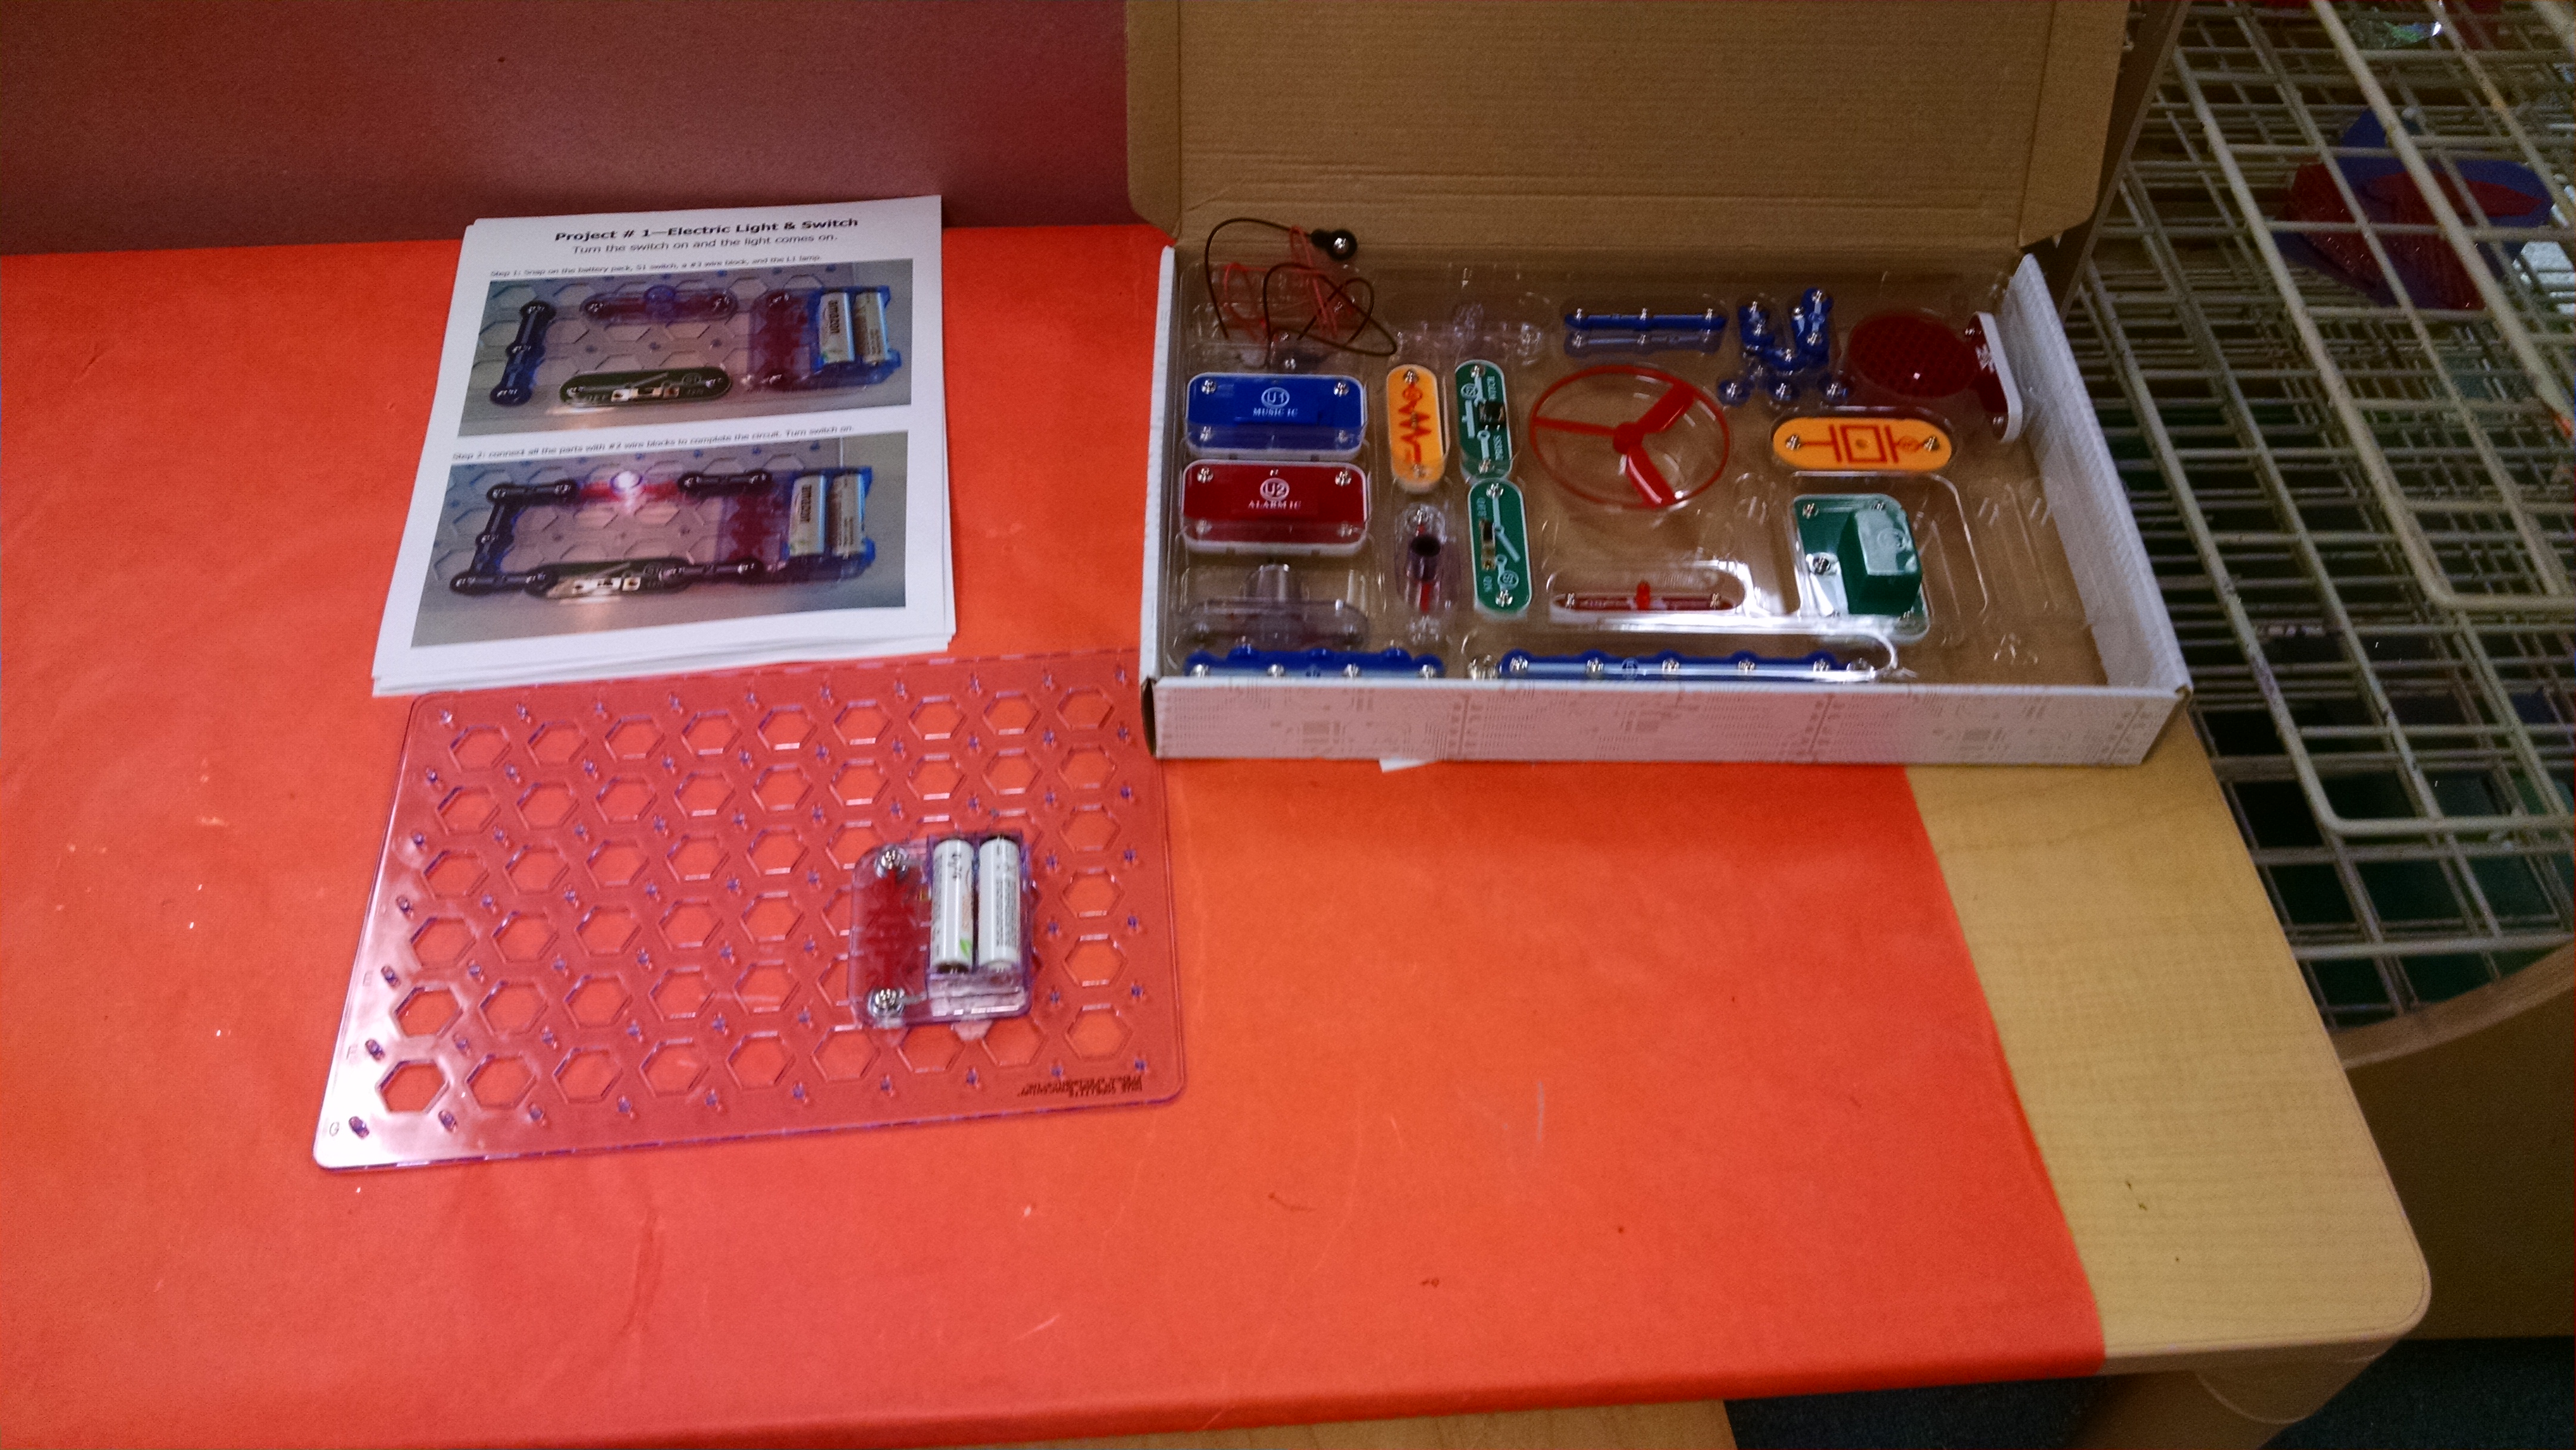
Snap Circuits is another modular electronics kit. Kids snap items on to the base plate, such as battery packs, switches, lights, and motors. Then they snap on wire modules to complete the circuit. The set comes with an instruction manual, but I’ve created my own simplified directions for 5 of the projects. Our 5 – 7 year olds could assemble them but they were beyond the fine motor skills/strength and beyond the cognitive grasp of our little ones. Find a detailed comparison of these and littleBits here. You could also consider Design and Drill Circuits, or Start-Up Circuits for 2 – 3 year olds.
Playing with Electrical Toys
Create electricity with a hand generator: We had a crank-powered flashlight and emergency radio plus several small flashlights with dynamos. (Like these, but we got ours in the Daiso dollar store for $1.50 each.) These were a great free play activity for the active kids – we turned off most of the lights in one room and they just played with flashlights and did flashlight tag.
Plasma ball: We had one of these to let kids see the “lightning”: Sphere Lightning Lamp
Sensor Toys: Ok, I know you’ve all seen toys during your life where if you touch two metal contacts on the bottom, it completes a circuit and the toy does something.
Years ago, my daughter got a toy chick one Easter that would chirp when you held it in your hands. When she brought her chick to kindergarten, she and her classmates discovered all sorts of cool concepts about electricity by playing with it. For example, if one person touches one contact and another person touches the other contact, the bird does not chirp. But then when those two people hold hands (to complete a circuit) the bird chirps. The bird chirps when set on a metal surface but not if set on wood or rubber, and so on. Her teacher, a master of emergent learning, was so excited by this. He said he wanted to jump in with “ooh! ooh! it’s electricity” and explain it all at the start of the day. Instead, he told me he “sat on his hands” all day and didn’t explain it until the end of the day when he asked the kids to share all the things they learned, make observations about what made the chick chirp and what didn’t, and what they thought was the reason. And only after that discussion did he explain the principles of electricity.
For our class, I found a battered Easter chick at Goodwill, and I ordered this Tedco Sensor Ball which flashes and makes noise. (This Energy Stick looks like a great option, plus if you look at that item on Amazon, it suggests several other related products.)
Operation. We put out the classic board game Operation. The goal of the game is to use wire tweezers to pick little pieces of plastic out of openings without making it buzz and light up. So, let’s look at the science… why does it light up and buzz?

Our 3 – 4 year olds basically just had fun setting off the buzzer over and over. Our older kids got both the point of the game (to try to get the plastic out without hitting the buzzer – a great fine motor challenge) AND got the idea of the electrical circuit. Here’s a poster to go with this activity.
Static Electricity
Weather Note: There’s lots of great static electricity activities you can do, but it’s worth noting that your success will depend a lot on the weather! One year in January, we figured that our classroom air would be quite dry due to all the forced air heat that was blowing through the room. However, when the outdoor humidity is at 85%, the static electricity demonstrations were less effective than we had hoped…
History and an Experiment to Go With It: 2,500 years ago a Greek mathematician and astronomer named Thales (TAY-less) first noticed the effects of static electricity. He was polishing a piece of amber, with a piece of wool or fur. Thales discovered that after he rubbed the amber that it attracted dust particles or other light objects like straw or feathers. (More history here: http://inventionofelectricity.weebly.com/contributors.html) You could re-create this in class with amber, sheep skin, and feathers.
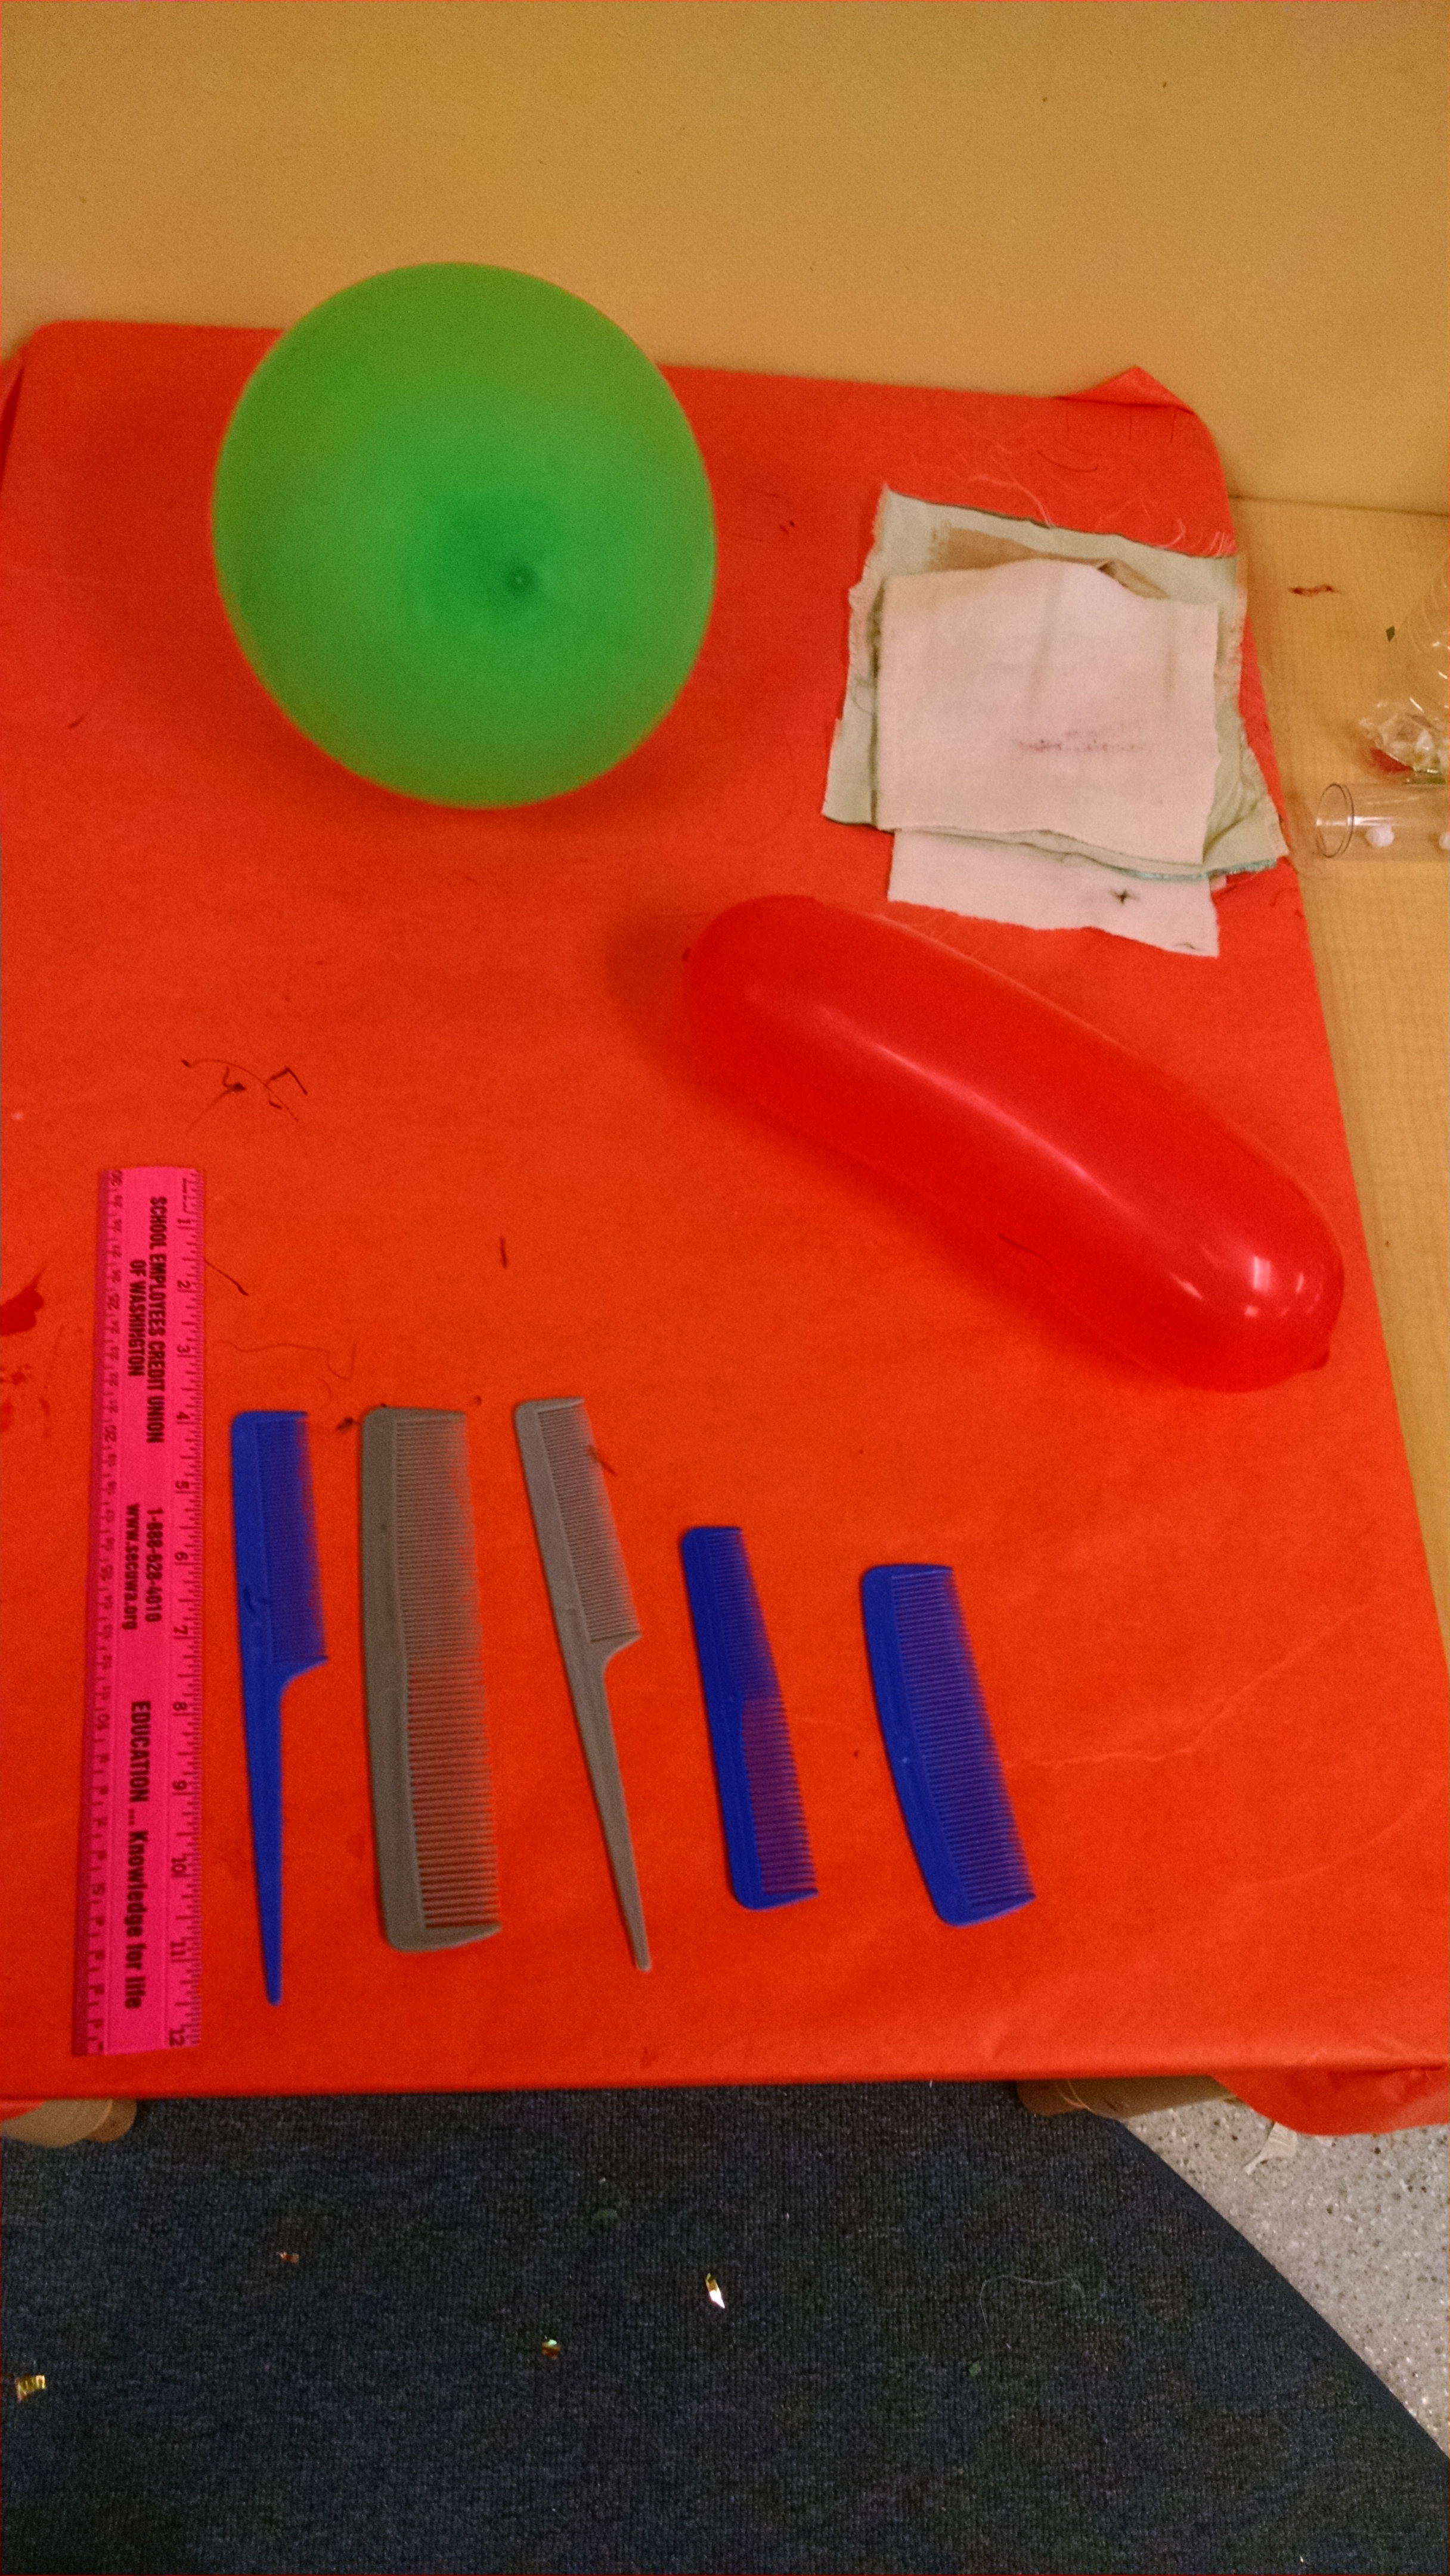
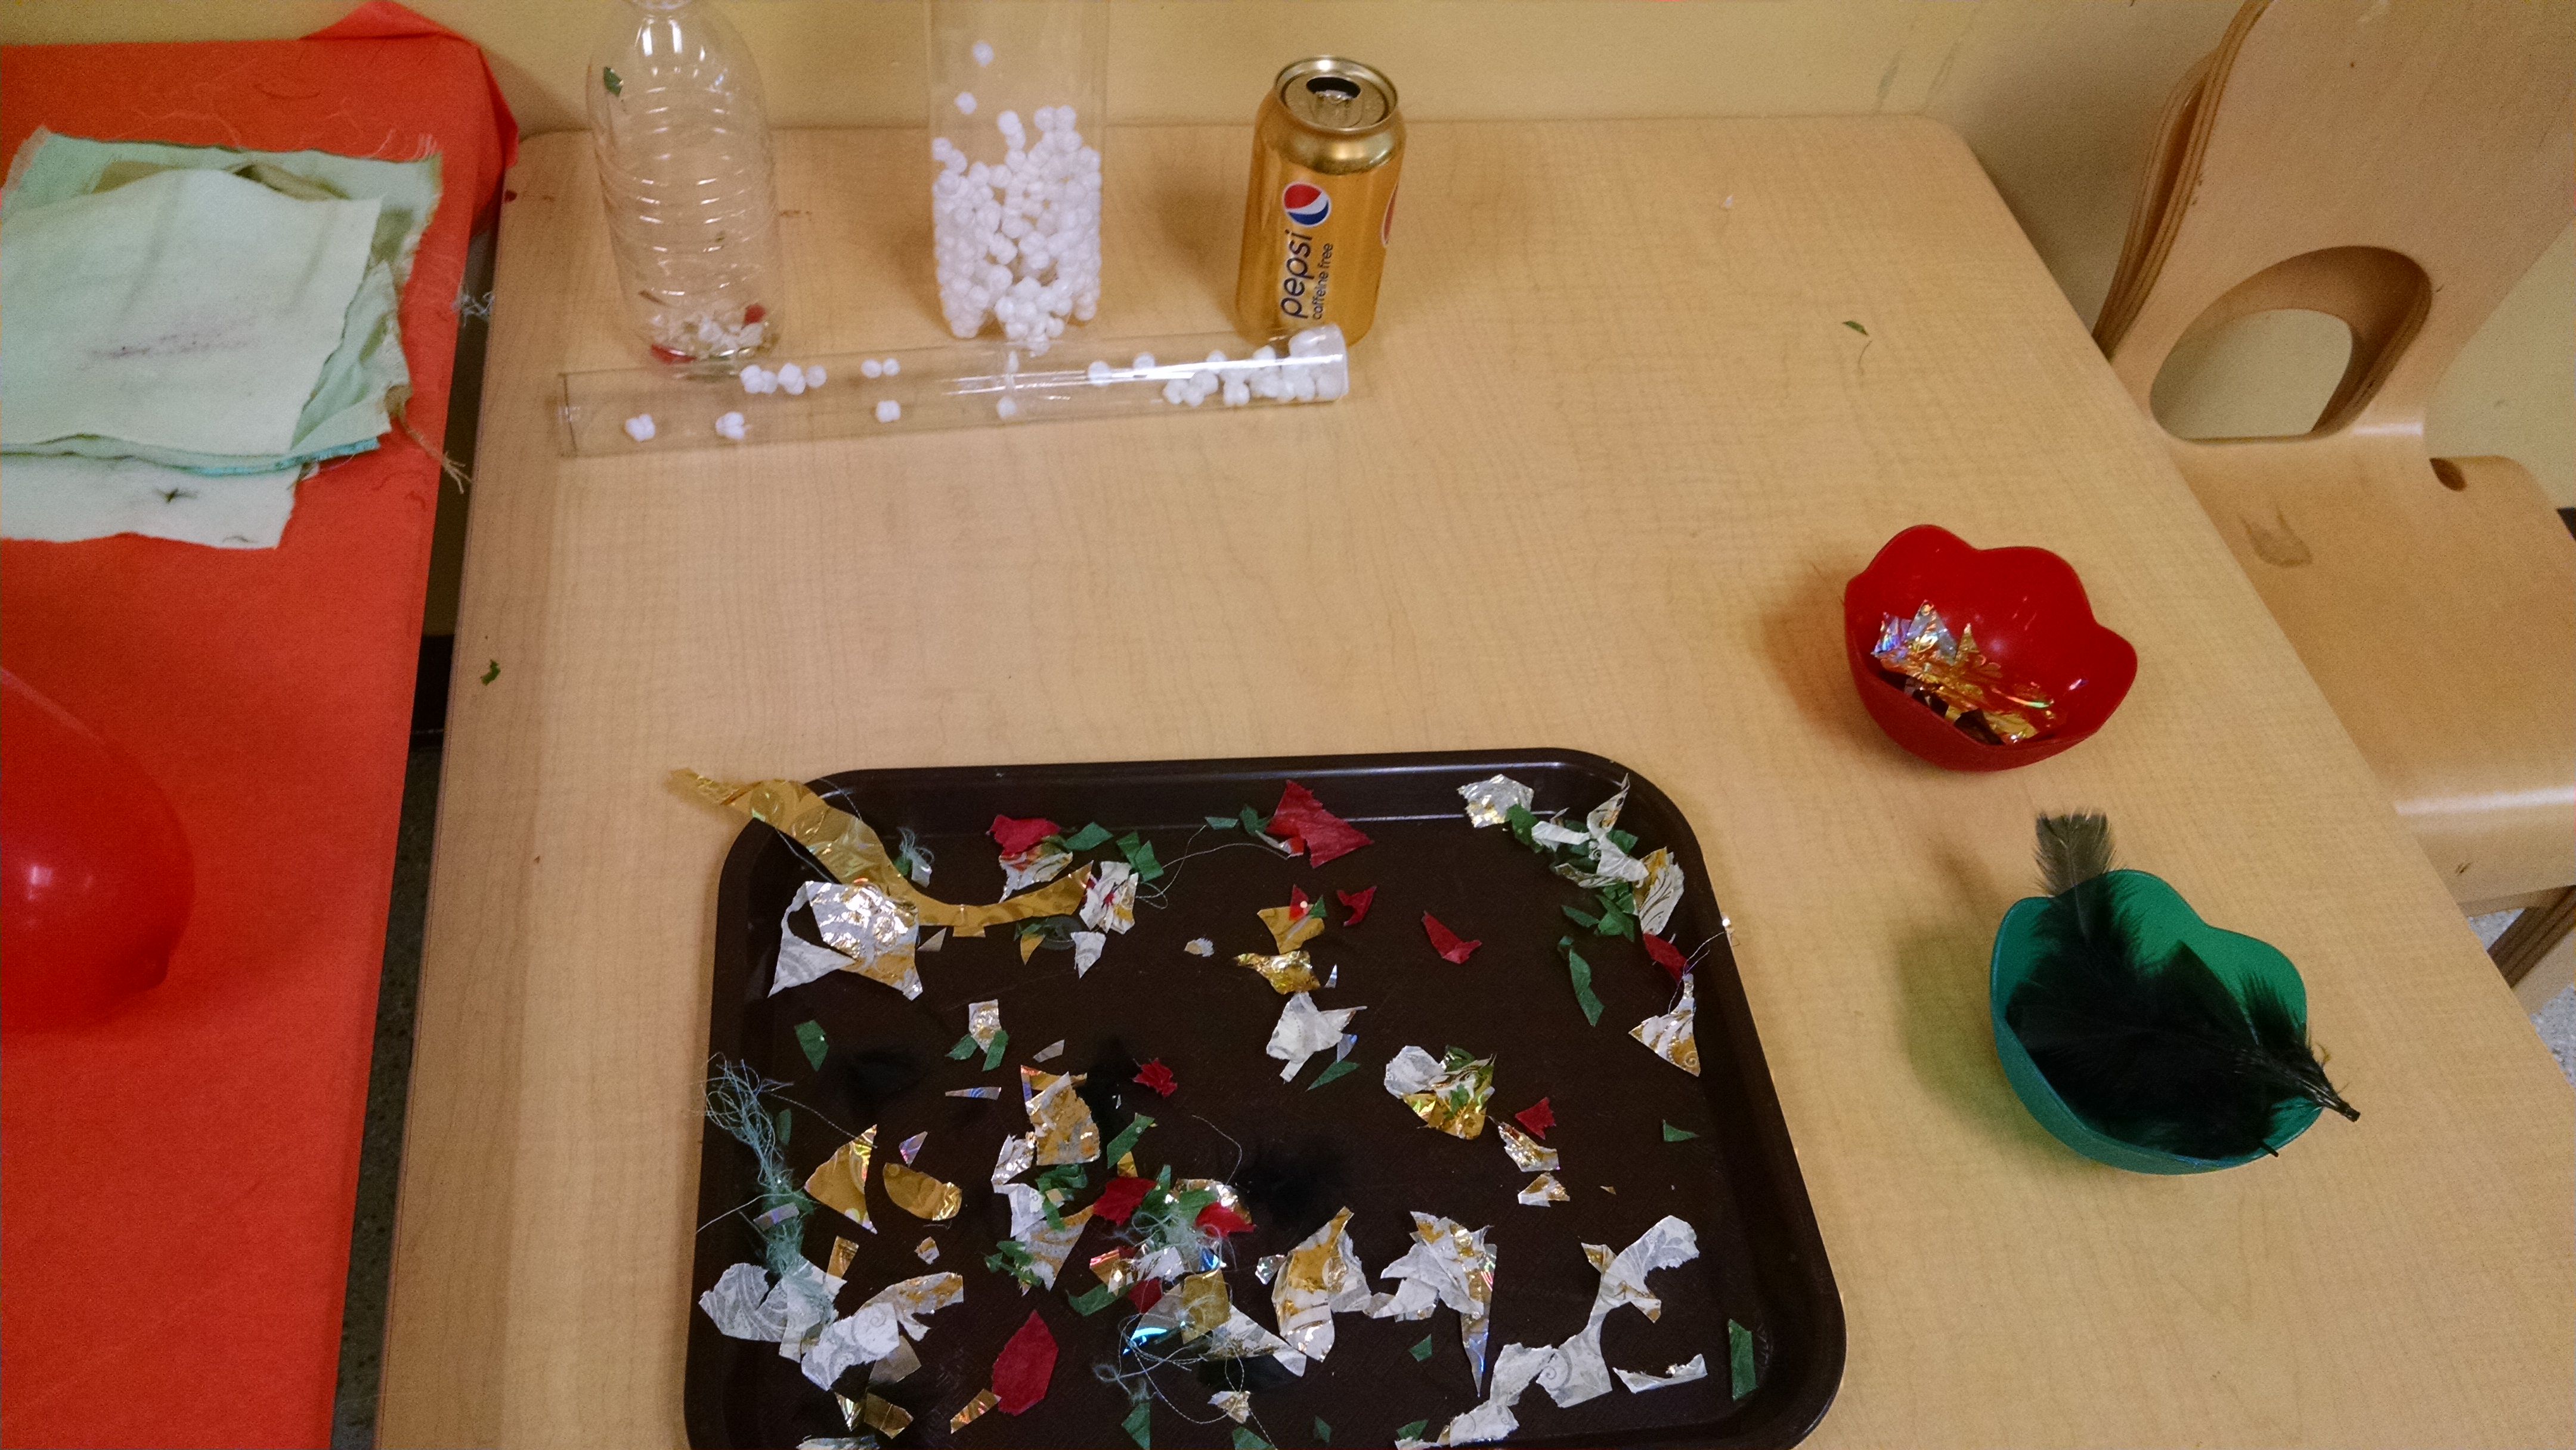
Static Station. We offered multiple ways to generate static electricity – balloons kids could rub in their hair, plastic combs and a plastic ruler that they could rub plus wool and silk to rub them with. Then we offered multiple items that will react visibly to the pull of static electricity. Some options are: puffed rice cereal, torn up tissue paper, plastic tubes filled with Styrofoam pellets, feathers, rabbit fur, and an empty aluminum can. You can also have a plate of salt and pepper. Wave the static charged balloon over it – the pepper will fly up first, and the heavier salt will be slower to attract. You could have a contest where kids charge their balloons, then stick balloons to a wall, and see whose balloon stays stuck the longest.
Light a bulb with static: Our teacher rubbed a balloon on her hair to build up a static charge, then held the balloon to one end of a compact fluorescent bulb, and it made it light up briefly. (Only works when humidity is low!) Learn more at: http://www.csiro.au/en/Education/DIY-science/Physics/Light-up-your-light-bulbs
Make Lightning: http://www.learnplayimagine.com/2013/04/how-to-make-lightning.html has two methods for getting a spark. We haven’t tested these.
Water table: Have a static generator (balloon and hair, or amber and wool, or comb and wool) next to the water table. Charge it up, then pour a trickle of water past it – will the static electricity “bend” the stream of water? Here’s a poster to go with this. The bending water is a little subtle. The littlest kids don’t really get it. The 5 – 7 year olds could understand it if FIRST we showed that normally when you pour water, it flows straight down, then we showed how the static bends the water.
Art
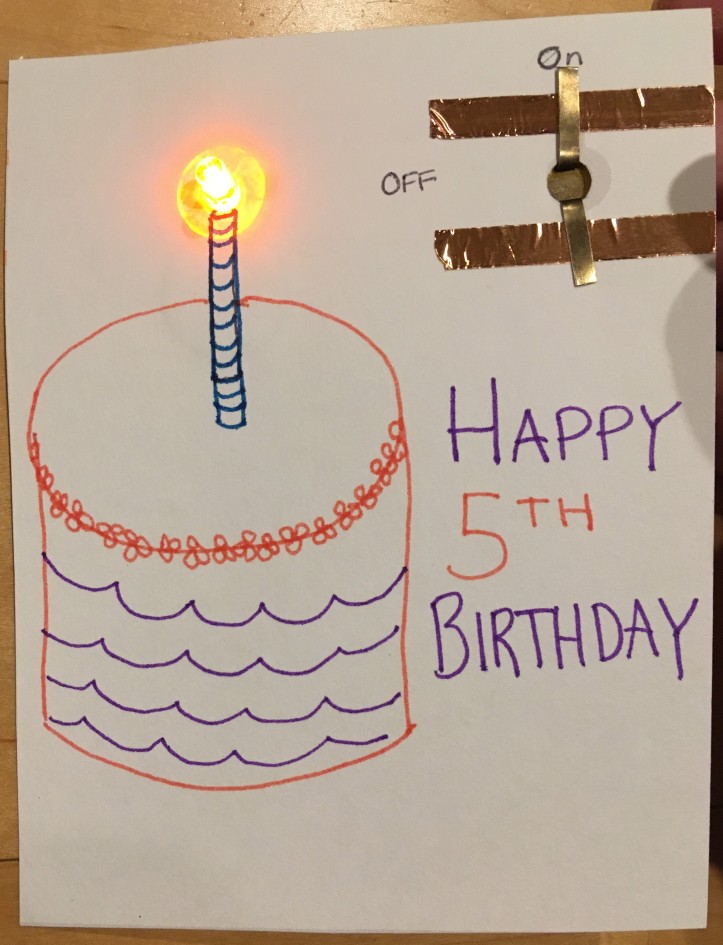
LED Card that Lights Up!
Our challenge project of the day is this cool card. Find the full tutorial here: https://inventorsoftomorrow.com/2021/11/05/an-led-card-that-lights-up/
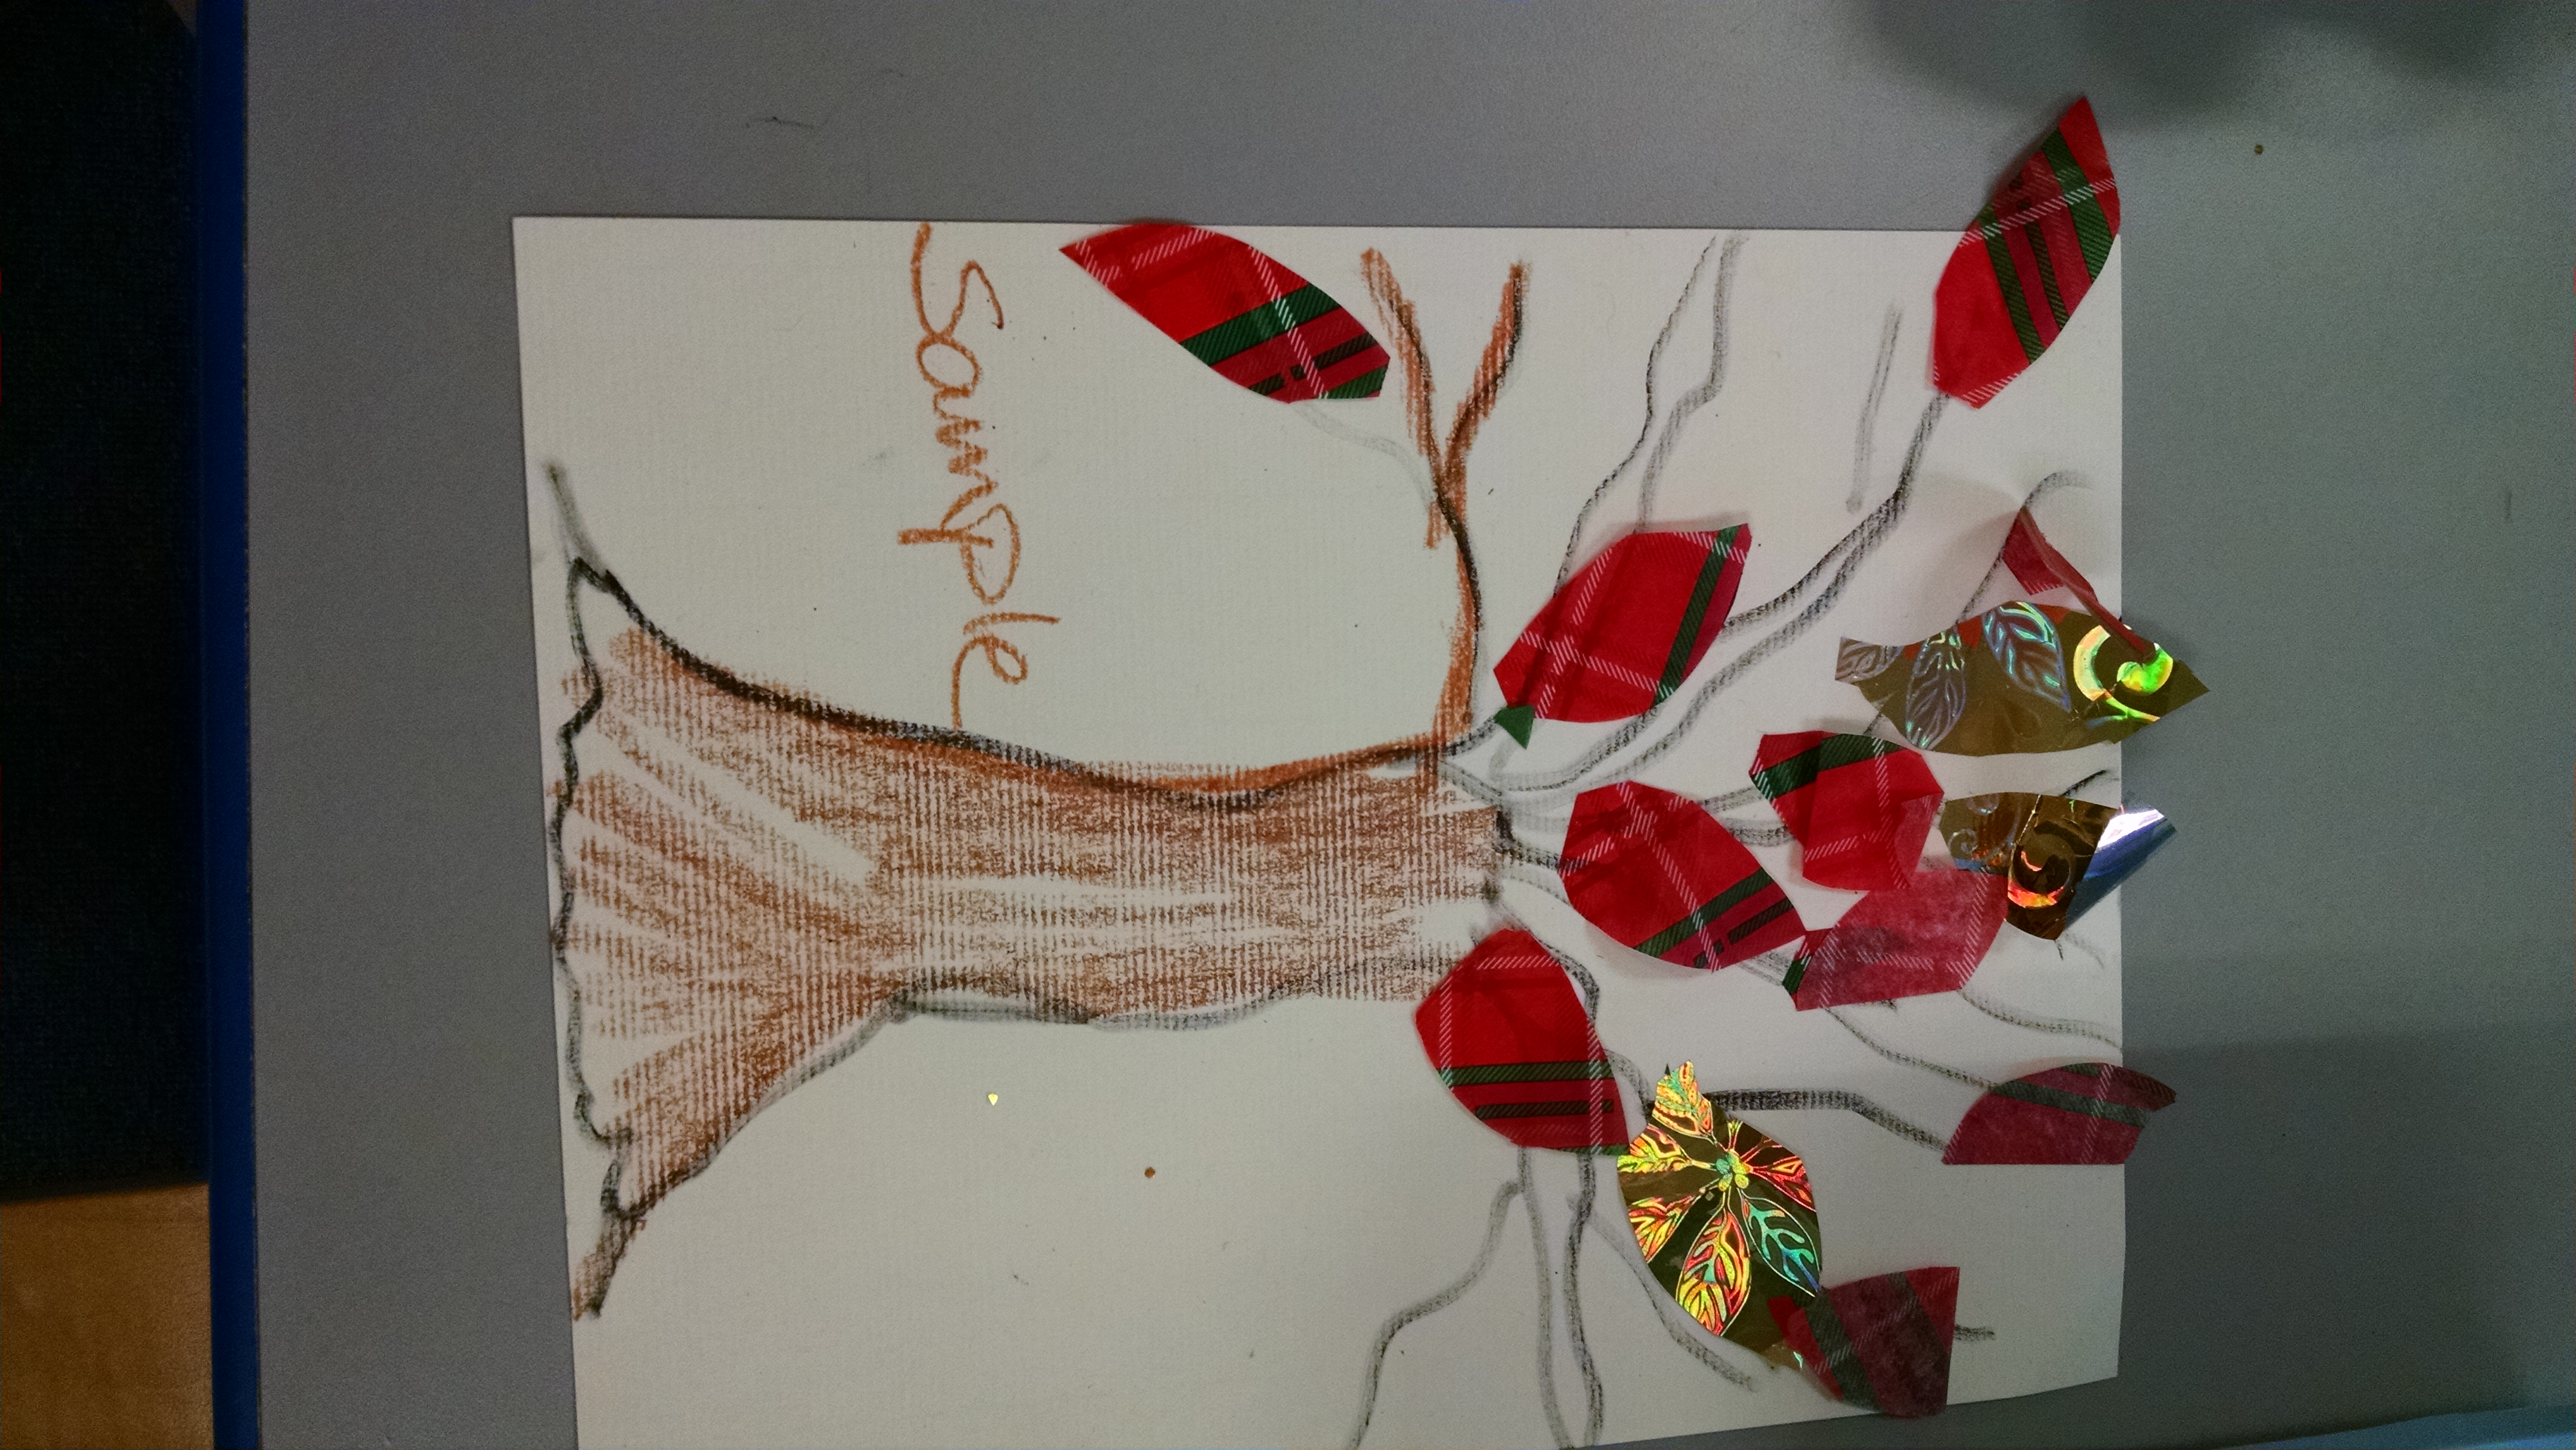
Tissue Paper Art / Static Detector
On I Heart Crafty Things, we found this great idea for a butterfly made of tissue paper where the wings will flutter in reaction to a static electricity source such as a charged up balloon. My co-teacher had the seasonally appropriate idea to do a tree instead, where the fall leaves flutter. They cut leaves out of tissue paper and Mylar wrapping paper. The key thing you need to explain to the kids is to only glue down PART of the leaf. They need to leave most of the leaf loose to flutter. Here’s a sheet of instructions.
We’ve tried a few other ideas, which are tangentially related to electricity. 1) drawings with Spirograph to represent electron orbits. 2) Scratch art pictures of lightning bolts… scribble with oil pastels to fill a piece of paper with bright colors. Paint over that with dark blue/black acrylic paint like the night sky. While the paint is still wet, use a stick to draw lightning bolts – it will move the paint aside to reveal the colors below. 3) Use electricity to draw by using a record player turntable. Put a paper plate on where the record goes, turn it on, and draw. 4) You could build a Scribblebot and use that to make art. You tape three markers onto a plastic cup to form “legs” on the robot. Add a motor and a battery, and your scribble bot dances around, leaving a drawing behind.
Water Power / Hydroelectricity
In the water table, use scoops and toy water wheels. (You can also make your own water wheel from plastic spoons or cups). Put pictures of water wheel generators next to the table so you can explain how, before the invention of electricity, water wheels on streams were used to do work (like grind grain or pump bellows.)
K’nex used to have a set called Exploring Wind and Water Energy. One of the projects you can make is this water powered generator. Your child can help to assemble it, then play with it.
Circle Time – Static Electricity
There are two big ideas to communicate: 1) things are made of atoms – atoms are made of protons, neutrons, and electrons. 2) Sometimes when things rub together, they lose electrons, and that “charges up” the item with static electricity.
History: Share the history of Thales, mentioned above.
Grounding in their Experience: Ask “have you ever slid down a plastic slide and then gotten a shock when you touched someone? Have you ever played parachute games at circle – did you notice that for the kids who went under the parachute, their hair would then stand up straight? When your parent gets laundry out of the dryer, have you ever seen a sock stuck on to something? That is static electricity.”
What’s happening? Explain that all things are made of atoms. Little itty bitty particles we can’t see. (There are millions in one eyelash.) Each atom is made up of three parts: protons and neutrons are held together tightly in the middle. Electrons are negatively charged and they’re held loosely. [Illustrate this with 3 balls of playdough – stick two together to be the proton and neutron, then use the other ball to show the orbiting electron.] Electrons bounce from atom to atom easily. So, when there’s a static charge in my hair, because I’ve been playing under the parachute, an electron might jump away from me to something else. [Show with the play-dough electron.]
Static electricity demos: Use your hair to charge a balloon, or fabric to charge a comb, then demonstrate how tissue paper reacts, or how you can pick up rice cereal with it. These things are attracted to each other. Then lay an empty aluminum can on its side, and hold the static item near it. The can will either roll toward the balloon or away. (Learn more at Exploratorium.) Light a fluorescent bulb with static electricity.
Parachute: Begin by playing with the parachute. Especially do games where the kids are under the parachute that’s going up and down. After a while, point out how all their hair is standing on end. It’s charged with static, and the hairs are “repulsing” each other and trying to move away from each other.
If you want a theme song, play the Schoolhouse Rock Electricity Song. When it says anything else, ripple the parachute, but whenever it says “Electricity, Electricity” raise and lower the parachute twice. (I also like throwing balls on there to be bouncing electrons.)
Circle Time – Electricity
Our third big idea is: For electricity to work, you need a complete circuit. You connect the negative terminal on the battery to the output (a light or a buzzer) with something that conducts electricity (wire, water, conductive play-dough), then connect the output back to the positive terminal. This allows current to flow continuously.
Ask the kids what they know about electricity, and how we use electricity. This grounds the rest of the discussion in their experience.
Song: My co-teacher wrote a simple song, that goes:
Electricity is a powerful thing… I know, I know… Electricity is a powerful thing… I know, I know…
Then we ask kids to suggest something that they use electricity for, and we substitute in those words.
Electricity lights our streets… I know, I know. … Electricity warms our Homes… Electricity starts our cars… Electricity makes lightning >boom< And so on…
Intro: Thanks to the work of lots of scientists and inventors throughout history, we’ve figured out how to capture and store electricity. One of the places we store it is in a battery. We’ve also figured out how to help move electrons so they do work. For example, they can light a light, make a buzzer buzz, or turn a fan, like we did with the Snap Circuits and littleBits. To make any of these things work, we have to hook up the power source and the thing we want to power so electricity can move from one to the other.
Circuits Demo: Use the batteries and lightbulbs and switches to demonstrate the idea of circuits and how current passes through a circuit. And how a switch interrupts the circuit.
Pass the current: Have kids hold hands in a circle. Squeeze a child’s hand, they squeeze the next hand, and so on, to pass the current all the way around a circle.
After you have done this, use your sensor toy (see above.) You touch one sensor. Have the child next to you touch the other sensor. Nothing happens. Hold hands with that child – you’ve completed the circuit – the light comes on, or the chick cheeps. Now, let go of that neighbor’s hand, and take the hand of the child on your other side. Have all the children join hands, so kids can see that the current travels from you through all of them, back to the sensor. When we all hold hands, the chick cheeps. If anyone lets go, it interrupts the circle, and the chick stops cheeping.
You could also play either of the games described below.
Books:

I honestly haven’t found any I love. So, I wrote my own. Click here to download a free PDF of Electricity: Let’s Light It Up.
Here are some other books to consider.
- Oscar and the Bird. When Oscar the kitten finds a tractor in a field and accidentally turns on the windshield wipers, he is full of questions about electricity. Luckily, Bird knows the answers! With the help of his friend, Oscar finds out how electricity is made and stored, which machines need electricity to work — and why we always need to be careful around wires, batteries, plugs, and sockets. Ages 4 – 8. This would be a great SECOND book to read if we’d first read a book with a nice summary of basics of electricity.
- Electricity: Bulbs, Batteries, and Sparks (Amazing Science)
. A little long, but otherwise a good circle book for ages 5 and up. (skip the “fun facts” when reading aloud.) Over the head of younger ones.
- Switch On, Switch Off by Berger. Library description: Explains how electricity is produced and transmitted, how to create electricity using wire and a magnet, how generators supply electricity for cities, and how electricity works in homes. Ages 6 – 8. Probably too long for circle.
- The Boy Who Harnessed the Wind: Picture Book Edition by Kamkwamba. Tells of a boy in Malawi who learned about wind power in books at the library and worked to build a generator for his village when they were struck by a drought. This is a nice “window” into another world. Best for ages 5 and up.
Good resource books for older kids (age 5+) and for experiment ideas. Not for circle.
- Electricity (Real Scientist Investigates…)
– ages 10+
- Electricity (Science Experiments (Benchmark))
– for ages 10+
- What Is Electricity? (Understanding Electricity (Crabtree))
- Electricity: The Best Start in Science (Little Science Stars)
- All Charged Up.
Group Activities / Games
Electrons: Explain that all things are made up of molecules (reminder of the states of matter activities last week.) All molecules are made of atoms. Atoms are made of protons and neutrons which hold tight together in the nucleus, and electrons are held loosely. Give each child a die (or a coin) where some/one side is labelled “proton or neutron” and one is labeled electron. On each turn, they roll their die or flip their coin, then pick it up. If it says proton or neutron, they run to the center of the room and huddle together. If it says electron, they orbit in a circle around the protons and neutrons.
Pass the Electron Game: This idea started with an idea on Hub Pages: http://hubpages.com/education/electricity-lesson-plan Have all the kids stand in a line. Tell them they are a copper wire. Give each one electron (a ball or other small toy). Tell them they’re a balanced copper atom. But, when the battery (the teacher) gives an extra electron to one child, they have to pass on one of their electrons as quick as they can. When the extra electron gets to the end of the line, flash a flashlight to show the electricity was discharged. We tried this in our morning class – the teacher told them that they should take the new electron in their left hand, pass the old one on, then pass the new one to the right hand. But it turned out that it was too much of a small motor challenge for our three and four year olds – they had a hard time transferring balls from hand to hand. There are two ways to fix that. One is that they hold THEIR electron in their left hand the whole time and always use their right hand to take and pass the new electron. The other is what we did in our afternoon class, where we just pretended they were holding their own balanced electron, and the only moving ball was the extra electron that was passed to them. We were then able to pass several electrons at once, for a “hot potato” style game. You can also curl the end of the circle to complete a circuit.
Note: this post contains Amazon affiliate links. I get a small fee if you click through and order something on Amazon.

[…] Electricity – STEM for Kids […]
LikeLike
[…] Electricity – STEM for Kids […]
LikeLike
[…] Electricity – STEM for Kids […]
LikeLike
[…] reminded them that a few weeks ago, when discussing electricity, we talked about atoms. We explained that molecules were made up of clusters of atoms, but they […]
LikeLike
[…] Theme: Electricity […]
LikeLike
[…] Theme: Electricity […]
LikeLike
[…] teach an electricity unit every year (read about it here), and I haven’t yet found a non-fiction book on electricity that’s a good match for 4 […]
LikeLike
[…] Electricity – Operation […]
LikeLike
[…] and then describe how nerve messages are similar to electrical signals. This would tie back to our electricity unit of the previous […]
LikeLike
[…] Electricity. Something that you need electricity to prepare. 🙂 For example, fruit smoothie in a blender: have them practice mashing up a little food by hand to see what hard work that is, and then put food in the blender and whir it quickly. […]
LikeLike
[…] our 11 week engineering unit, we study Simple Machines, Electricity, Ways to Build Tall Structures and Strong Structures, Building Houses and Cars and Contraptions. We […]
LikeLike
[…] batteries and LED Lights to add lights to the robot. (We used some in making our light-up cards in electricity […]
LikeLike
[…] If you’d like more fun activities for an electricity theme for a kids’ STEM class, check out our full Electricity lesson plan. […]
LikeLike
[…] our electricity unit, we explore electrical circuits in many ways. One option is to use a 1.5 – 3V motor and […]
LikeLike
[…] we study electricity in our kids’ science class, we do a lot of experimenting with static […]
LikeLike
[…] a parent-child class that helps to reinforce how electrical circuits work. We use it when we study Electricity. We do it with 3 – 6 year olds when we have one-on-one support from parents. The older […]
LikeLike
[…] Electricity – Operation […]
LikeLike