

Our theme this week was the Earth, Earthquakes and Rocks. This post covers Earth and Earthquakes. I have a separate post that focuses on Rocks.
As always, we began class with Discovery Time, where we let kids explore all our activities hands-on, before we teach the scientific concepts for the day. This inspires their curiosity, allows for a-ha moments of independent learning, and raises questions which helps them engage more with the answers we give. Then we have opening circle, then tinkering time to explore more.
Shake Tables
Every week, we have a challenge activity which encourages kids to build something, test it, re-build it… This week’s theme was perfect for that!
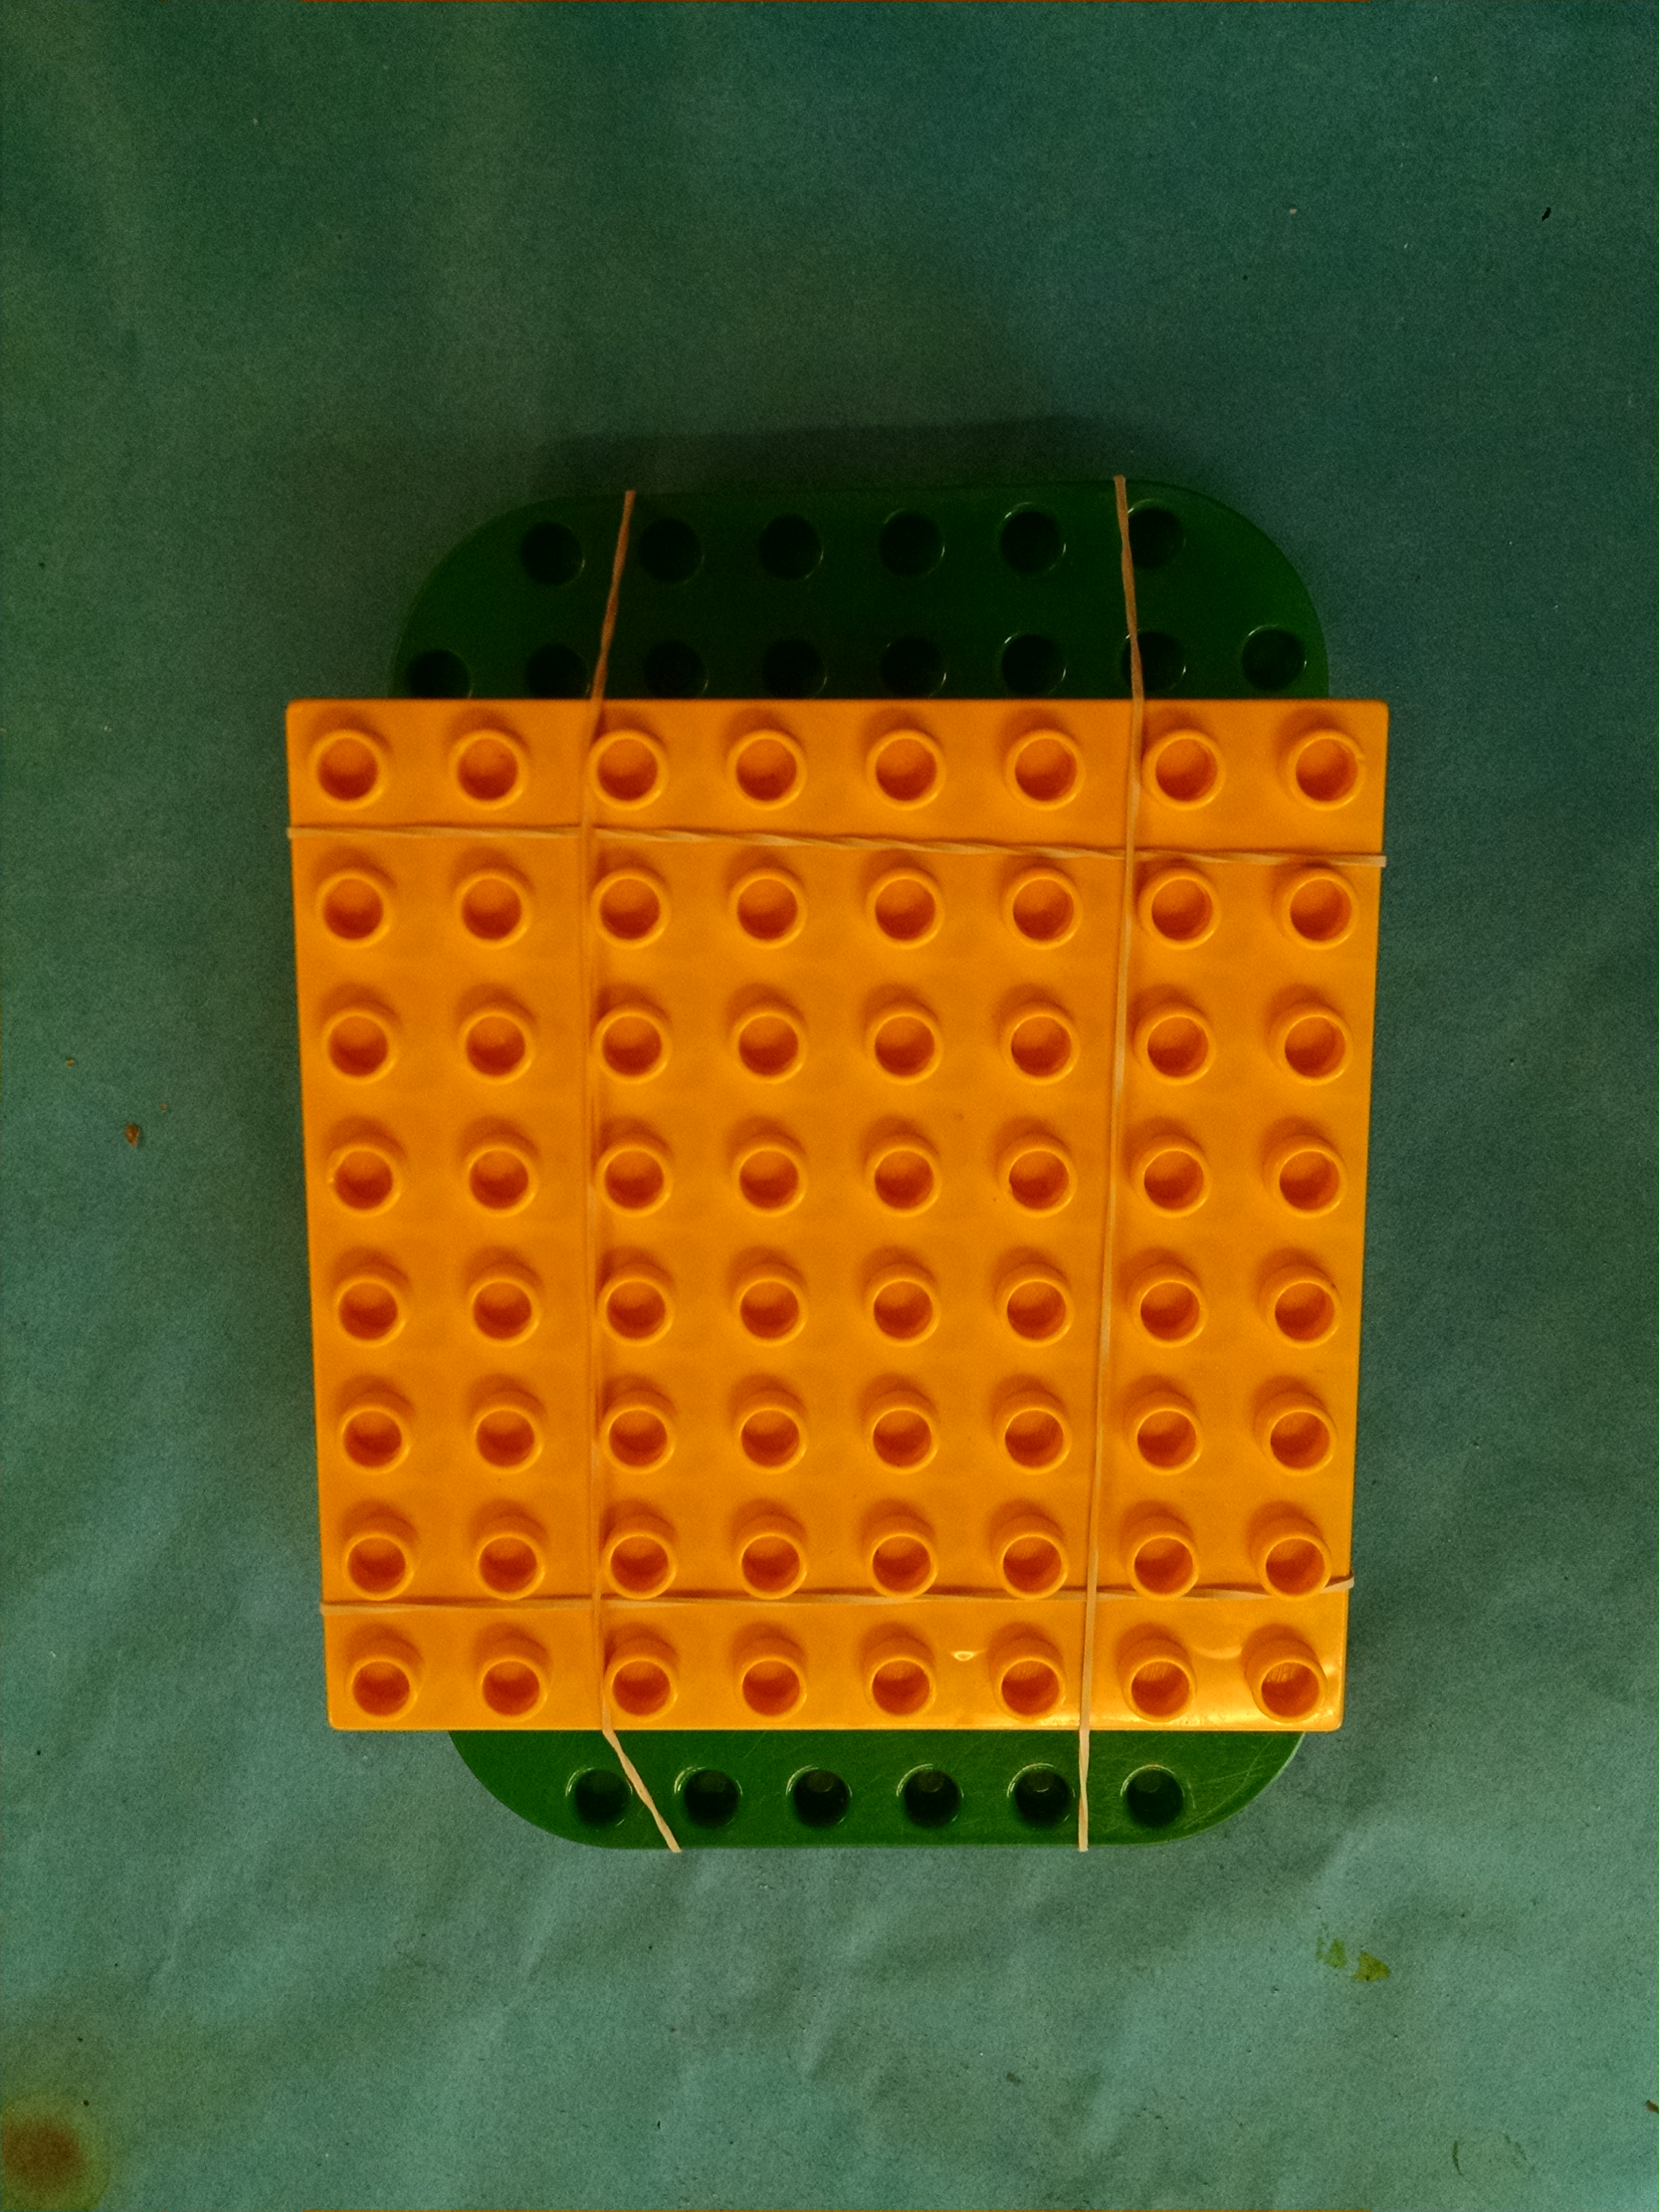
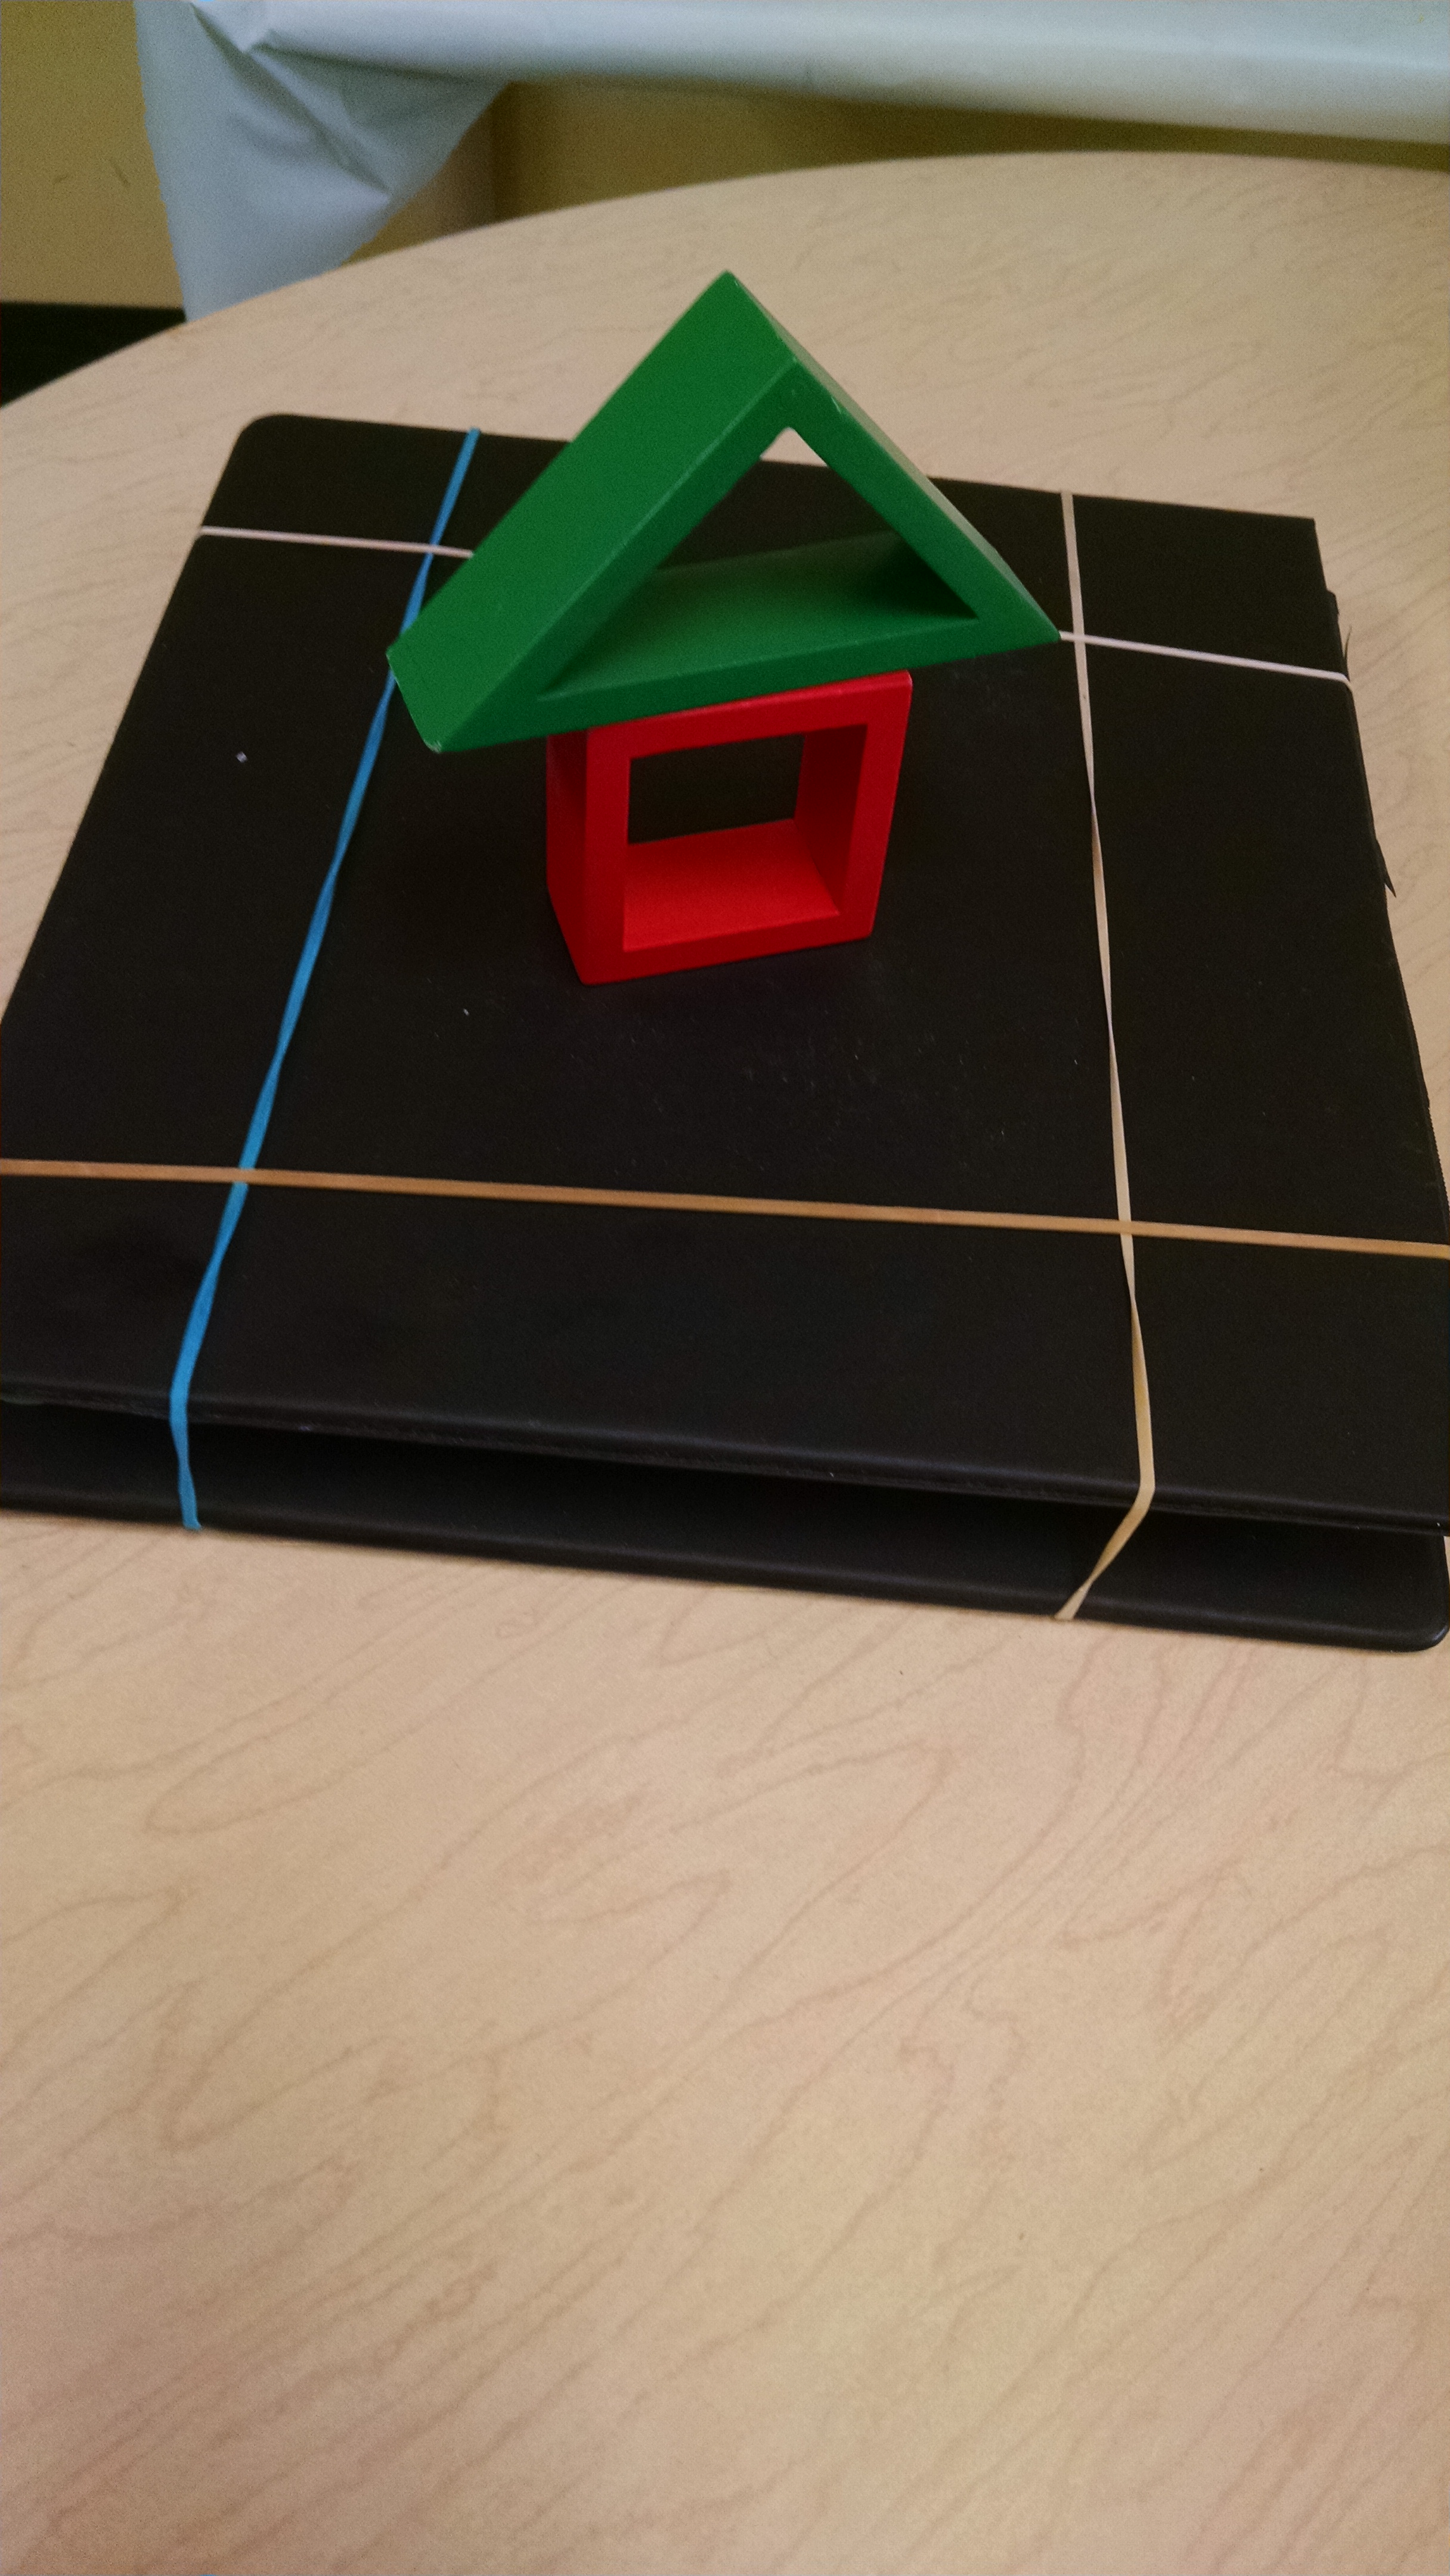
I built shake tables (earthquake simulators). For the first, I took two duplo base plates (green and yellow) and rubber-banded together, back to back. Then inserted four rubber bouncy balls in between them, one at each corner. For the second, I cut the cover off an old three ring binder to get two stiff “boards.” Then I placed two dowels between them for them to roll back and forth on, then rubber banded that together, and taped a Duplo base board to it. The third one was the binder covers, rubber bands, and balls, but no Duplo base board. On each of these shake tables, if you bump a corner or pull back then let go of one side, it would jiggle and shake.
We also had a wobbly lazy Susan in our cabinet and it was a great earthquake simulator.
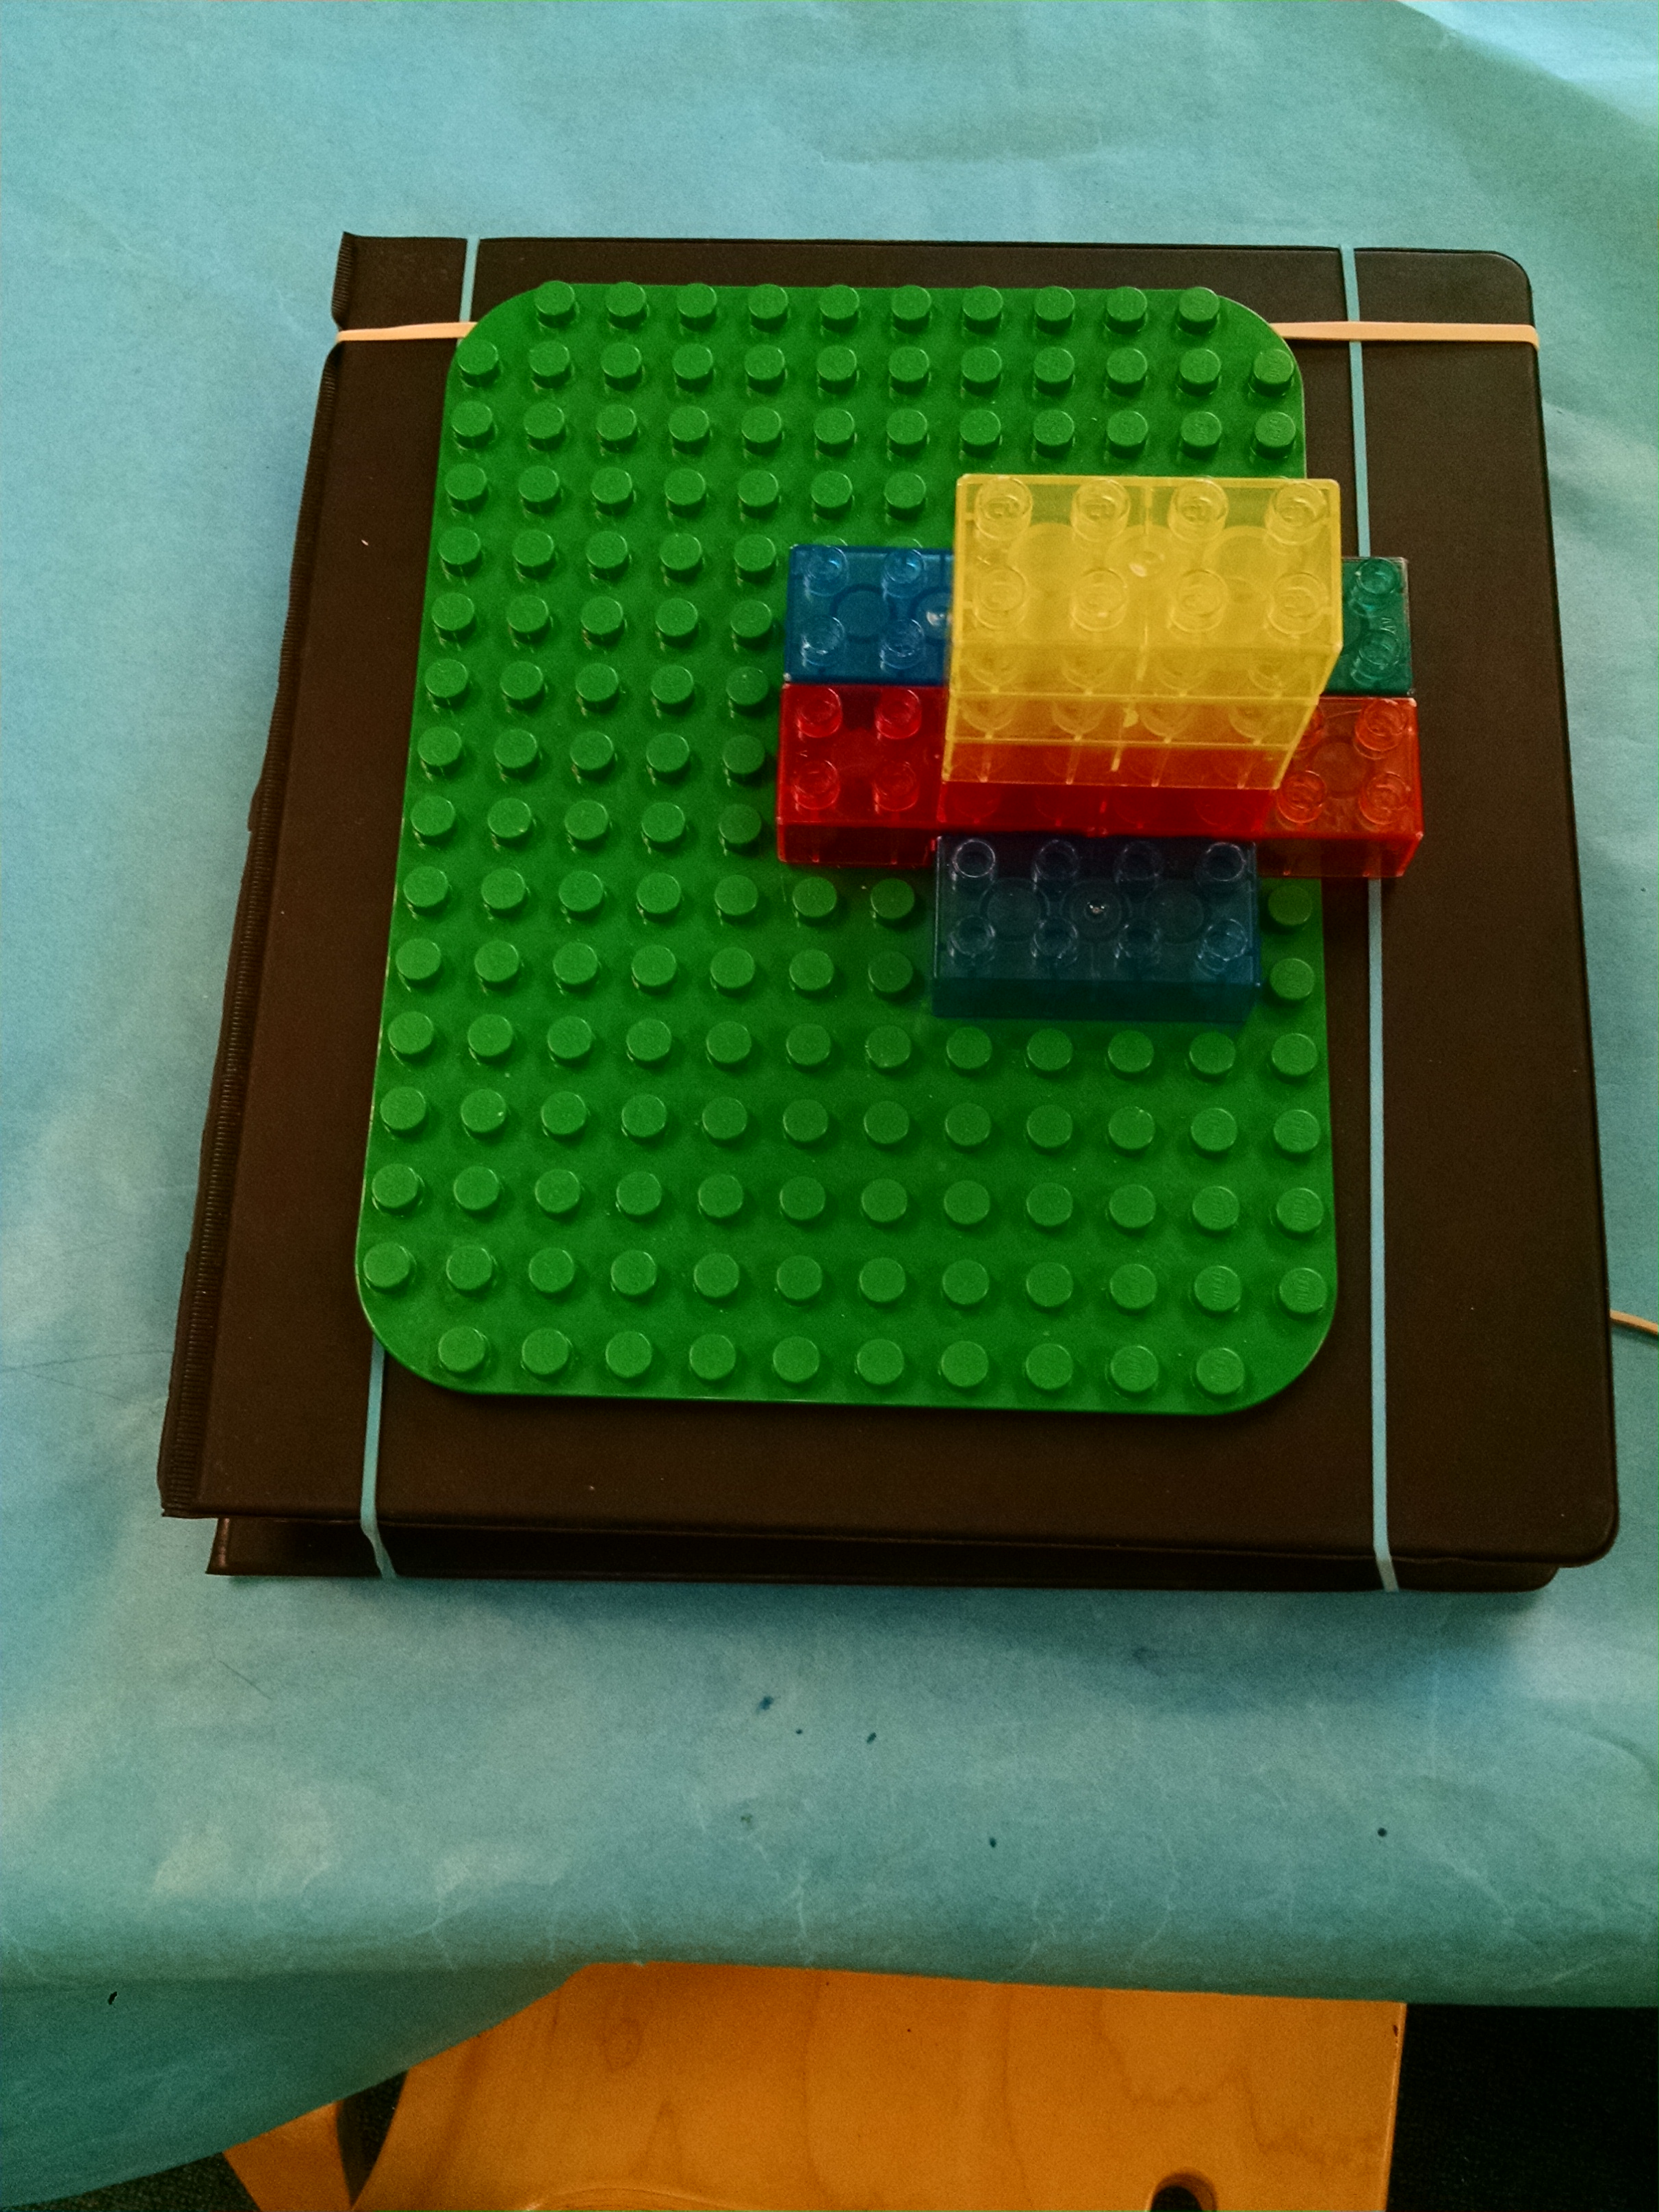
They tested Duplo towers. If they built a very tall tower, the “earthquake” would knock it down. Unfortunately, Duplos are pretty sturdy (especially when you attach them to the base plate!), and it was easy to build towers that could withstand the shake.
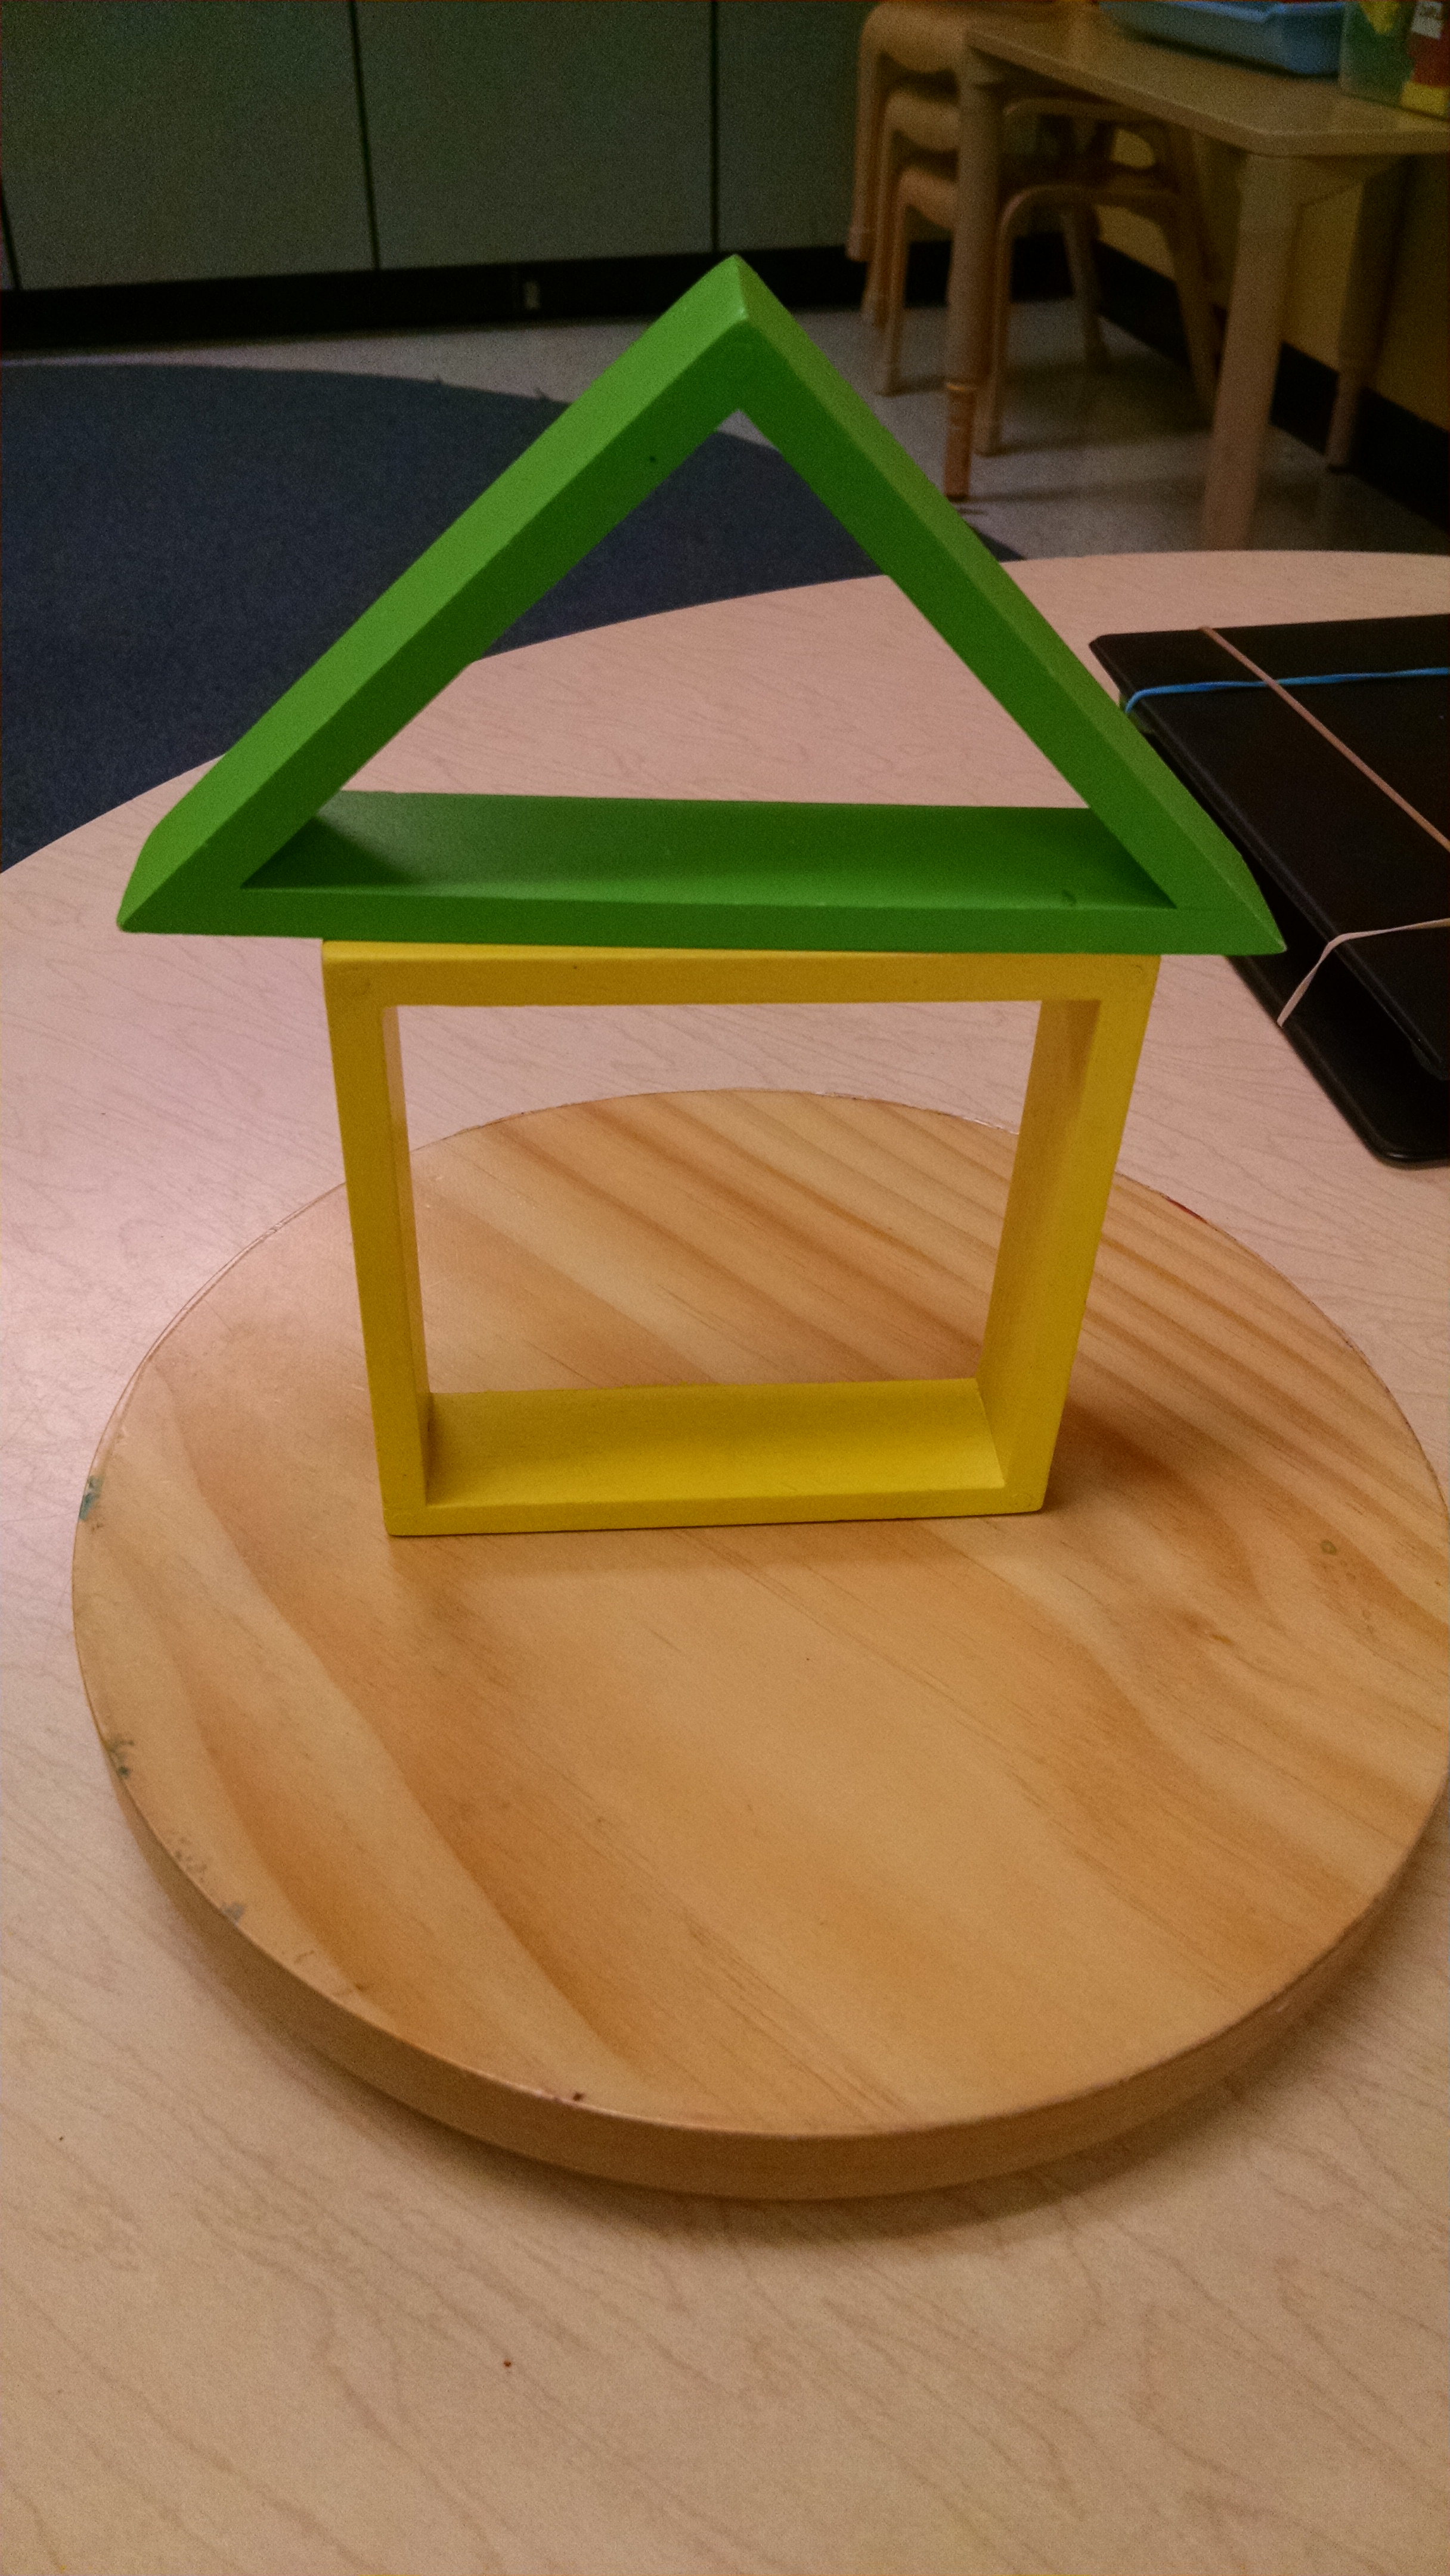
The wooden blocks were a more effective demo. For our little kids (age 3 – 5), we just had them build with the wood and knock it down. We had our oldest kids (age 6 – 7) try building with Duplos too to see the difference that materials make in earthquake safety.
In the IMAX movie “Dream Big – Engineering Our World”, they showed a class project where they set large jello molds on top of the shake table and jiggled them.
For detailed instructions on building shake tables, and related activities / discussions, see www.scientificamerican.com/article/bring-science-home-earthquake-proof-engineering/ or www.pbslearningmedia.org/resource/kqed07.sci.ess.earthsys.lpquakes/living-with-earthquakes/ or the video here: www.raftbayarea.org/ideas/Shake%20Table.pdf#)
I’ve also considered purchasing this pre-made shake table and blocks from Lakeshore: https://www.lakeshorelearning.com/products/stem/building-engineering/survive-the-quake-engineering-kit/p/DD121
Science Exploration Activities
Earthquake on Sand
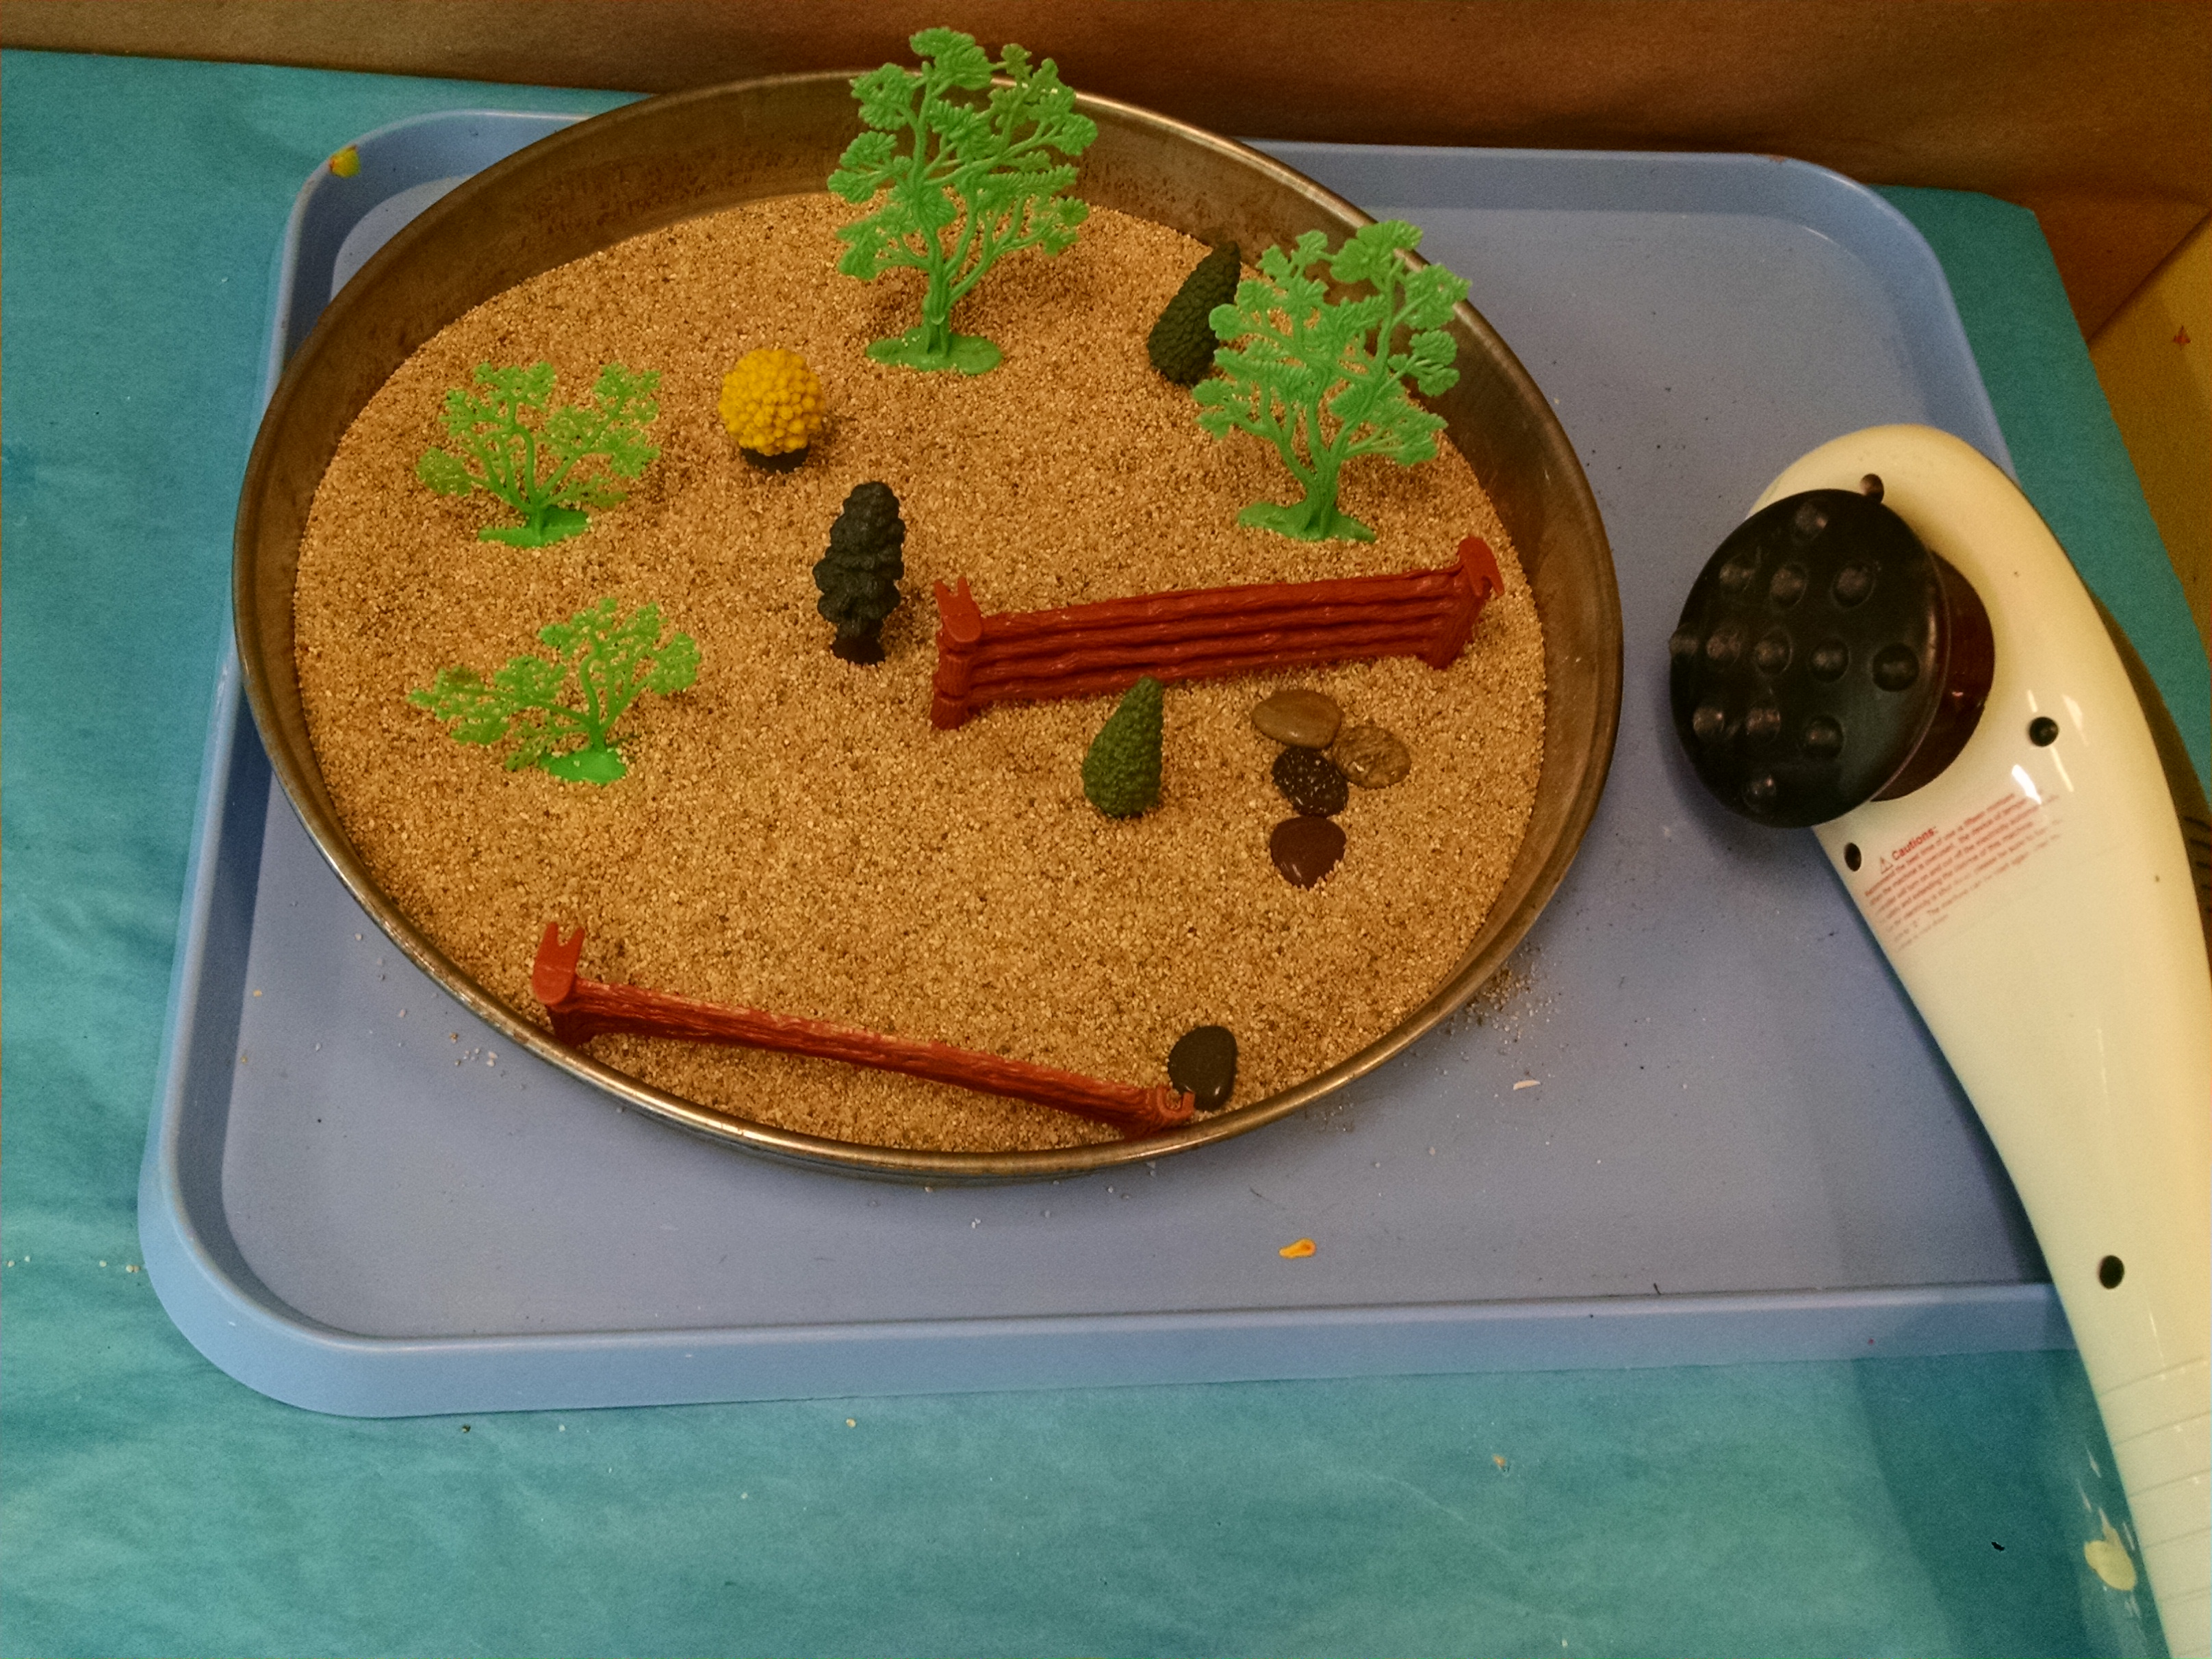
Fill a large container with sand, and toys, such as plastic fences, trees, and flat rocks. Use a back massager tool to create a vibration, by holding the tool up against the side of the pan. The sand will start to jiggle, then shift and move, knocking over the trees and fences, carrying the rocks across the pan – flowing almost like water. Clear evidence for why not to build on loose soil in an earthquake zone!
We have found some containers are easier to use than others, plus in some it’s hard to get the sand moving and in others you get a big response. If you try this experiment, definitely try a variety of containers to find the best effect!
Seismograph
On the table with the back massager activity, we placed our home-made seismograph which could be used to track the vibration of the “earthquake.”
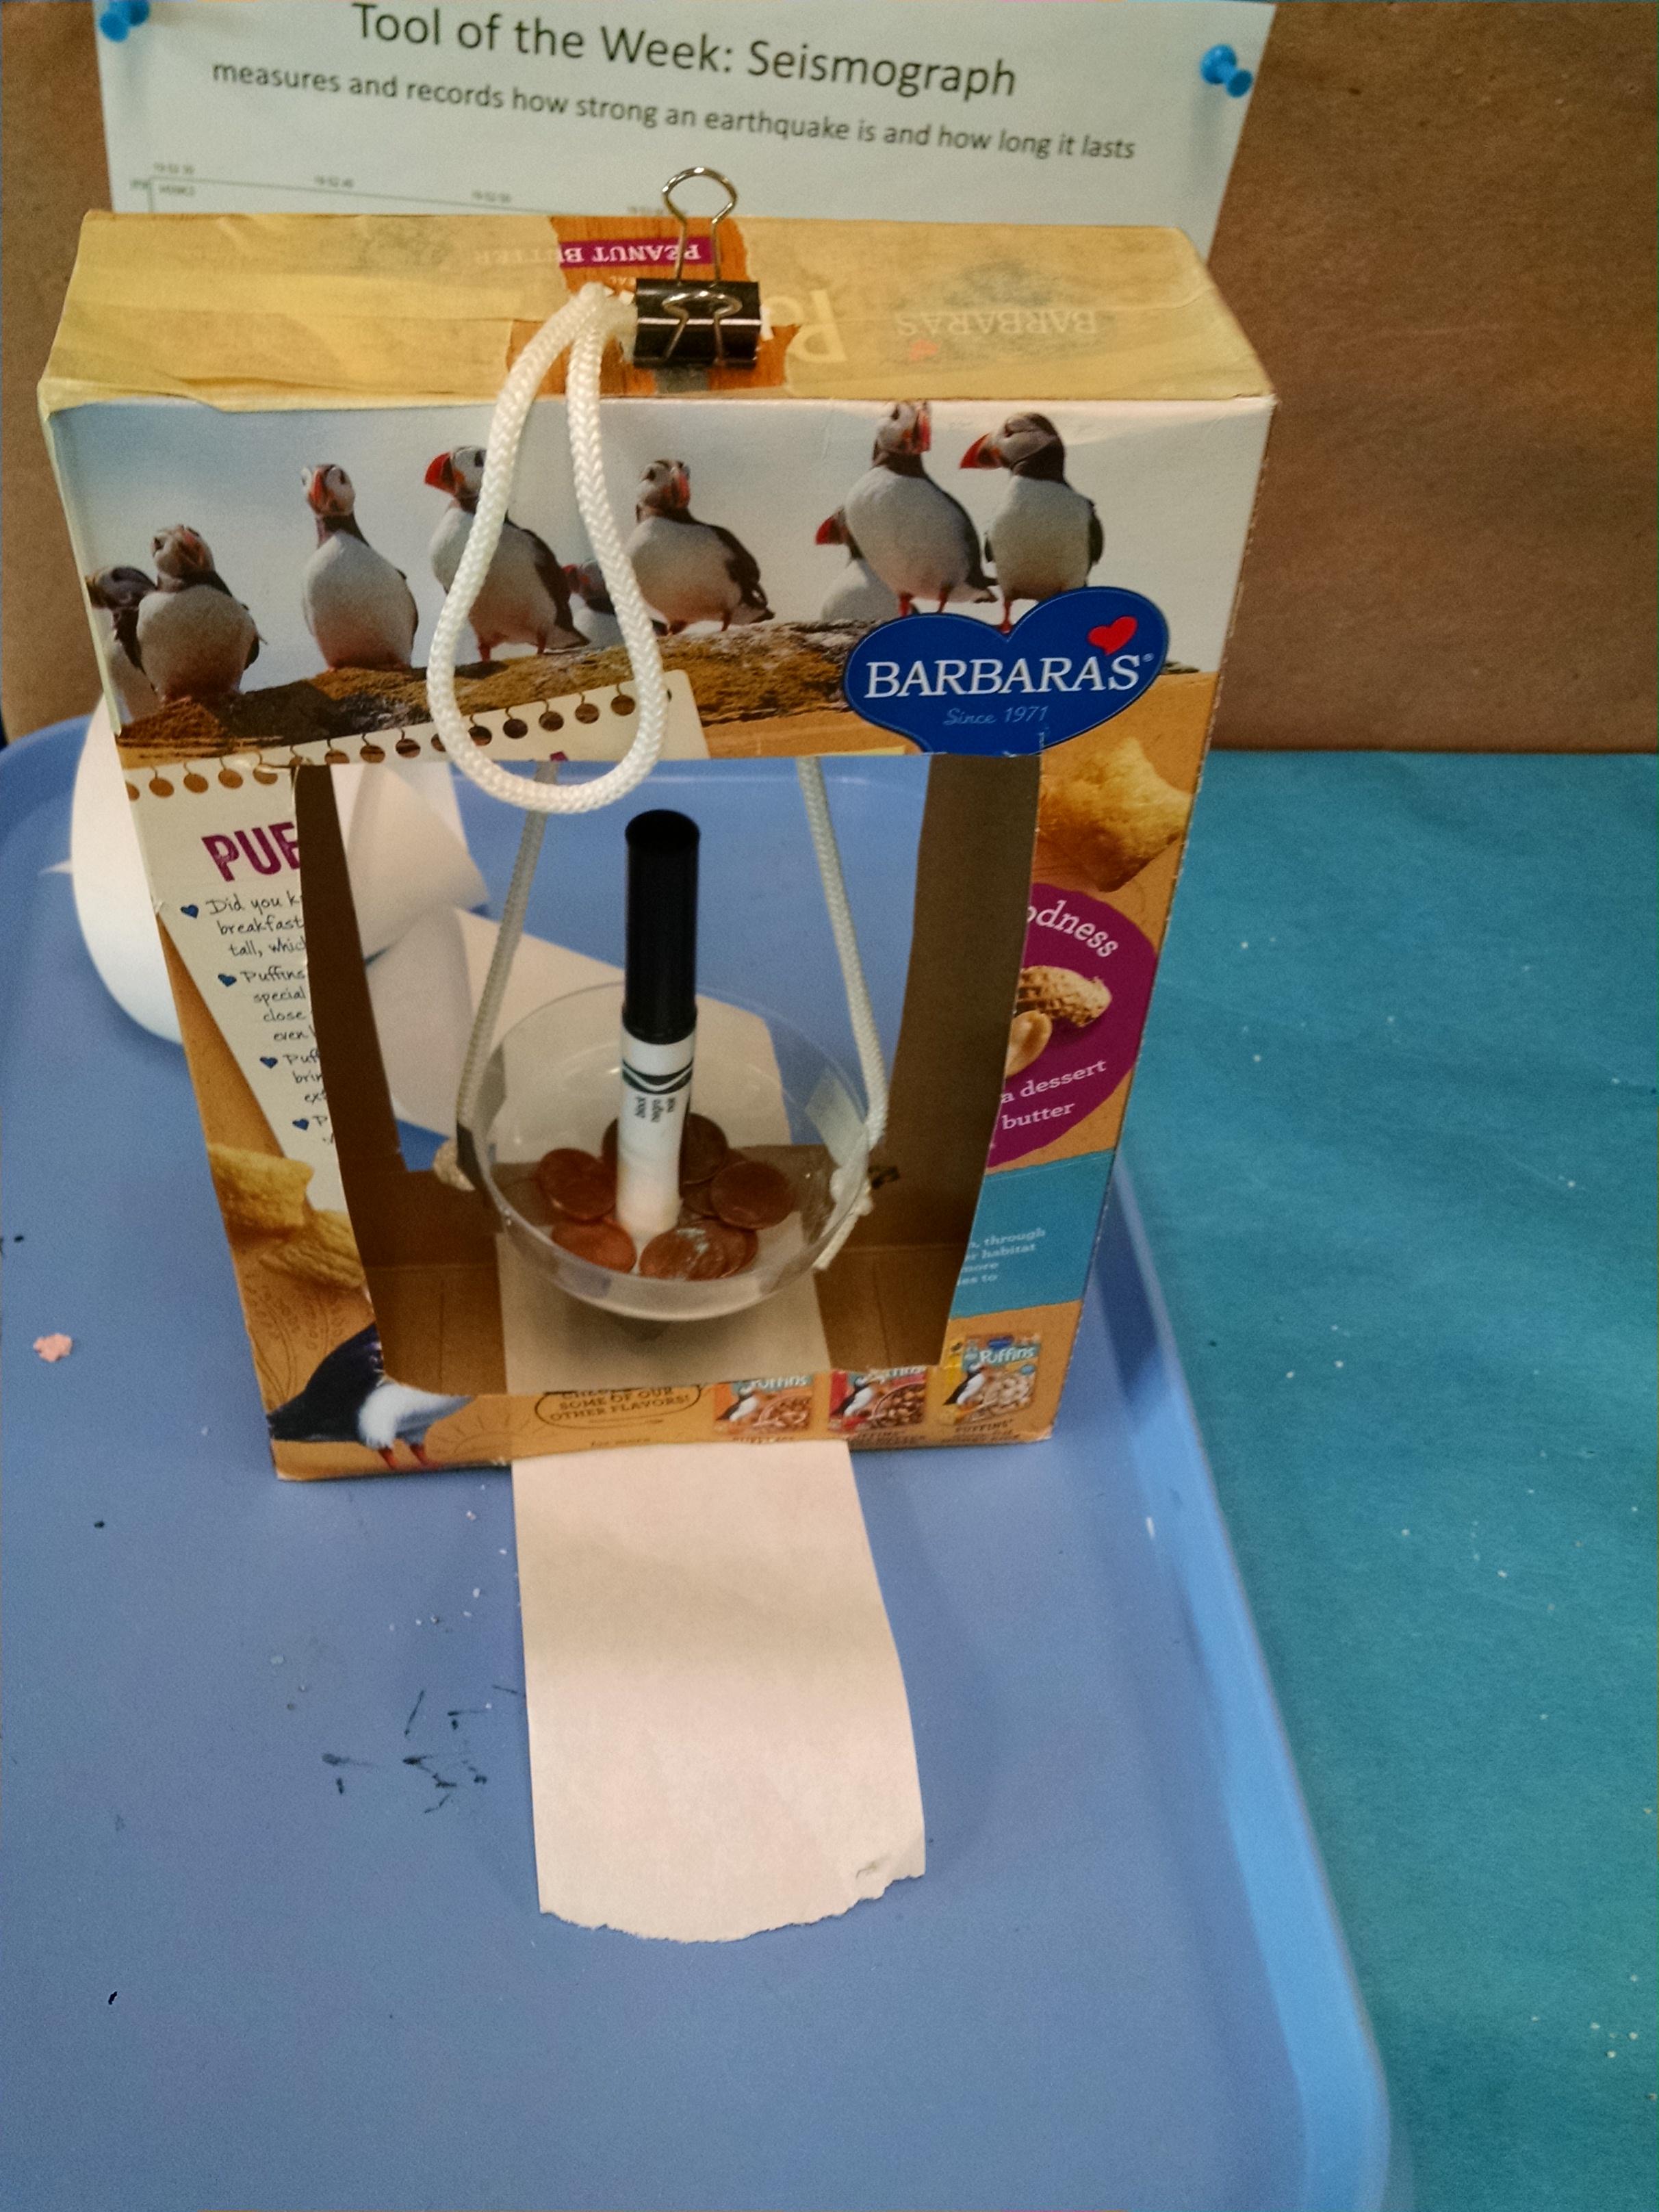

The seismograph on the left is built with a cereal box, a plastic champagne glass, string, pennies for weights, and a marker. You feed adding machine paper through slots, and the marker tracks the vibration. The one on the right (version 2.0) was made with a sturdier cardboard box, a pencil, a pill bottle with a lid to hold the pencil upright and weighted with marbles. It worked better, but the pencil marks were very pale. (I couldn’t find a marker that was long enough to extend through the pill bottle from top to bottom. That will be next year’s improvement… )
Here’s the sign I made to go with the seismograph. Find directions to make your own seismograph here: https://www.mrsec.psu.edu/sites/mrsec.psu.edu/files/education-outreach/make_a_working_seismograph.pdf and www.iris.edu/hq/files/programs/education_and_outreach/aotm/8/1.SeismographModel-Lahr.pdf and http://science-mattersblog.blogspot.com/search/label/Earthquakes
Note: building the seismograph is a lot of work, and so far I haven’t got one to work well enough to really engage the kids, but I want to play with it more, because I think they could really love seeing the difference between little shocks that create squiggly lines and big shocks that really jerk the pen back and forth. Plus, it’s good for me to challenge myself just like we try to challenge the kids to take a design, test it, improve it, test it again, and improve it again.
Understanding Earth’s Layers
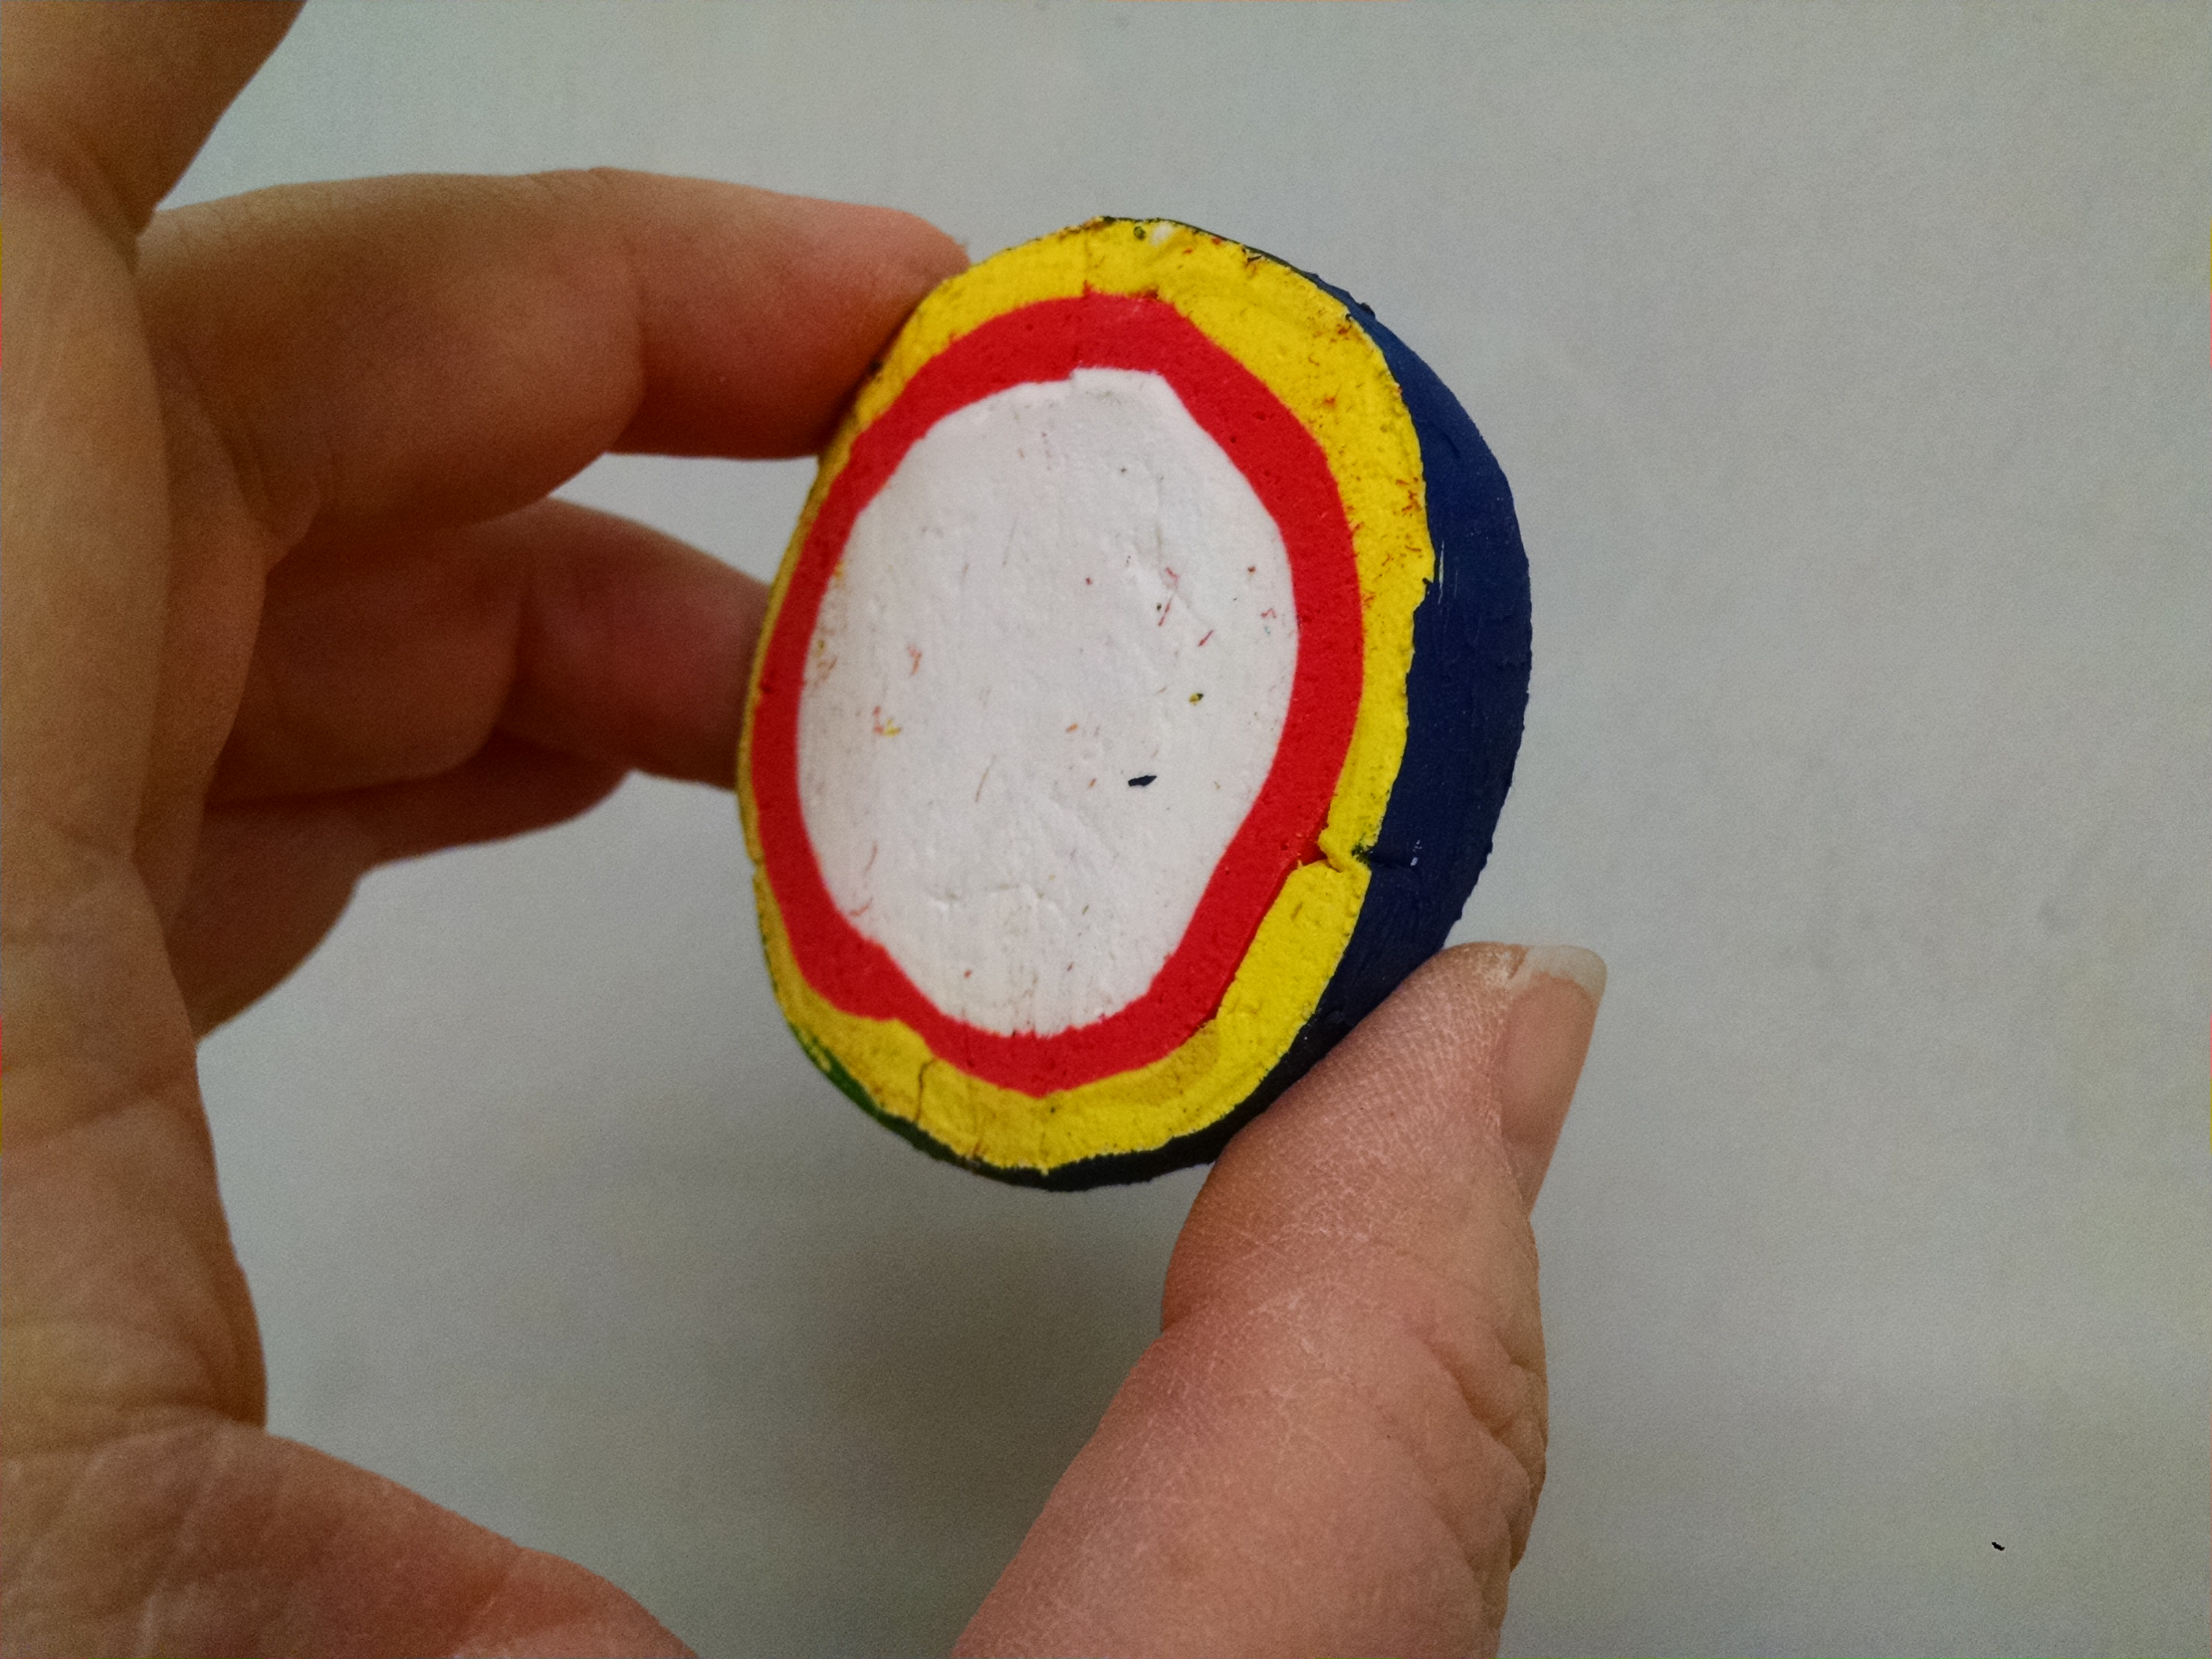
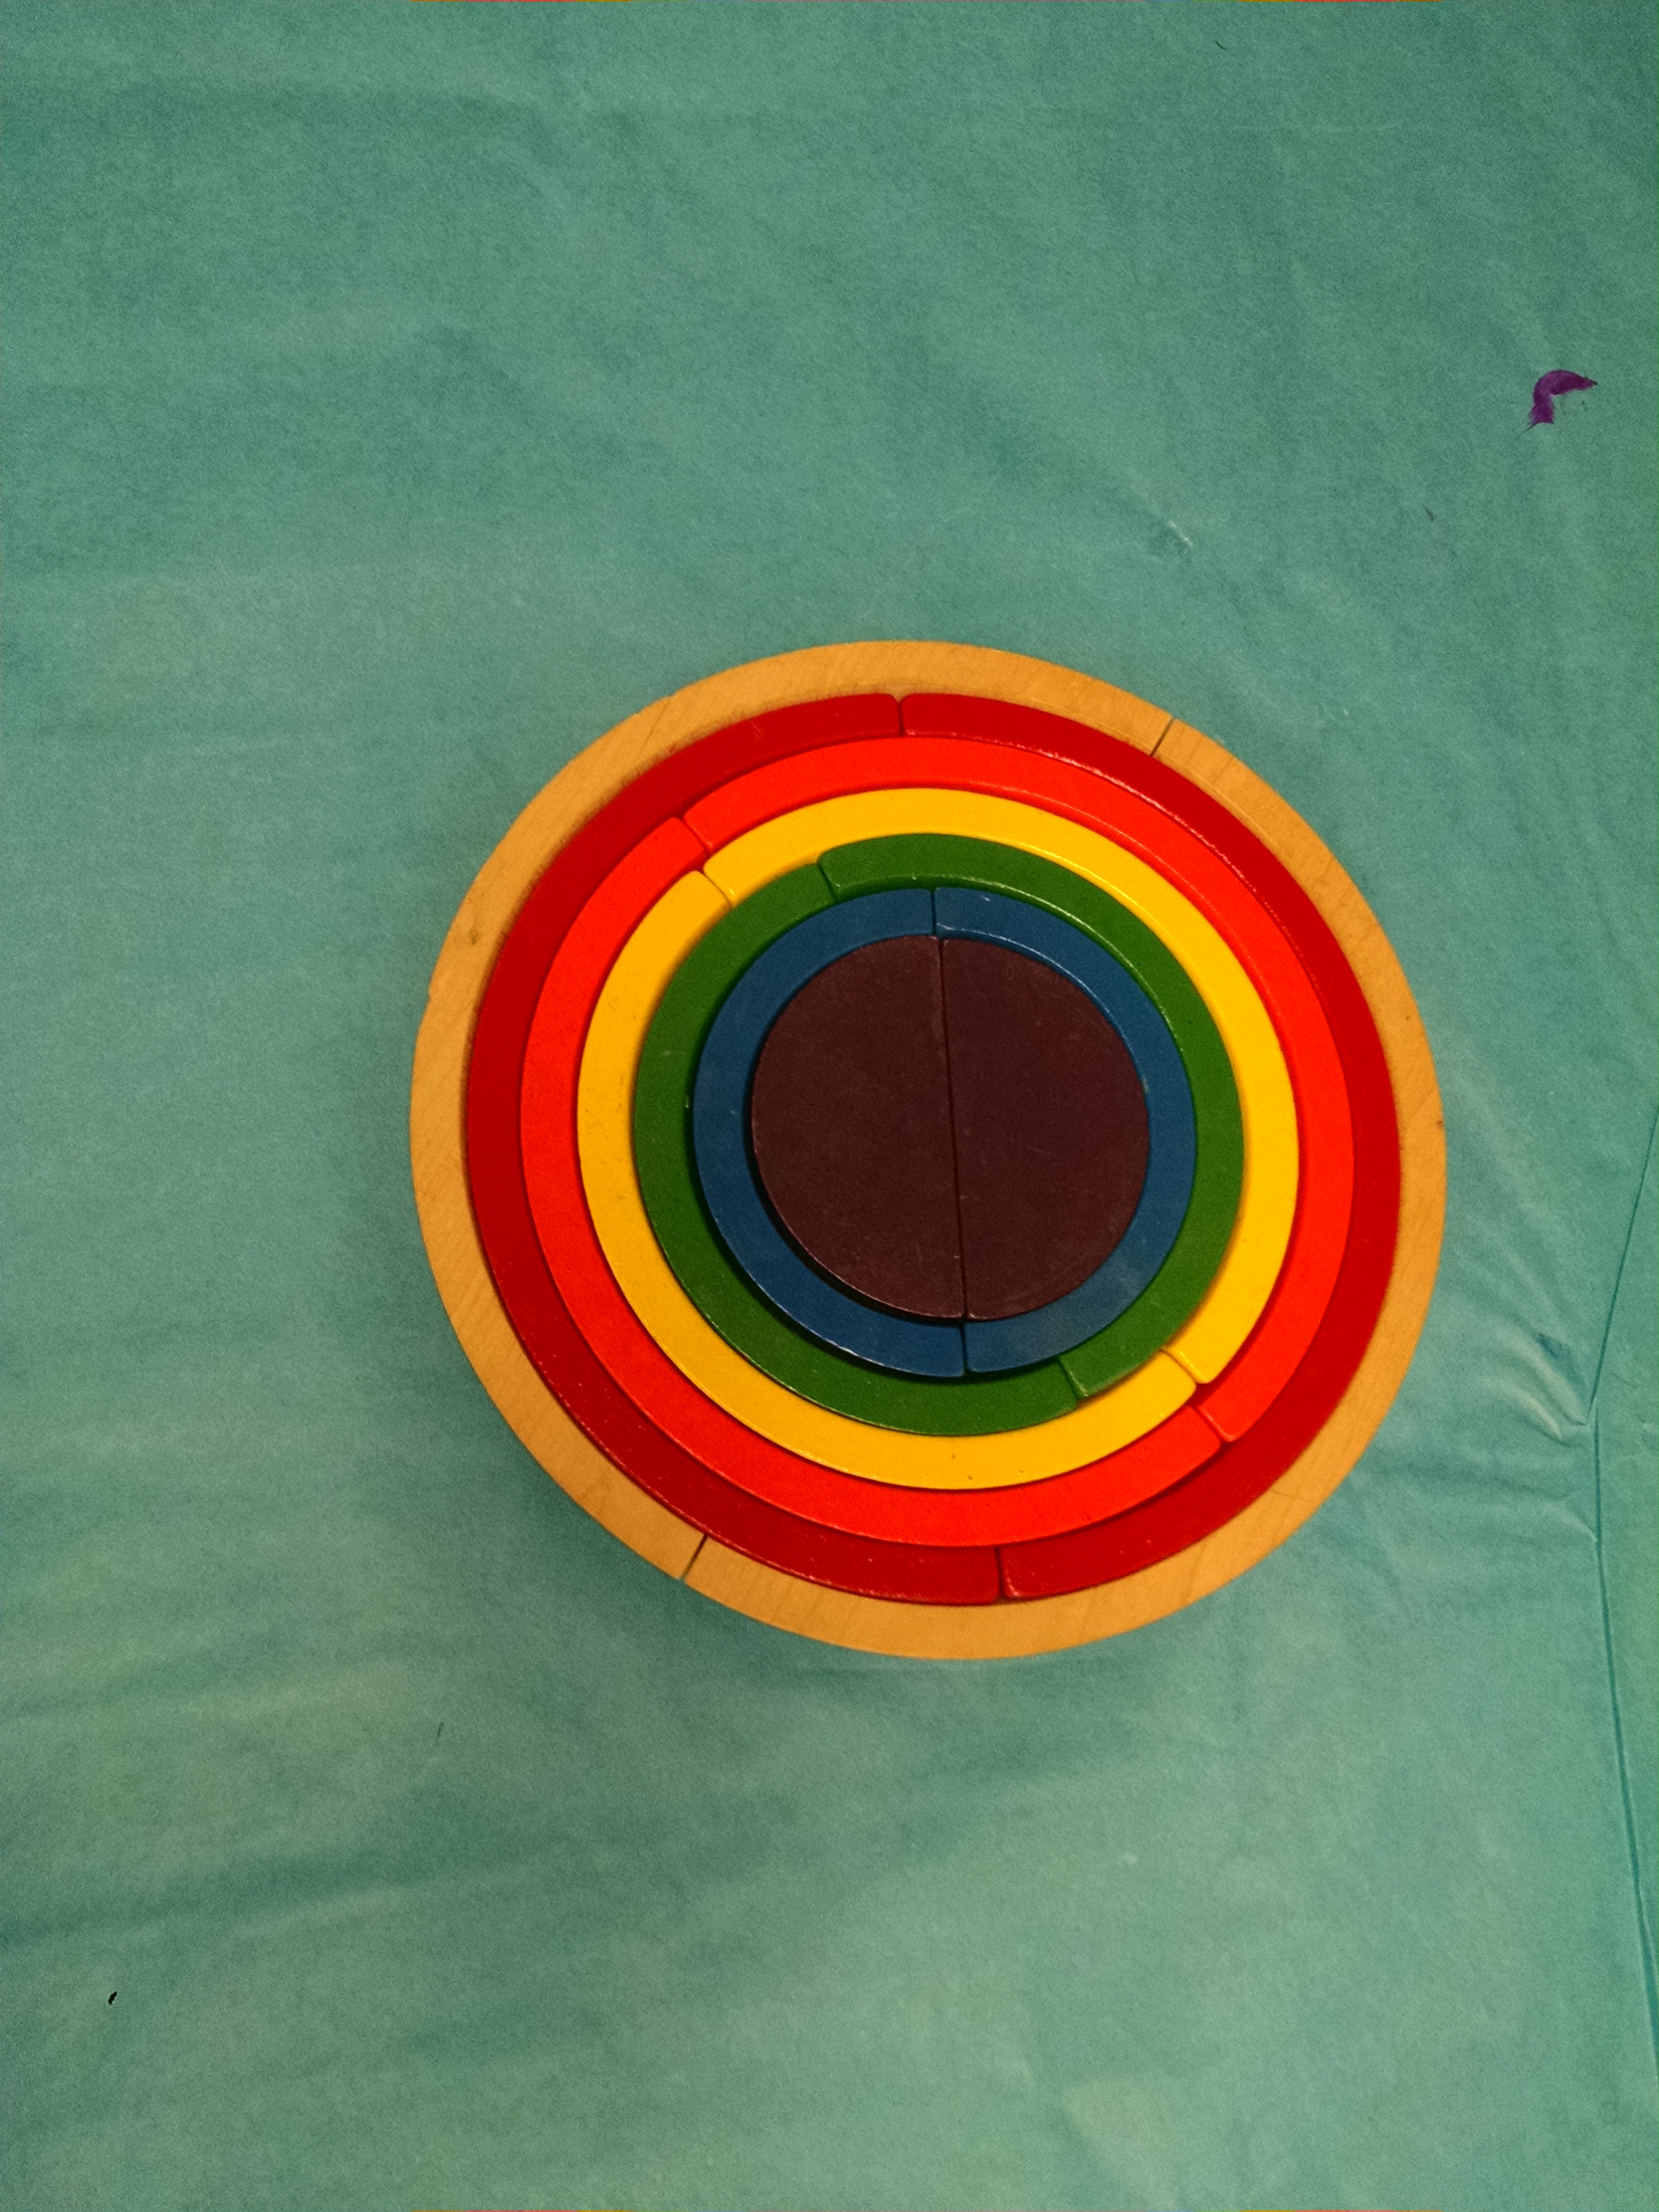
We put out 4 ways to illustrate earth’s layers – an illustration, nesting easter eggs, a model of the earth, and a puzzle of nesting rings. The model was made with Model Magic – on Monday, I made a ball of white clay for the inner core and let it dry overnight. On Tuesday, I covered that with a layer of red for the outer core – you’ll see that my proportions are off – I need less white or more red. On Wednesday I added the yellow “mantle” and let it dry. On Thursday, I painted it – the paint layer is the Earth’s crust. On Friday, I very carefully cut it in half with a bread knife.

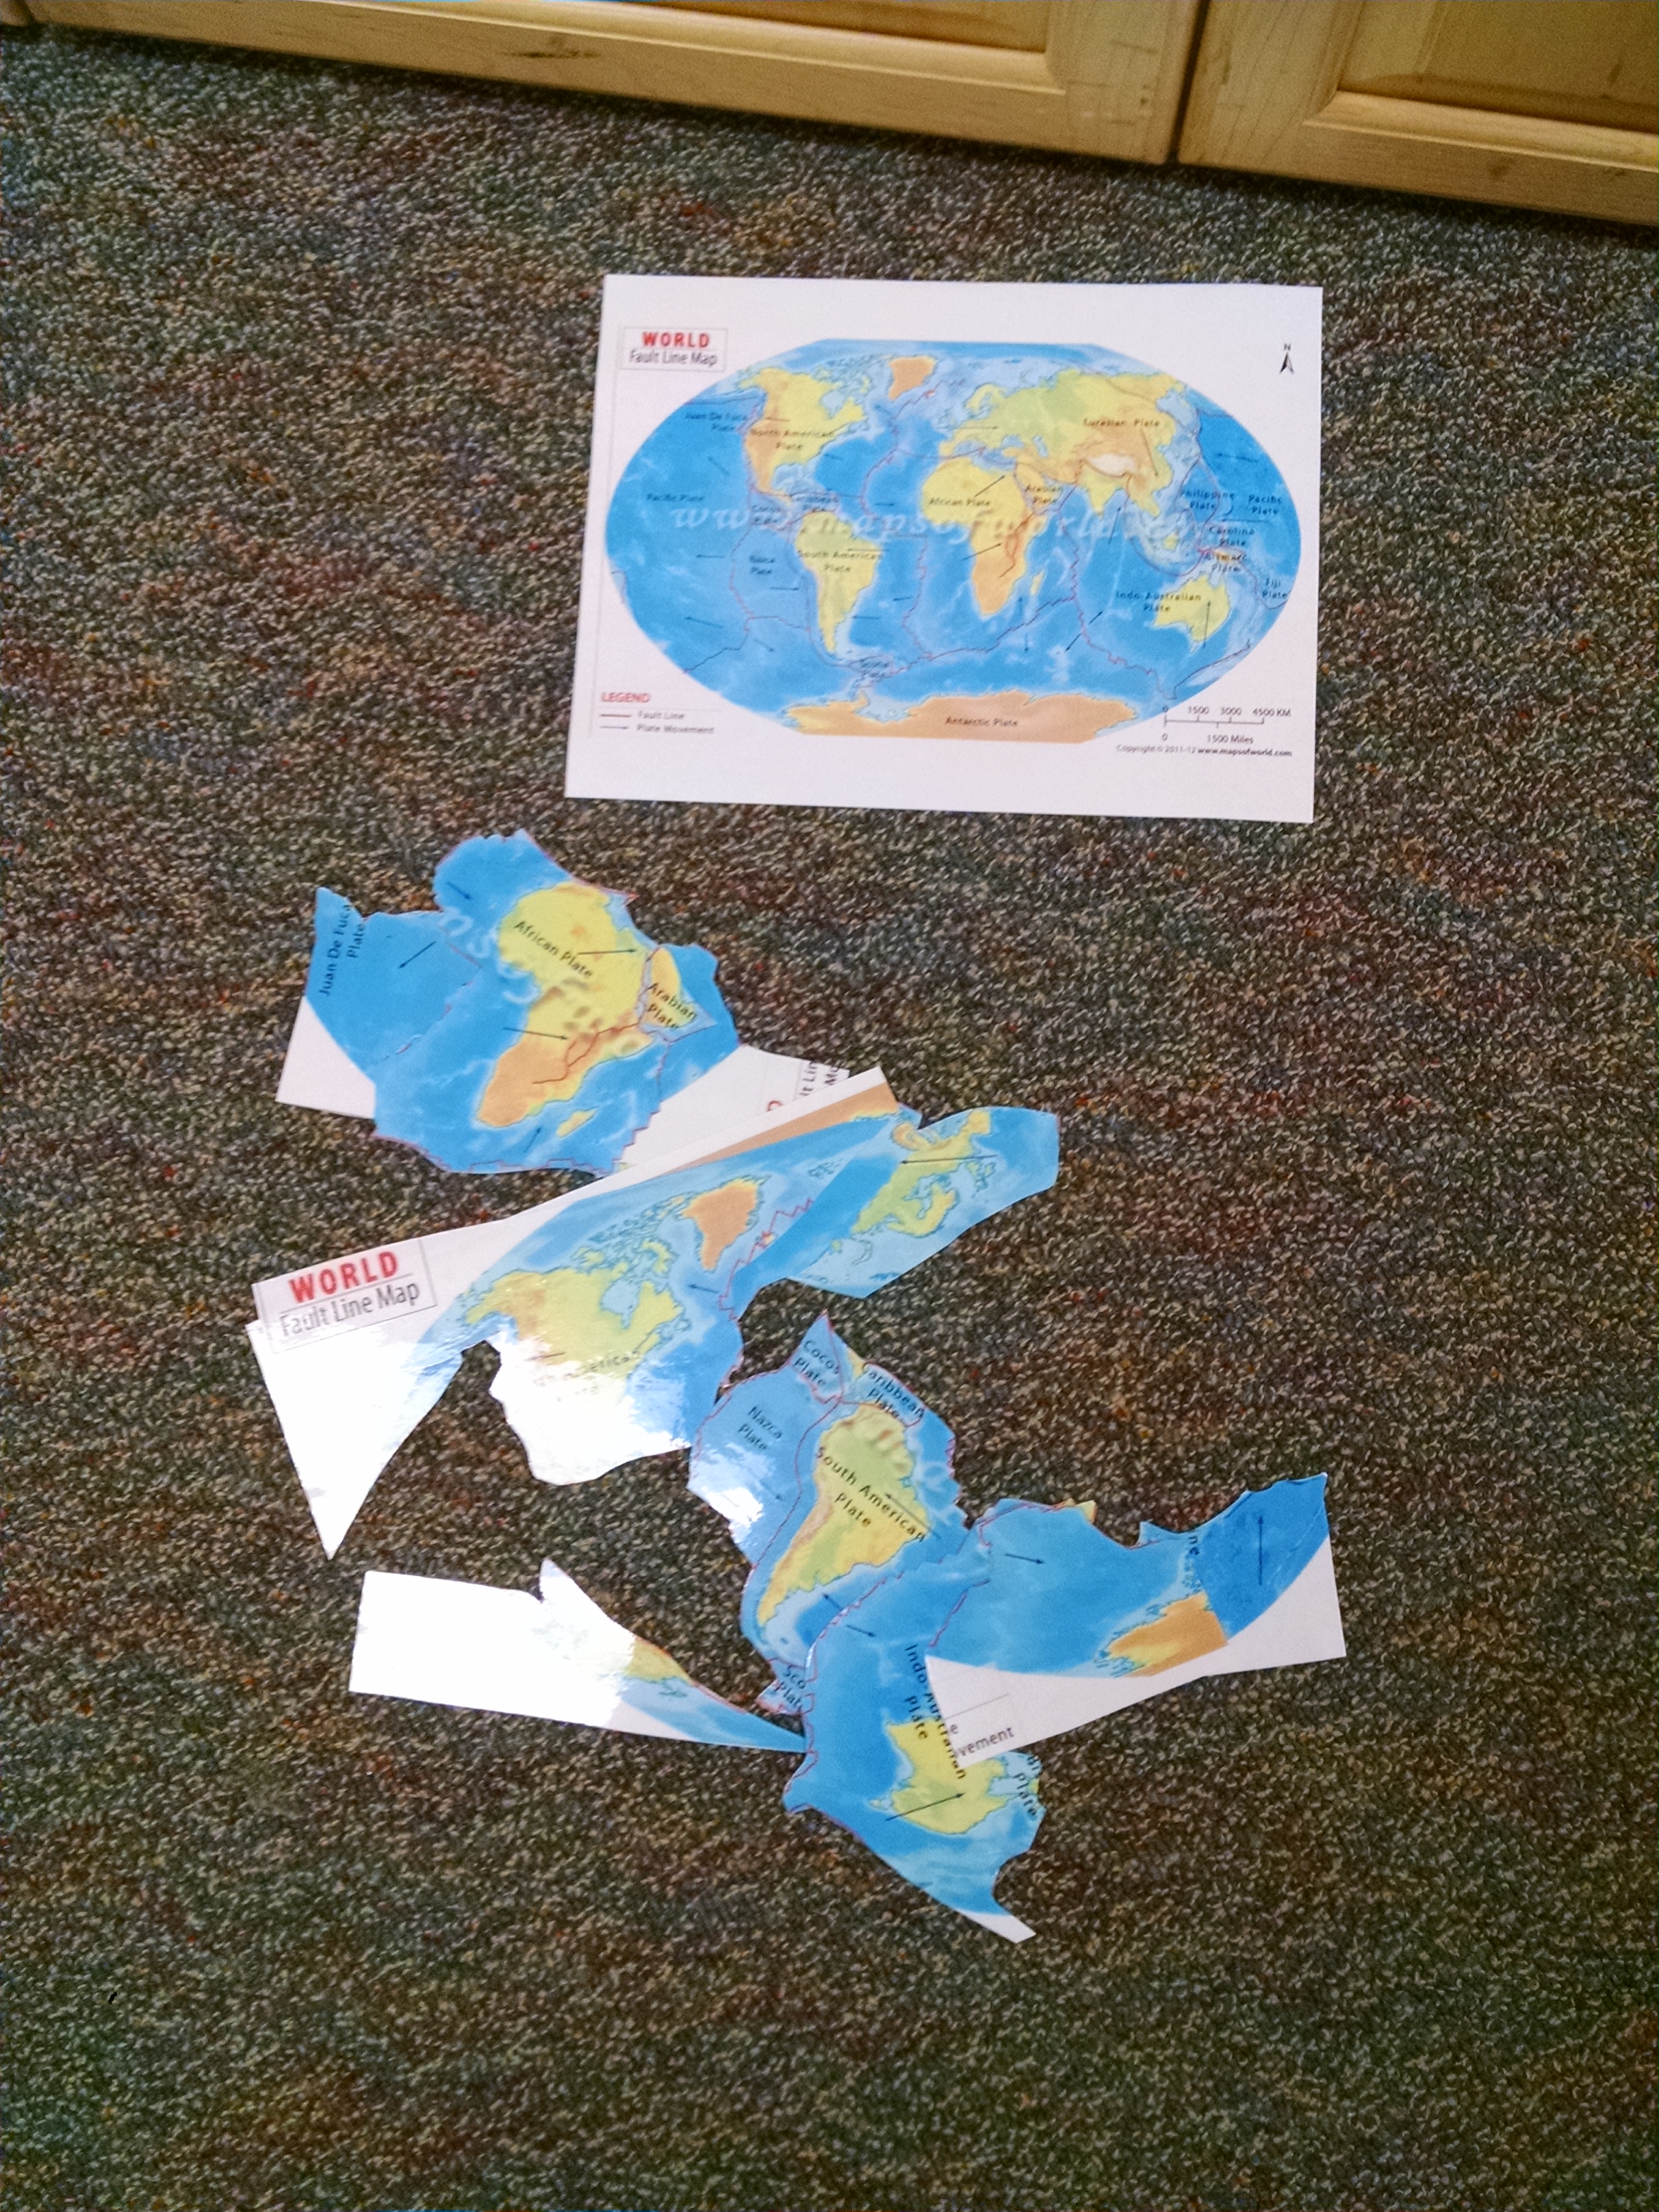
Tectonic Plates – jigsaw puzzle
Find an illustration online of a world map with the plates shown. Print it, laminate it, cut it along the fault lines.
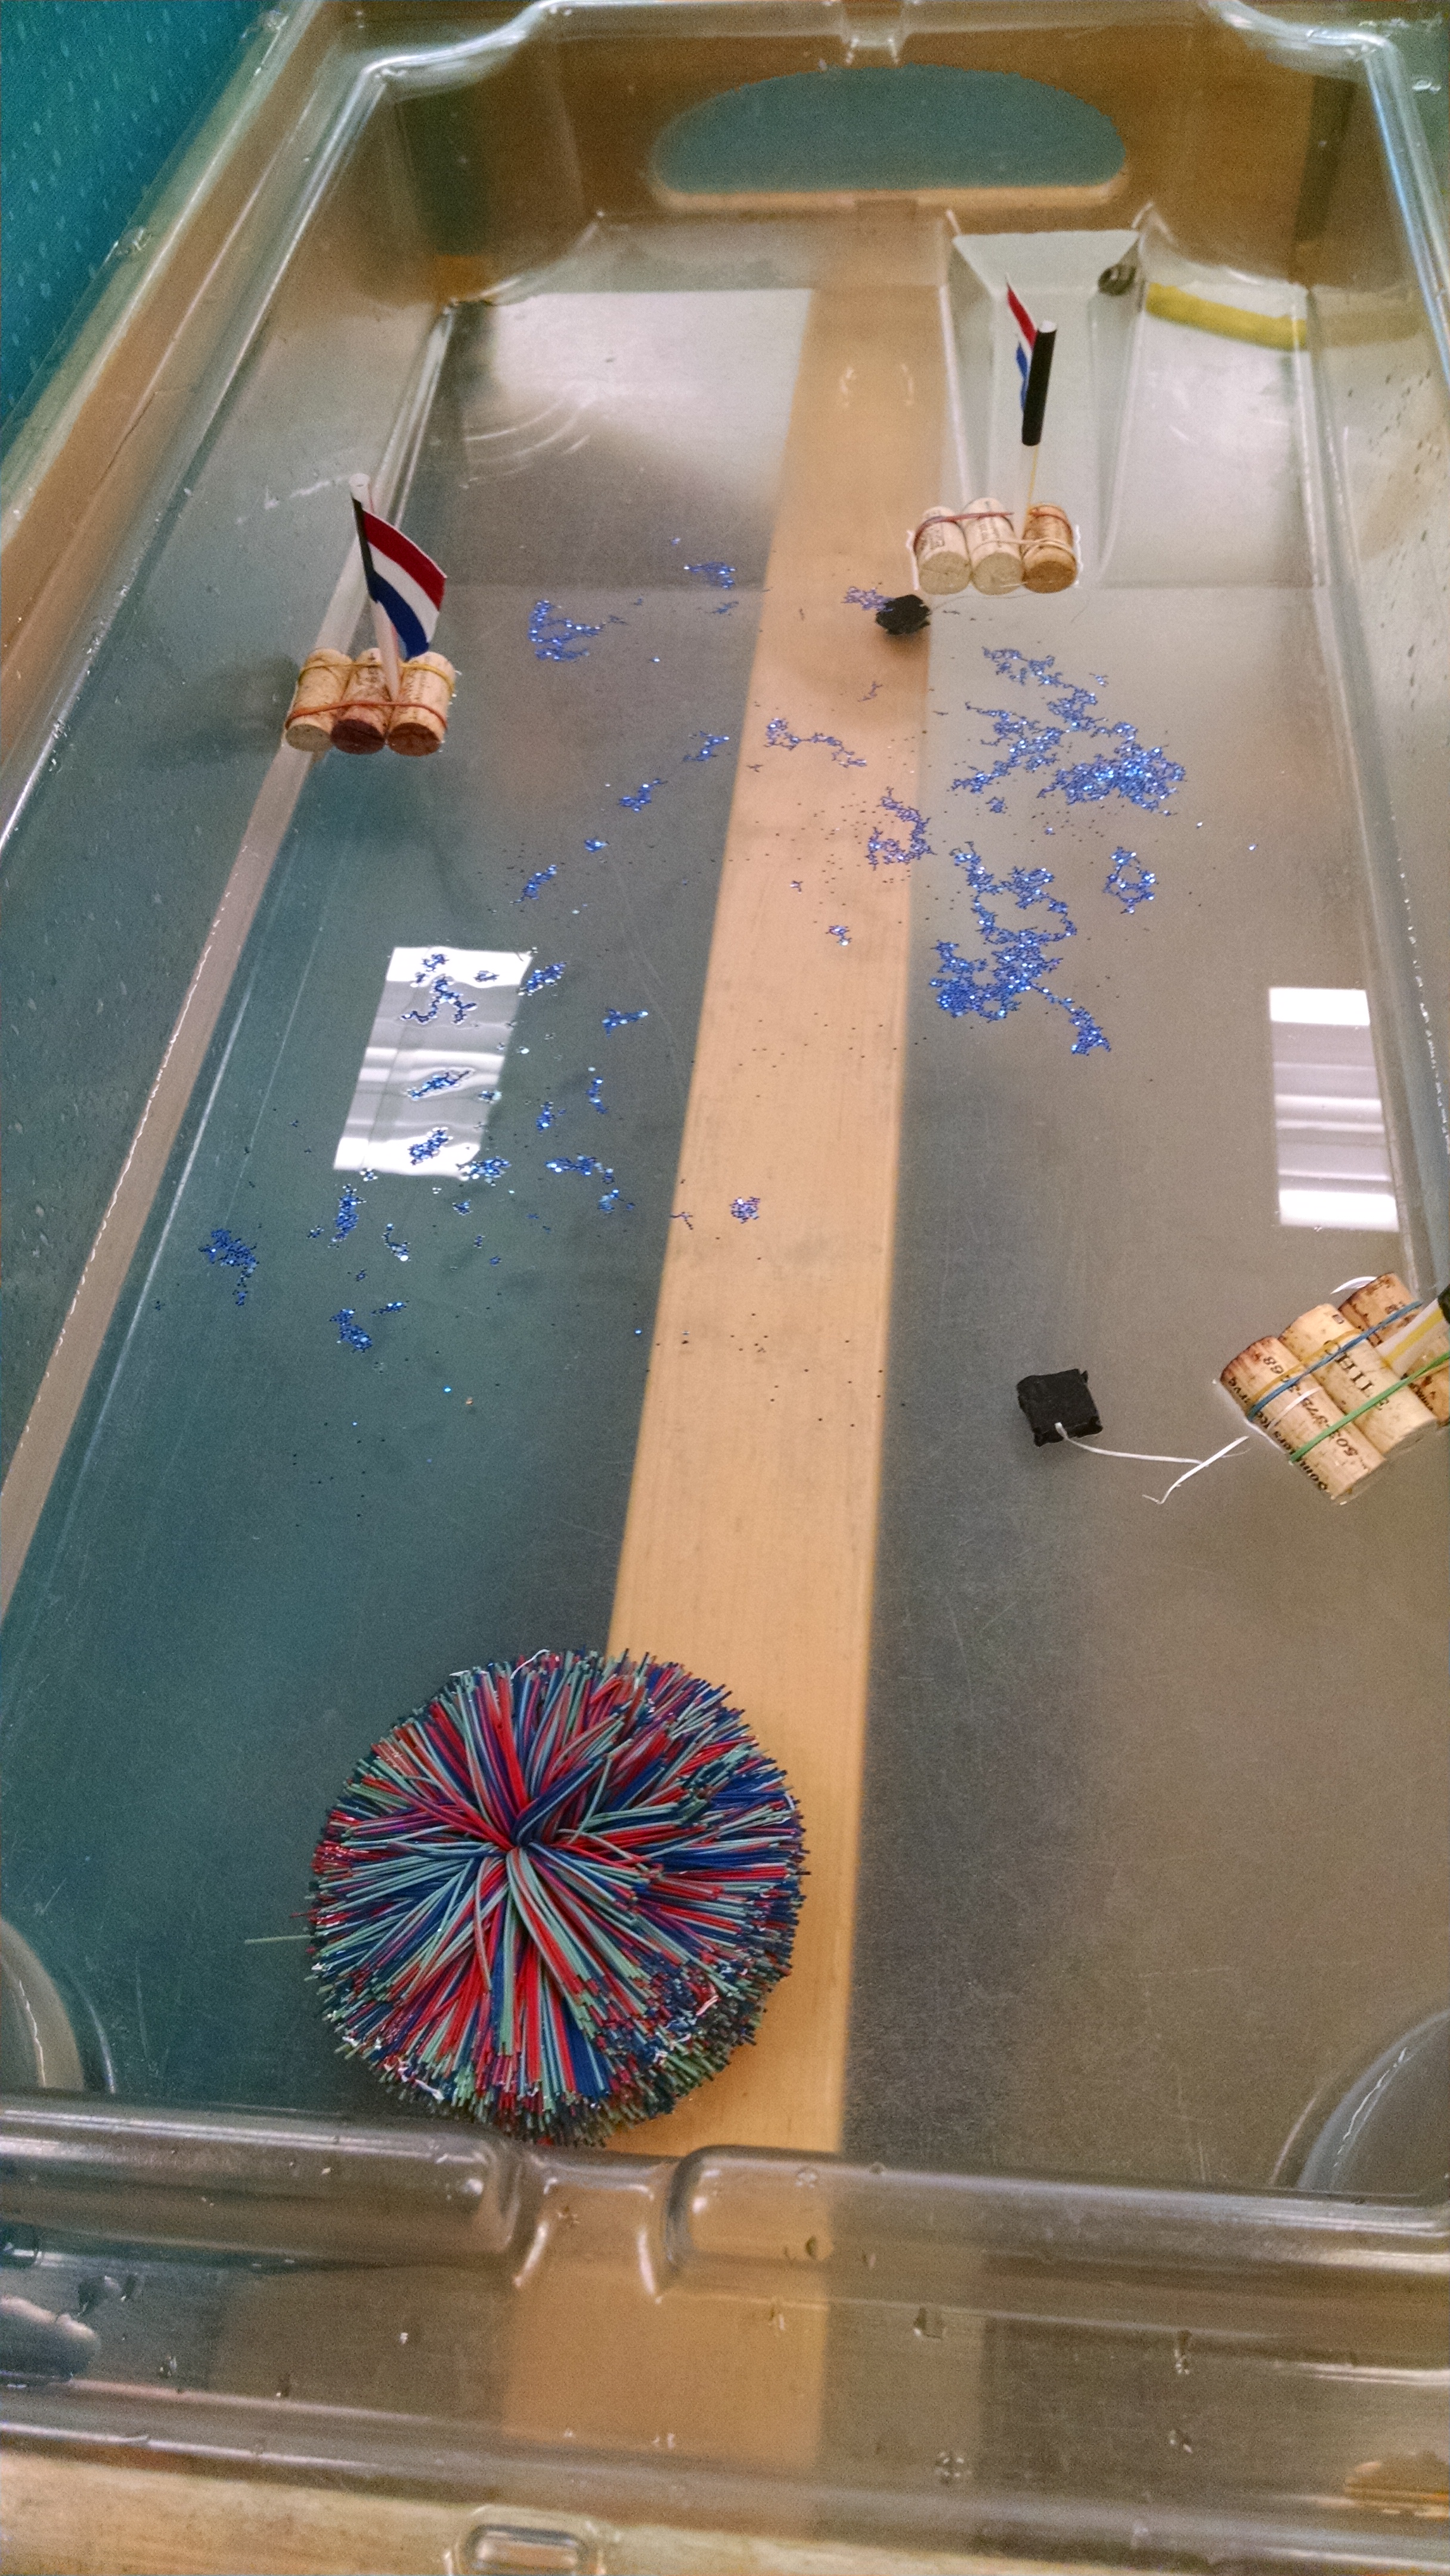
Make a Tsunami Wave
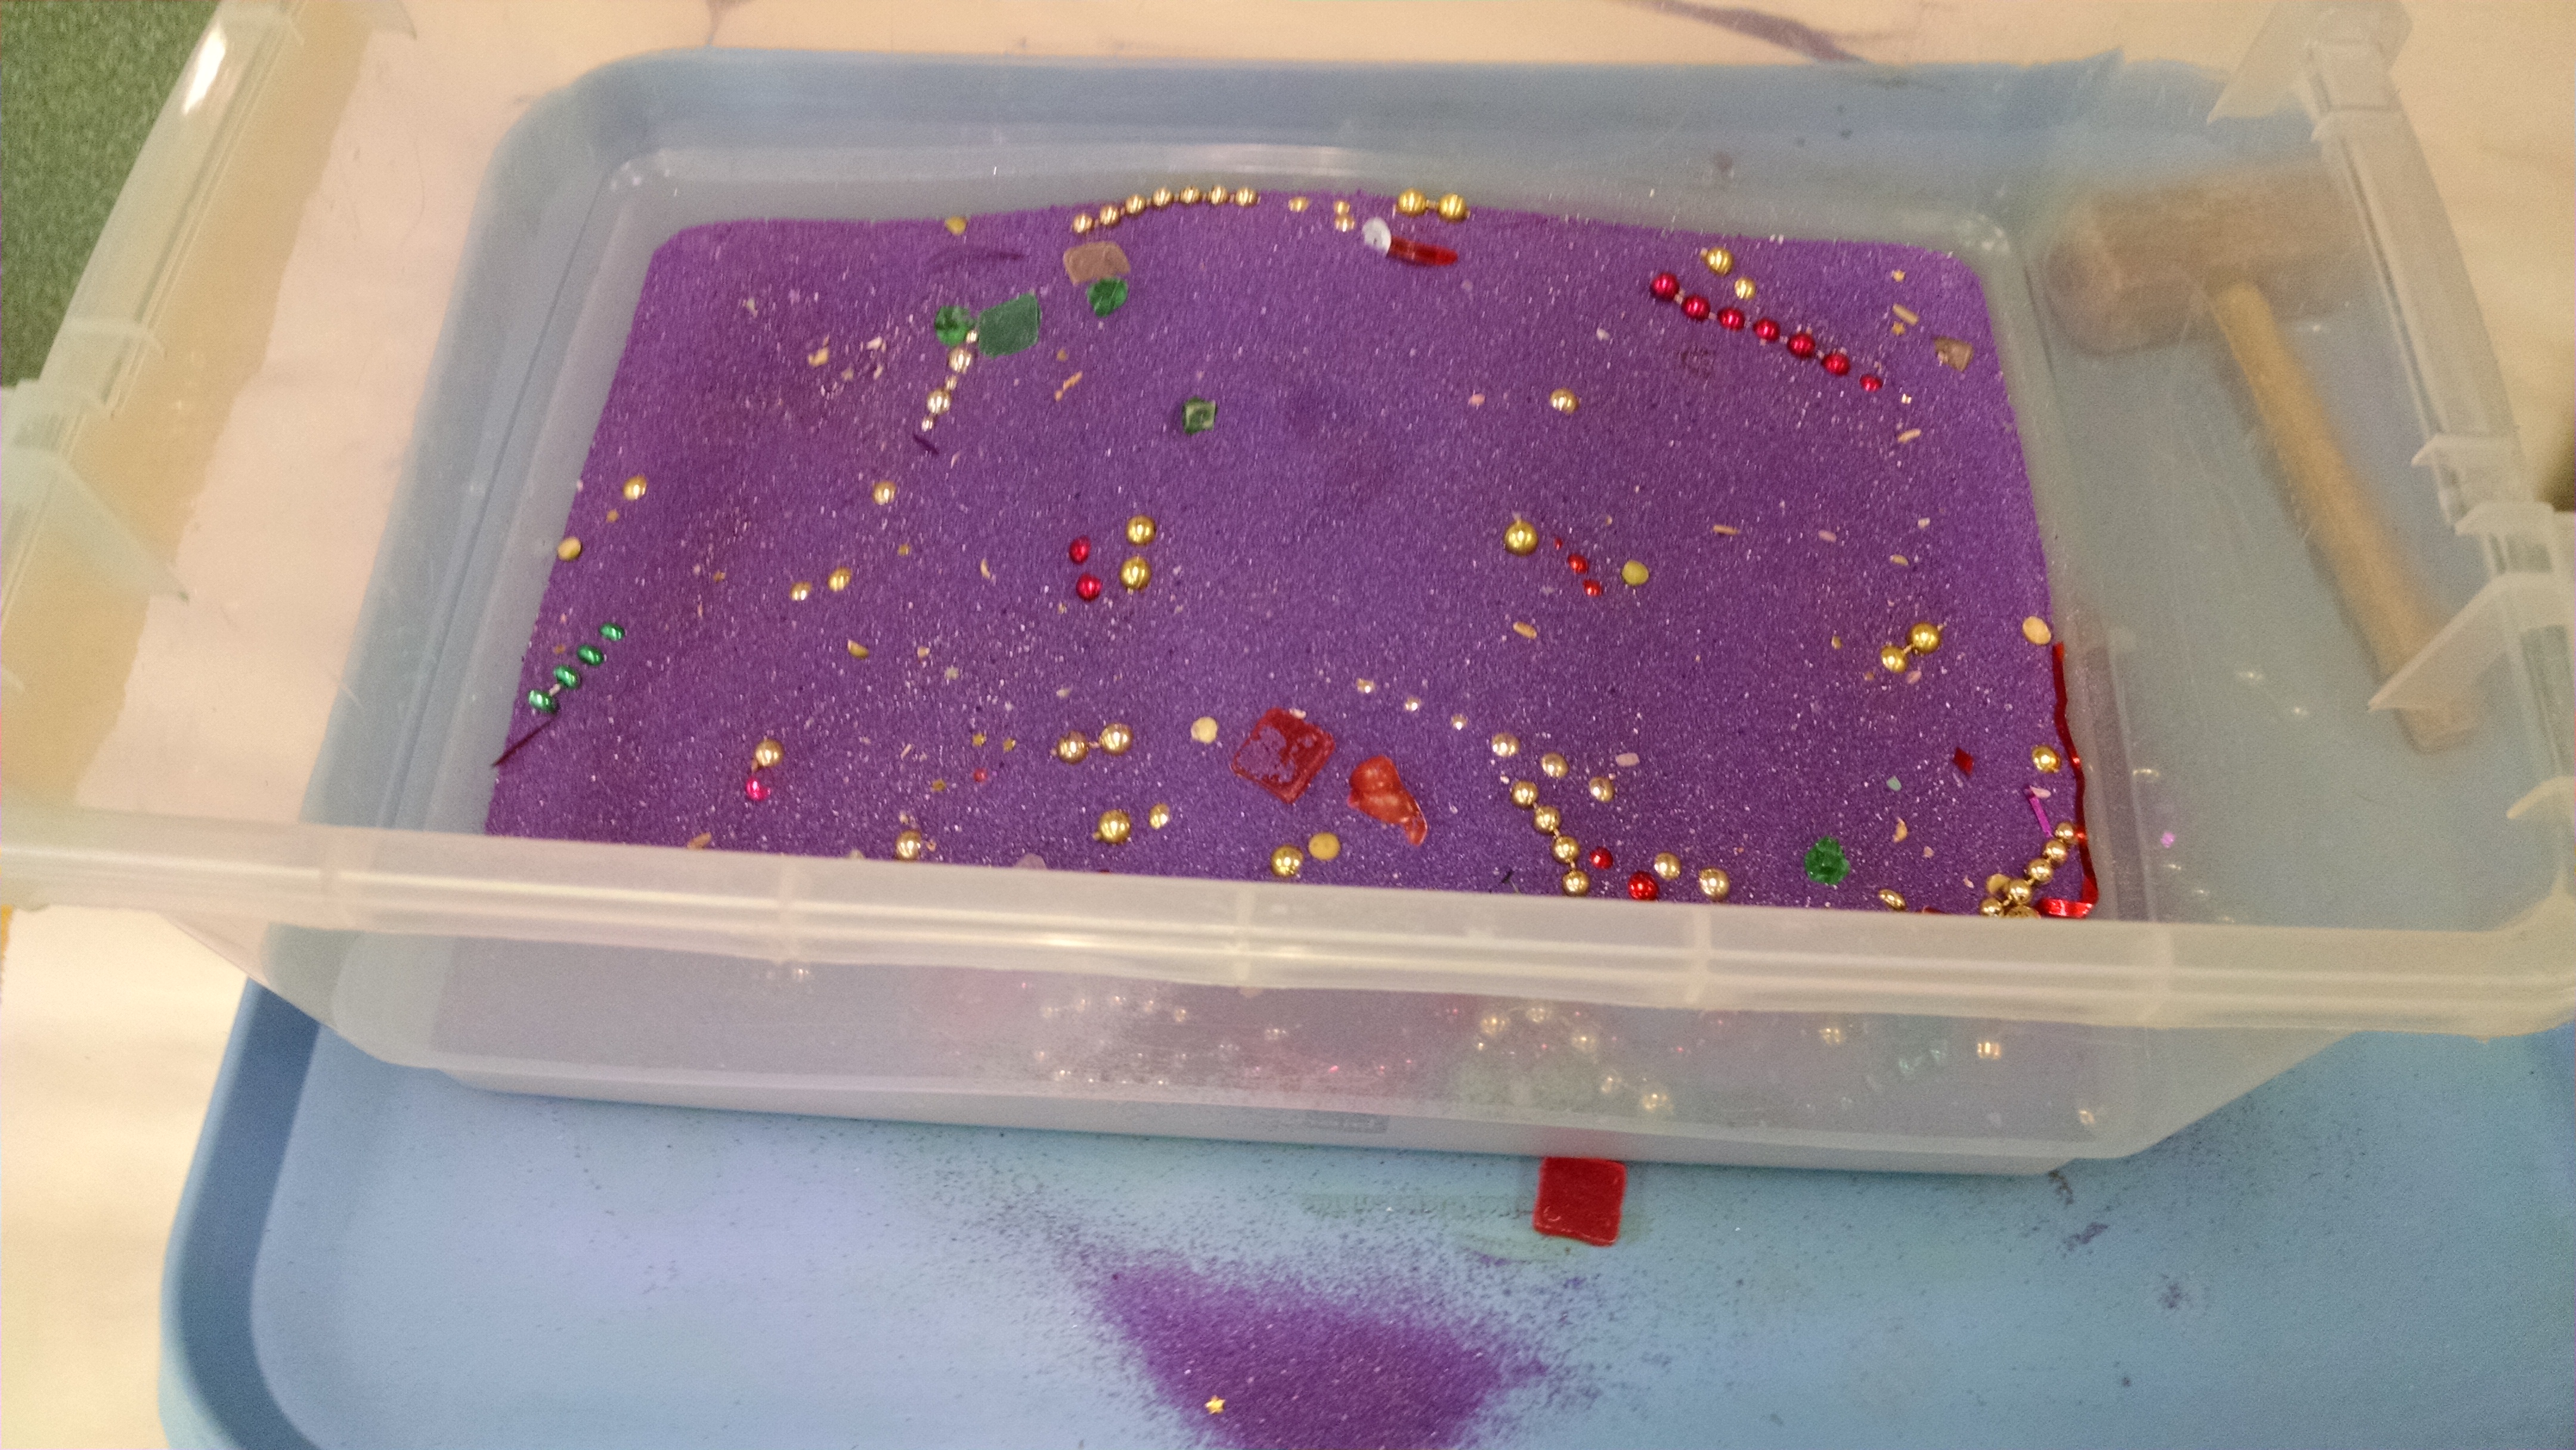
We filled the water table with water and some glitter. We made sailboats like we did for Wind week. We added anchors to two of the boats – we wrapped up pennies in electrical tape, and tied them to the boat with string.
You can create a wave by simultaneously lifting and pushing one end of the table. (The kids can also drop the koosh ball to make waves, of can just splash in the water.) There is more you can do with this idea… just go to YouTube and search for tsunami science fair.
Art Activities
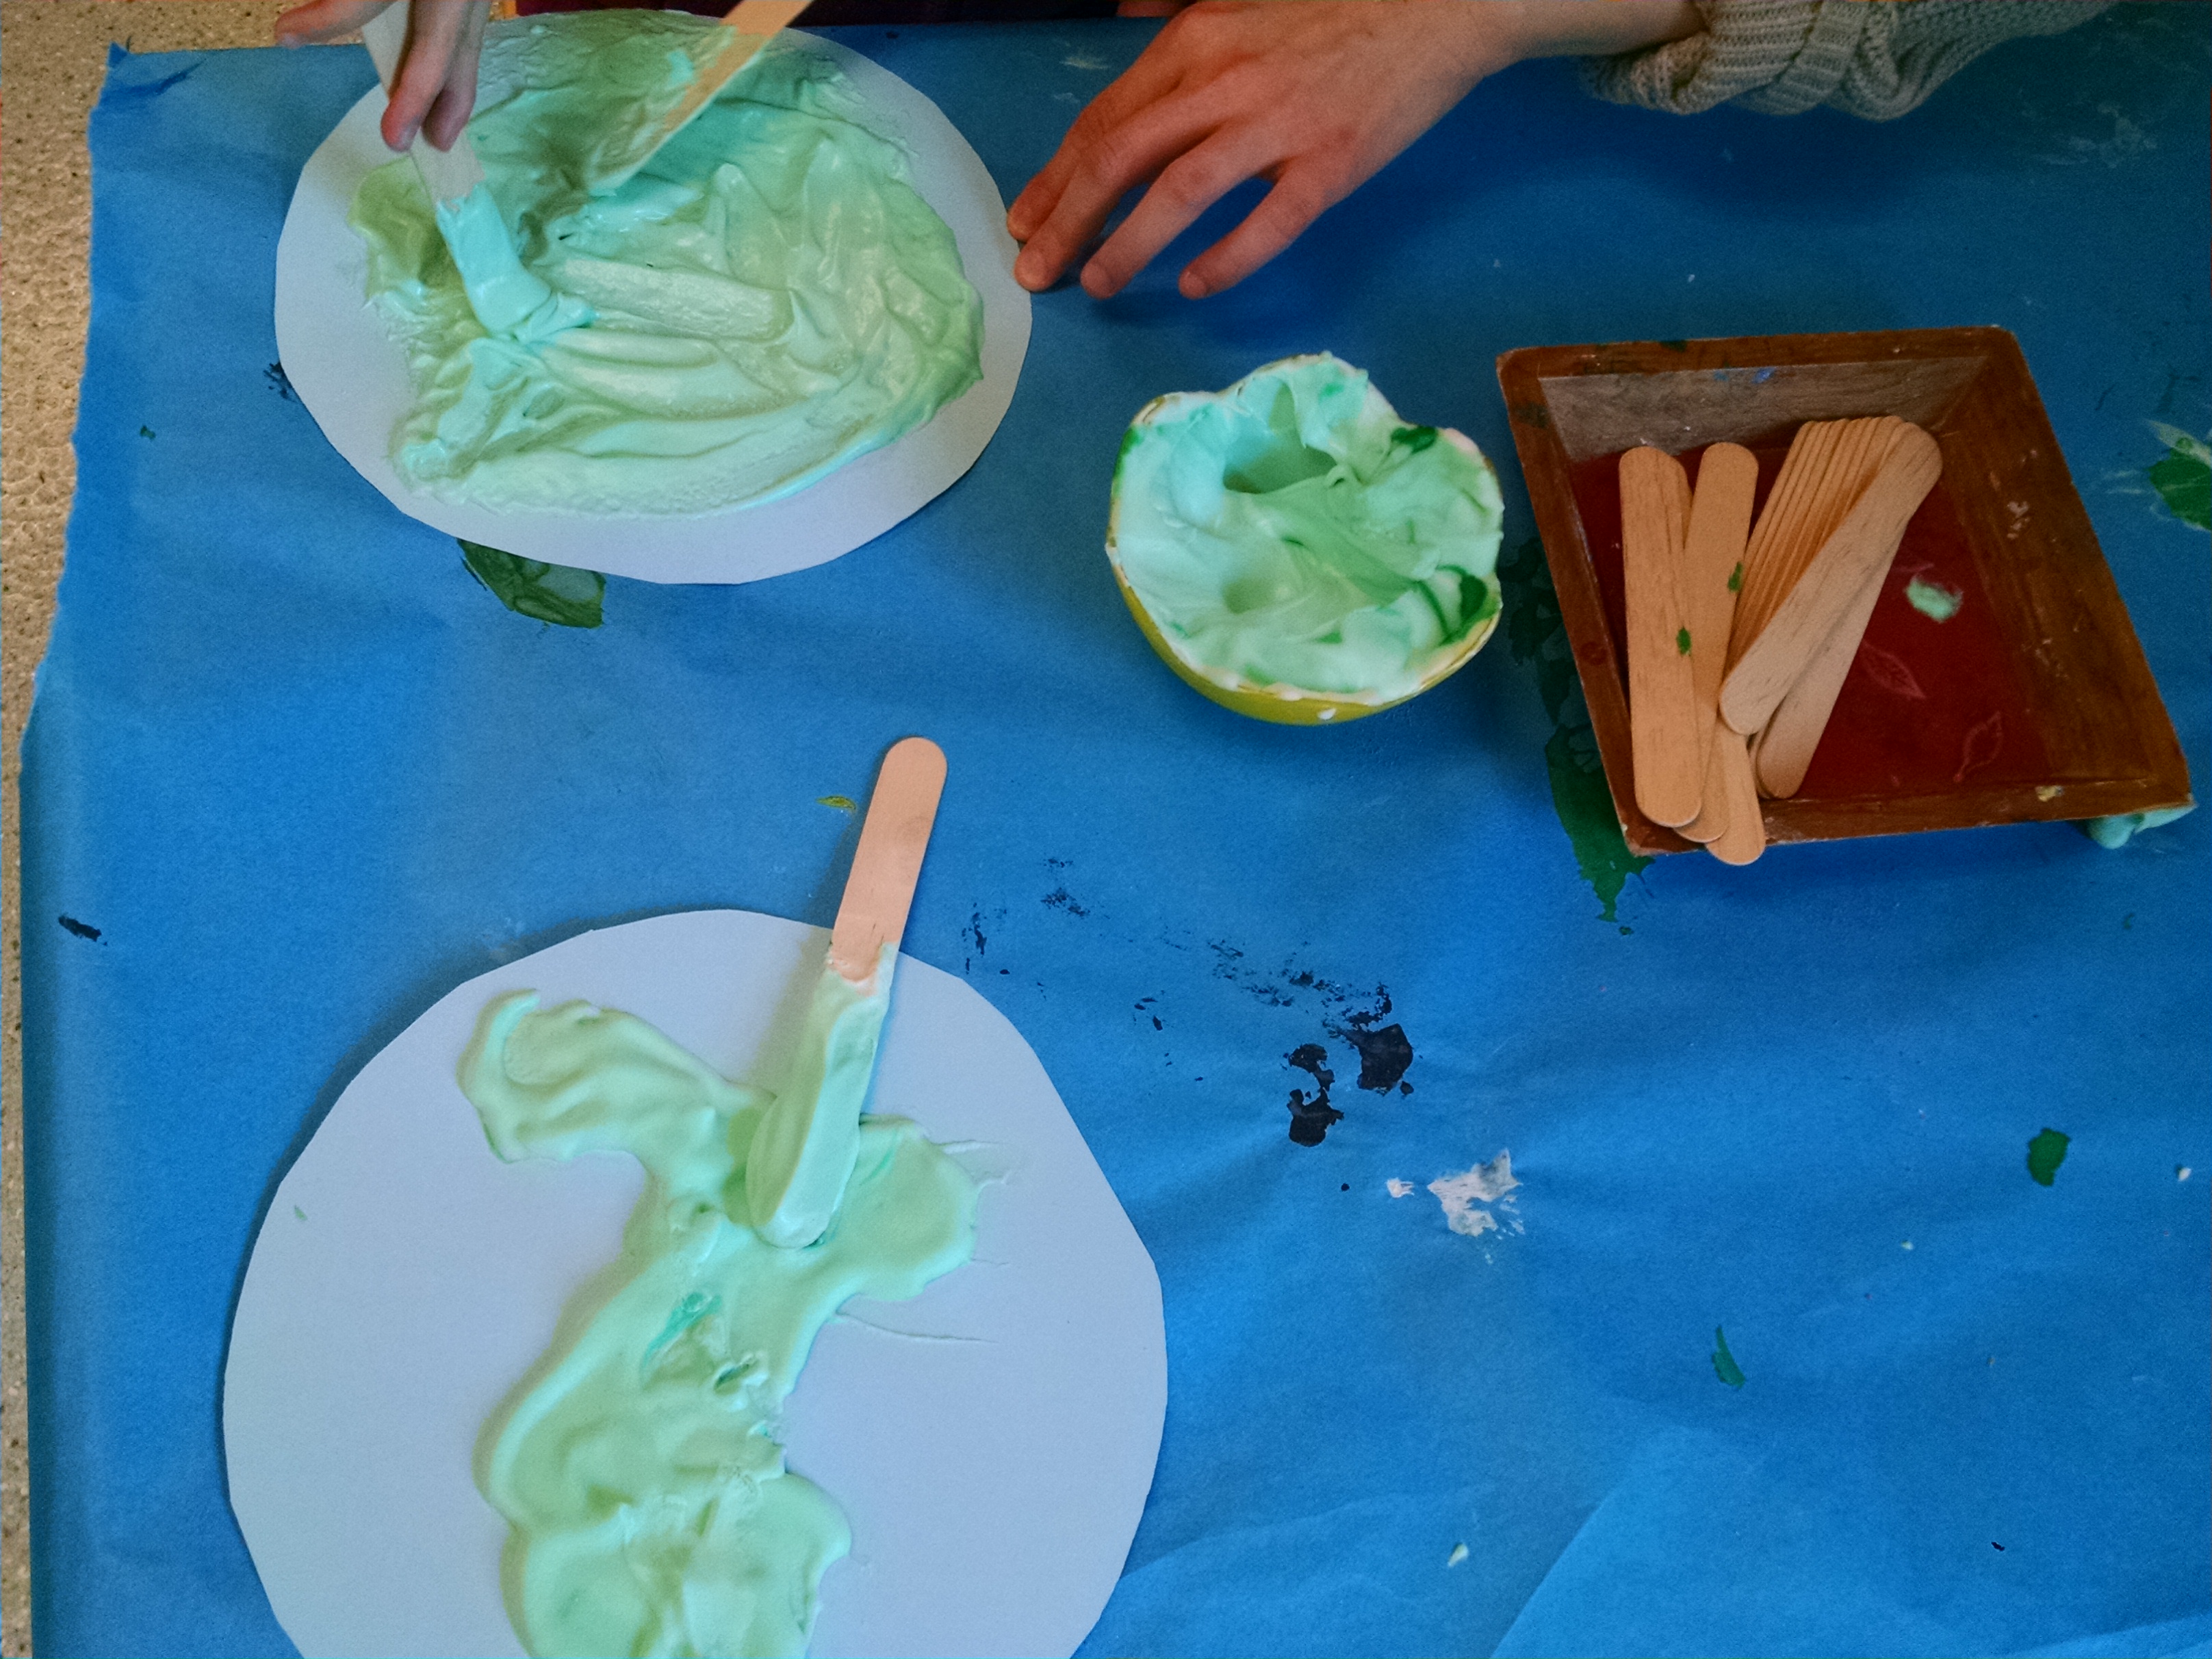
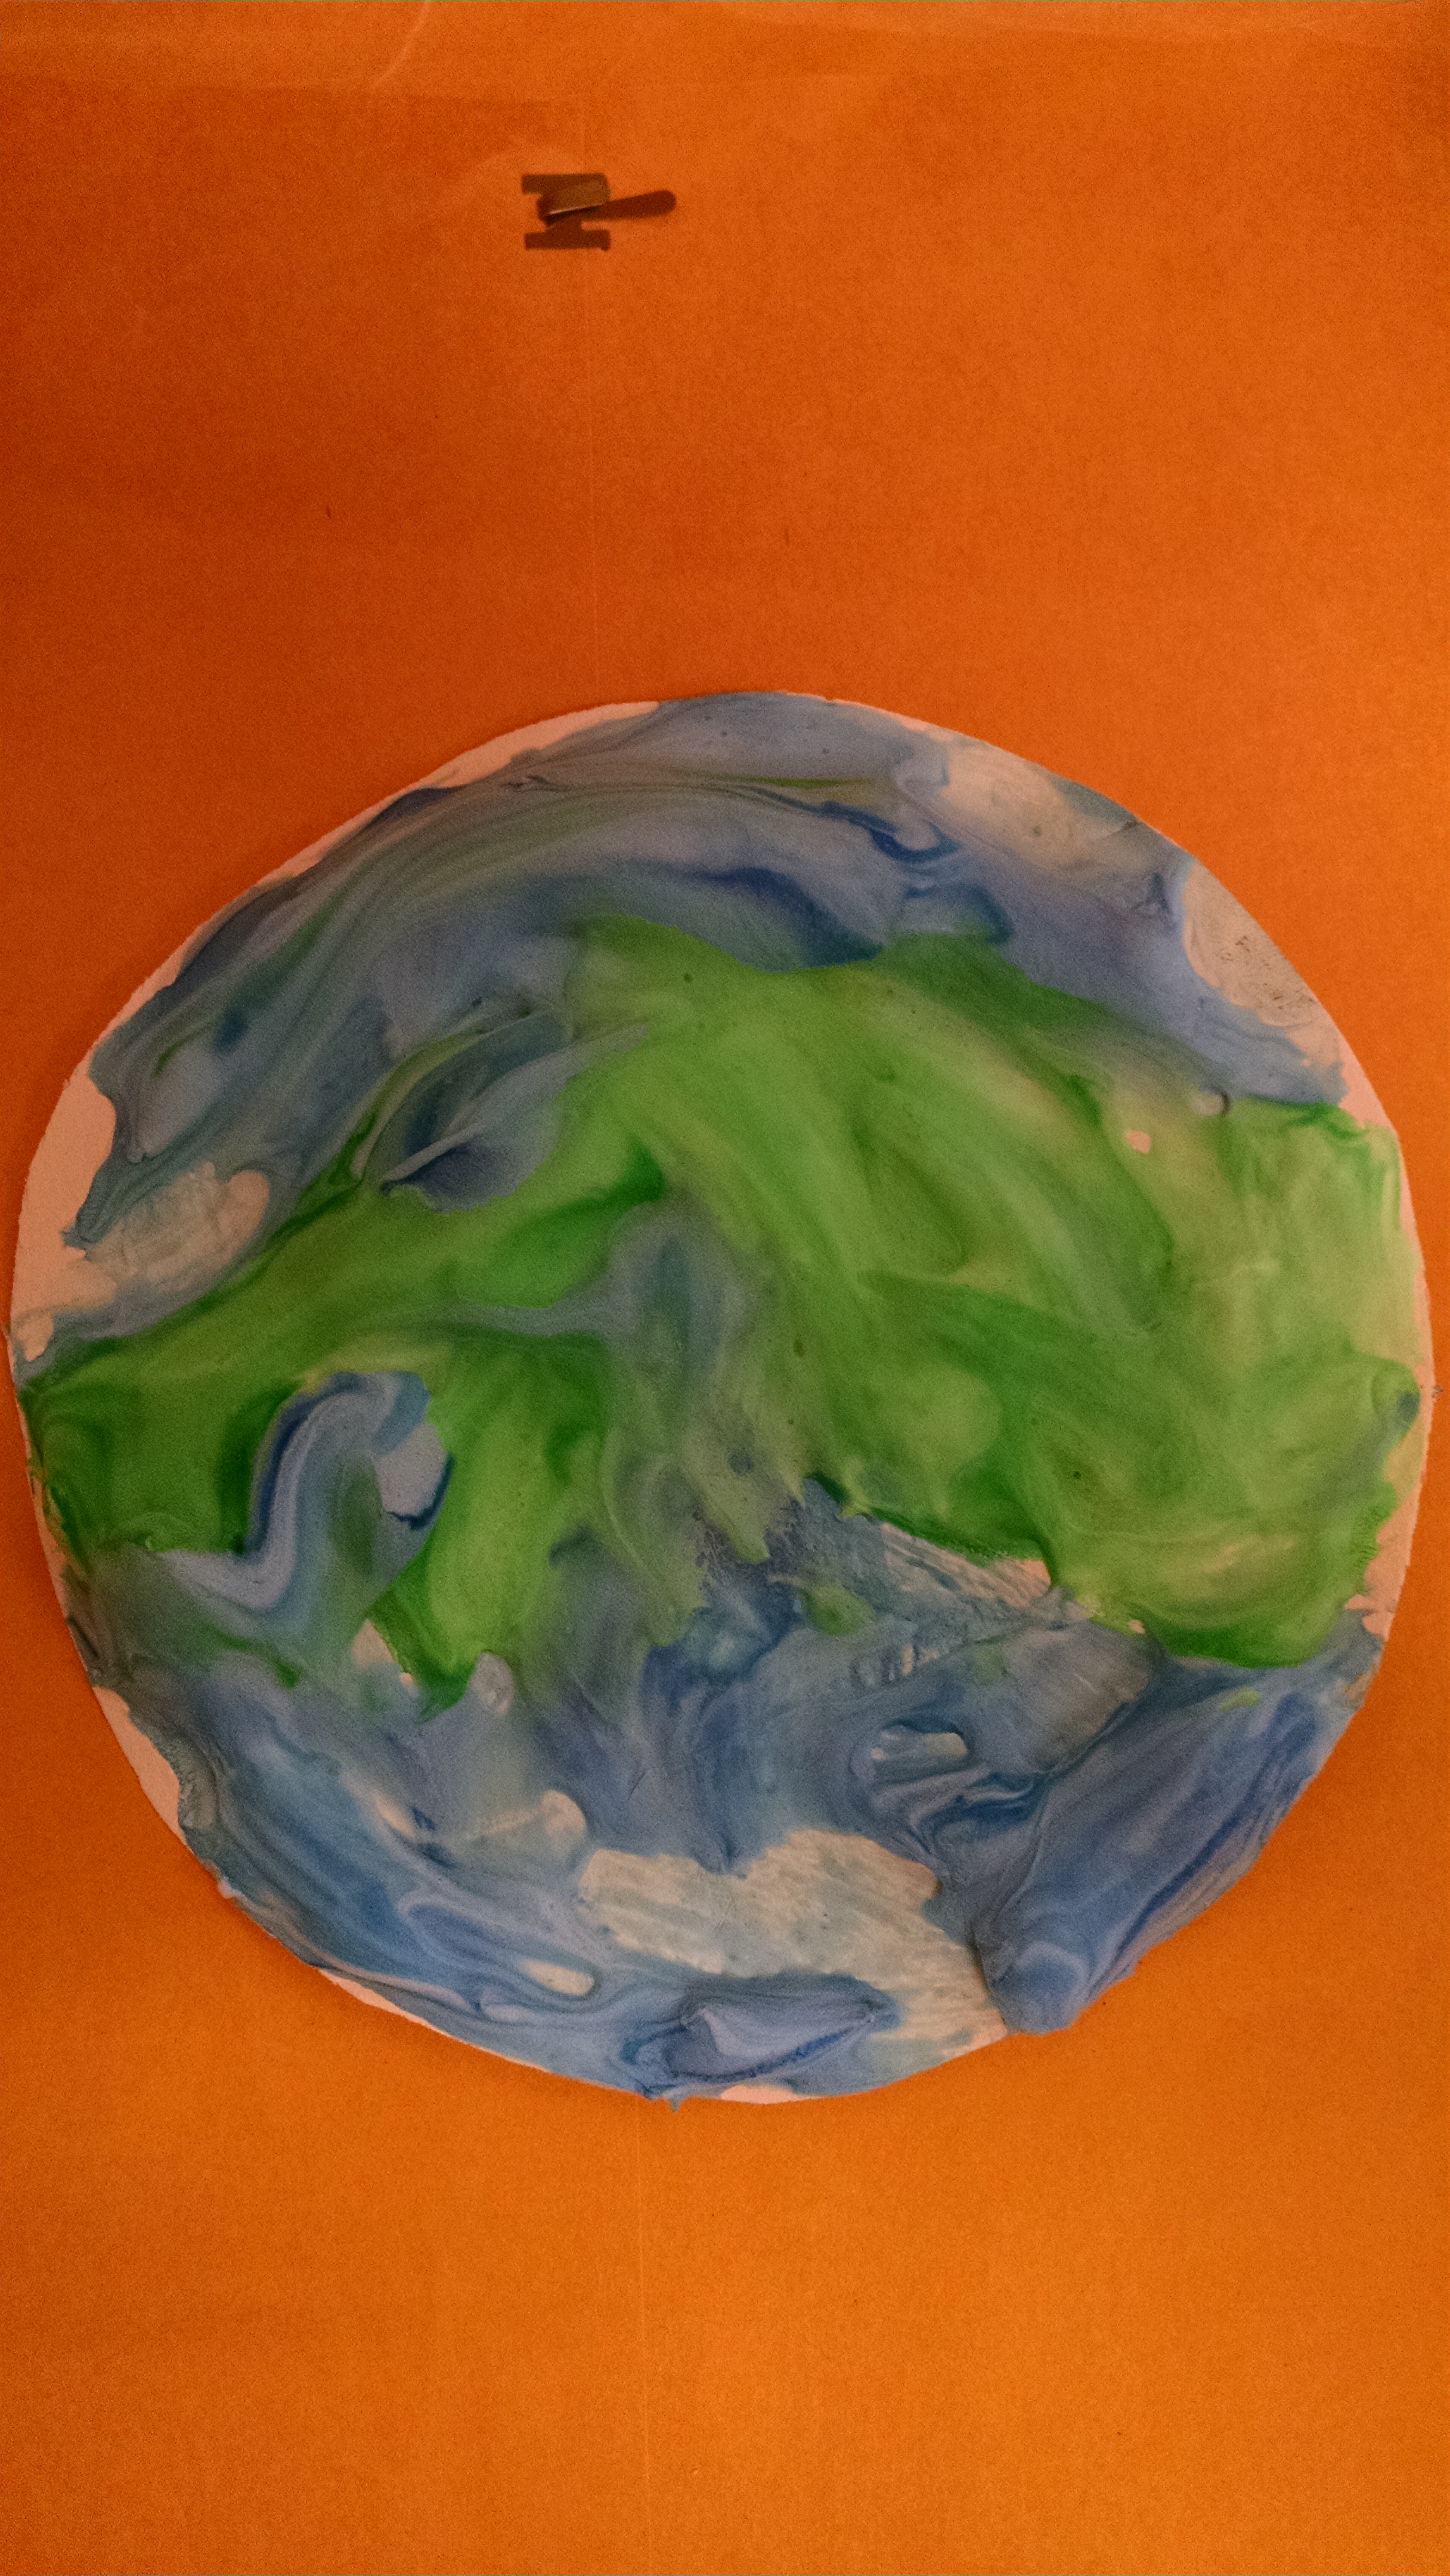
Puffy Paint Earth
We mixed shaving cream, Elmer’s glue, and liquid watercolor to make puffy paint to paint on to blue cardstock circles. (Later in the day, we switched to using big easel paper, and drawing a big circle in the center for them to paint – this was easier than trying to keep all the pain on the circle.) We had a photo of the Earth posted next to the table for inspiration. You could do more with this by having cotton balls to pull apart to make clouds, and pebbles to build mountain ranges on your continents.
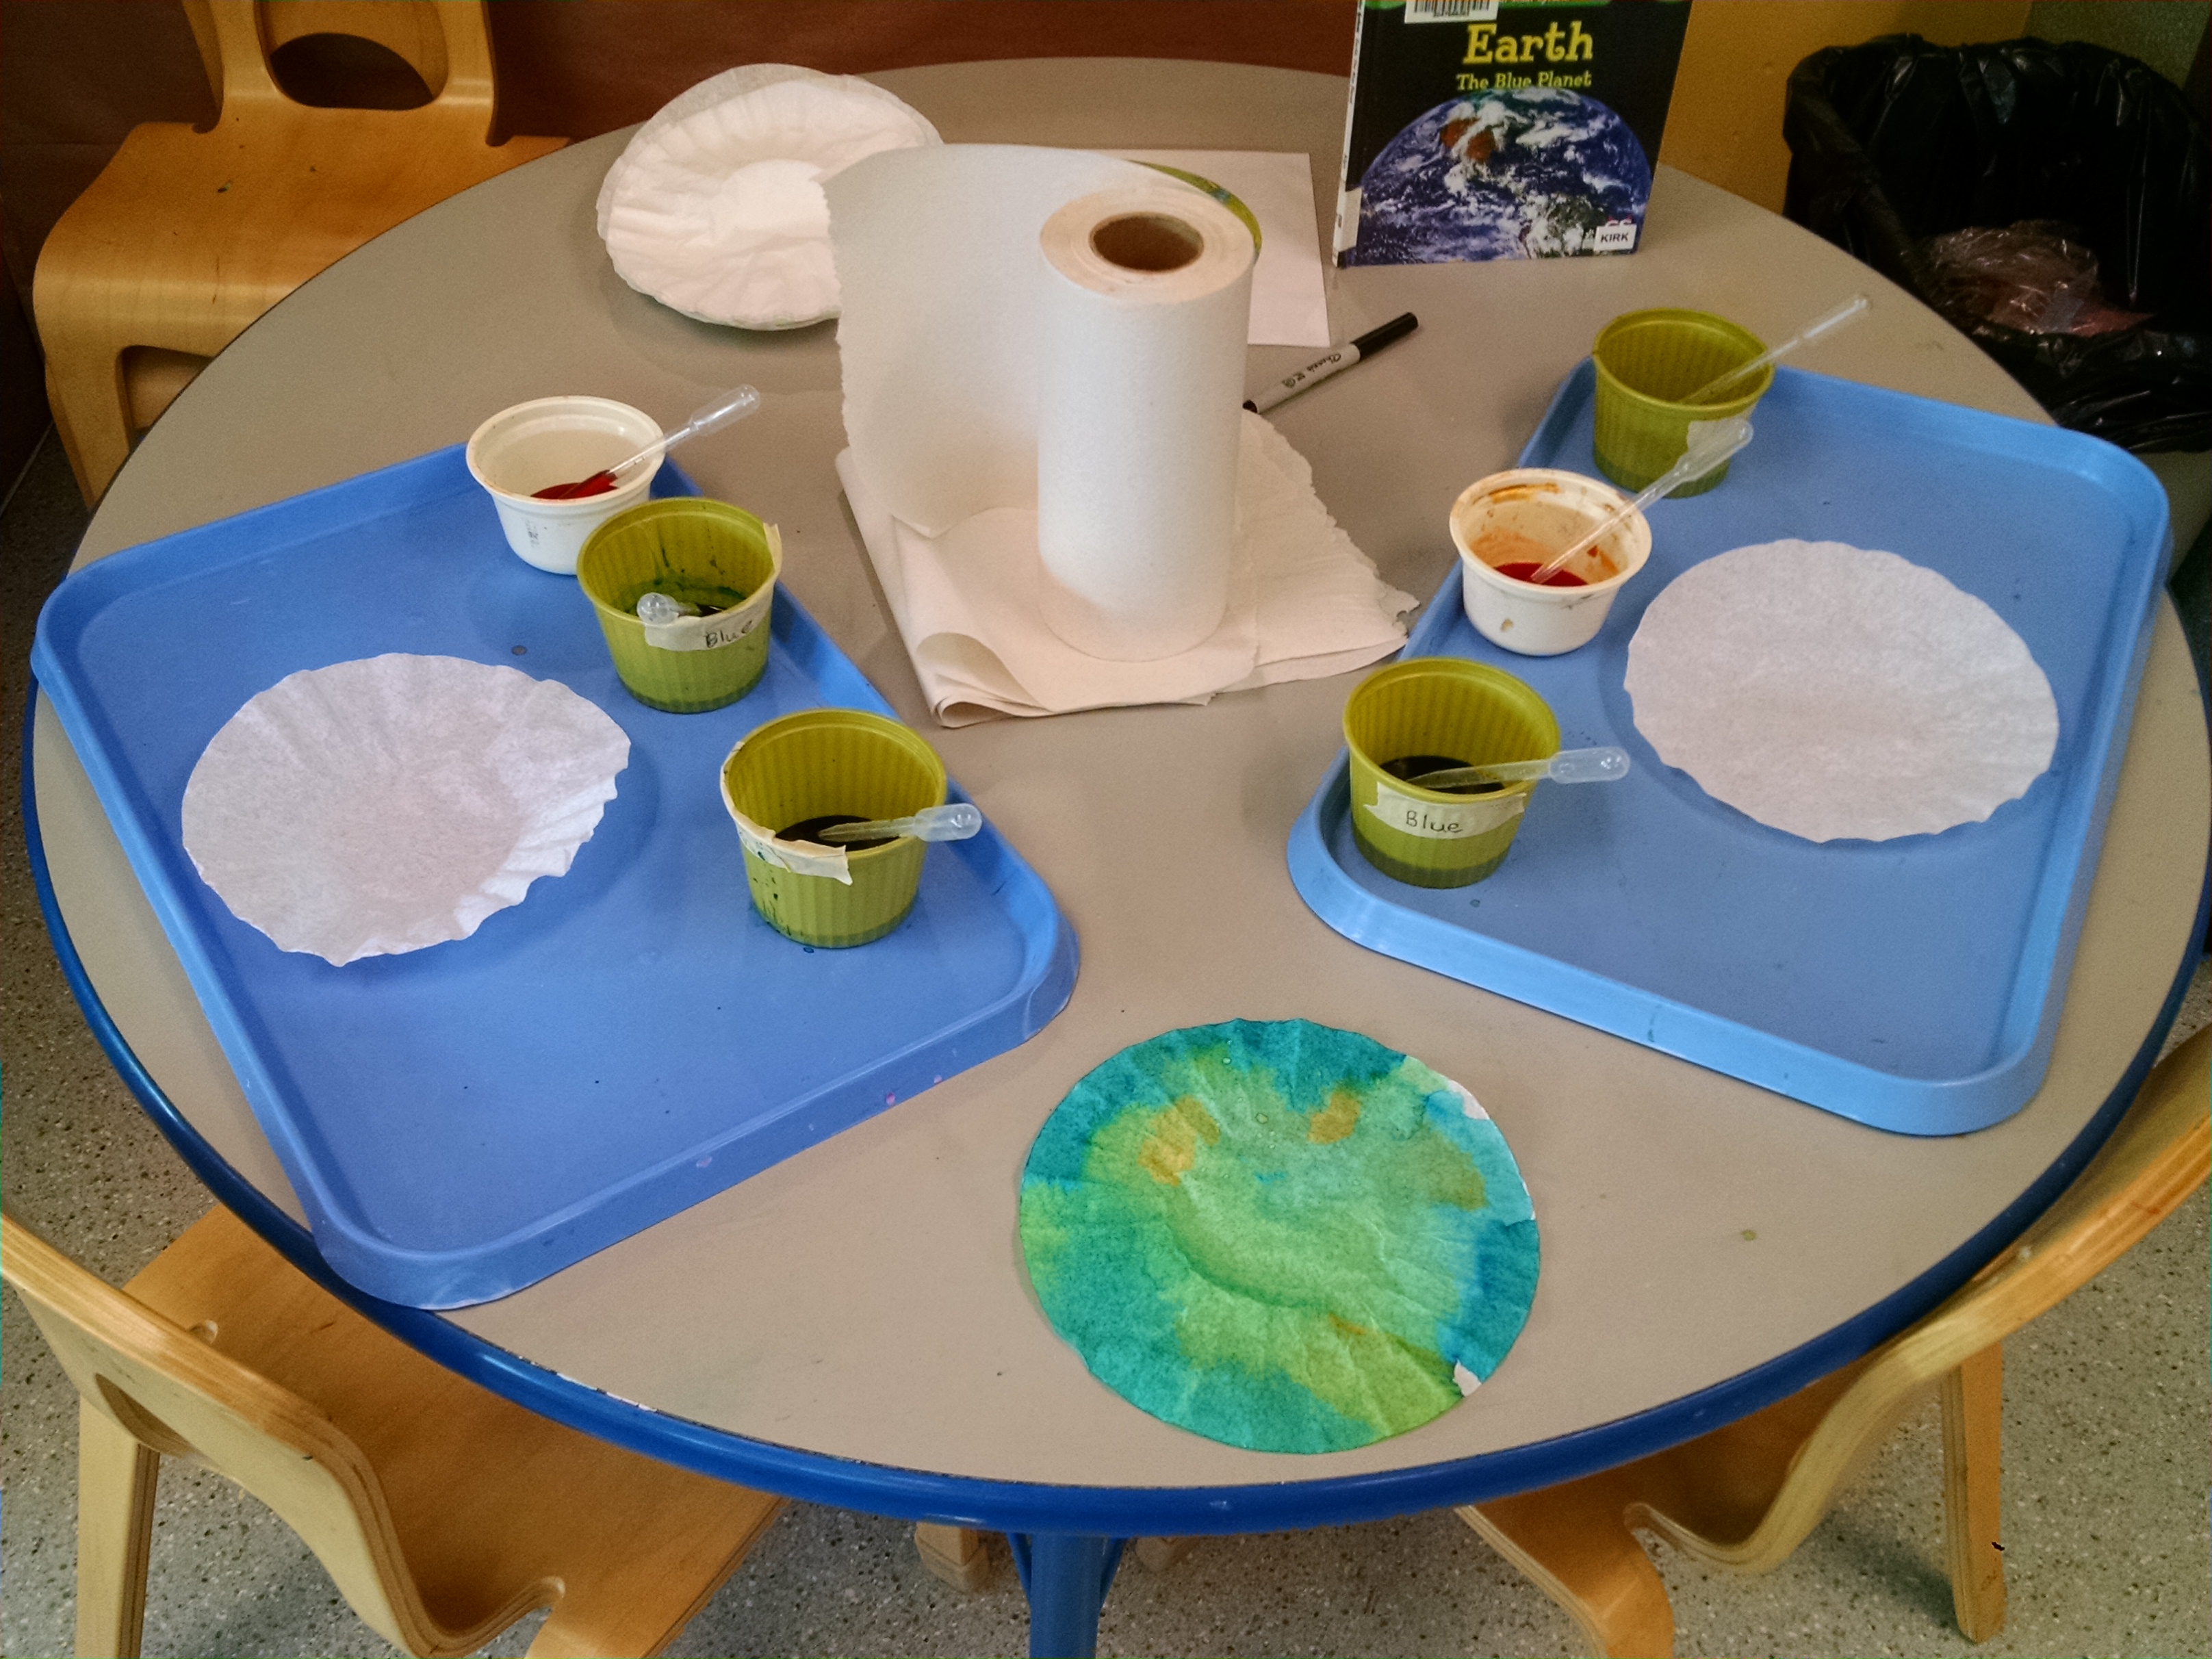
Coffee Filter Earths
Put out coffee filters, liquid watercolors and pipettes or eye droppers, plus pictures of the Earth for inspiration. Kids could drip on watercolors. (With little ones, they tend to use a LOT of watercolor when working with pipettes, and soak the trays, so after they finish with a coffee filter, you need to use paper towels to mop up their extra color. You could reduce this issue by using eye droppers with a slow flow rather than pipettes.) If it’s warm out, you can hang coffee filters on a string, and let kids spray them with spray bottles of diluted colors.
Craft: Terrarium
We made a terrarium, where we used layers of sand, rock, charcoal and dirt, and talked about how this is similar to how Earth is made of layers. These are described in detail in my post about rocks.
Snack – Layers.
You can either do a yogurt parfait where kids layer together yogurt, fruit and granola, or a mud cup where they layer together chocolate pudding, bananas, crumbled graham crackers, and a gummy worm.
Opening Circle
Today’s question / Big Picture Ideas: What causes an earthquake?
To answer the question, we have to step back a little and talk about the plates of the earth’s crust. Before we do that, we have to step back and explain what the earth is and what it’s composed of. (When working with young children, it’s important to do this stepping back – don’t assume they already know science basics – be sure to cover them!)
So, the order of ideas we wanted to express were:
- Earth is the planet that we live on.
- It’s shaped like a ball, but the ball is made up of many layers.
- We live on the top layer, the crust.
- The crust is made of several big plates that fit together like a puzzle.
- When those plates bump up against each other, or rub against each other, they cause earthquakes. Little earthquakes happen all the time, and mostly don’t cause damage.
- But, a big earthquake can knock over trees and buildings, so we do need to know what to do to stay safe if we feel an earthquake.
We read Earthquake! by Bauer, which covered all the ideas we wanted to cover in simple-to-understand terms. It had pictures of buildings that had fallen over or been damaged in earthquakes, but they were not frightening (many kids’ books about earthquakes have pictures or words that could cause a lot of fear and anxiety.)
When reading through the book, you can incorporate hands-on visual aids. There was a picture of a globe, and if you have one, you could pause a moment there to explain what a globe is. When it discussed the layers of the Earth, we showed our model magic sphere – we could have also used the rainbow puzzle (see above). We then passed around the sphere for them to touch. We also talked about our terrarium project, where we put rocks down in layers.
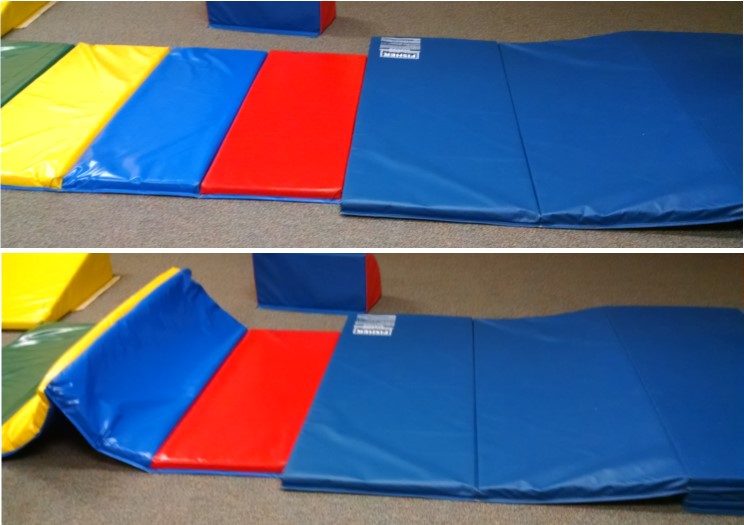
When the book talked about how the crust is broken into pieces that fit together like a jigsaw puzzle, we showed our tectonic plate jigsaw (see above). When it talked about plates bumping up against each other, we demo’ed that with tumbling mats. (You could also demo it with crackers, as described on Mad Sci Network. There’s a more complicated graham cracker demo on Homeschool Den.) The book also showed a picture of a seismograph, so we reminded them to check out our DIY seismograph in the other room.
Tumbling Mat Demo of Tectonic Plates: We had set up the mats on the floor in advance for the kids to sit on during circle. At this time, we had them get off the mats, and told them to imagine that the blue mat and the rainbow mat were two tectonic plates bumping up against each other… we pushed each one toward the other… The rainbow mat buckled up to relieve the pressure – creating a mountain! Sometimes the rainbow mat will slip and land on top, with the blue mat going under, which can also happen in earthquakes.
Earthquake Drill: We talked about how today we’re playing with the idea of earthquakes, and having fun knocking over Duplo houses and plastic trees with fake earthquakes. But, we said, real earthquakes can be scary when they happen and can be dangerous, and you need to know what to do. We explained that when the ground shakes it can knock you over, and also things can fall on you, and you could get hurt. So, if the ground starts shaking, you need to drop, cover and hold on. We practiced doing this together during circle (in a room with no tables) and then practiced again later in the day while the kids were in a room with tables.
I have a post where I discuss all the details of the current recommendations on earthquake safety (note: if you’re still teaching to hide in a doorway, or to move across the room to an interior wall, then you’re not following current recommendations.) That post also includes a book that you can download to read to your child(ren) and use when practicing earthquake drills – it’s called “Rabbits in a Hole“.
Click here: for all the information about earthquake preparedness for preschool.
Closing Circle
Book: You could read Round Like a Ball, a nice book about the Earth, or Roslyn Rutabaga and the Biggest Hole on Earth!
by Gay – a silly little book about digging a hole to the center of the earth.
Slinky Waves: You can use a slinky to illustrate two kinds of earthquake waves. For a p-wave, you stretch it out, then give a quick push-pull on one end – the wave travels to the other end and back again. For an s-wave, you swing it side to side – this works better if the slinky is laid on a table or on the ground than if it’s held in the air. Here’s two detailed discussions of this activity: http://web.ics.purdue.edu/~braile/edumod/slinky/slinky.htm and http://earthquake.usgs.gov/learn/kids/RockShakeyGround.pdf (Note: this second link is also just a great overall resource about earthquakes.
The Human Wave: This is good IF the kids have recently studied States of Matter. Have the kids put their arms over each other’s shoulders, chorus line style. (They’re solid matter.) Put one teacher on each end of the line. Push on the shoulder of the kid on the end – they all rock toward the other teacher – she pushes back… this is how a P wave moves through solid. Then have the last person in line bend forward at the waist, then straighten up again – that spreads down the line – this is an S wave moving through solids. Then have kids stand shoulder to shoulder but without linking up – they’re now a liquid. The p-wave will still travel through them, but the S wave will not. Learn more here: www.iris.edu/hq/files/programs/education_and_outreach/aotm/6/Activity-HumanWaves.pdf)
Parachute earthquake: Get out a parachute. Throw a soft ball or other object in it. Make an earthquake, shaking and shaking till the object flies out. Repeat endlessly. 🙂
Books
- Earthquake!
by Bauer. (see under Opening Circle)
- Earthquakes
by Schuh. I strongly prefer Bauer, because Schuh has several photos of collapsed buildings and bridges which might be concerning to some children. The tone of the words is reasonably reassuring.
- Pandas’ Earthquake Escape
by Perry is about a mama panda and her babies escaping an earthquake. The nice thing is that it’s an engaging story about a mother and her children (the kids really enjoyed listening to it), but I think it’s a bit long for circle, and it also shows animals running away in an earthquake to try to find safety, when we’ve just taught that the best thing is to drop, cover and hold. So, I cannot recommend this book.
- Round Like a Ball
by Ernst. “Let’s play a guessing game! I’m thinking of something that is… round like a ball. ‘I love balls’ barked the dog.” Nice illustrations and graphic design elements. Appealing and engaging read-aloud.
- Our Earth
by Rockwell. A nice simple book about the Earth. Appealing to animal lovers, as there are animals pictured on almost every page.
- Earth
by Taylor-Butler, Earth
by Roumanis, and Earth
by Bloom are all early-reader non-fiction books that are part of series that cover each of the planets of the solar system. I like Roumanis best, because it has a section at the back for parents/teachers that gives more detail about the basic facts on each page. All these books are fine, none are great.

[…] Earth and Earthquake Science for Kids […]
LikeLike
[…] Earth and Earthquake Science for Kids […]
LikeLike
[…] Earth and Earthquake Science for Kids […]
LikeLike
[…] learned about Gravity, our planet, Earth, and on our field trip to the Bellevue College planetarium, we learned about stars and […]
LikeLike
[…] Theme – Earth and Earthquakes […]
LikeLike
[…] Geology: Earth and Earthquakes; Rocks […]
LikeLike
[…] needed a transitional topic between our units on Light, Shadow, and Rainbows and our units on Earth Science, Planets and Stars; Weather is a logical follow-up to Rainbows, and ties together with Climate and […]
LikeLike
[…] Geology: Earth & Earthquakes. We’ll be talking about the layers of the earth, so a yogurt parfait where kids layer together yogurt, fruit and granola, or a mud cup where they layer chocolate pudding, bananas, crumbled graham crackers (or oreos), and a gummy worm. […]
LikeLike
[…] Earth, and […]
LikeLike
[…] building process. Our sensory bin is the excavation stage with toy bulldozers and cloud dough. For Earthquake week, we put plastic fences, trees, and animals in a tray of sand, and give kids a back massager to […]
LikeLike
[…] in a Jar and shaving cream paper marbling. Or mix it half and half with glue, and use it as “puffy paint” in a painting / […]
LikeLike
[…] our upcoming class on Geology and Earthquakes, I am testing the idea of making “geodes” with fondant and sugar crystals. My sources […]
LikeLike
[…] Earthquake Testing – Build a shake table: you’ll need two flat boards (thick cardboard may do), big rubber bands, and four bouncy balls. Then use blocks to construct buildings on top – shake it to knock them down. […]
LikeLike
[…] For fun, hands-on science activities, check out my post at Inventors Of Tomorrow about Earthquake Science for Kids. […]
LikeLike
[…] plant. If you have a succulent (in our class, we planted them in our week where we studied the earth), you can gently twist off a leaf or two, let it dry for a day or two, set the leaf on top of some […]
LikeLike
[…] it… Our Earthquake theme offers a great opportunity for that. (You can find lots more earthquake activities […]
LikeLike
[…] – learn that Earth events can occur quickly (volcanic eruptions or earthquakes) or so slowly it’s hard to observe (erosion). Compare solutions to slow / prevent wind or […]
LikeLike
[…] a large scale earthquake shake table for kids to play on and build on https://inventorsoftomorrow.com/2017/01/30/earth_quakes-2/ and create a jigsaw puzzle map of the world from its tectonic […]
LikeLike
[…] to build something that WILL fall down when shaken. I teach a kids STEM class where we have a day learning about earthquakes, and we specifically DON’T use interlocking Lego or Duplo – we use wood blocks that […]
LikeLike