
An easy and cheap science project for preschool – first grade kids (age 4 – 7) is to make a constellation viewer with a toilet paper tube. I’ll describe and illustrate our method here, but add notes below about my sources and about variations you could try.
Prep: print out these constellations: https://inventorsoftomorrow.com/wp-content/uploads/2017/02/ccf58-viewerfile.png. Note: they’re a little smaller than you want, so what I did was copy the image, paste it into a document and made it as big as I possibly could while still having them fit on the paper (i.e. 9.7 x 8.1 inches)
1. On a black piece of paper (yellow in these pictures): Trace a circle around the fat end of a plastic cup.
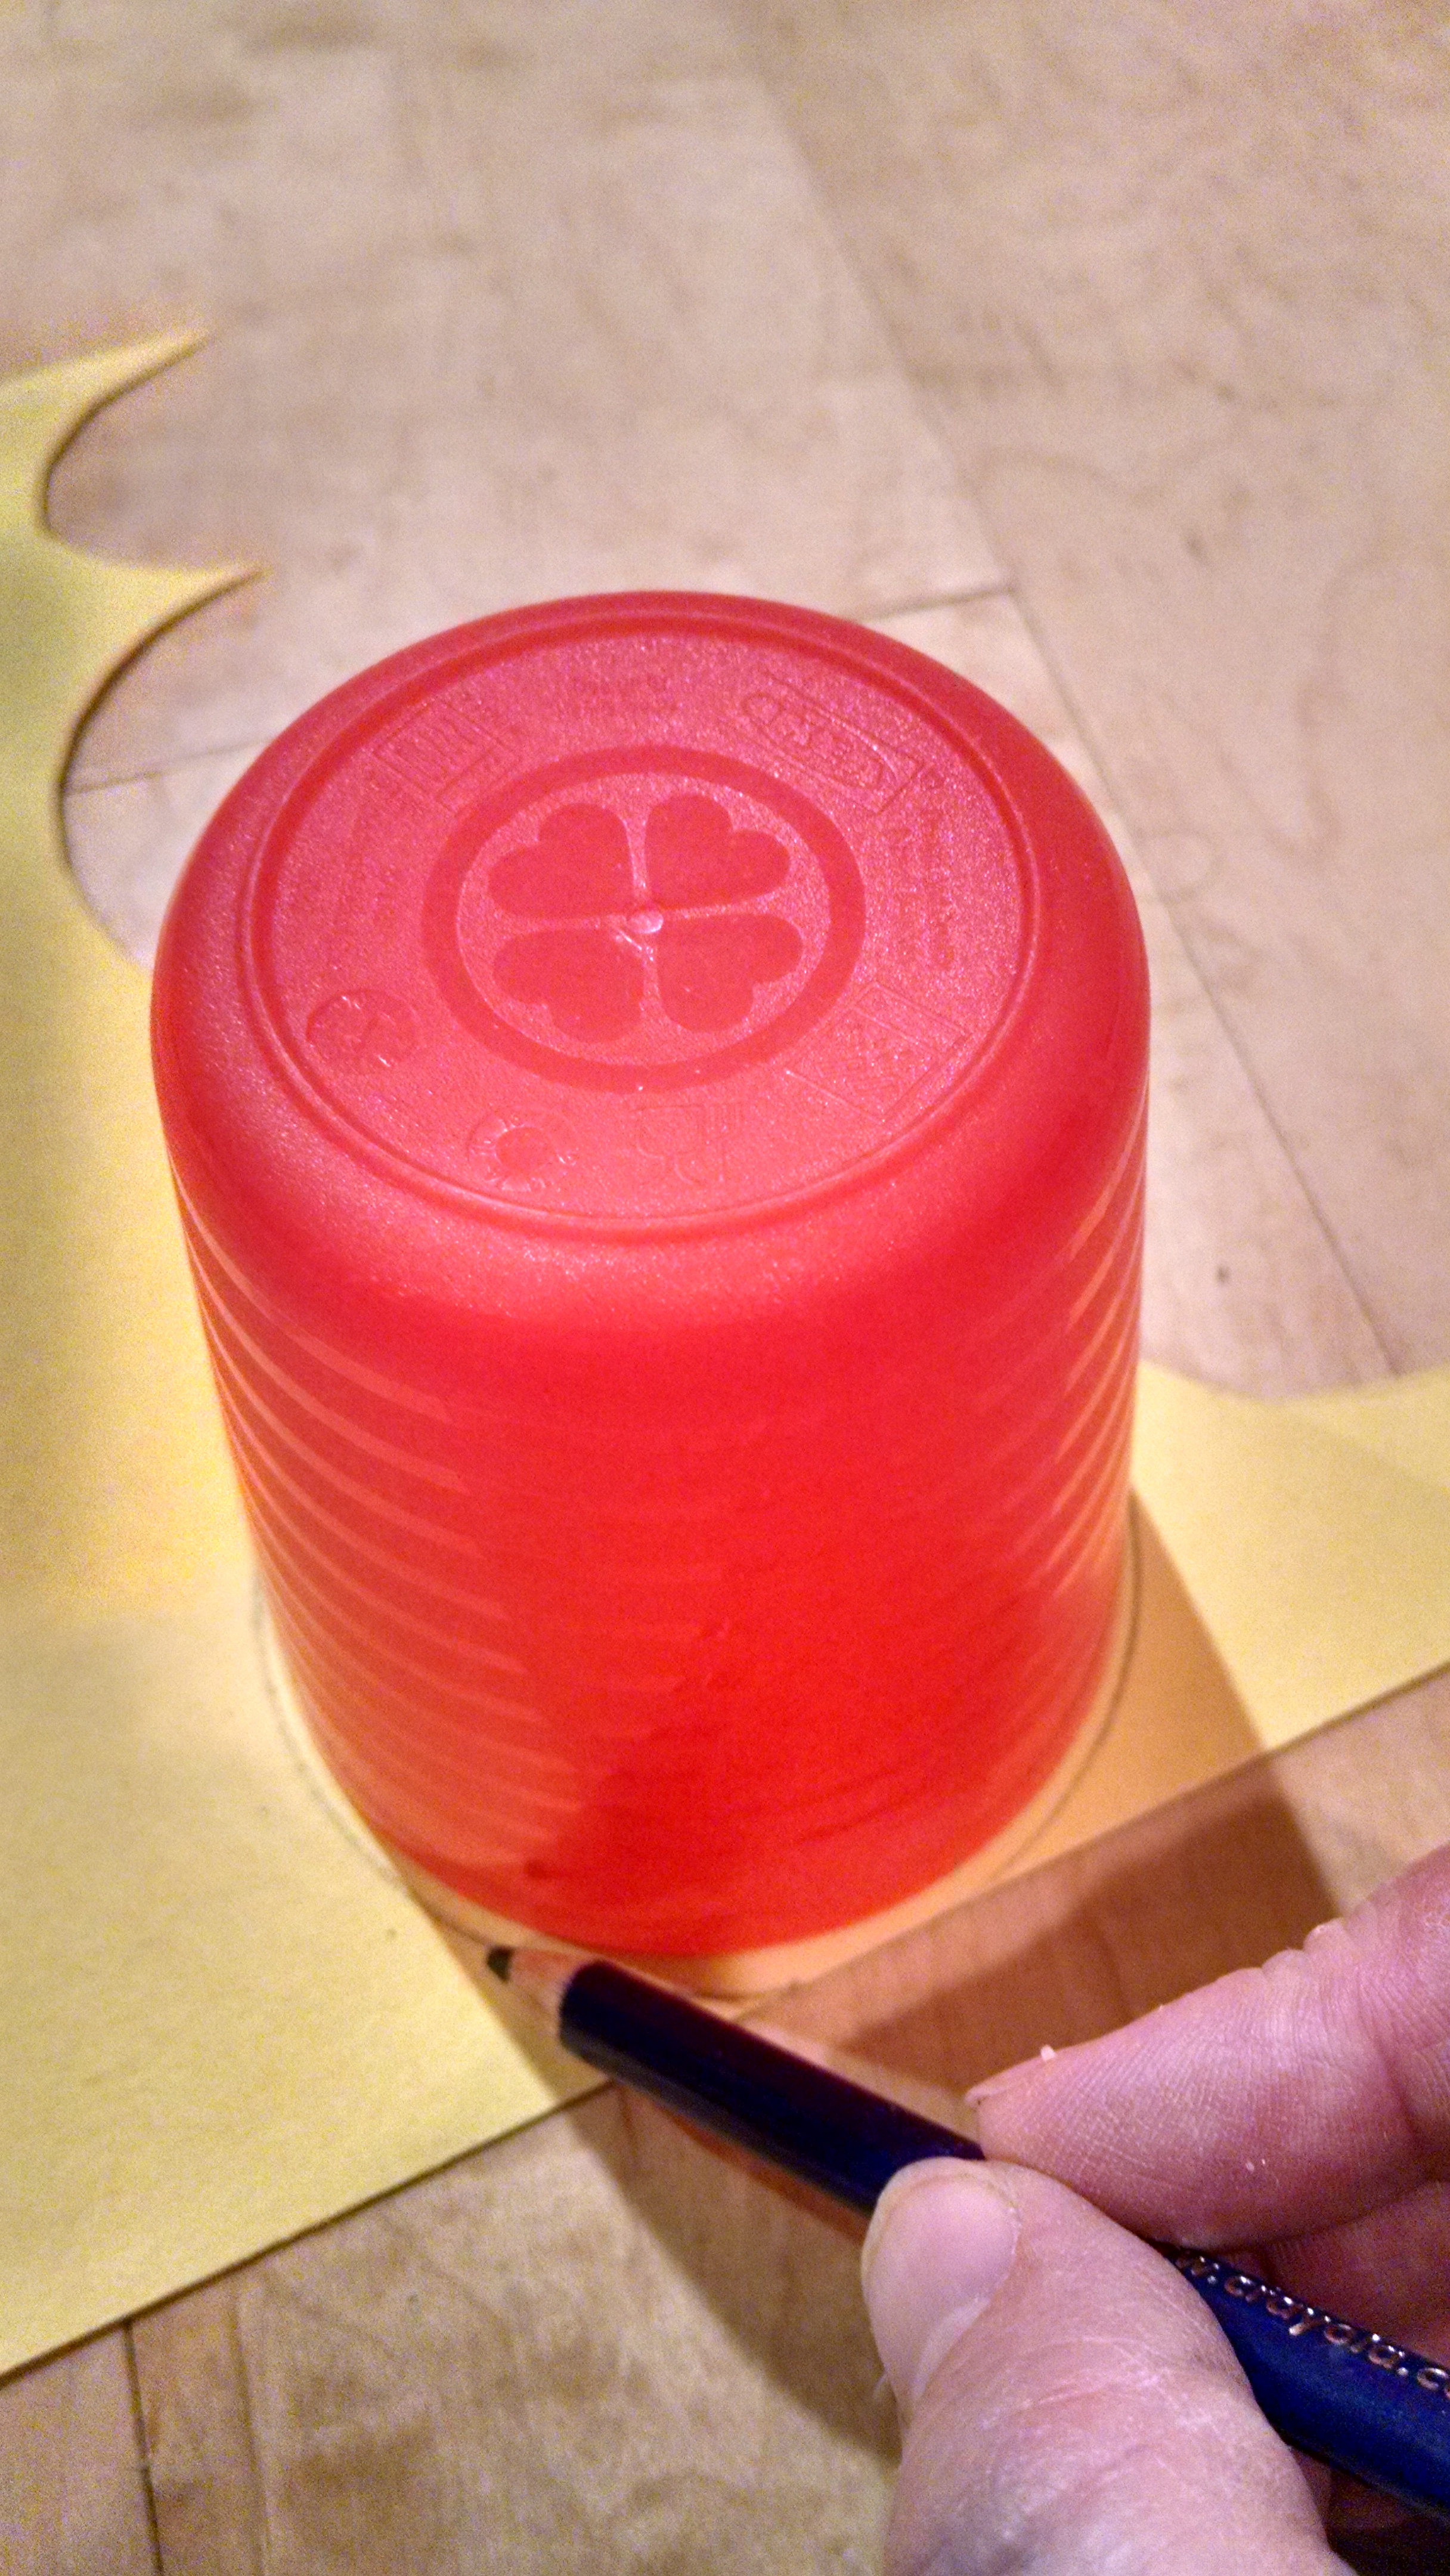
2. Cut out the paper circle.

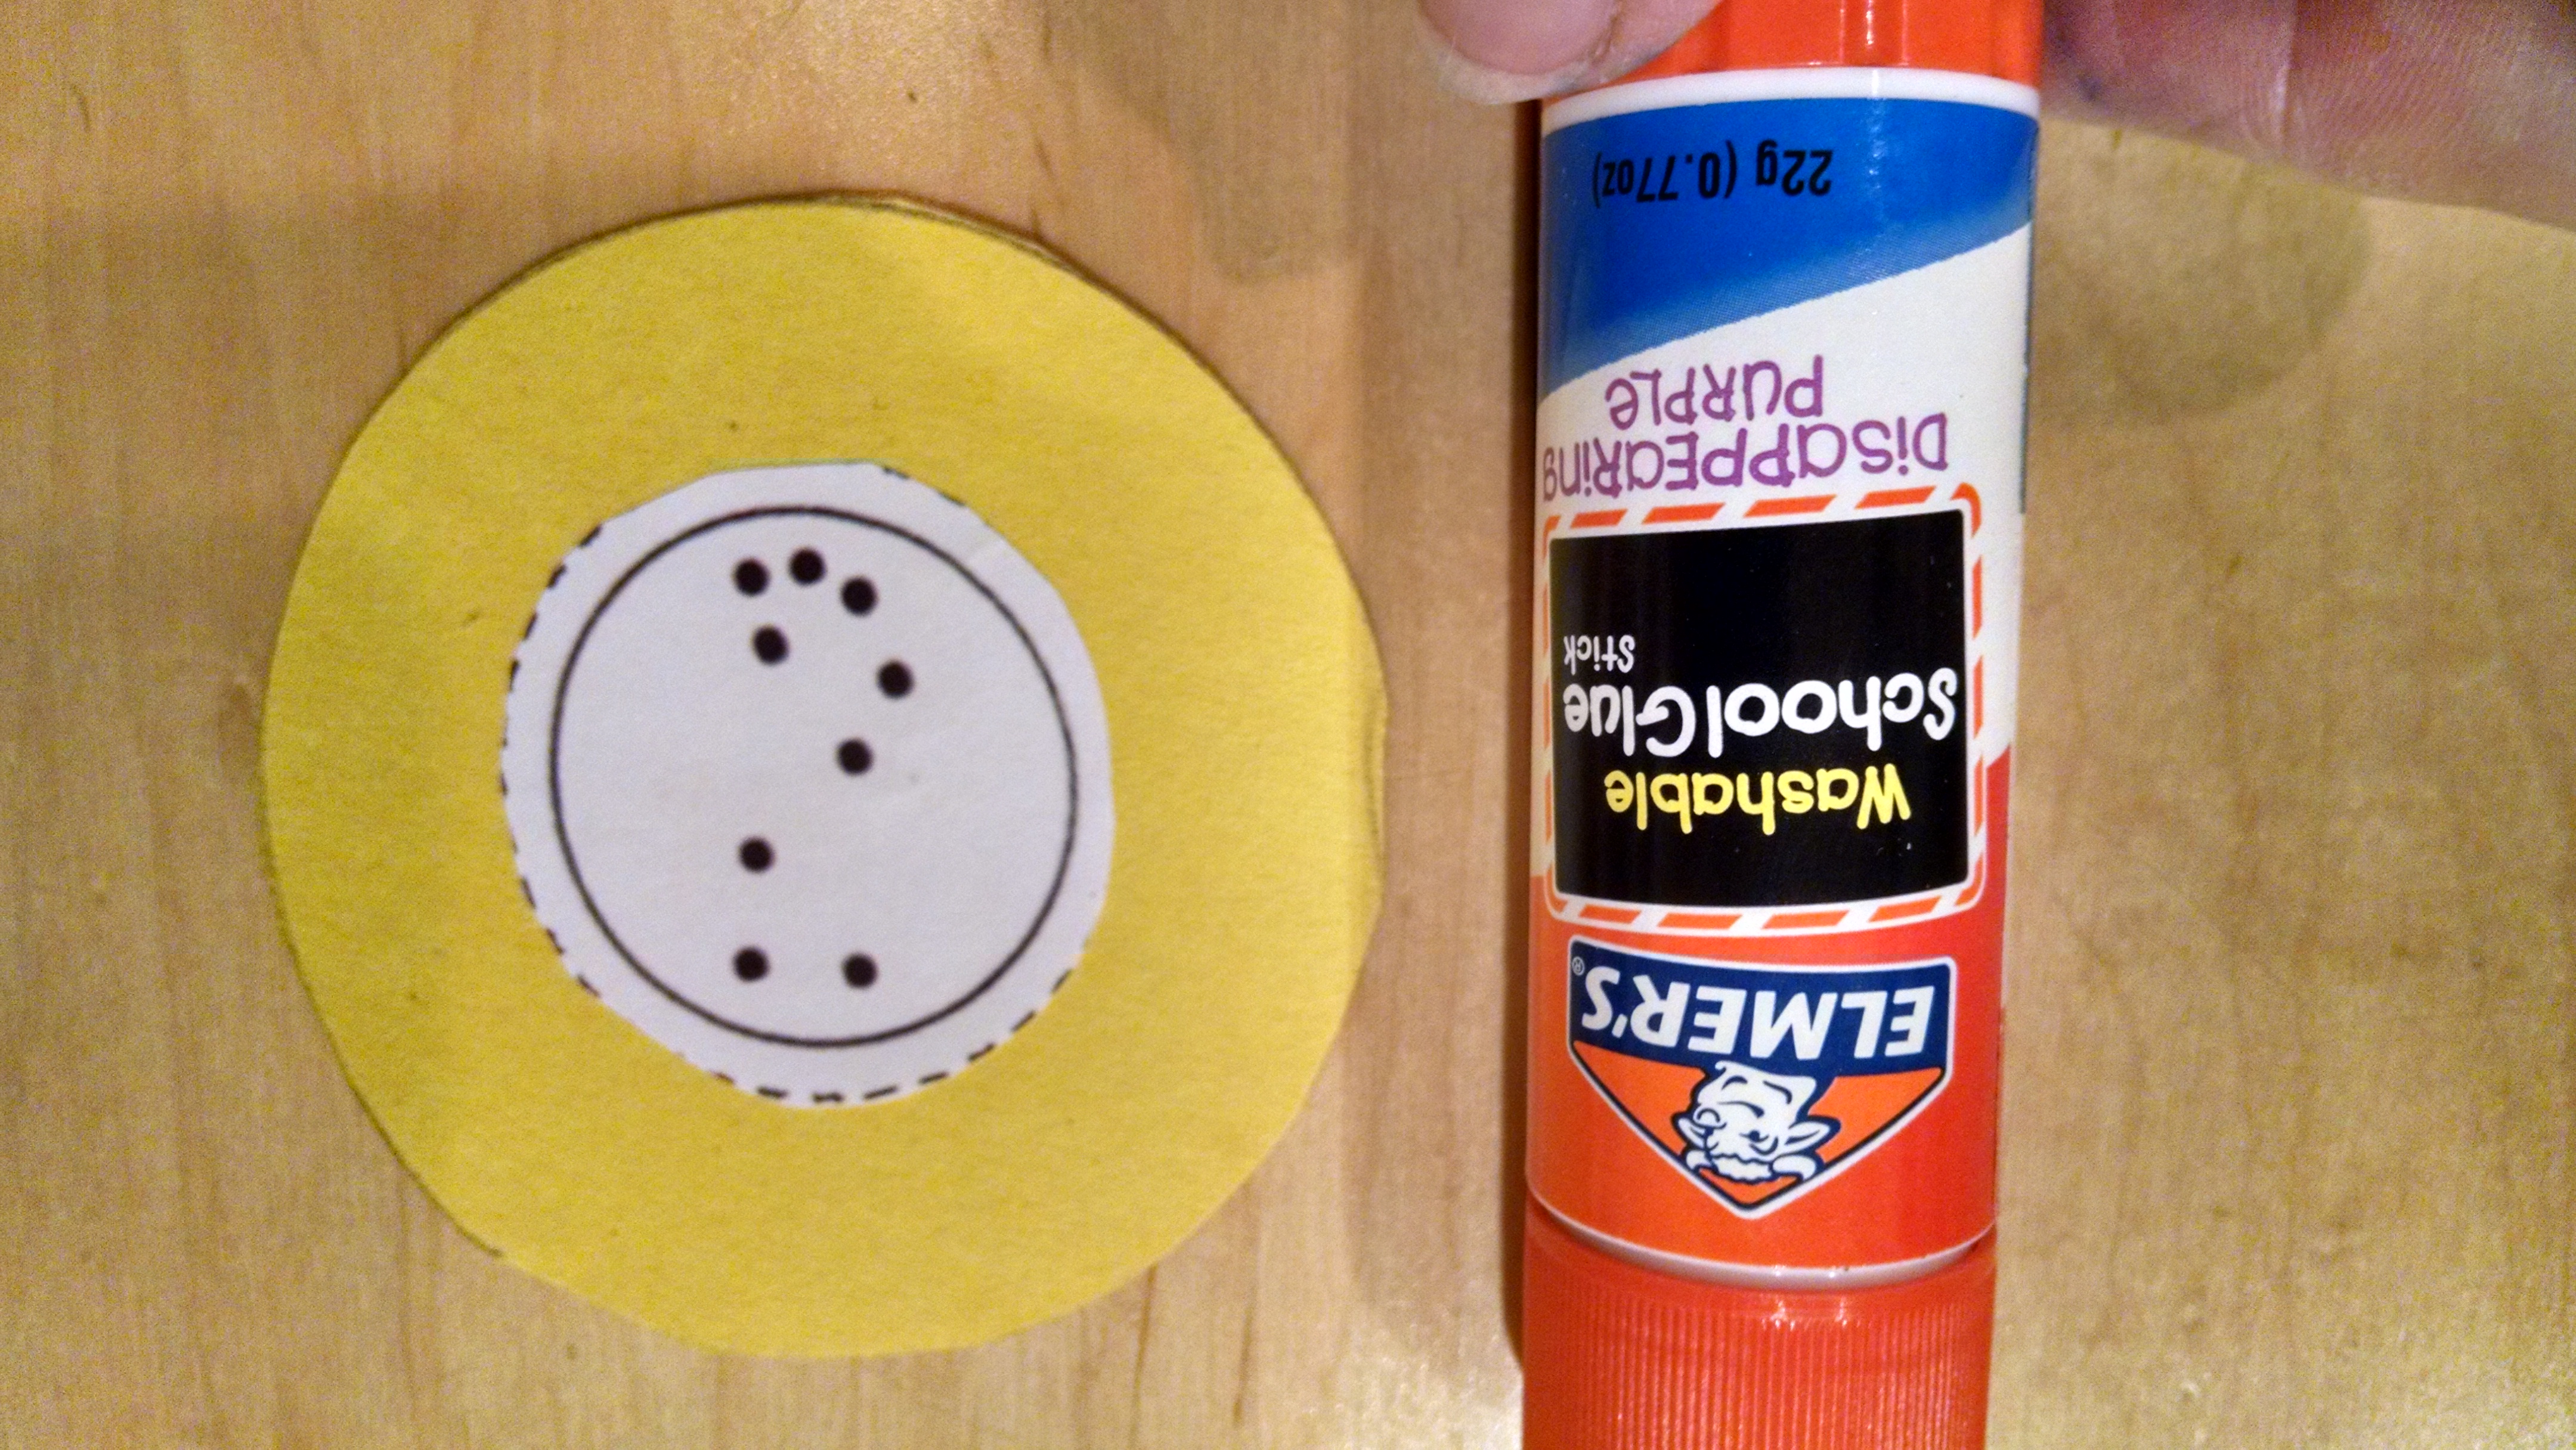
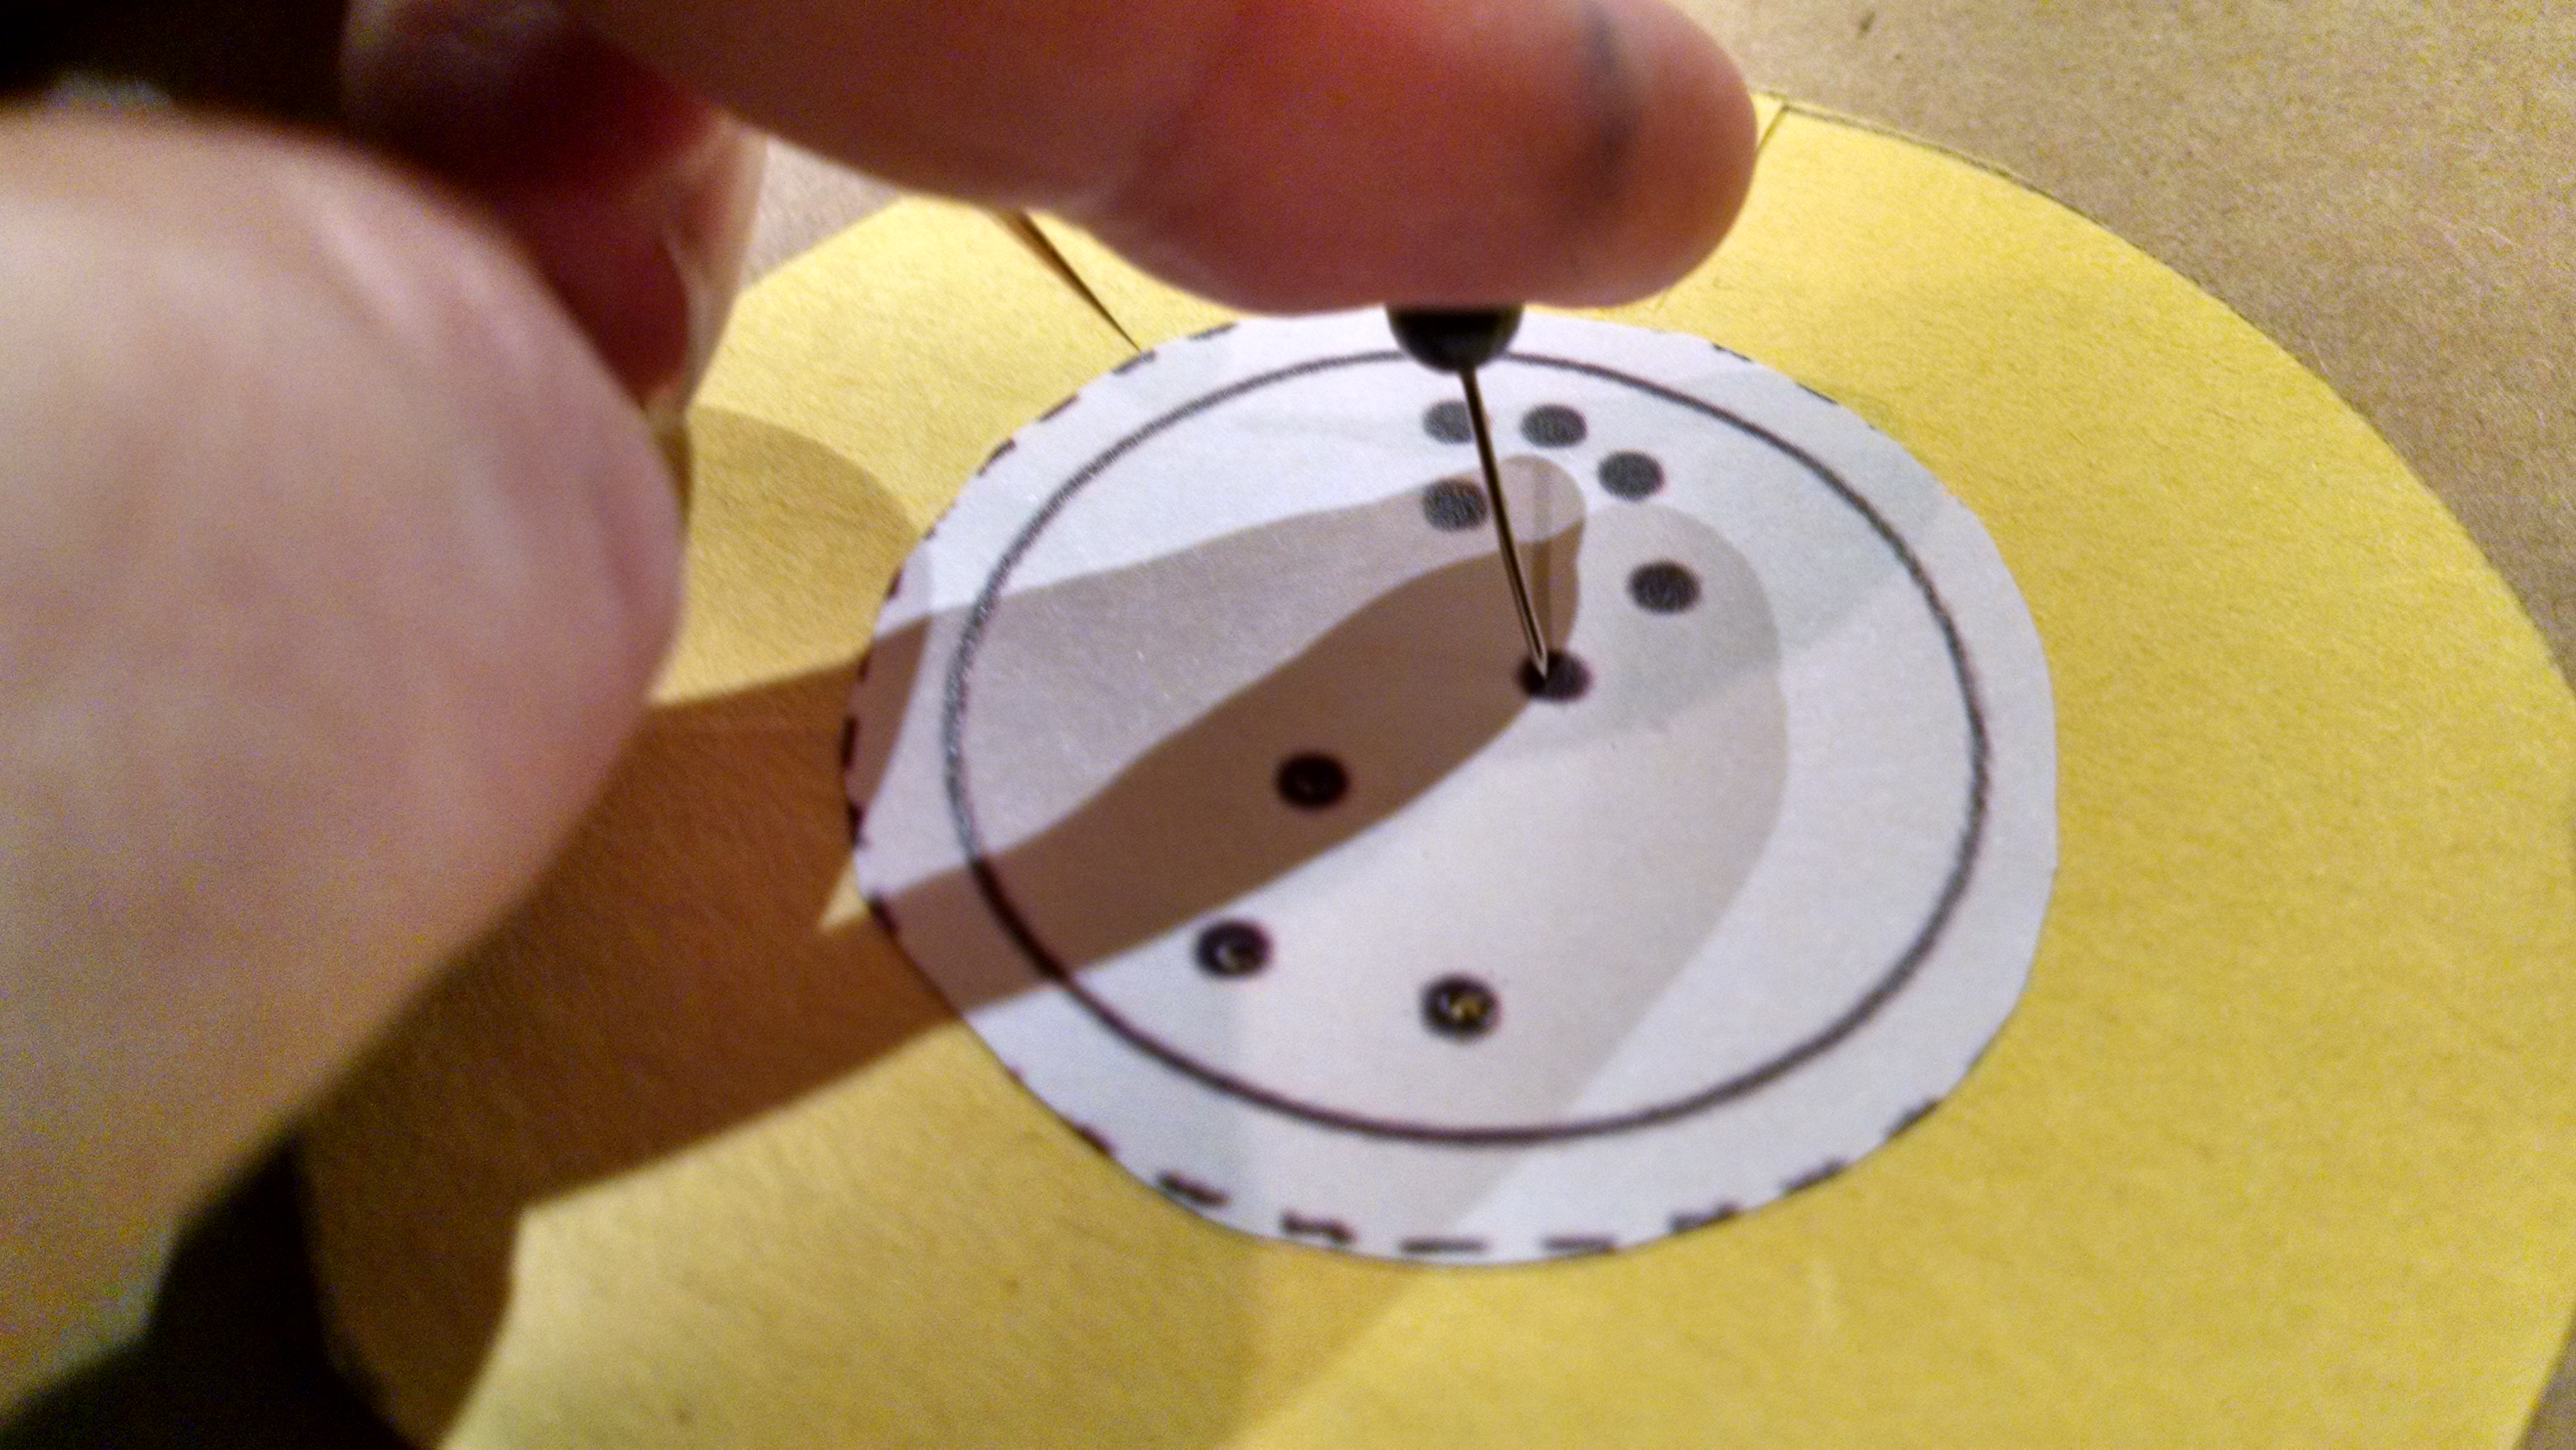
Choose and cut out a constellation. Glue the constellation to the paper.
Optional: cut slashes in paper to help it fold down better.
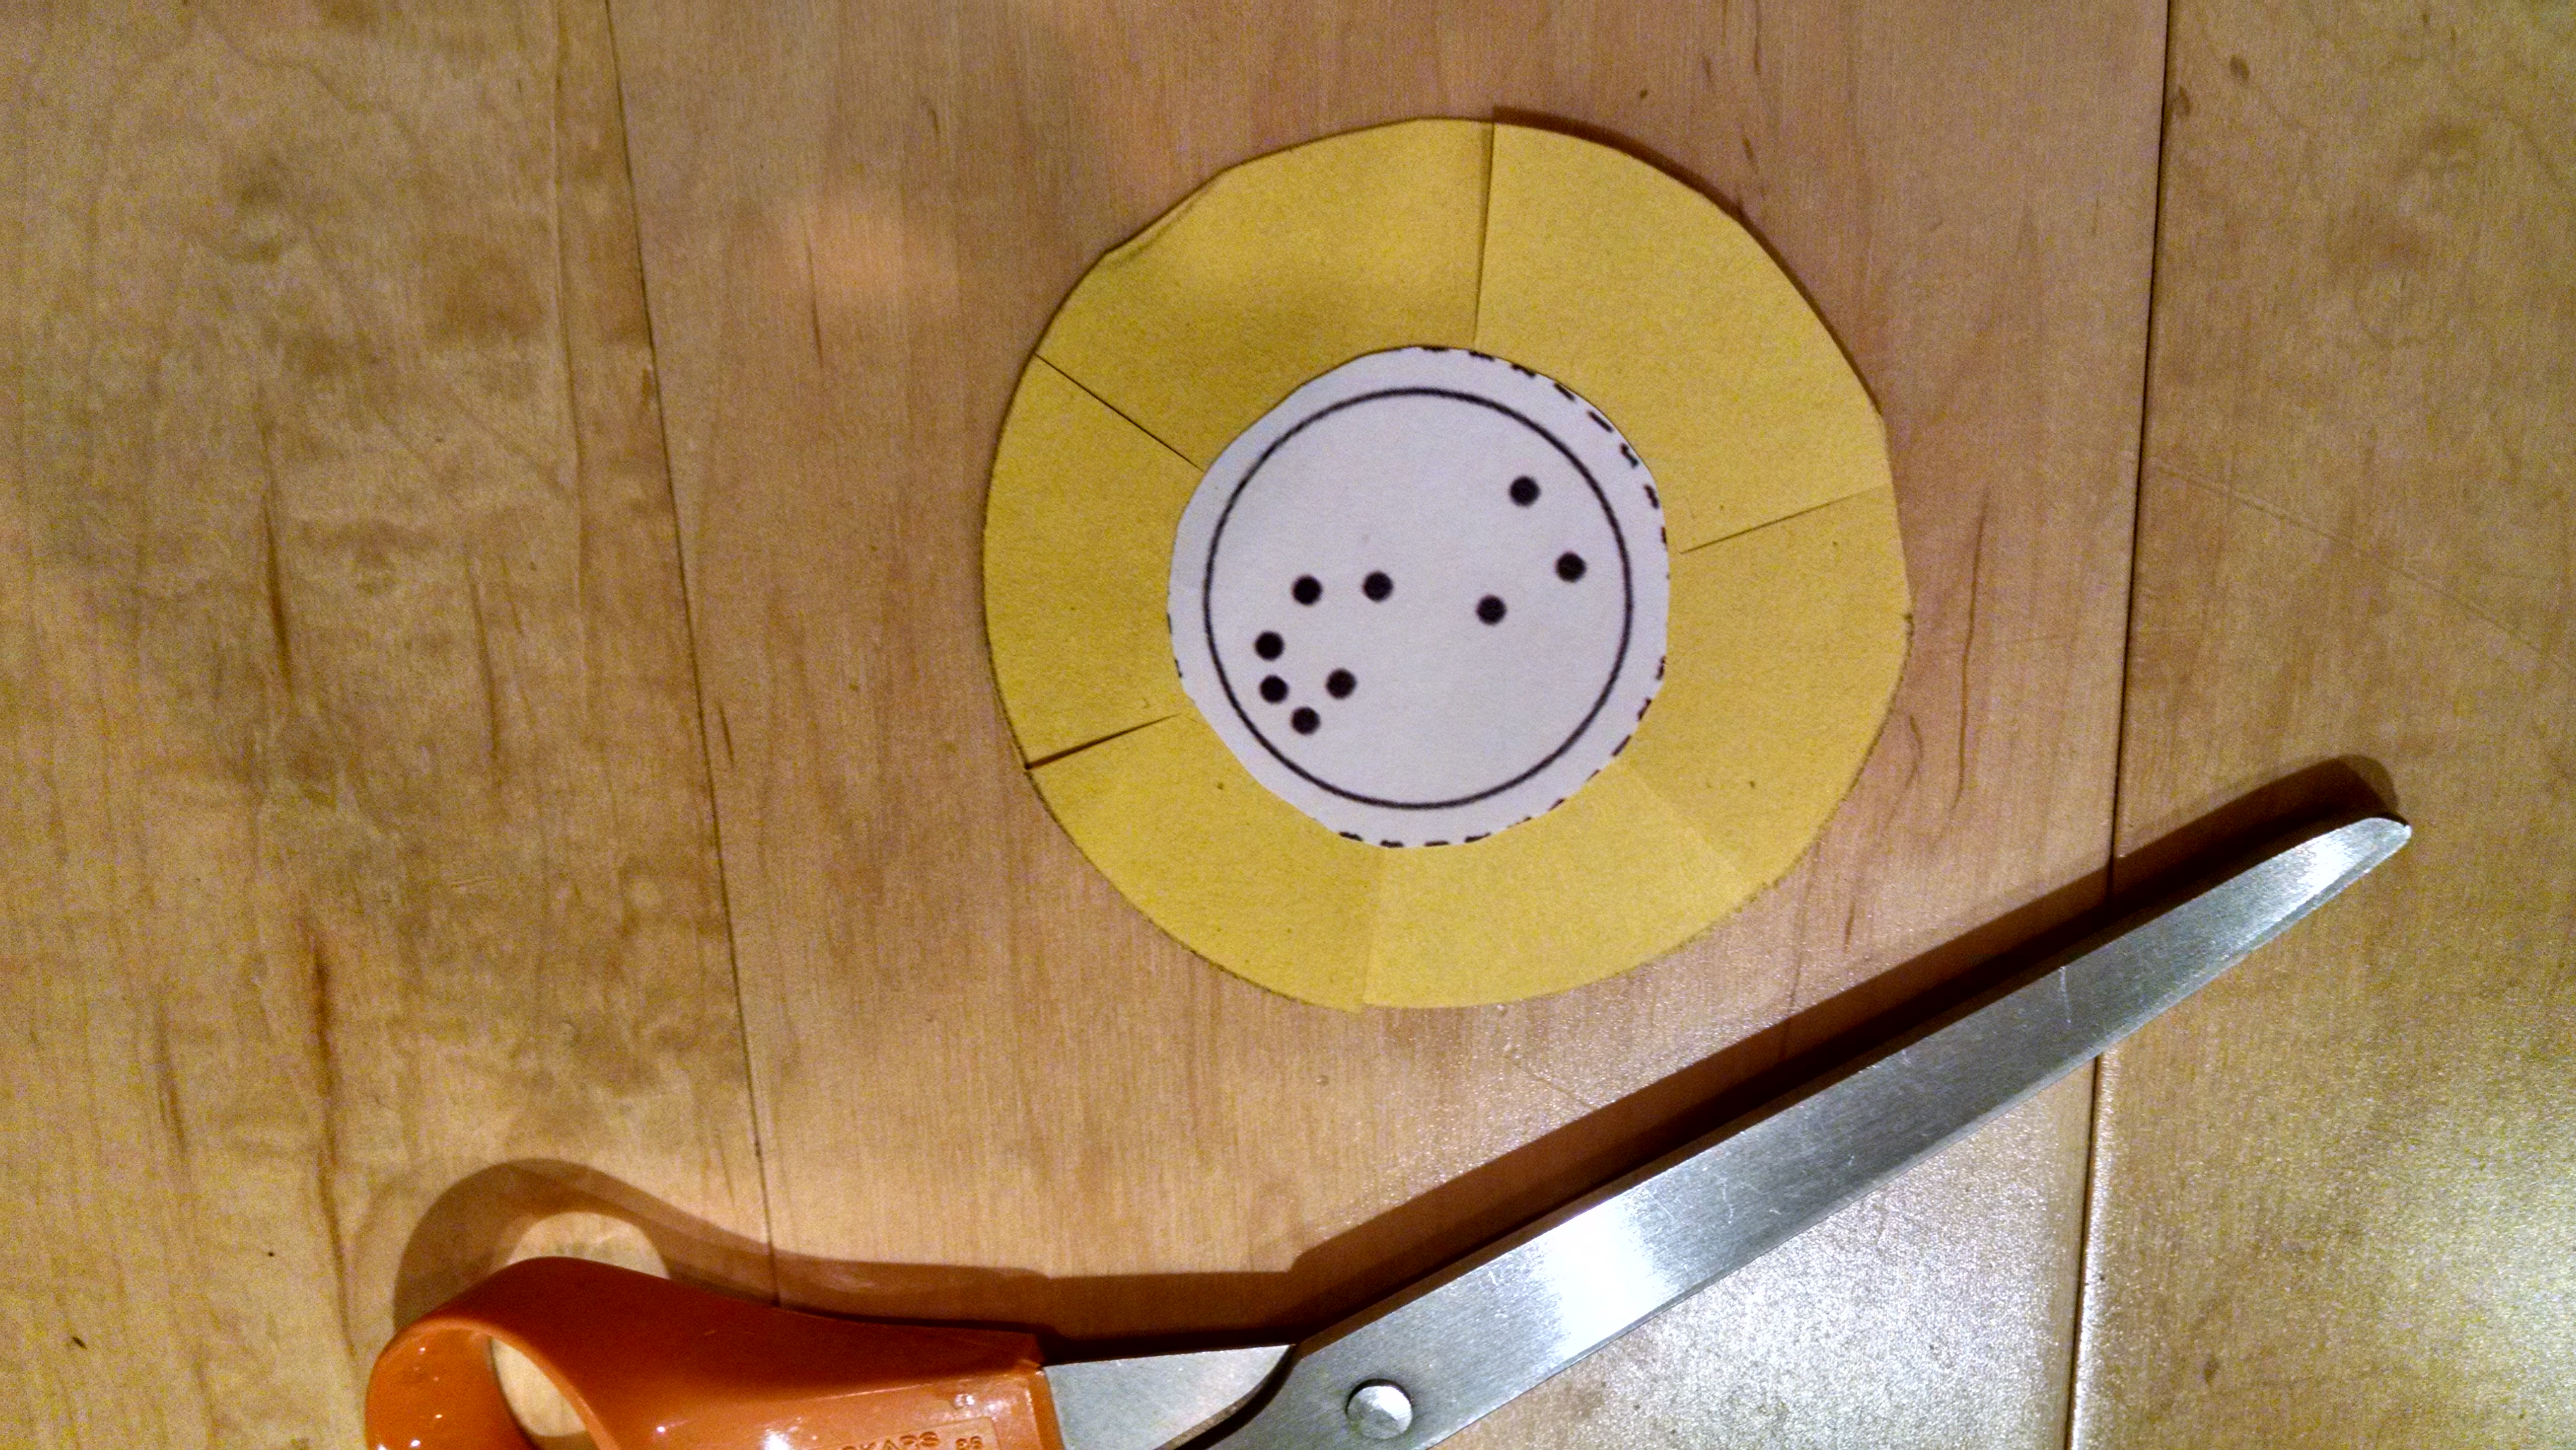
Use a thumbtack to poke holes where stars are. (It helps to put the paper on top of cardboard or Styrofoam so you can poke the pin through the paper and into that surface.)
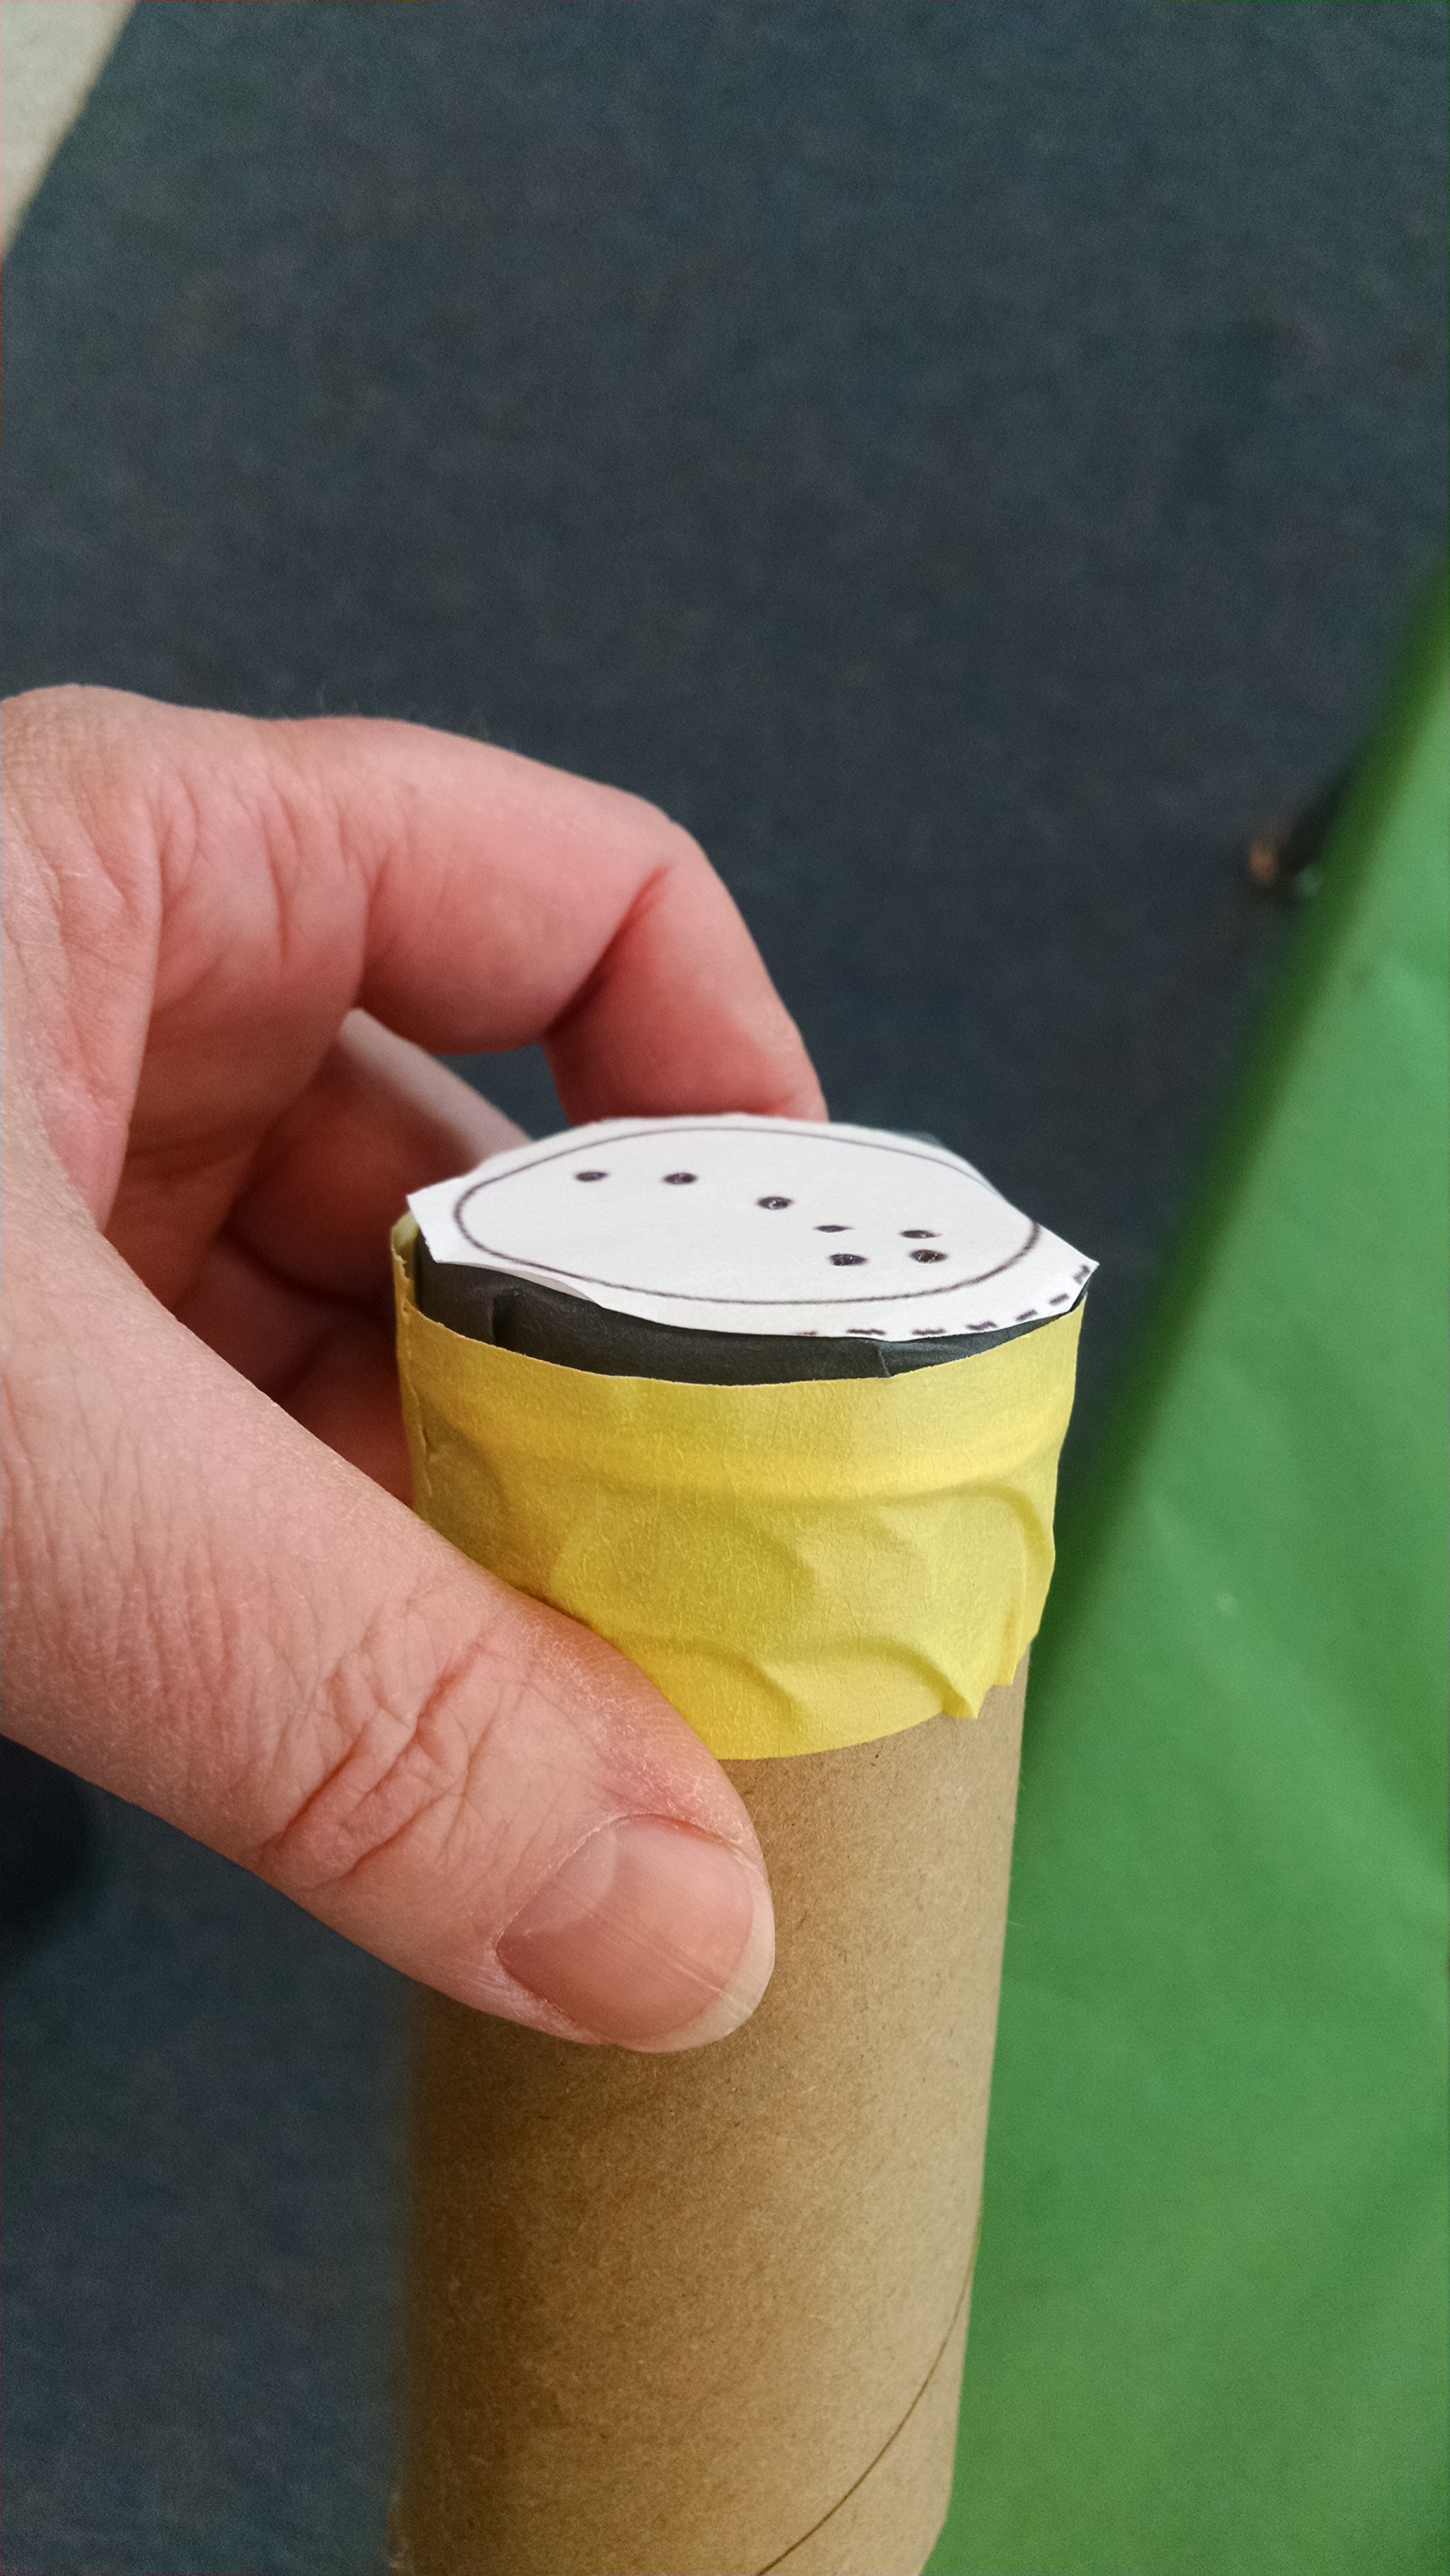
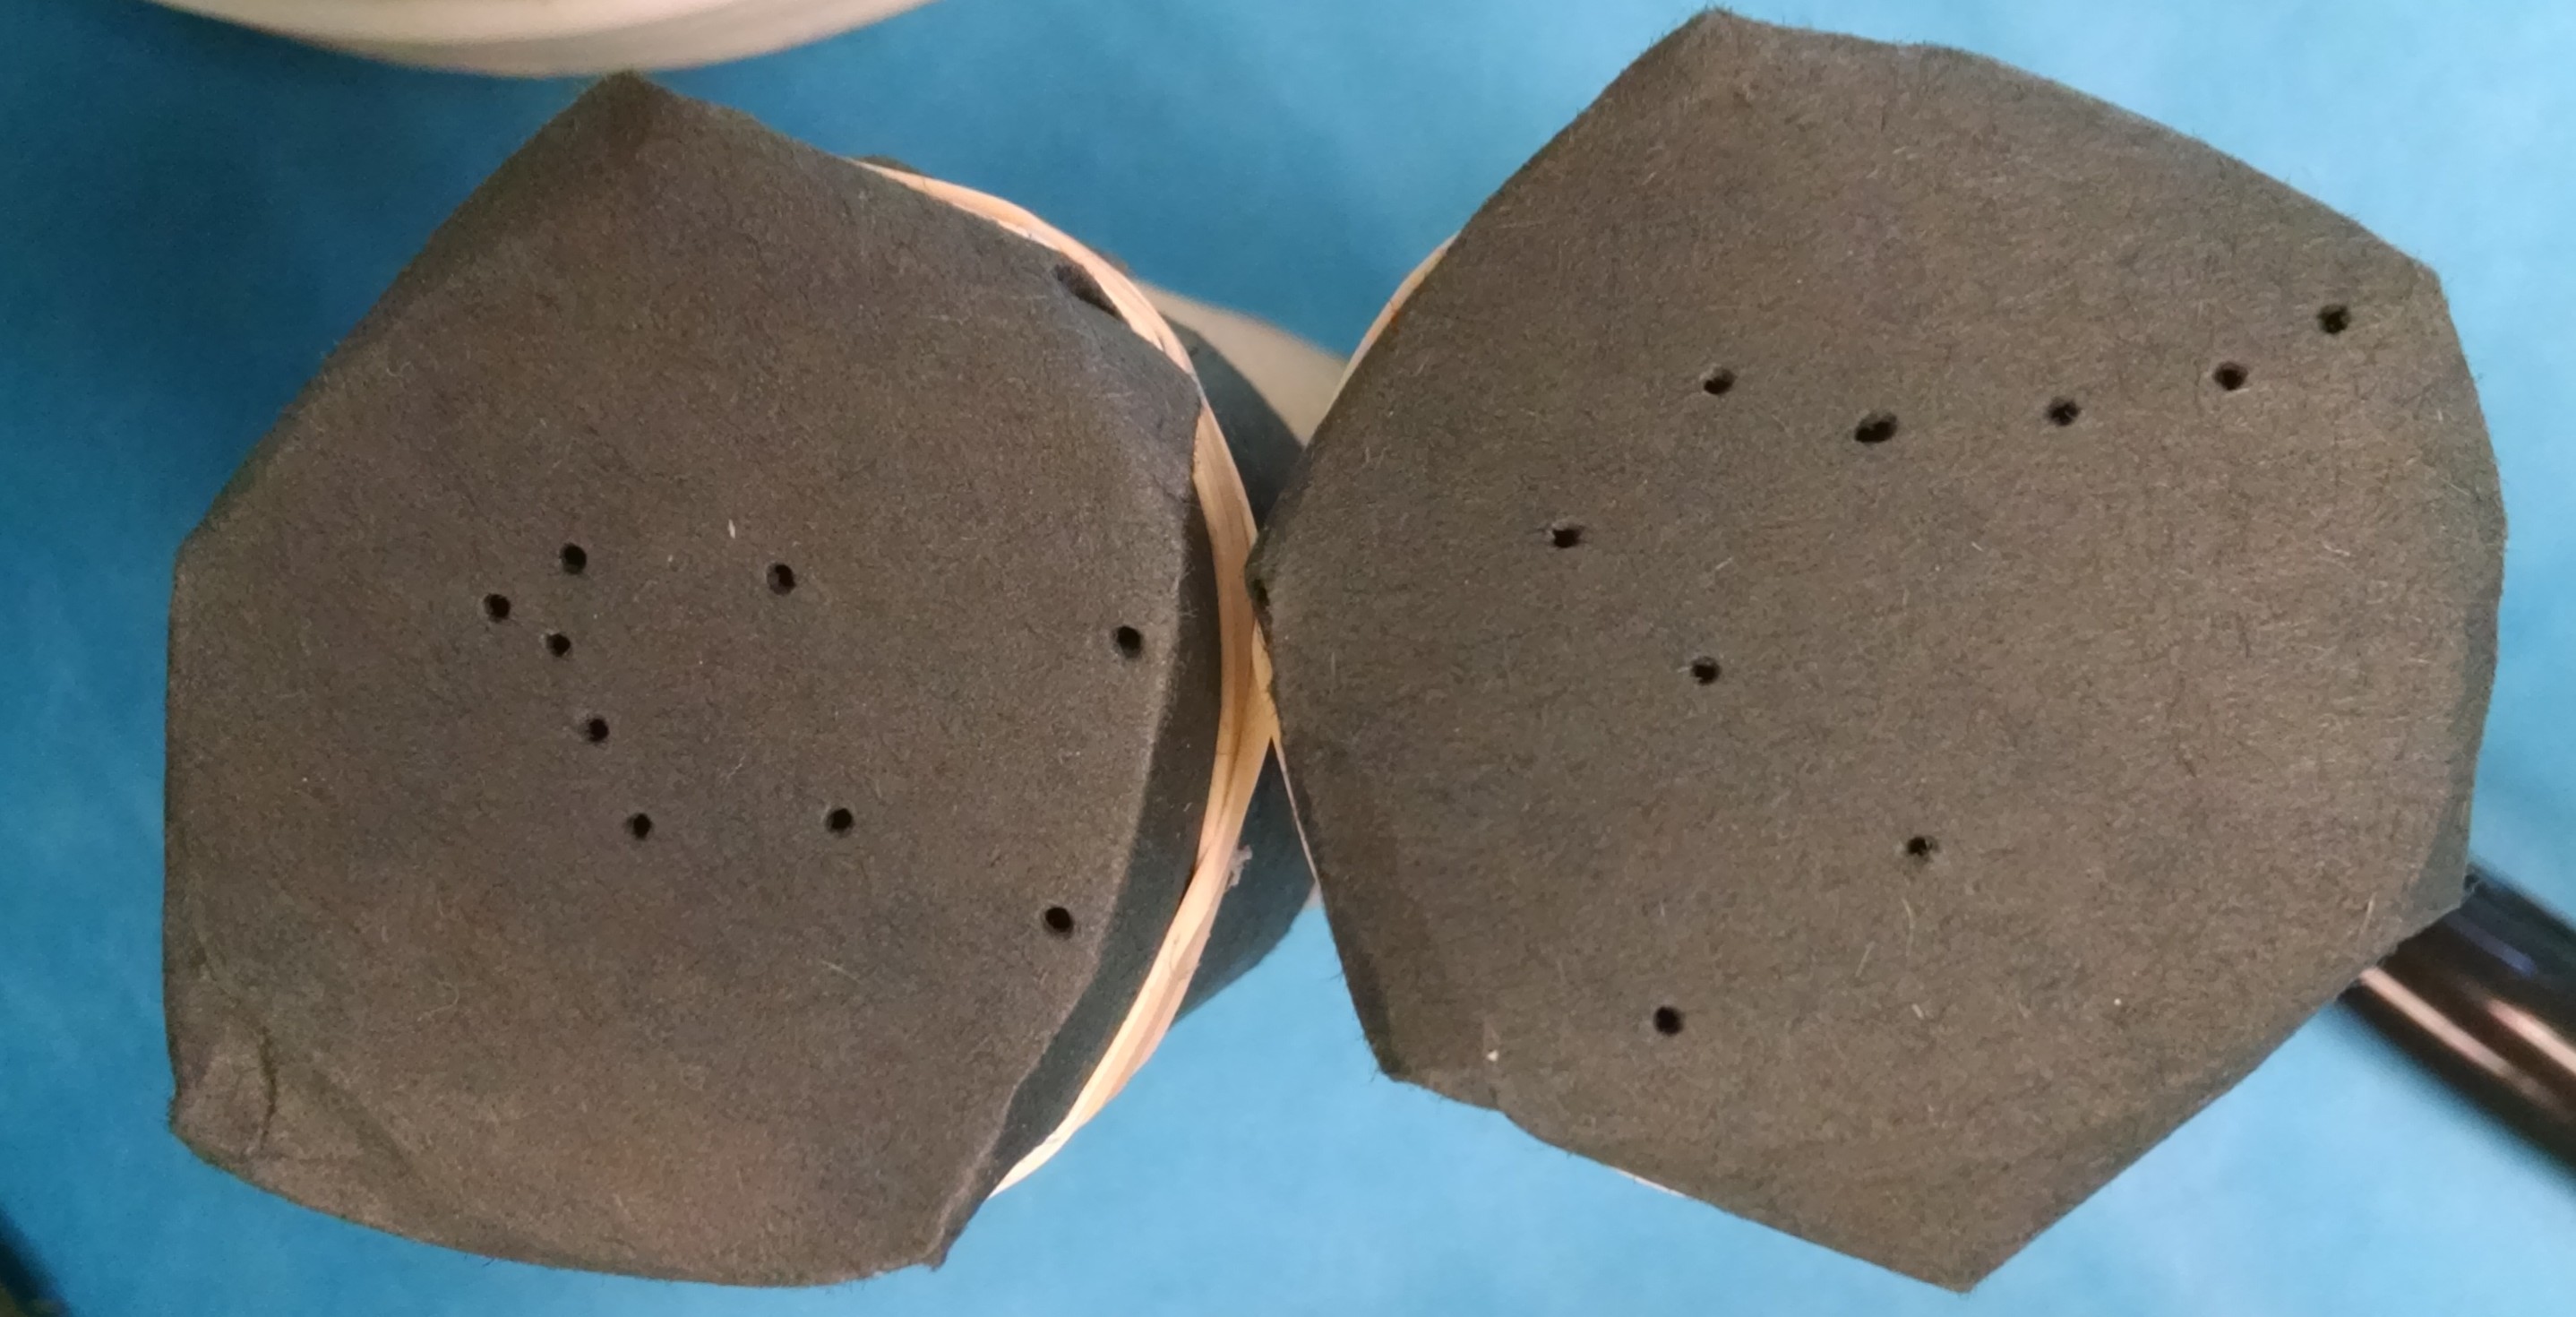
Put disc on top of tube, fold paper down, hold with rubber band.

Tape paper down and tape label on.

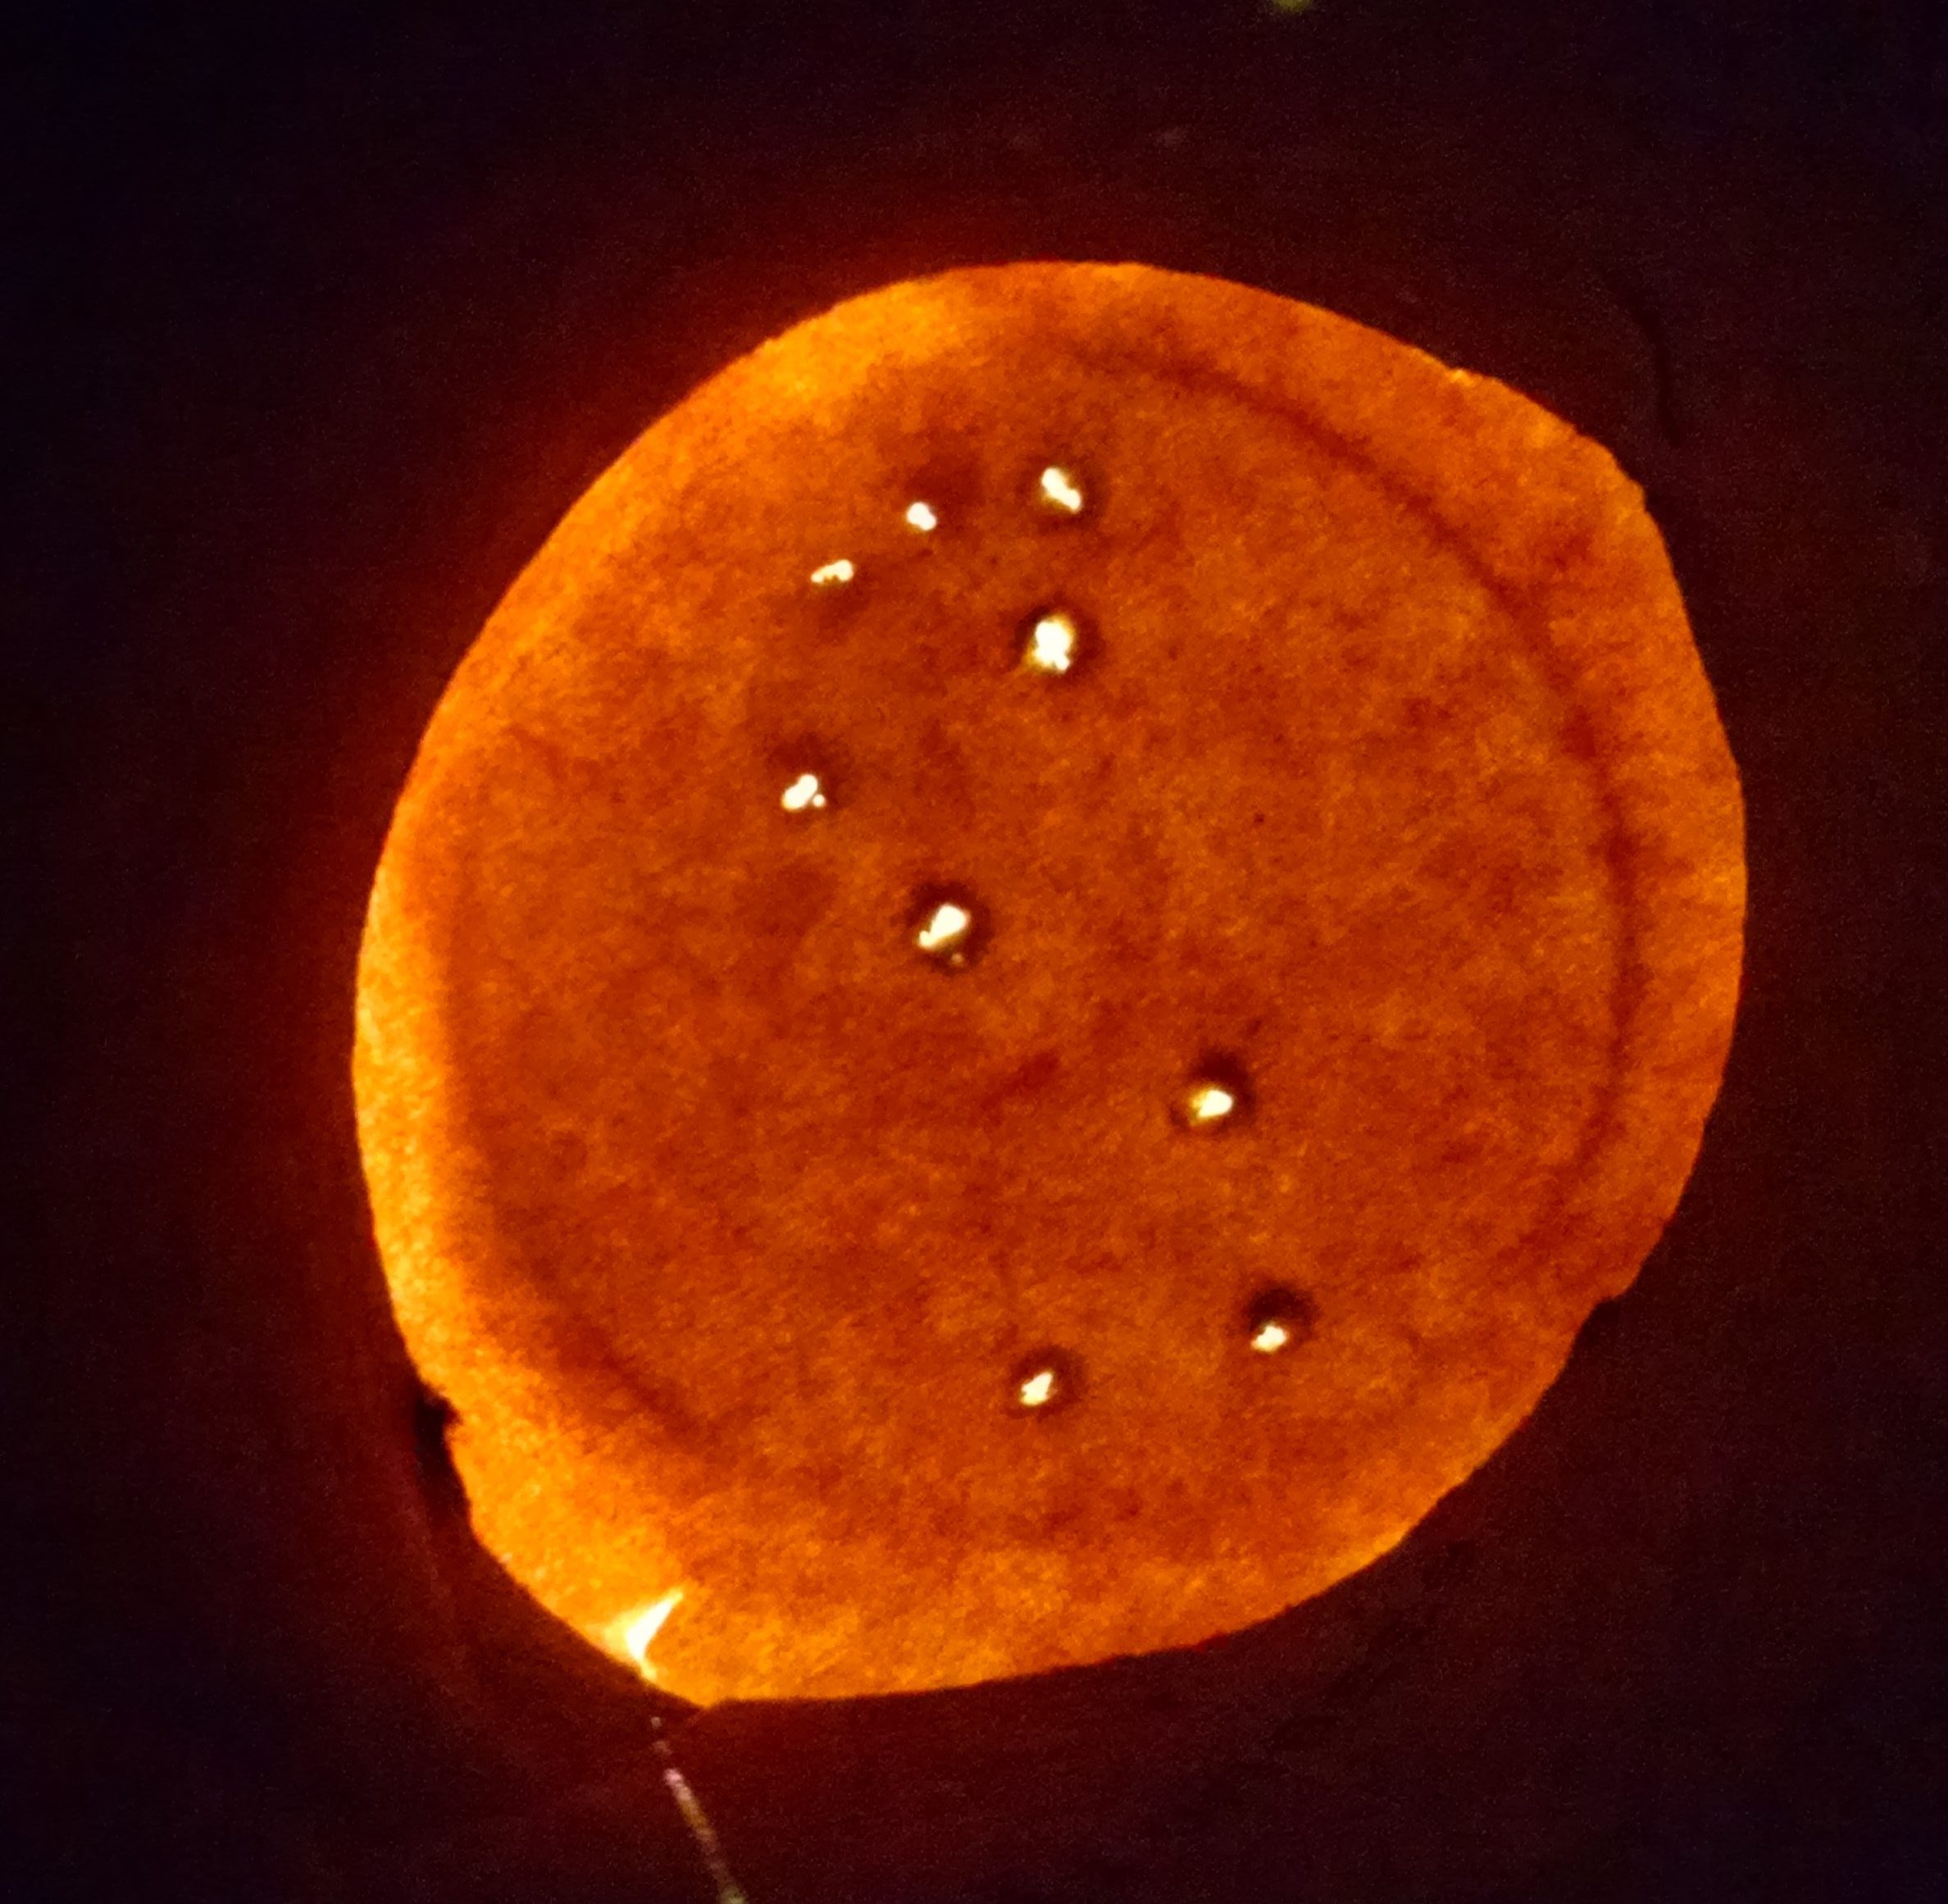
Look through viewer at light. You’ll see the “stars” in the constellation.
A key thing to remember when making constellation viewers. For the projection to be accurate when you look through the tube at the bottom of the paper, you need to punch the holes so that when you look at it from the top, you see a mirror image of the constellation. So, use constellation patterns that are reversed (as the ones I linked to above are… )
If you’re using constellation patterns that are not mirror imaged, then just tape them onto the tube with the white constellation pattern facing down, and the black paper facing up.
Sources Consulted and Variations
Ours are similar to Momma Owl’s. They made a collection of tubes with a variety of constellations and kept them together in a shoe box for later use.
Kids Activities Blog had square constellation cards to hold in front of the tube, so you could use the same tube for multiple constellations. 
I think you could make black disks with handles shaped like this that you could hold in front of the tube or use on a flashlight for interchangeable constellations. Then you could keep them together on a string or keychain like this constellation keychain from Nature Watch.
On Inna’s Creations, they made a telescope and stand with toilet paper tubes. Rather than mounting a constellation permanently, they made caps that can be taken on and off the viewer. I loved that idea. They glued a photo of a planet on the cap but you could easily do the punched out constellations instead.
I bet you could also make a homemade version of this Constellation Viewer Kit that has multiple constellations on a rotating disk.
Constellation Projector
You could shine a flashlight through this viewer to project constellations on the wall.
Or you can take a margarine tub or other small opaque container. Poke constellation patterns in it. Then place that over the top of a flashlight – the light will shine constellation patterns on the ceiling.

[…] Make a Constellation Viewer […]
LikeLike
[…] posts on the design process: anemometer, retractable badge car, scribble bots, a cardboard finger, a constellation viewer, sailboats, and Cartesian diver bottles. Each one of these is inspired by MANY different sources, […]
LikeLike
[…] identifying and drawing constellations. Use your telescope to get a better look, or create your own constellation viewer using a cardboard […]
LikeLike
We just made this. It worked perfectly. Both looking at a lamp and shining on the ceiling in a dark room. Labeled each constellation with name and orientation lightly in pencil. Used a rubber band so we could swap constellations out on a single toilet paper tube. Store the discs in an envelope.
LikeLike
[…] Printable from Inventors of Tomorrow. […]
LikeLike