
A few years ago, we invented a “scarf cannon” using a shop fan – we use the Lasko Utility Fan 4900. In this post, I’ll share the three activities we’ve developed with that fan. These are super fun for kids to play with and also allow them to do lots of hands-on science learning.
The Ball Levitator
Many science museums have an exhibit like this, typically called something like Bernoulli blower. (If you’re working with older children, like 4th grade or higher, check out this great resource on the Bernoulli effect and the scientific principles of flight.) The fan creates a column of air, and you can float a ball on the current, so it hovers in the air until you turn off the fan or block the airflow.
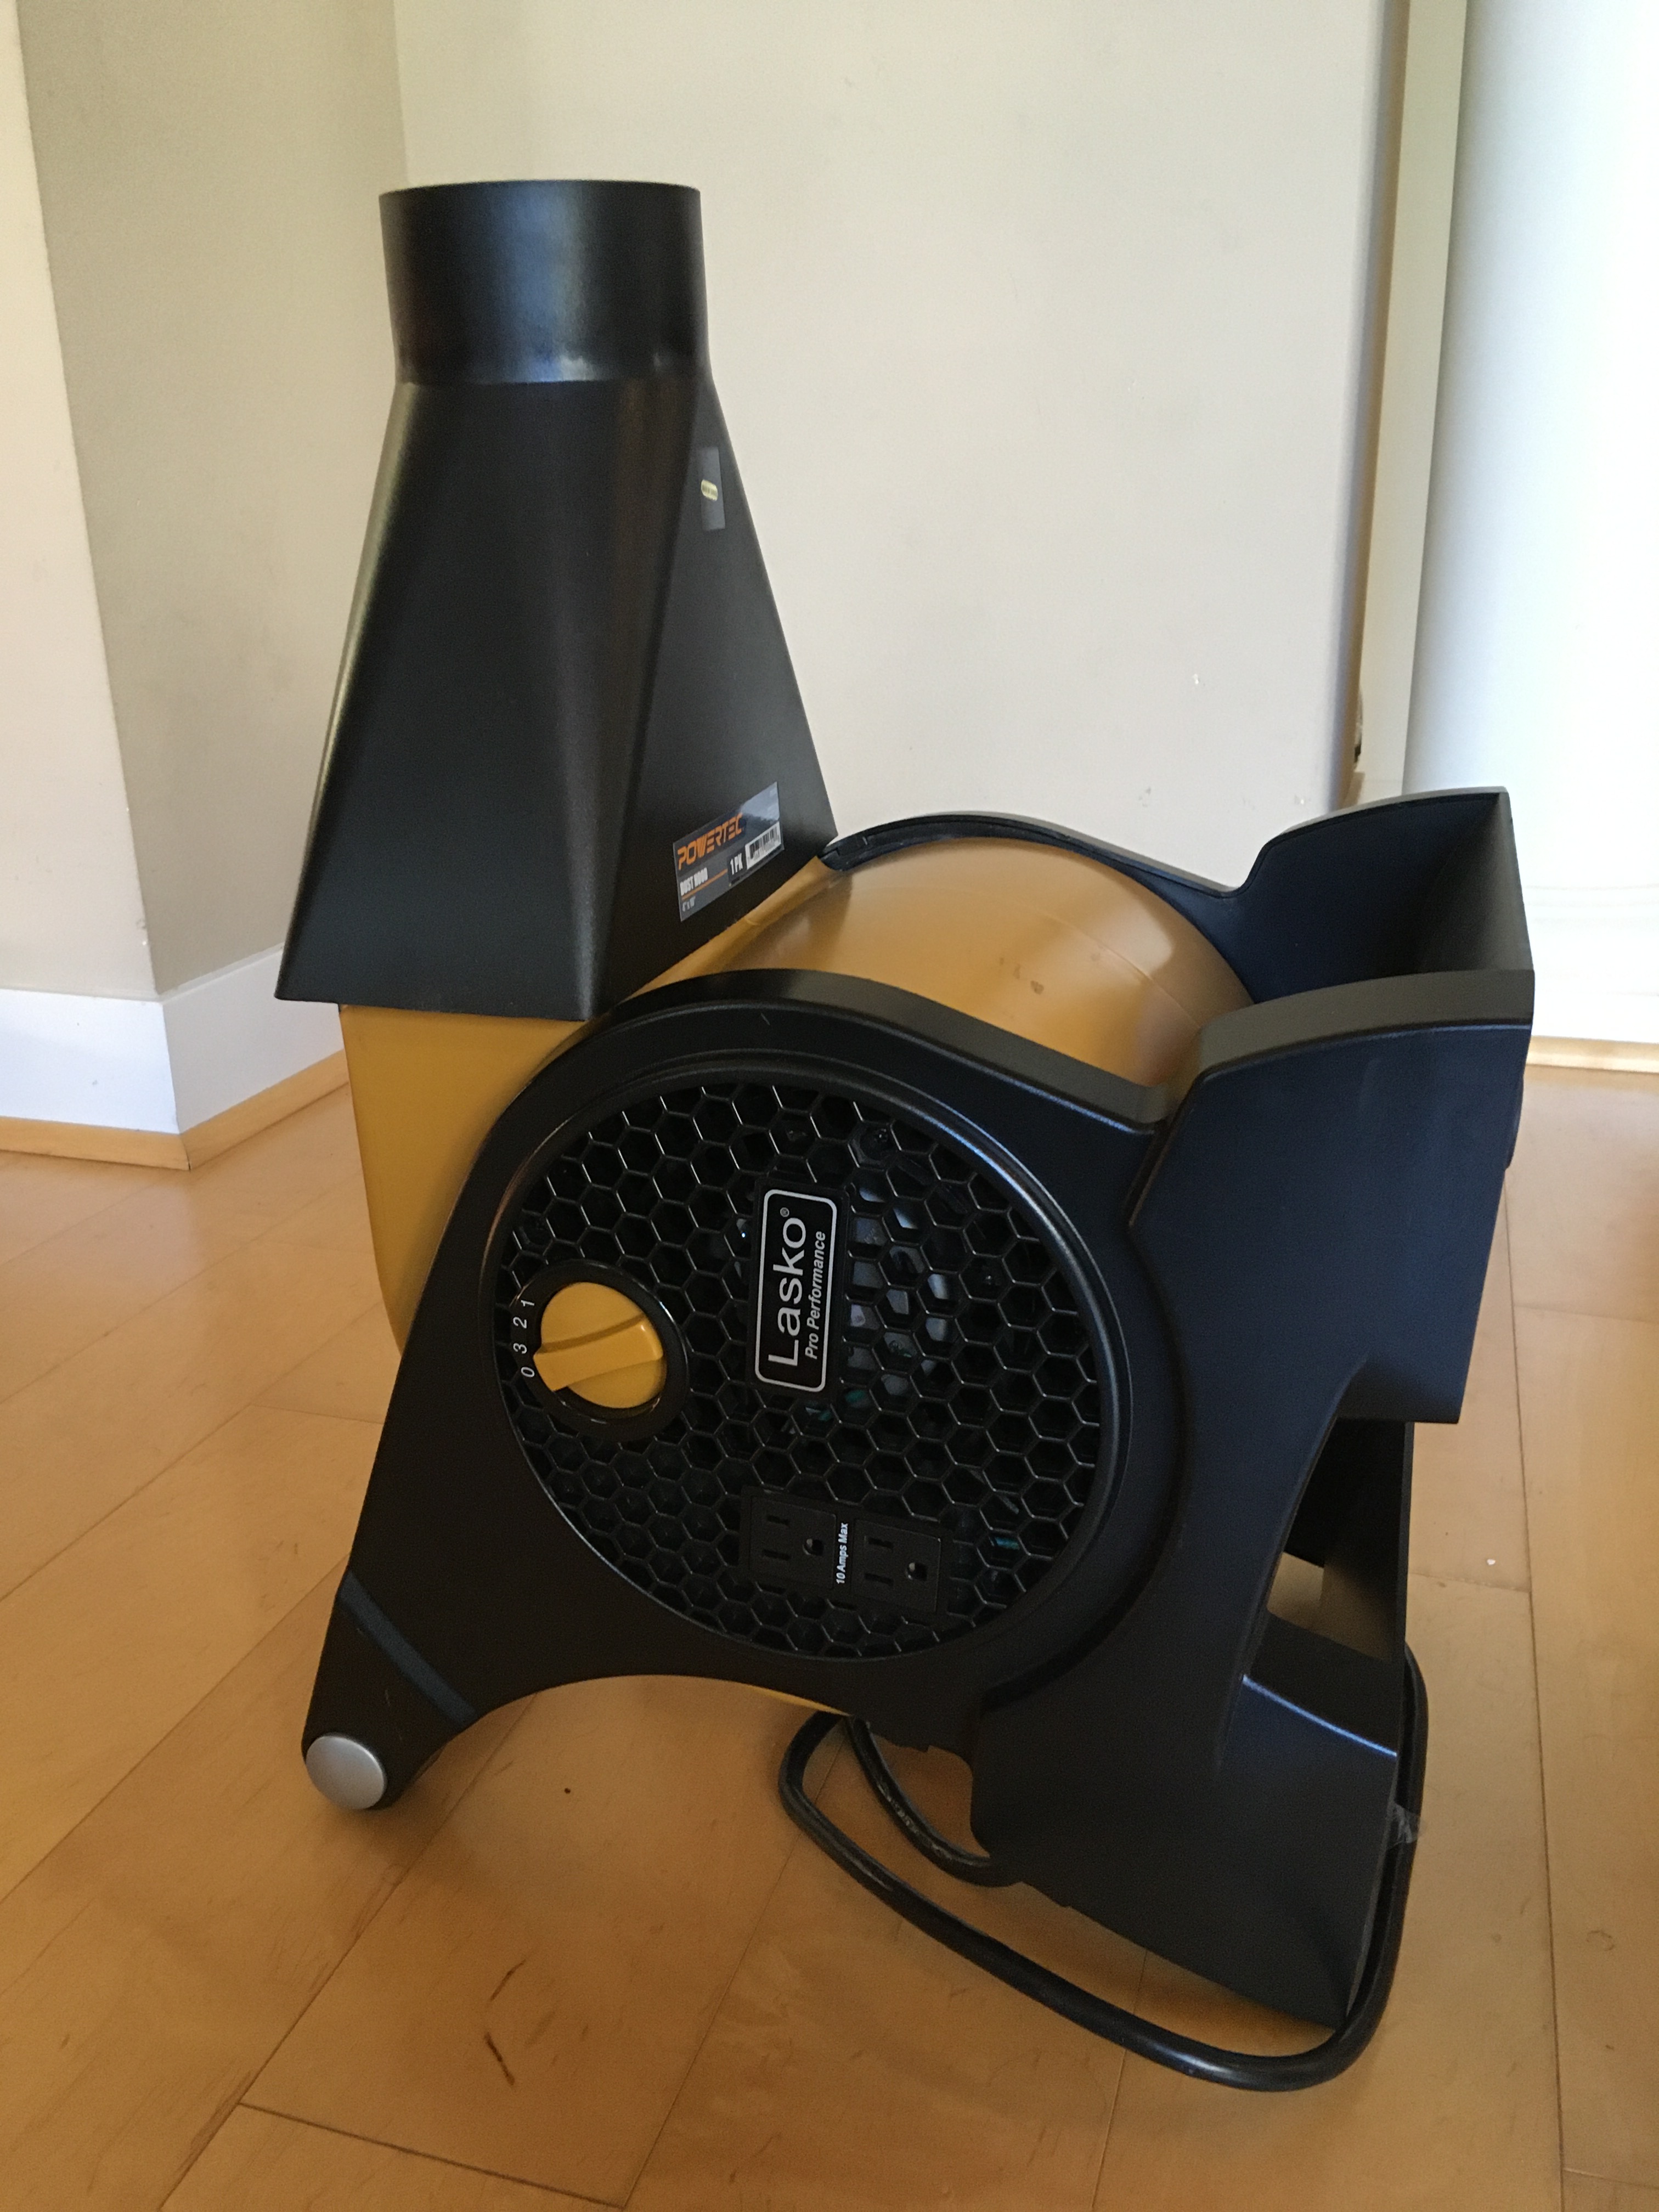
This one is so easy. All you need is the fan and this dust hood. Aim the fan straight up and mount the dust hood on it. (Note: I find it works best if you tilt the fan onto its handle and you tilt the fan to aim straight up from that position.)
Turn on the fan, and float the ball. In this video, you can see it at low power, medium, and high, and then see what happens when you wave your hand across it, blocking the air flow.
Kids have tons of fun just setting the ball into the air, knocking it out, throwing the ball in and letting the current catch it, and so on. But if you want to add another level of fun, you could give kids a foam baseball bat and let them swing at the ball. (This picture shows a similar set-up on a bounce house.) Or they could shoot Nerf darts at the ball to try to knock it out of the air.

If you don’t want to spend $10 on the dust hood, you could always just build a cardboard box with a short poster tube in it to concentrate the air into a column. Or even just tape the tube directly onto the fan if you don’t care about the tape residue this would leave.

If you wanted to play with the Bernoulli effect, but didn’t want to buy a fan, you can also experiment with using a leaf blower or a hair dryer. This flyer from Discovery Museum in Acton, MA has all the info about how to experiment with a hair dryer and challenges to try. This Museum in a Box – Principles of Flight booklet from NASA has the science background info, multiple experiments to try with air currents, and info on how their lesson plan aligns with national science standards.
Ball Cannon
You load a ball in at the base – it shoots through the air! I use really lightweight plastic balls for this – they’re a little smaller than a ball pit ball. If they hit things or people they don’t do any damage. You could also launch scarves with it. I mentioned above that if you want to float a ball on air, you could just tape a poster tube onto the fan. But for this ball shooter, you need to build a box that mounts onto the fan where they can insert the ball, and then attach the poster tube to the box for the “cannon.”
To build the box, you can use the pattern below. That makes a 21 cm tall box which is necessary for the blast door I used. For the hose connector I use here, it really only needs to be 18 or 19 cm tall probably. The box has a door in it where the child can insert the ball.
Then the poster tube needs to attach to the box. If you just tape it on, it’s easy to knock it off, so it’s better to create a sort of vertical sleeve of some sort to mount it on. I think you could permanently affix the tube to the box with a hose adapter. Or you can make it possible to separate the box and tube, as I did these. I used a hose connector from Home Depot which is no longer available there, but I think this Dryer Dock is the same. The poster tube doesn’t fit perfectly in the connector, but I just wrapped a few layers of duct tape and bubble wrap around it to fit it in perfectly.
If the box is fit perfectly, it might stay on the fan with adults playing with it, but kids ALWAYS knock the box off. You could tape the box onto the fan, but I tie it on with ratchet straps.
Shoot a Ball through a Flexible Hose
This project was inspired by all the children’s museums and science museums that have those great ball walls where you insert balls or scarves into doors, and they shoot through a series of clear tubes and fly out somewhere else. My son LOVED these when he was in preschool. (OK, and in 5th grade, he still loves them!)
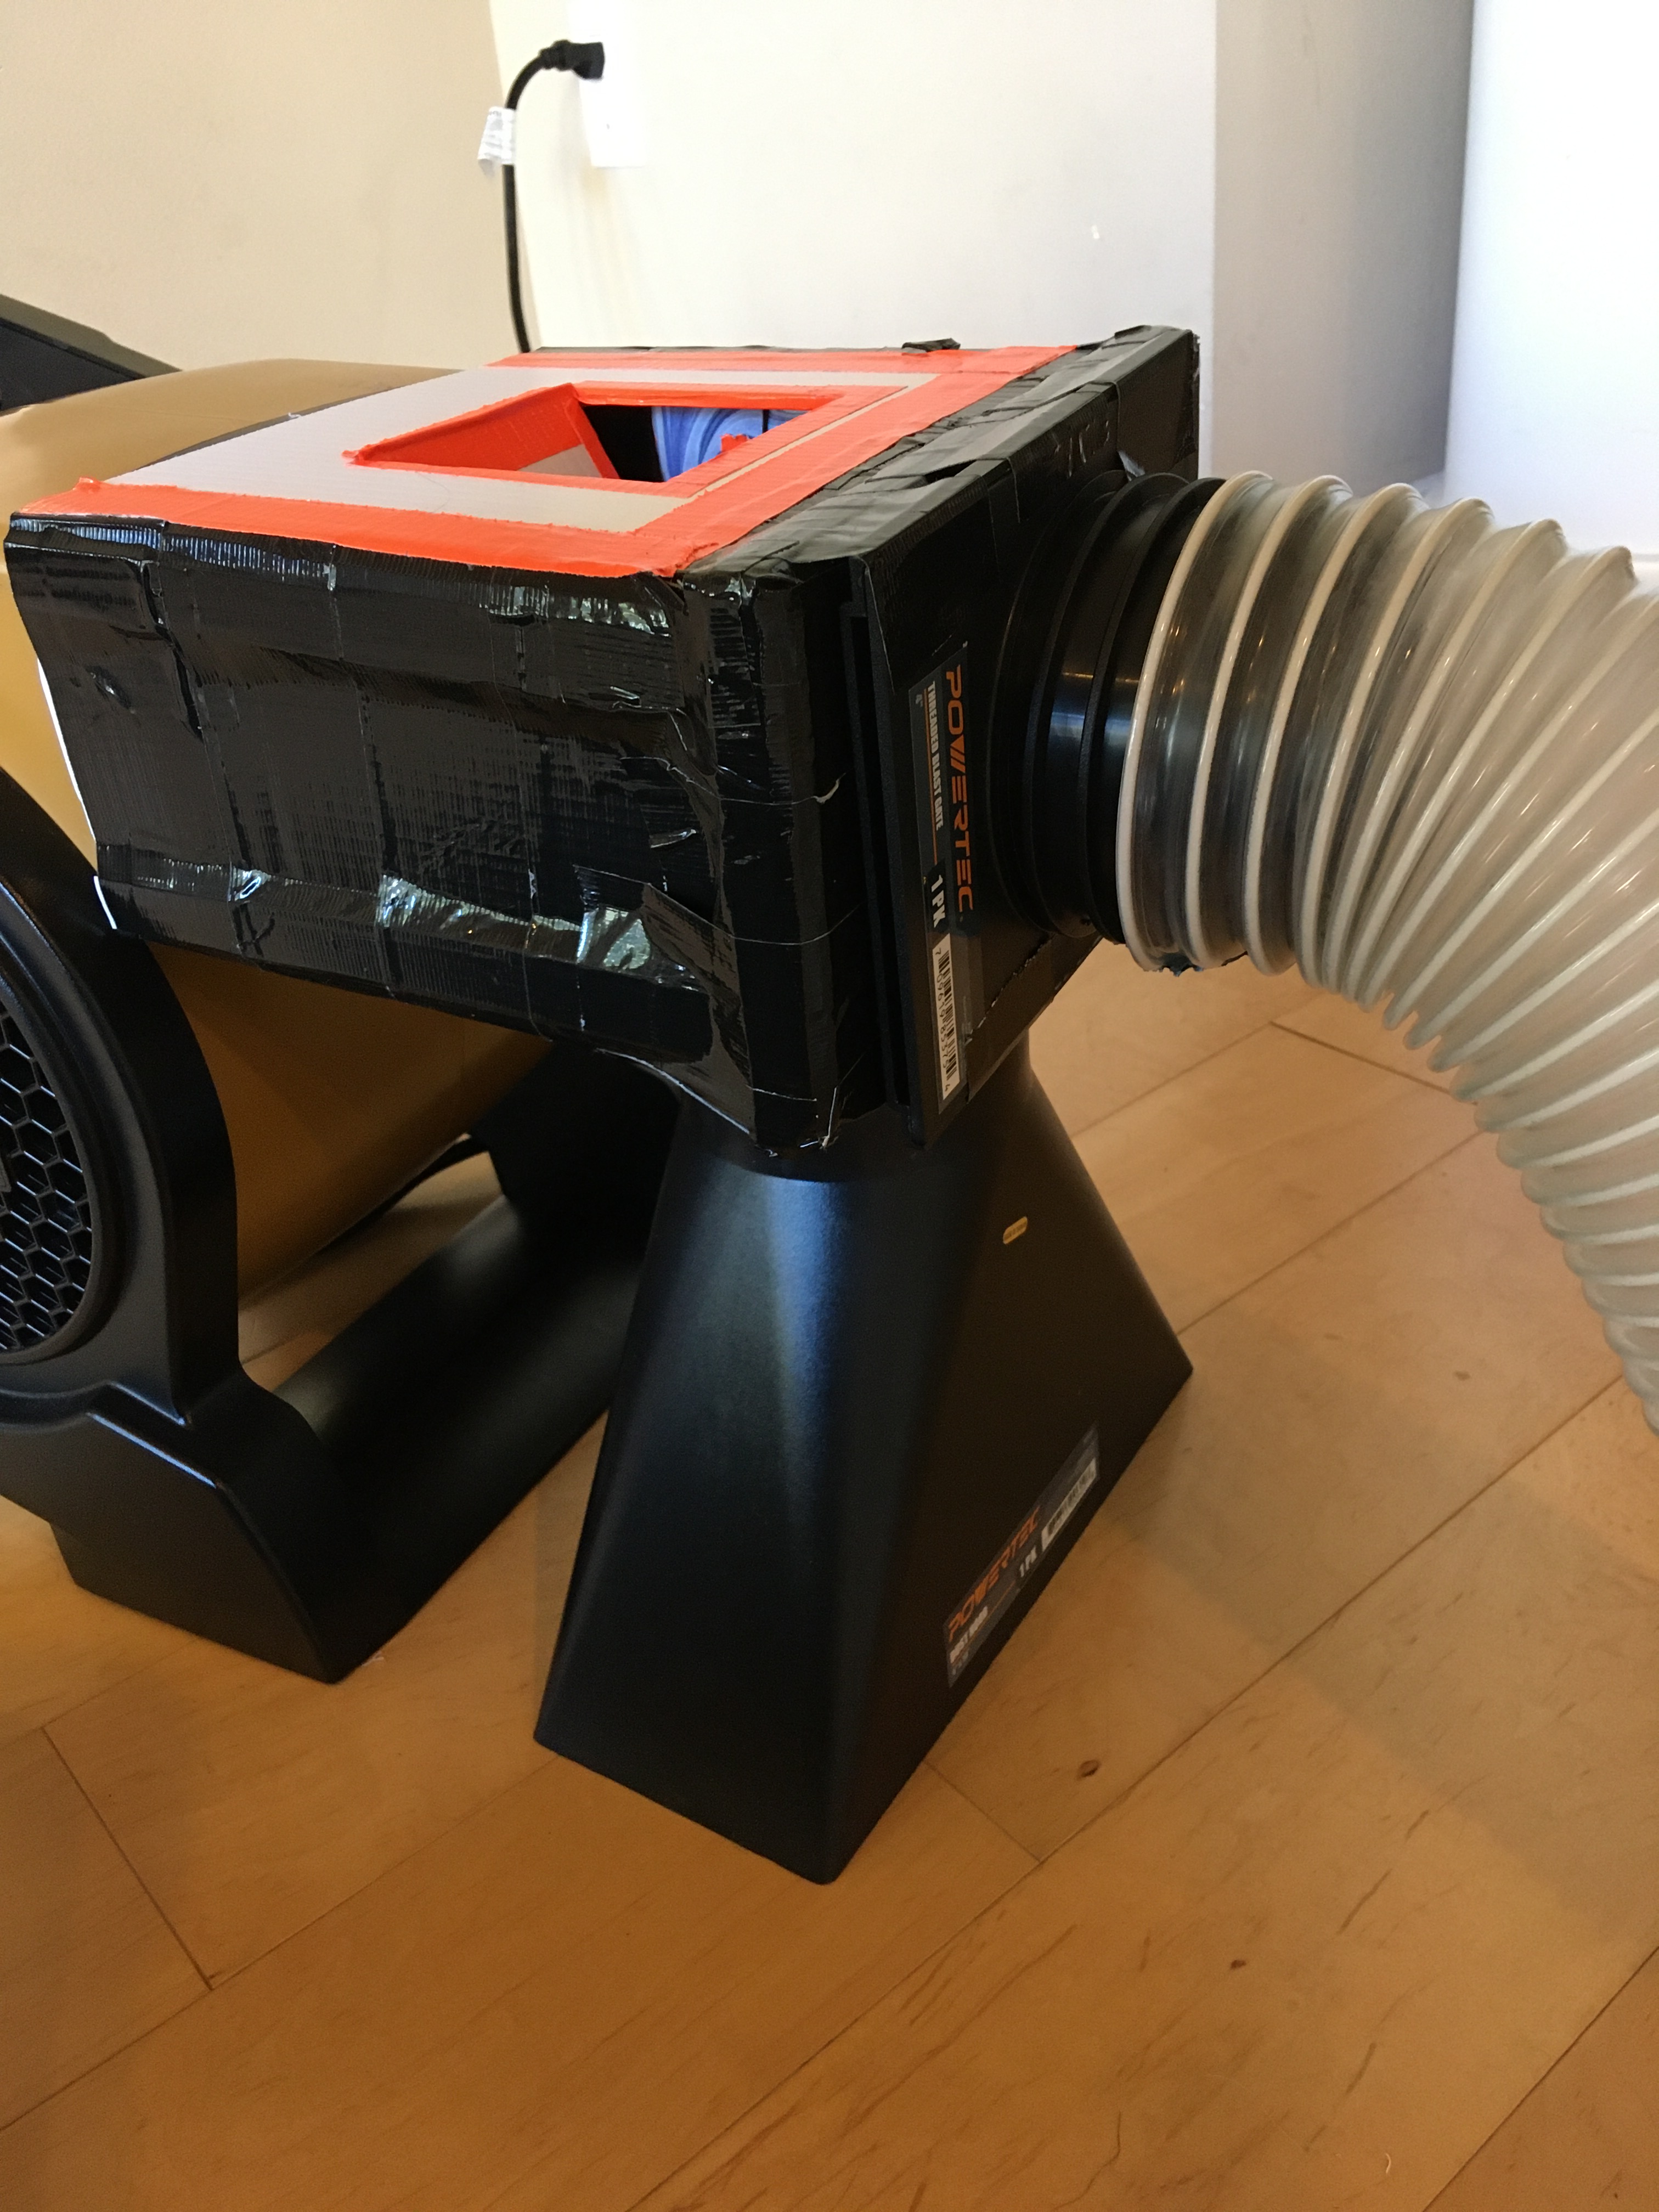
I bought a clear, flexible hose. 4″ diameter by 10 ft long. Then I built a box out of corrugated plastic and duct tape. (You could also use cardboard and packing tape.) I created these directions for making your box.
The challenge with this is it has to fit on PERFECTLY. If it’s too small, it won’t mount onto the fan properly. If it’s too big, then it will blow right off. Notice how the door that kids use to insert the ball is hinged on the bottom – that means when they remove their hand, the air blows the door closed, creating a seal, for the best possible launch.

Then I needed to attach the hose to the box. (We tried taping the tube on – it doesn’t work well. It pulled off too easily.) I bought a blast gate, because I thought I might want that function of being to open and close it. But it needed to be pulled really firmly to open and close and I didn’t know if my three and four year old students could manage that. So, I popped it apart and removed the sliding door. You could also use the same hose connector I describe above, or I think you could use this threaded coupler.
I wanted to really focus the air, so I built walls inside the box so all the air goes up the center. I don’t know whether it’s necessary, but I’m happy with the results.

When you put the box on the fan, the hose is heavy and tends to drag it down and off. You might be able to strap the box on to counteract that, but I found that it worked perfectly just to put my dust hood in front of the fan and prop the box on it.
Once it’s all assembled, you can lay the hose along the ground and just shoot the ball or scarf out along the floor – we’ve used this for “fan golf” where you can aim the hose at different angles to make the shot.
Or, you can aim the hose opening up in the air and shoot scarves up into the air so they can drift back down. In this video we just wound the hose around a stool to get that vertical angle.
This was a fun project to work on and with all of these elements put together it’s fairly low cost (Fan $77, dust hood $10.50, dryer dock ~10, hose $25. Plus a poster tube, some cardboard or corrugated plastic, and tape.) And kids LOVE it!! (And a side benefit during COVID is that having this fan blowing helps with the air circulation in your classroom.)
You can learn more about our initial design process when we first created this invention back in 2015. Or, learn how to build a wind tube – another great hands-on experiment for kids. Check out more experiments in wind and flight – that post includes book recommendations. I’ve also got ideas for hands-on projects, books, and videos about science for kids related to 40+ other themes! Find links to them all here.
Note: this post contains Amazon Affiliate links. If you click through to Amazon, and then purchase something I do receive a small percentage of the proceeds.

[…] them where you can push a scarf in. [Note: you can find a pattern for these boxes in a more recent post on my other blog.] These were more fun for kids, because it focuses the air, so scarves shoot a […]
LikeLike
[…] scarf cannon (click on that link to learn how to build your own). We aimed the tube straight up at the ceiling […]
LikeLike
[…] scarf cannon and ball levitator (click on that link to learn how to build your own and see videos of it in […]
LikeLike
[…] use a shop fan to create a ball cannon and a scarf shooter and a ball levitator https://inventorsoftomorrow.com/2021/10/11/fun-with-a-fan/ […]
LikeLike