
There are lots of great hands-on ways to explore chemistry with kids. (I cover them in these posts: States of Matter, Mixtures, Reactions.) Three of our favorites are Milk Fireworks, Slime and Oil and Water.
Milk Fireworks
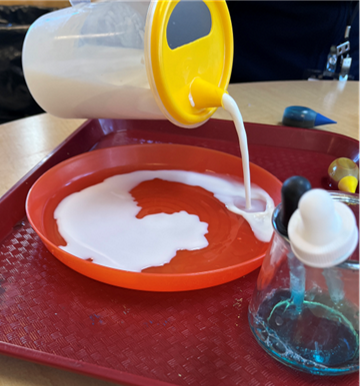


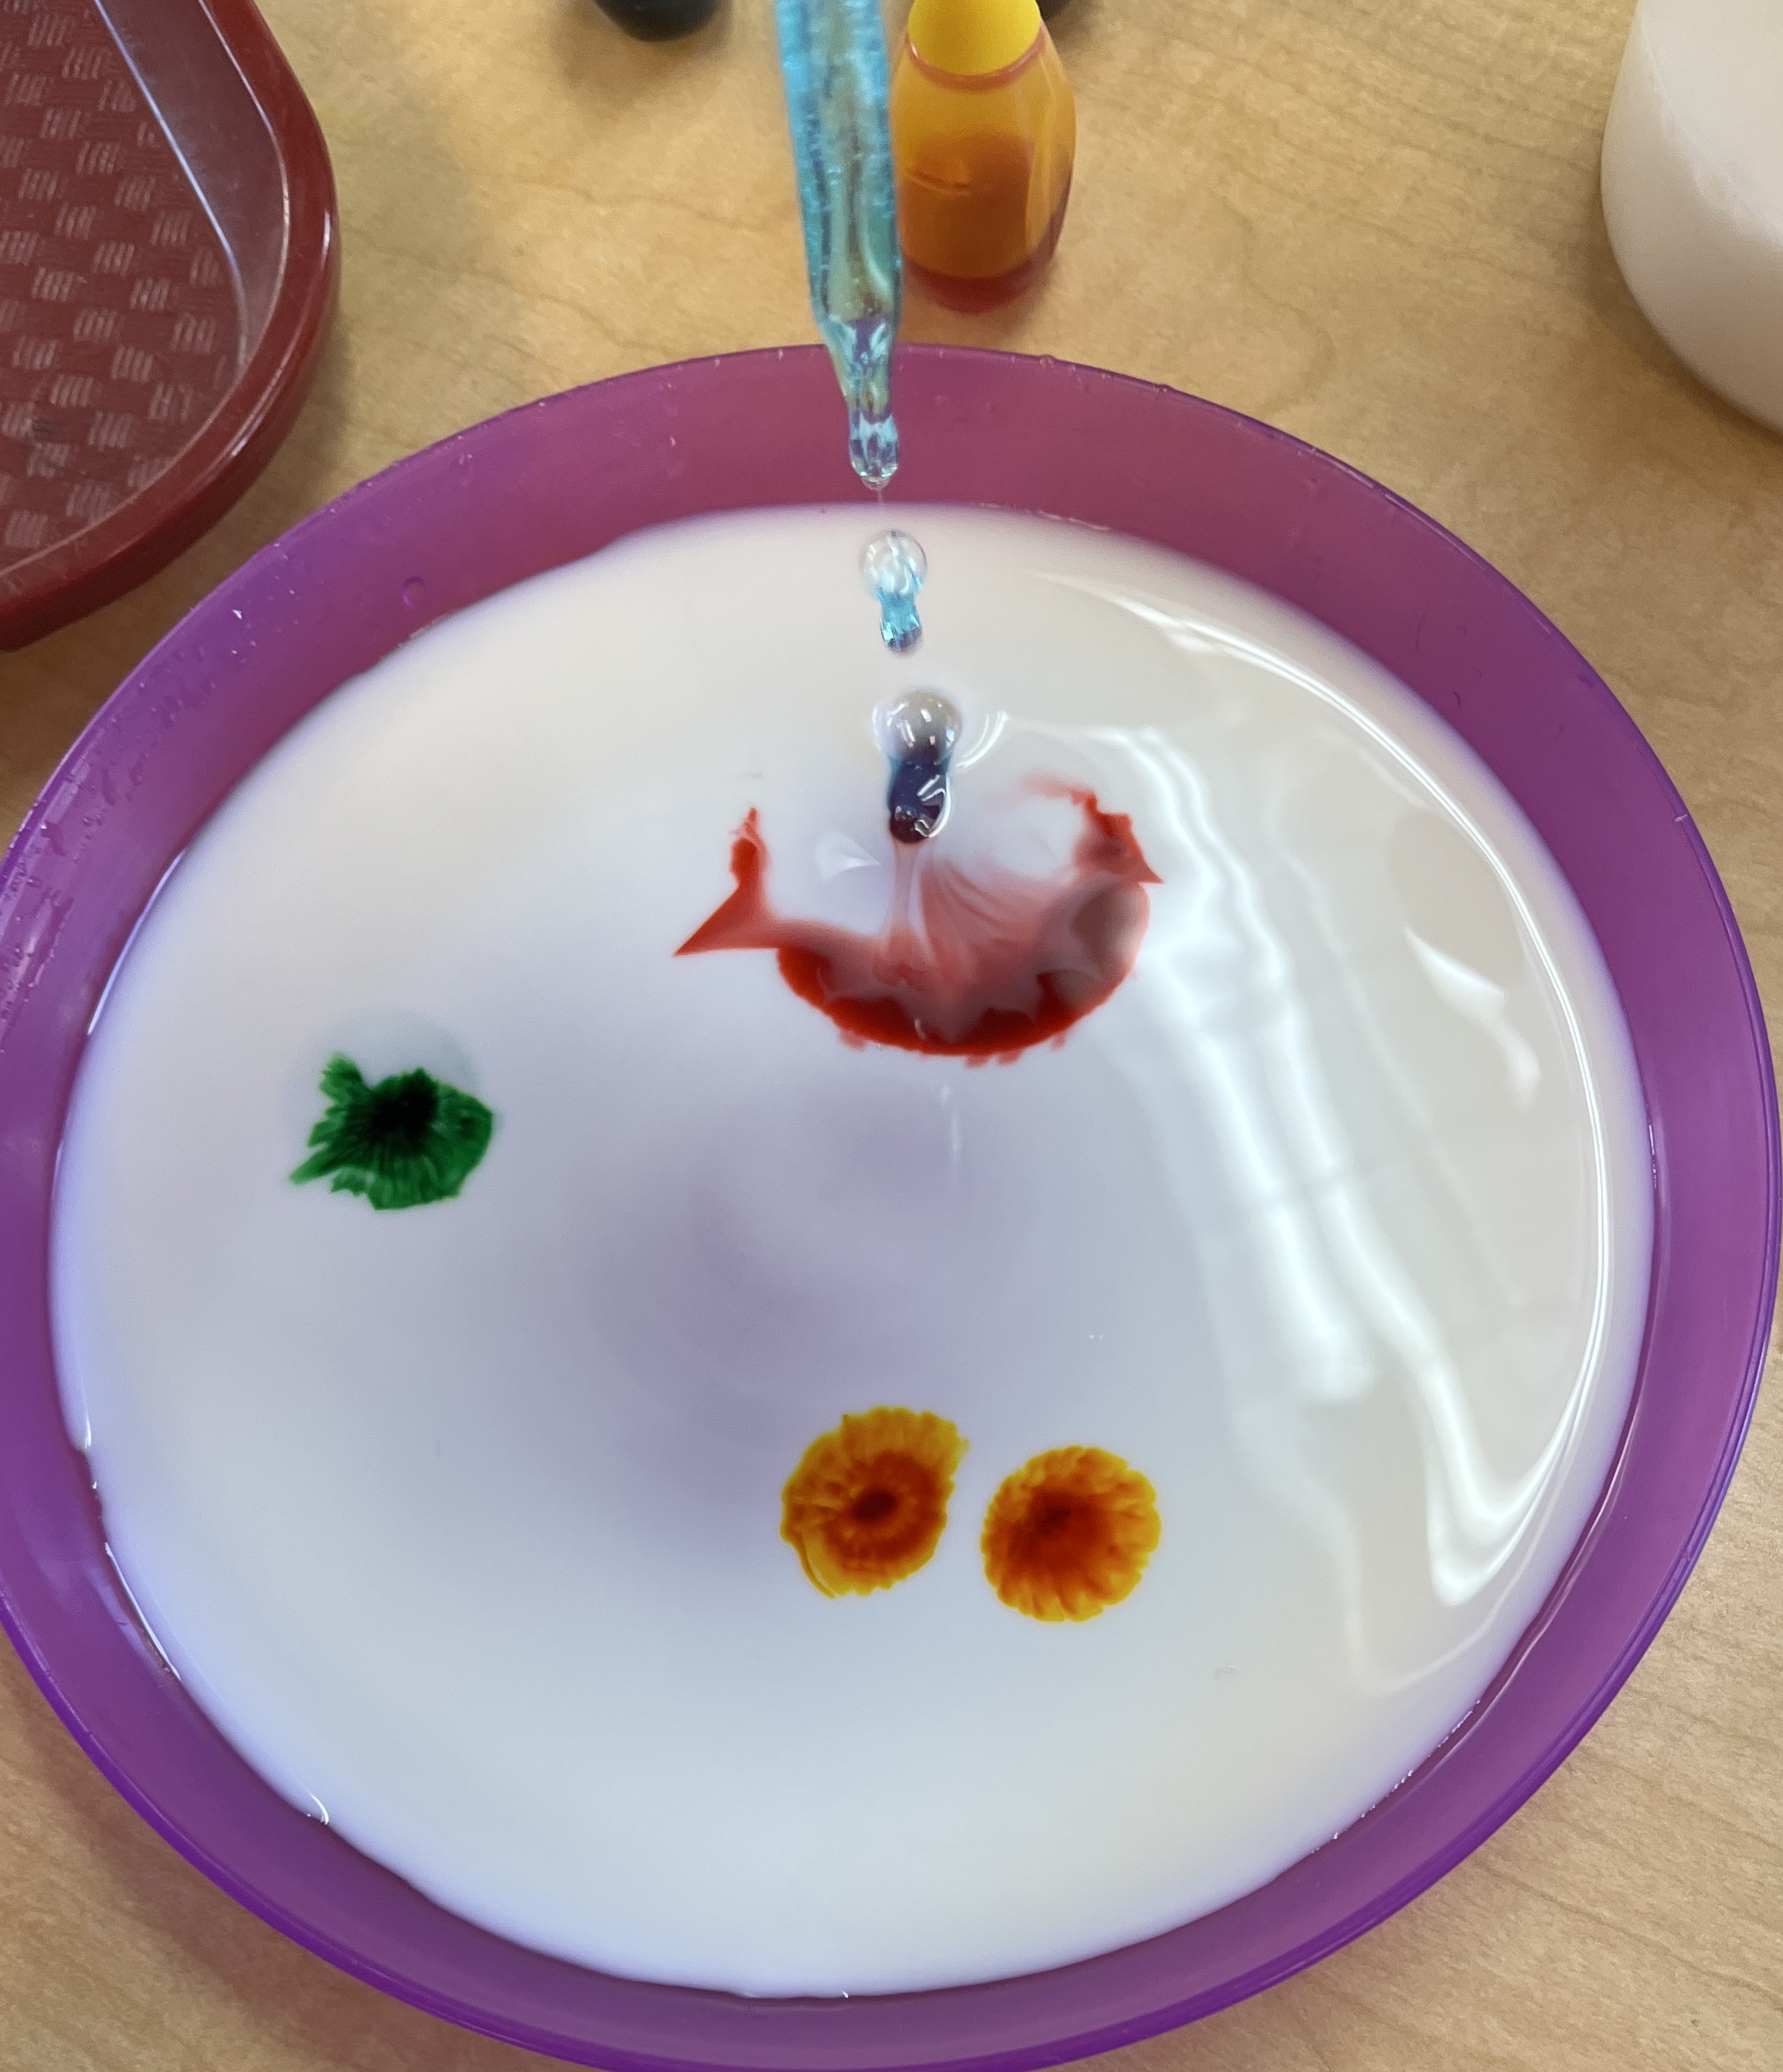
- Take a flat shallow dish, pour in a thin layer of whole milk – just enough to cover the surface of the dish is plenty. It’s important to use whole milk, not skim – you need the fat!
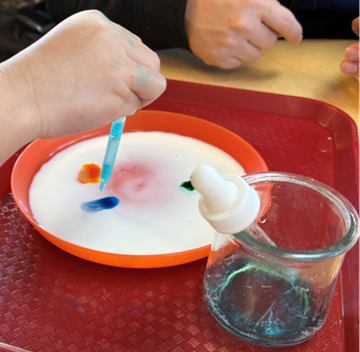
- Drop on a few drops of different food colors, near to each other – they mostly float on the surface of the milk, since the water-based colors are less dense than the milk.
- Using an eyedropper* with dishwashing detergent (Dawn and Joy work well), drip a few drops of detergent onto the food coloring.
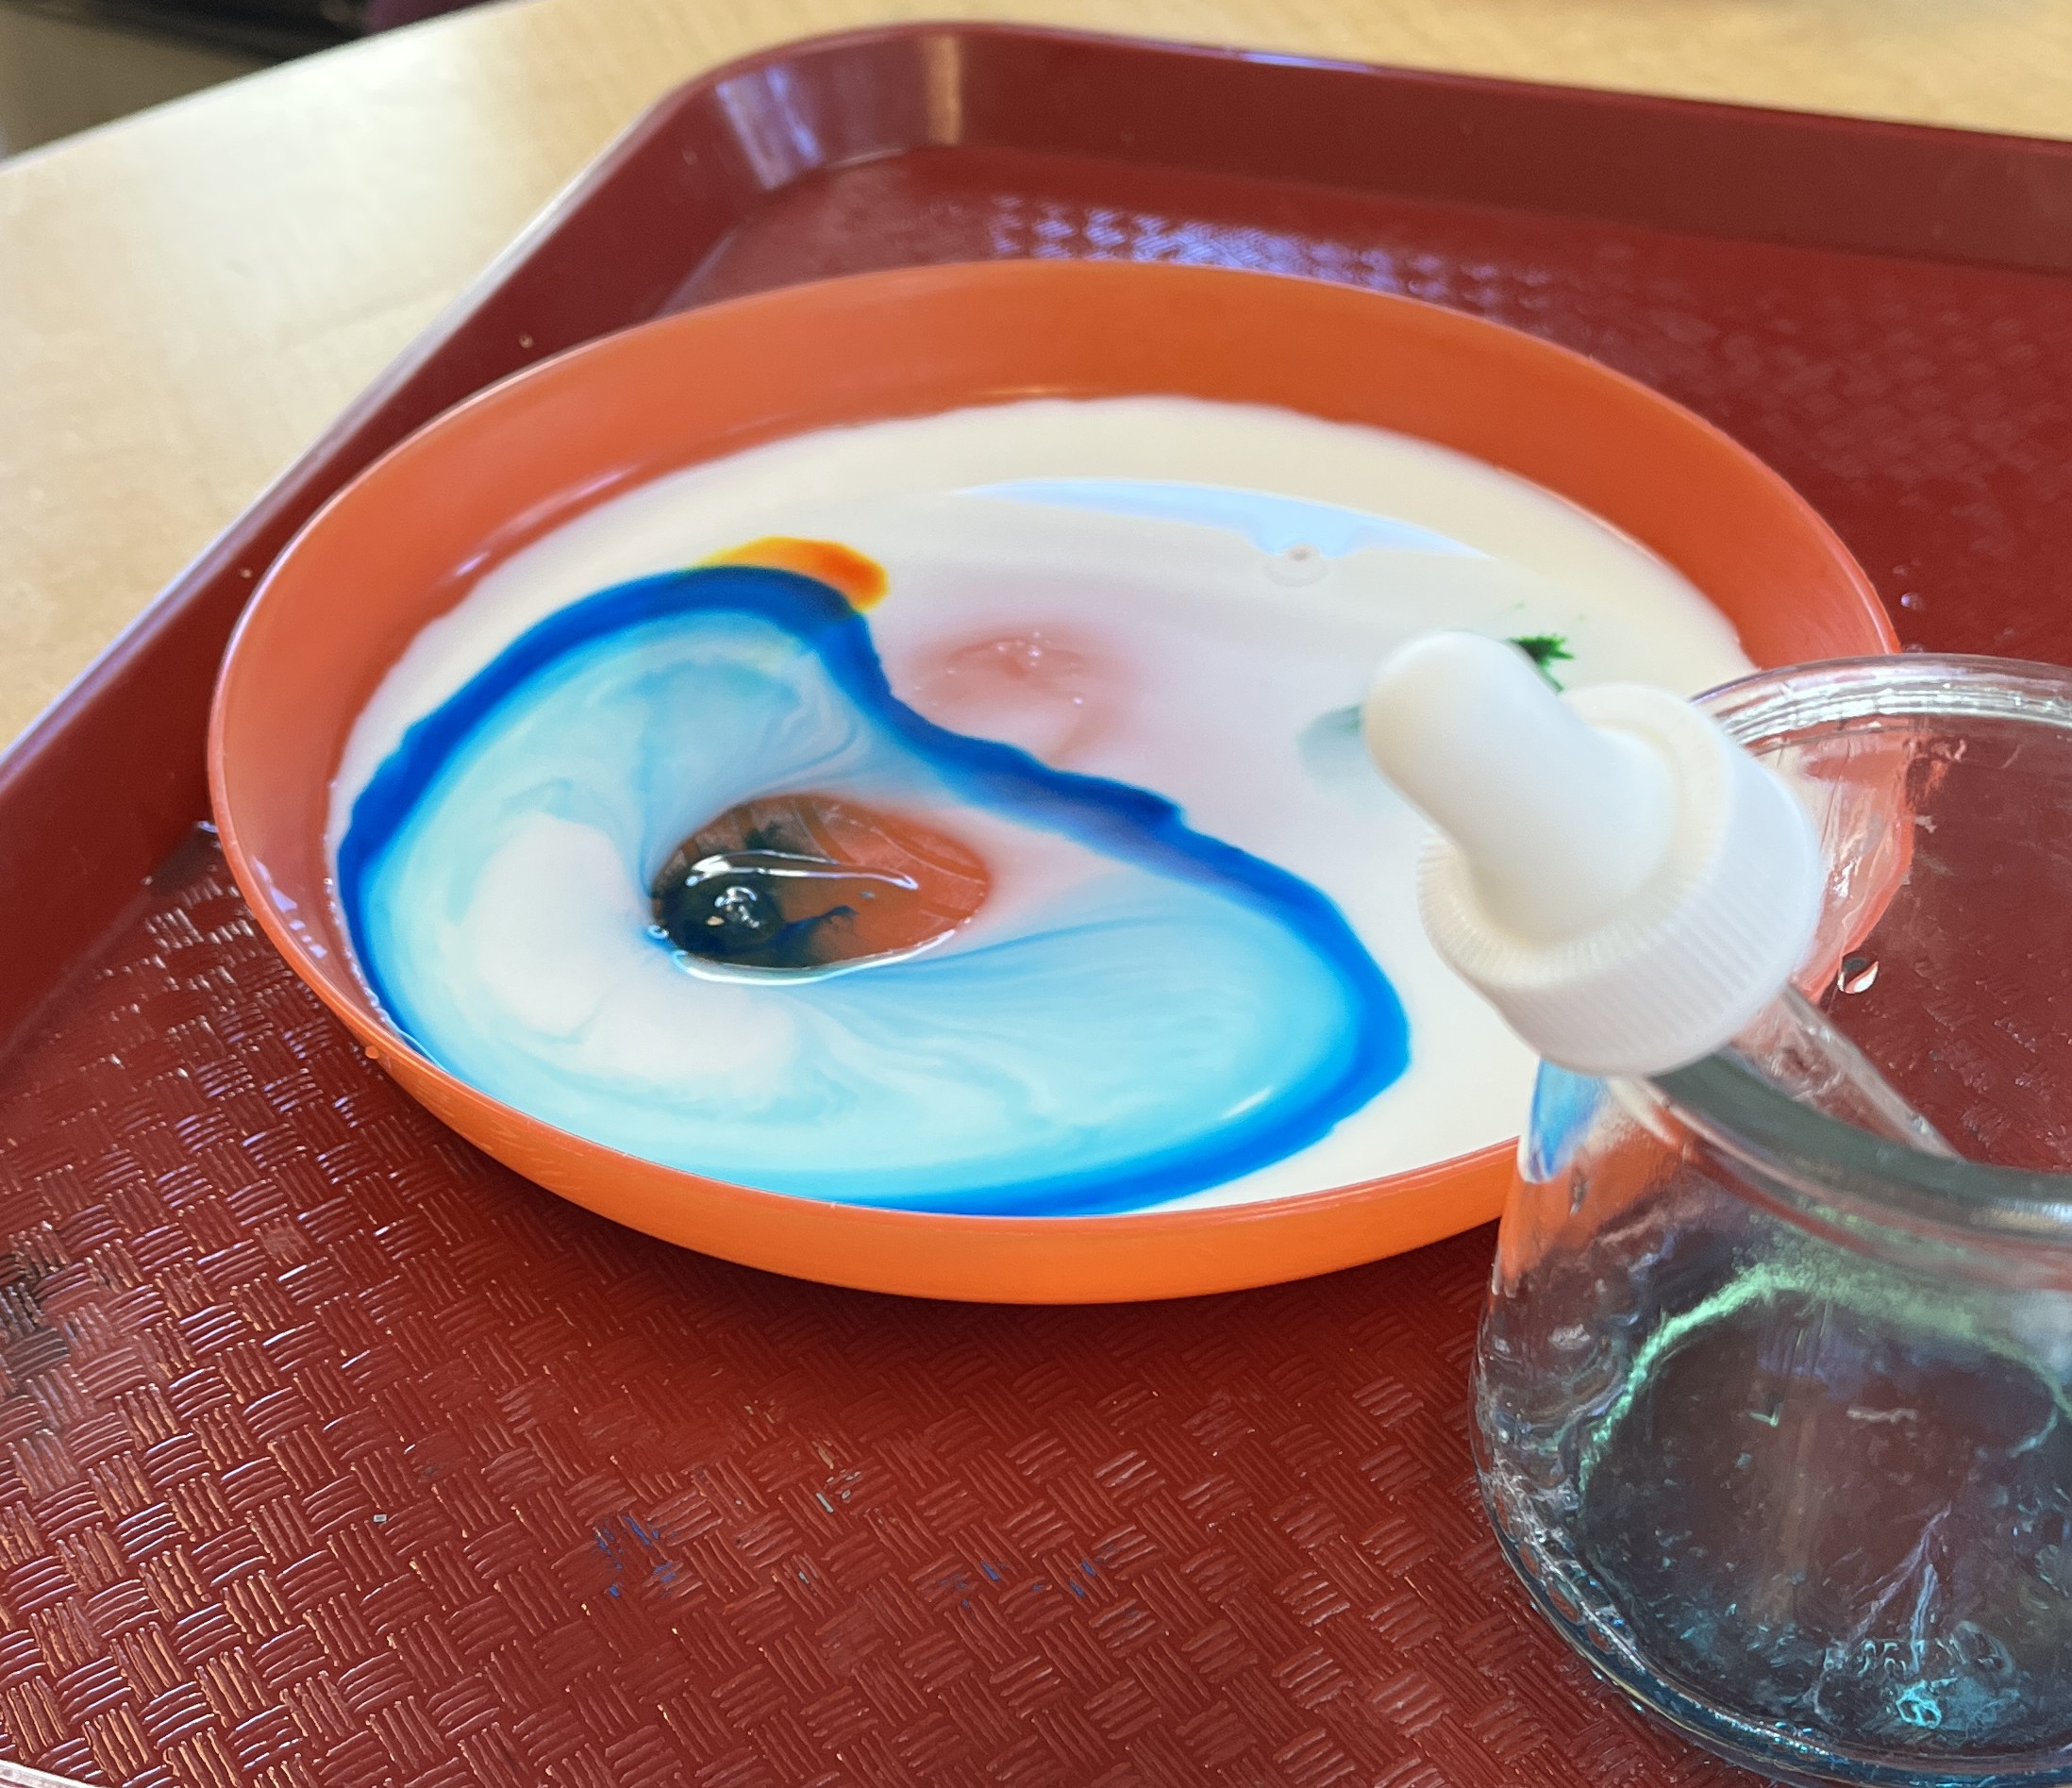
- The colors will fly away from where you added the detergent. (Do a web search for “milk fireworks” to see images or video of the reaction in action!) Once the reaction slows down, drip some detergent somewhere else – a new reaction begins.


*Most online directions use a q-tip instead of an eyedropper – they dip it in detergent, then dip it in the milk near the food coloring. This works fine, if you dip it and hold it there, not moving, waiting for the fireworks to start. We have found that almost all three and four year olds will stick the q-tip in and immediately stir, and this means the firework effect is just nowhere near as dramatic. We get much better results with the eye dropper method.
Steve Spangler explains the science of milk fireworks here.

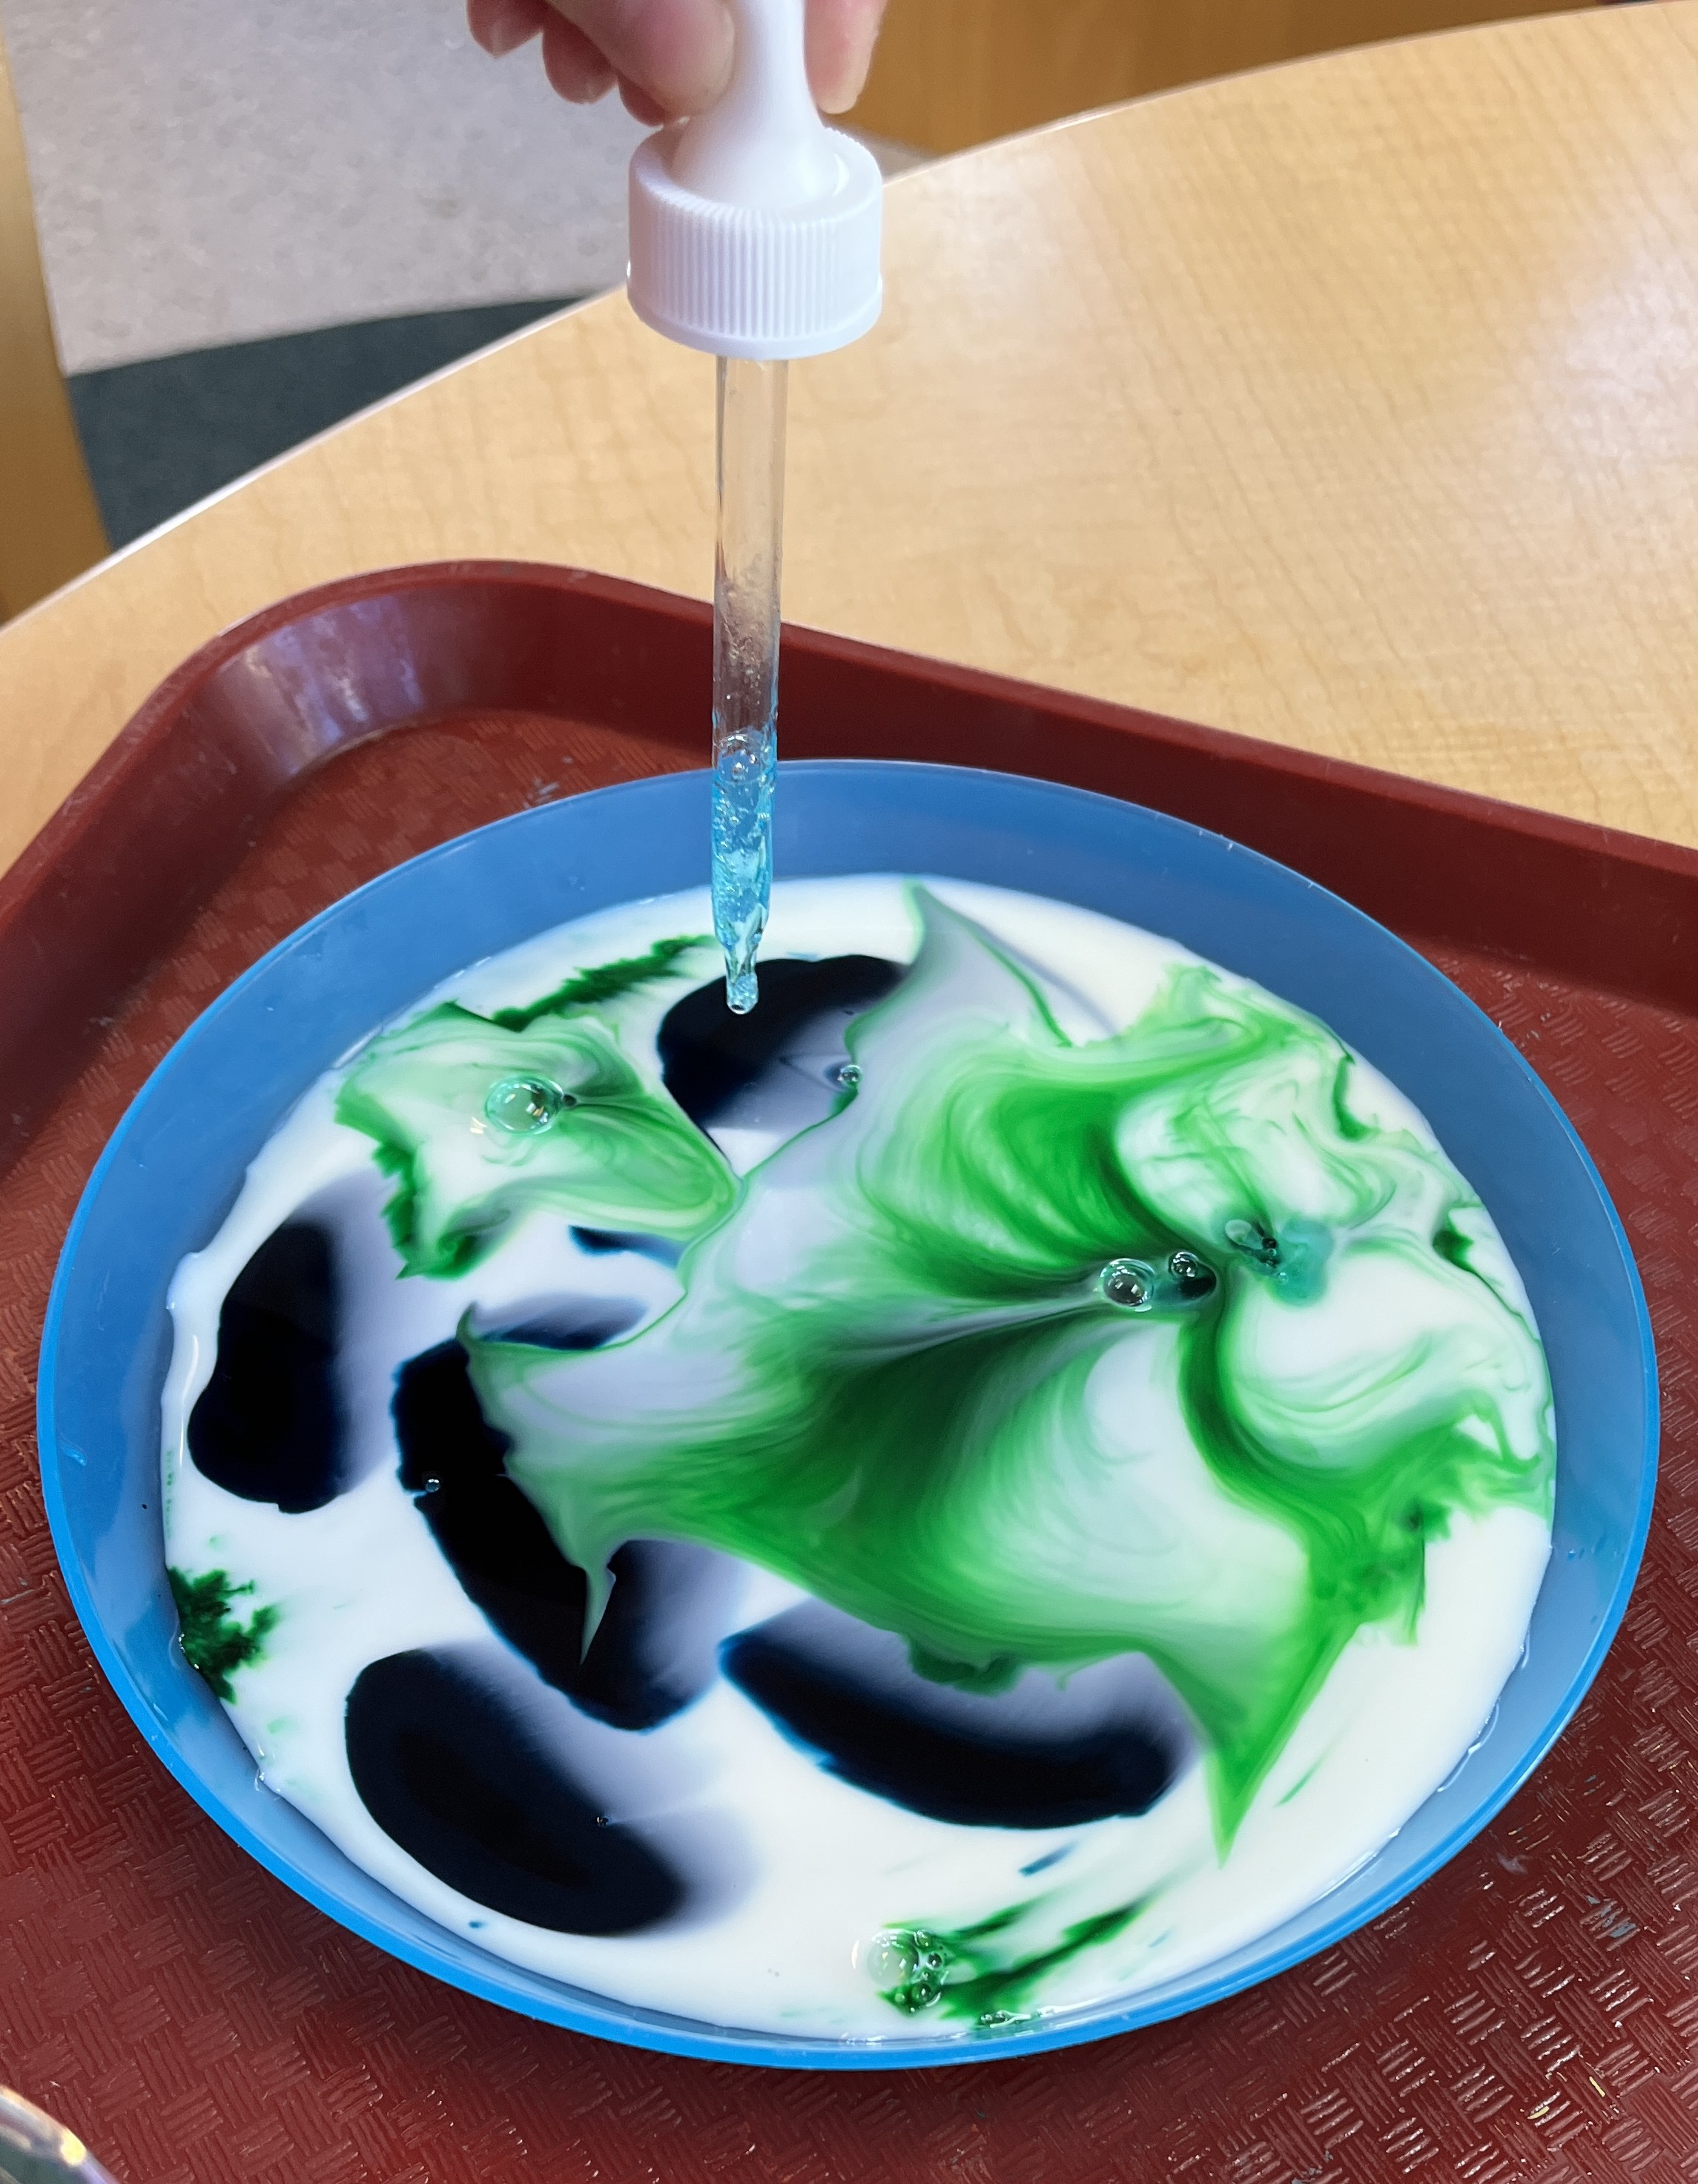
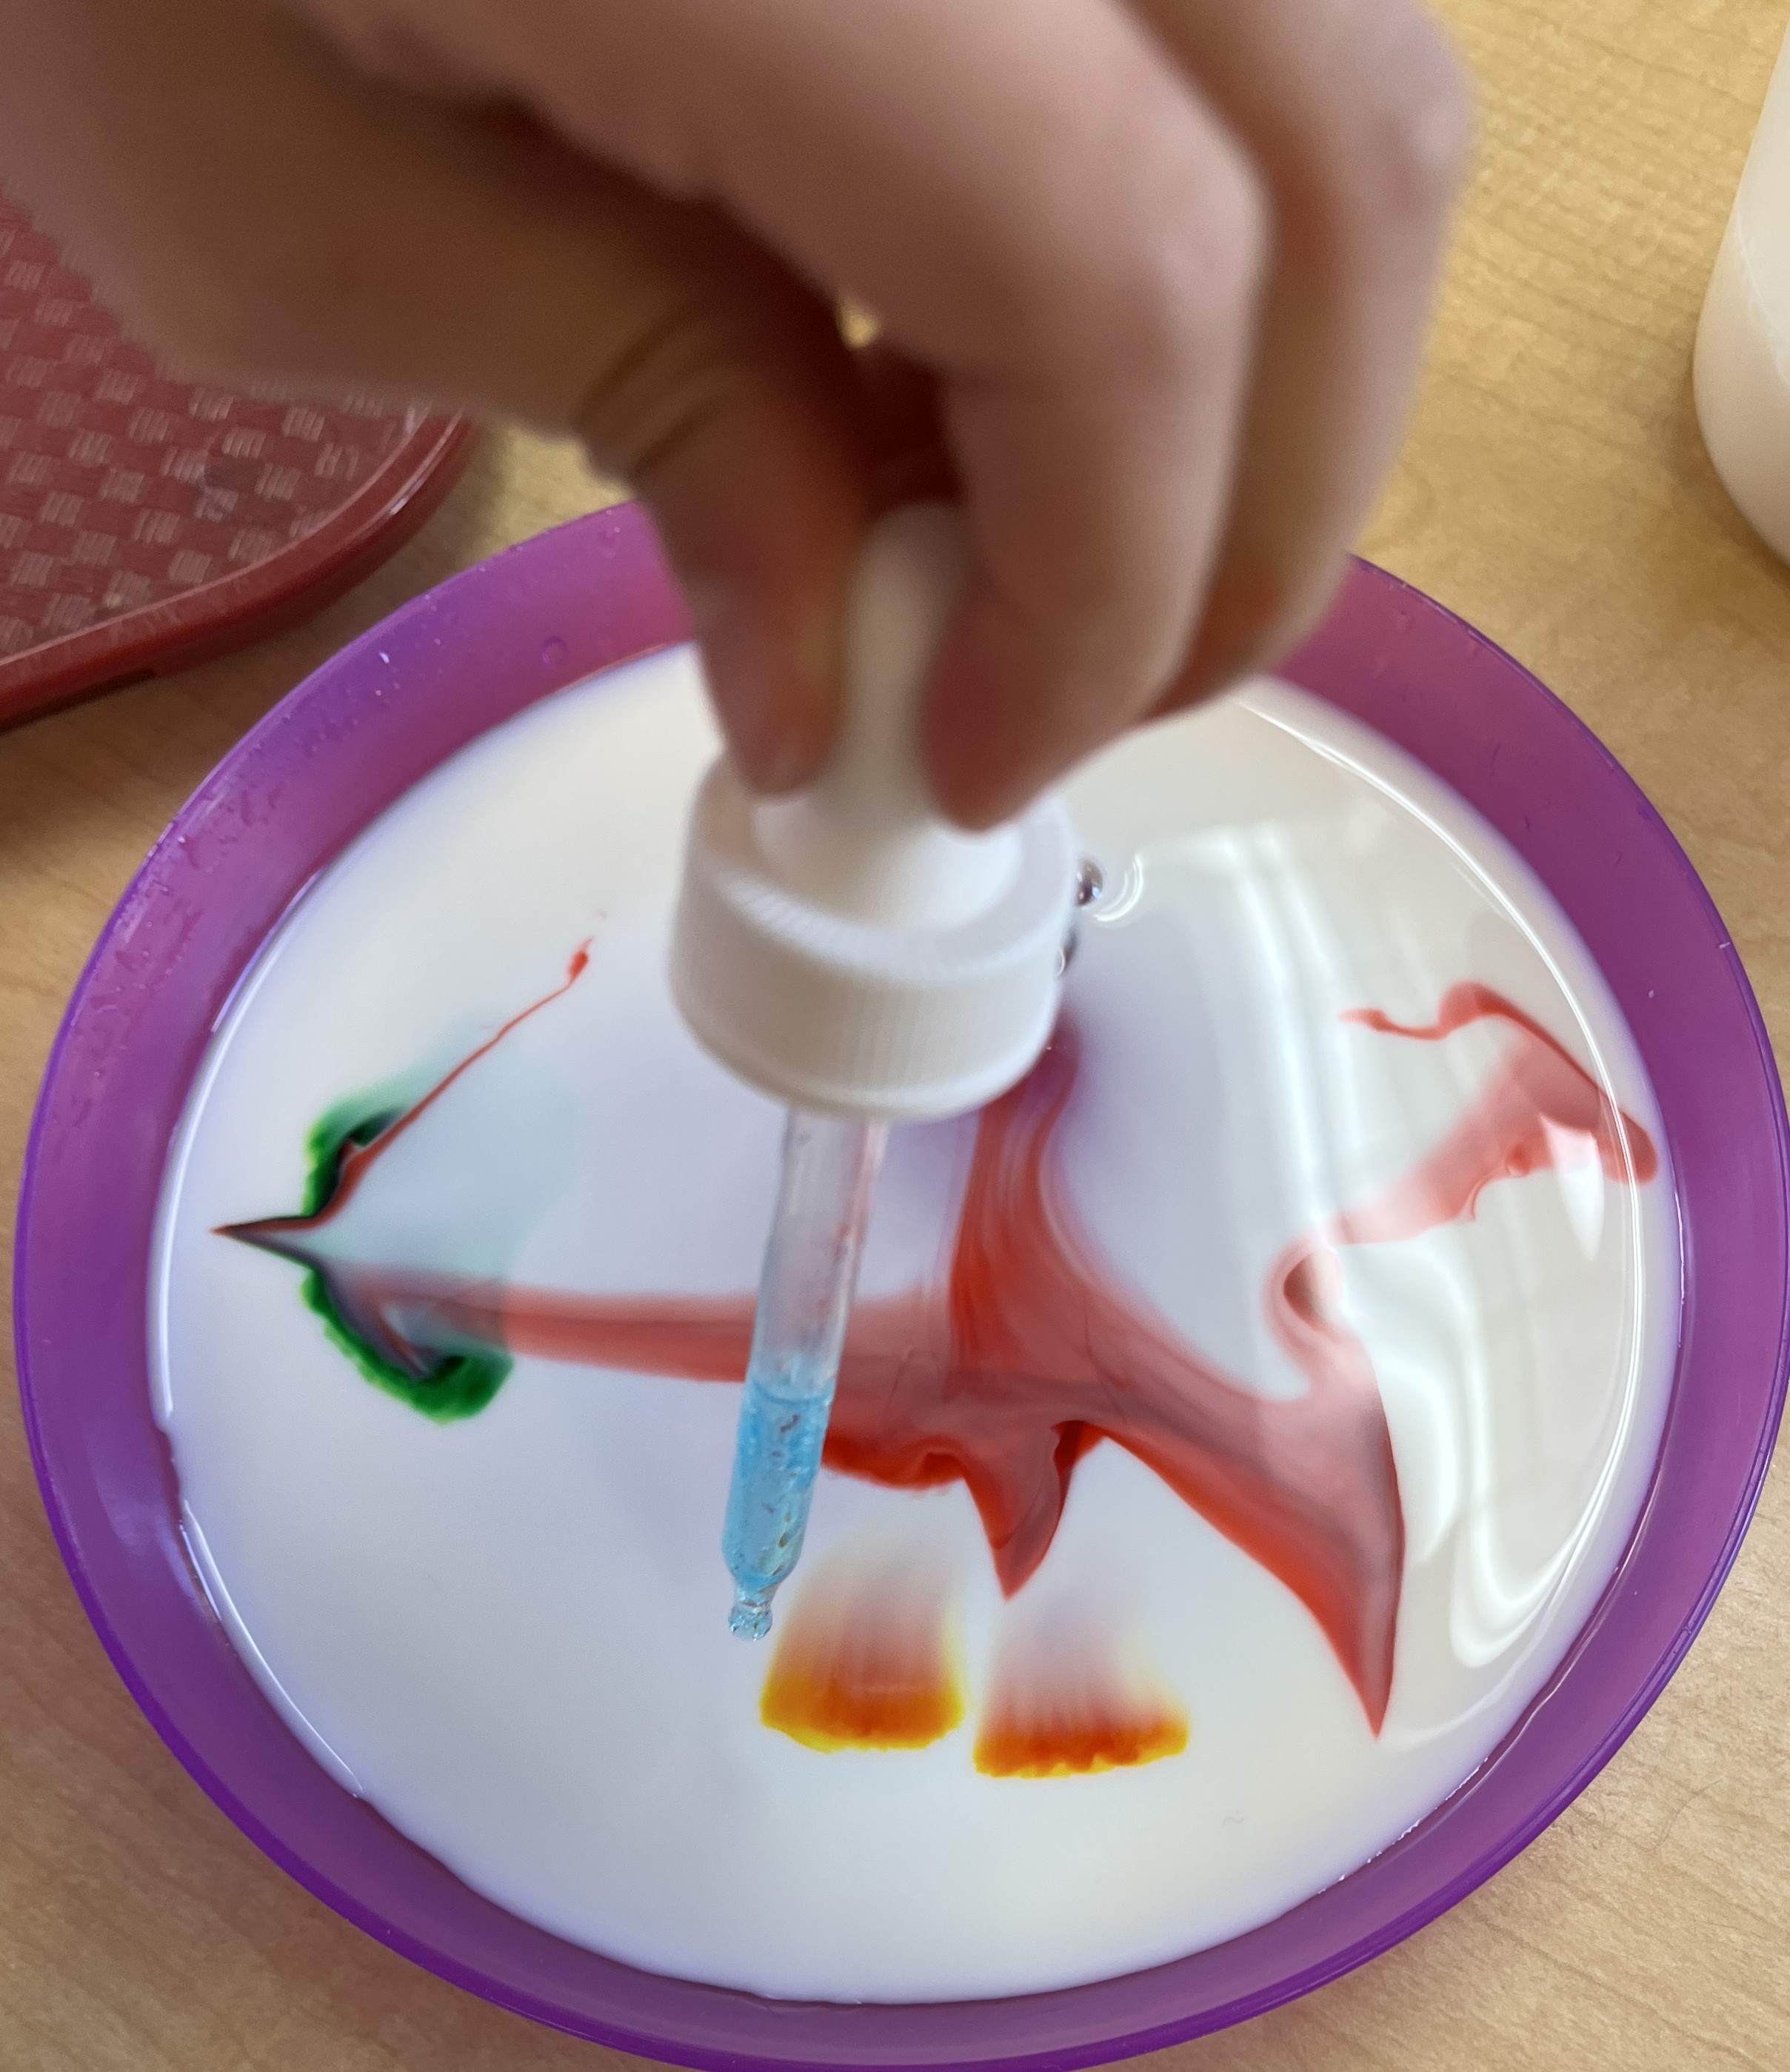

Once the reactions have slowed down, you can gently stir the milk and the colors will swirl around, creating a marbled effect.
Art – paper marbling. You can also capture the results of the milk fireworks in beautiful marbled paper. This works best on an absorbent paper, like watercolor paper, construction paper, or even paper towels. BEFORE you do your milk fireworks, cut out squares of paper that fit well into the container you’ll put the milk in. AFTER you’ve done milk fireworks, take a piece of paper, lay it carefully flat on top of the milk. Press down lightly, just to make sure it’s in contact with the surface of the milk. (Note, children tend to press hard enough to sink it, so be clear in your instructions.) Then lift it off by peeling up from one corner, flipping it over as you do. Set it aside to dry. See pictures at Babble Dabble Do and Childcare Network. You might worry the paper would smell of soured milk later, but we haven’t found that to be the case.

[…] cover them in these posts: States of Matter, Mixtures, Reactions.) Some of our favorites are Slime, Milk Fireworks and Oil and […]
LikeLike