

In this project, you use LED lights, 3V lithium batteries and copper tape on cardstock or index cards to make an artwork that lights up.
Battery Placement:
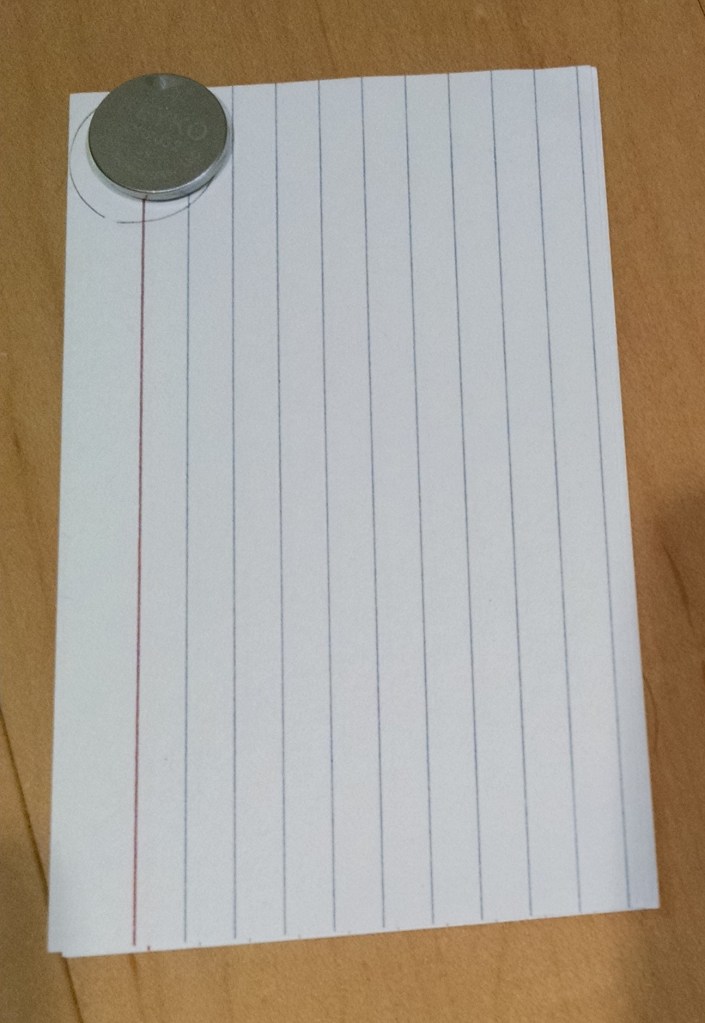
Put the battery in one corner of the card. Trace around it. Now slide the battery toward the center of the card, leaving just a little space between it and the circle you’ve just drawn. Hold the battery in place while you fold over the corner of the card. Then open the fold back up again, and trace around where the battery now sits. Set the battery aside.

Drawing
Decide what you want to draw. Think of something that could have one light in the design to light it up.* Lightly sketch your drawing.

Adding the Light:
Use a pen to poke a hole where you want the light to be. Choose a lightbulb. Push the “legs” of the bulb through the hole. Open up the “legs” so they lay flat on the back of the card.

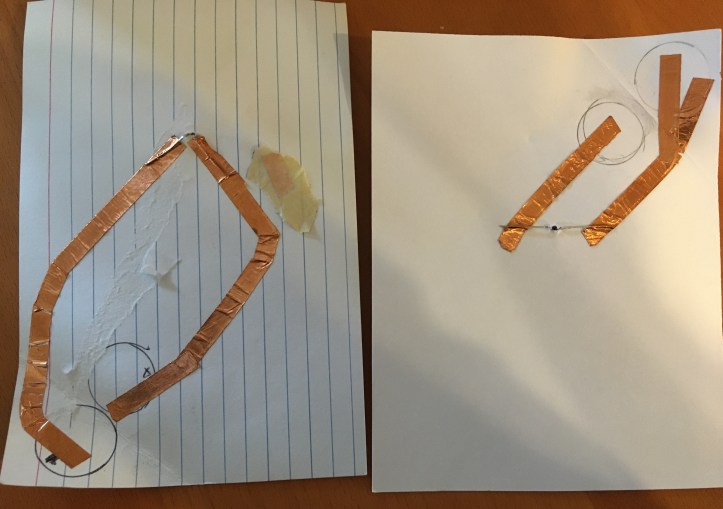
Create a tape circuit.
Use copper tape to tape one leg down, then run that tape over to one of the circles. Keep it flat! Use a second piece of copper tape to tape the other leg down, and run the tape over into the other circle. Be certain the two pieces of tape don’t touch each other!

Close the Circuit:
Place a battery on the inner circle so it’s on top of the copper tape. Fold the paper over, so the other tape touches the other side of the battery. That creates a closed circuit. Is your light shining? If not, flip your battery over and try again. (The positive and negative sides of the battery needs to connect to the correct legs on the light to light it up.) When it’s shining, use a clip to hold the battery in place.


Note: We do this as a parent-child project with preschool and kindergarten age children, and definitely the parents need to help to make it work well. It definitely takes some planning to line it up right. Although this is not what is shown in the pictures below, I might recommend that in step 2, you just sketch out the drawing with a light pencil, then when you’ve laid out the plan for the tape placement and light placement and know it works, you can go back to finalizing the art work and coloring it in, then assemble everything.
* If you need inspiration for designs, I made up this PDF that shows ideas for designs such as a light at the top of a Christmas tree, or on a menorah, or a Diwali lamp, or a Valentines’ card or birthday card. Or a firefly or angler fish.
If you don’t have copper tape, or it’s damaged, then in theory, you can make a connection using a pencil. Pencil lead is graphite, which conducts electricity. So, instead of the tape, take a pencil and draw a very thick, heavy line where the tape should be. Look up “graphite circuits” for more ideas. I have not had great luck with this.
Safety note: COIN BATTERIES ARE DANGEROUS IF SWALLOWED, so keep this away from small children who might mouth the battery.
If you’d like more fun activities for an electricity theme for a kids’ STEM class, check out our full Electricity lesson plan.
