
I recently joined a Facebook group called Flisat Table Simple Set-Ups. (The Flisat is a table from IKEA that can combine with Trofast storage bins or trays and some optional hacks to make a sensory bin. But it’s mostly sensory bin ideas that could work in any container.)
Often when someone posts a cute idea there (or on Instagram or elsewhere), all the comments are basically “where can I buy the supplies to make a set-up exactly like yours?”
This post is to encourage you to try a different approach when scrolling through sources for sensory bin ideas. Ask: “what general lessons can I learn from these examples? How can I use these examples as inspiration for things I could do that:
- don’t require me to buy new stuff,
- use toys my child already enjoys and
- follow my child’s interests of the moment?”
Rather than focusing on appearance and how Instagram-worthy your set-up is, I encourage you to think about what your child will DO with the set-up. So below I share suggestions about: imaginary play, pouring into containers, putting things into holes, (“feed the kitty”), sorting, hunting and matching, calls to action, collage and crafts, I’ll look at how combining toys and the sensory bin increases the appeal of both, keeping it simple and what does and doesn’t mix well.
Getting Started
If you’re new to sensory play, check out my “Ultimate Guide to Sensory Tables” that gives all the basics. (And my post on teaching your child how to use a sensory bin without making too much of a mess.) The key concept is a mix and match, where you choose one item from each column:
- what sensory material will you use (e.g. rice, beans, shredded paper)
- what tools will they use to scoop, pour or move things about; what containers will they pour into or sort into
- are there add-ins that would make play even more engaging
In this post I’ll share specific examples* from the Flisat Facebook group to illustrate bigger ideas.
What will they do?
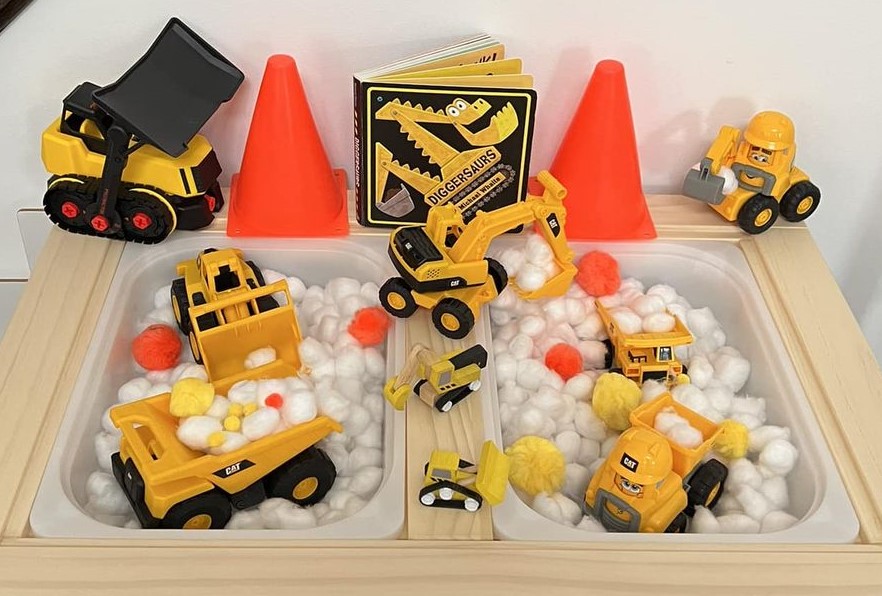
One of the first things to consider is how a child will interact with the bin. If you just have sensory material (e.g. rice) and nothing else, they sometimes stir it around with their hands for a minute and wander off. If you add a scoop, but no containers, they’ll want to transport the rice somewhere – that usually means dumping it on the floor. If you have a scoop and a container, they’ll usually scoop rice into the container till it’s full, dump it back in the bin and do it again. If you have larger items like rocks scattered in and a container, they’ll gather larger items and put them in the container, then pour rice over them. If you have rice, scoops, toy dump trucks, cardboard ramps and rocks, you’ve got a construction site! They’ll use scoops to fill the trucks with rice and rocks, drive them up and down the ramps, dump them, and go back for more.
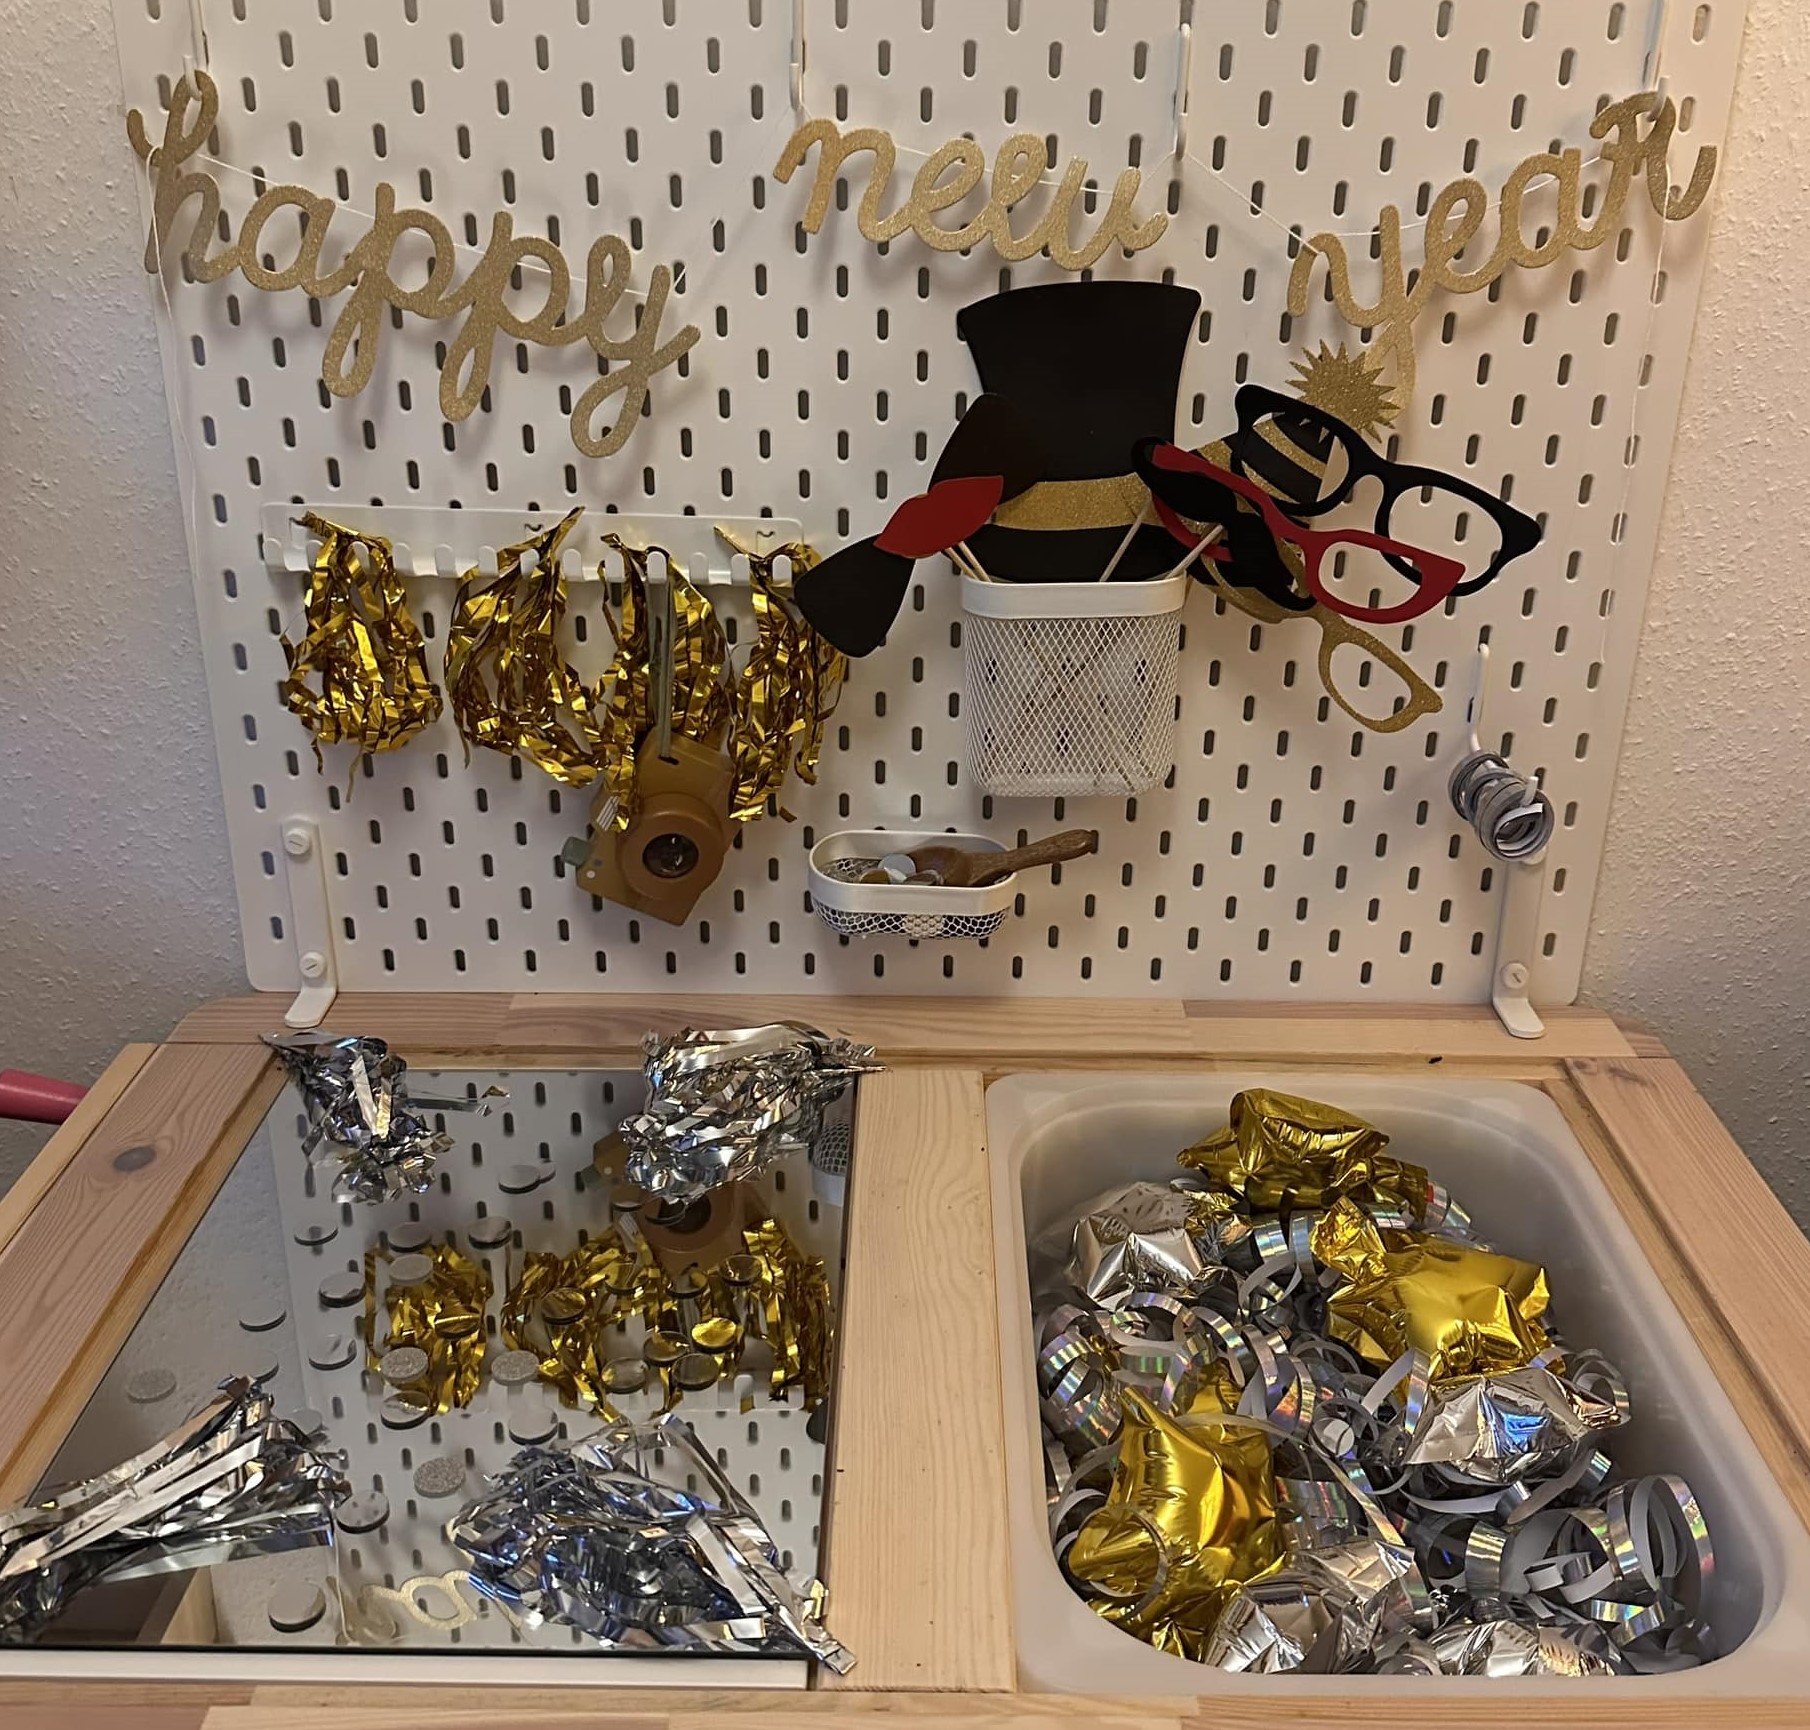
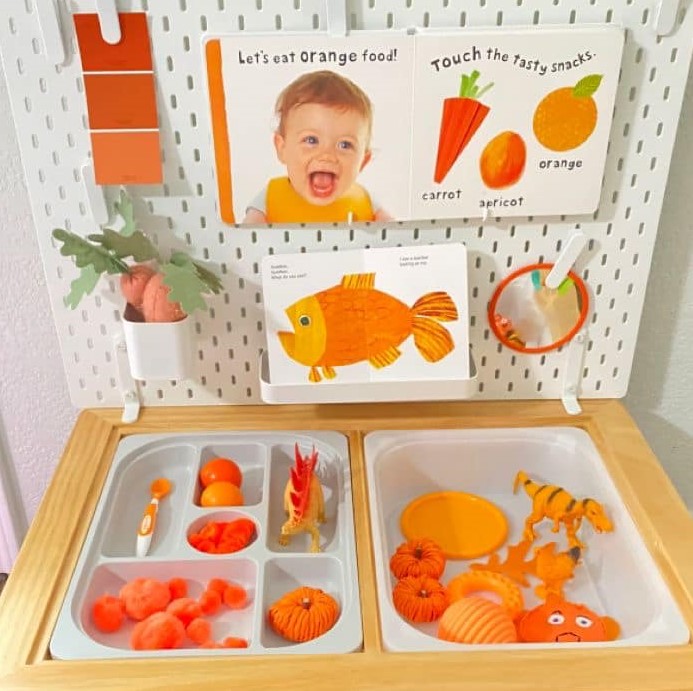
Here are some examples of sensory bins which are lovely, but to me, it’s not clear what a child would do with it, rather than move things back and forth a bit and quickly move on. After you set up a bin, ask yourself: could I create an interesting call to action here that could extend the play time?


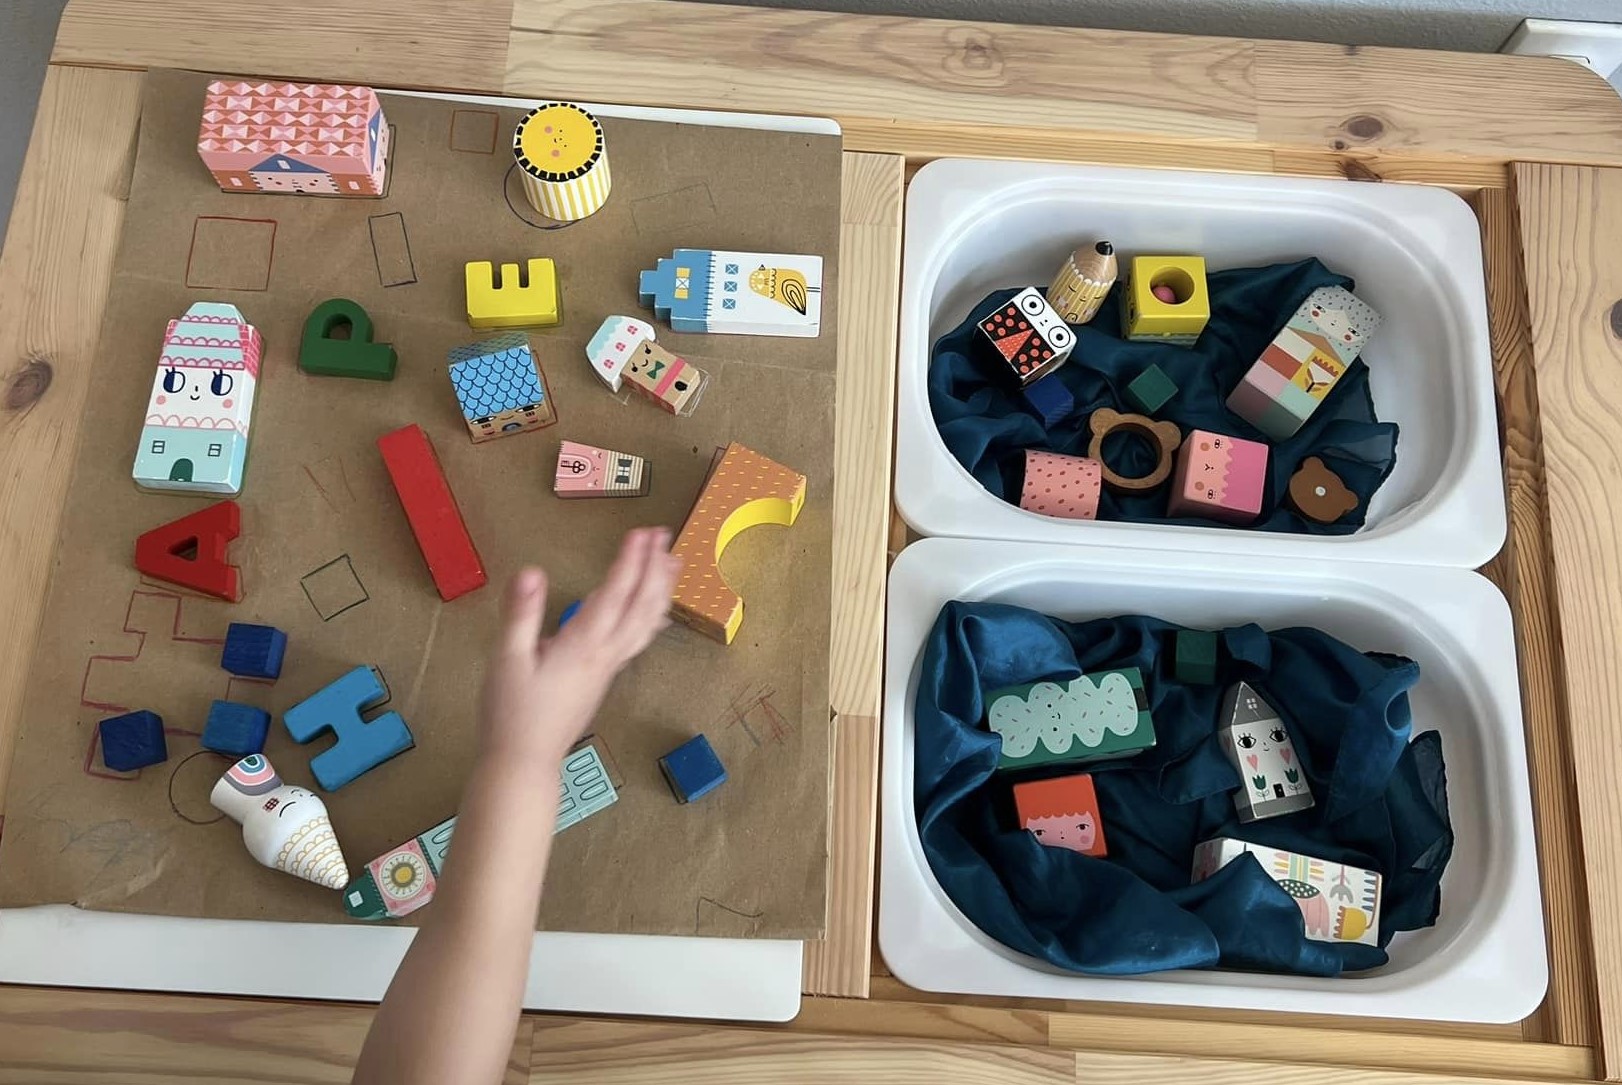
Small World Imaginary Play?
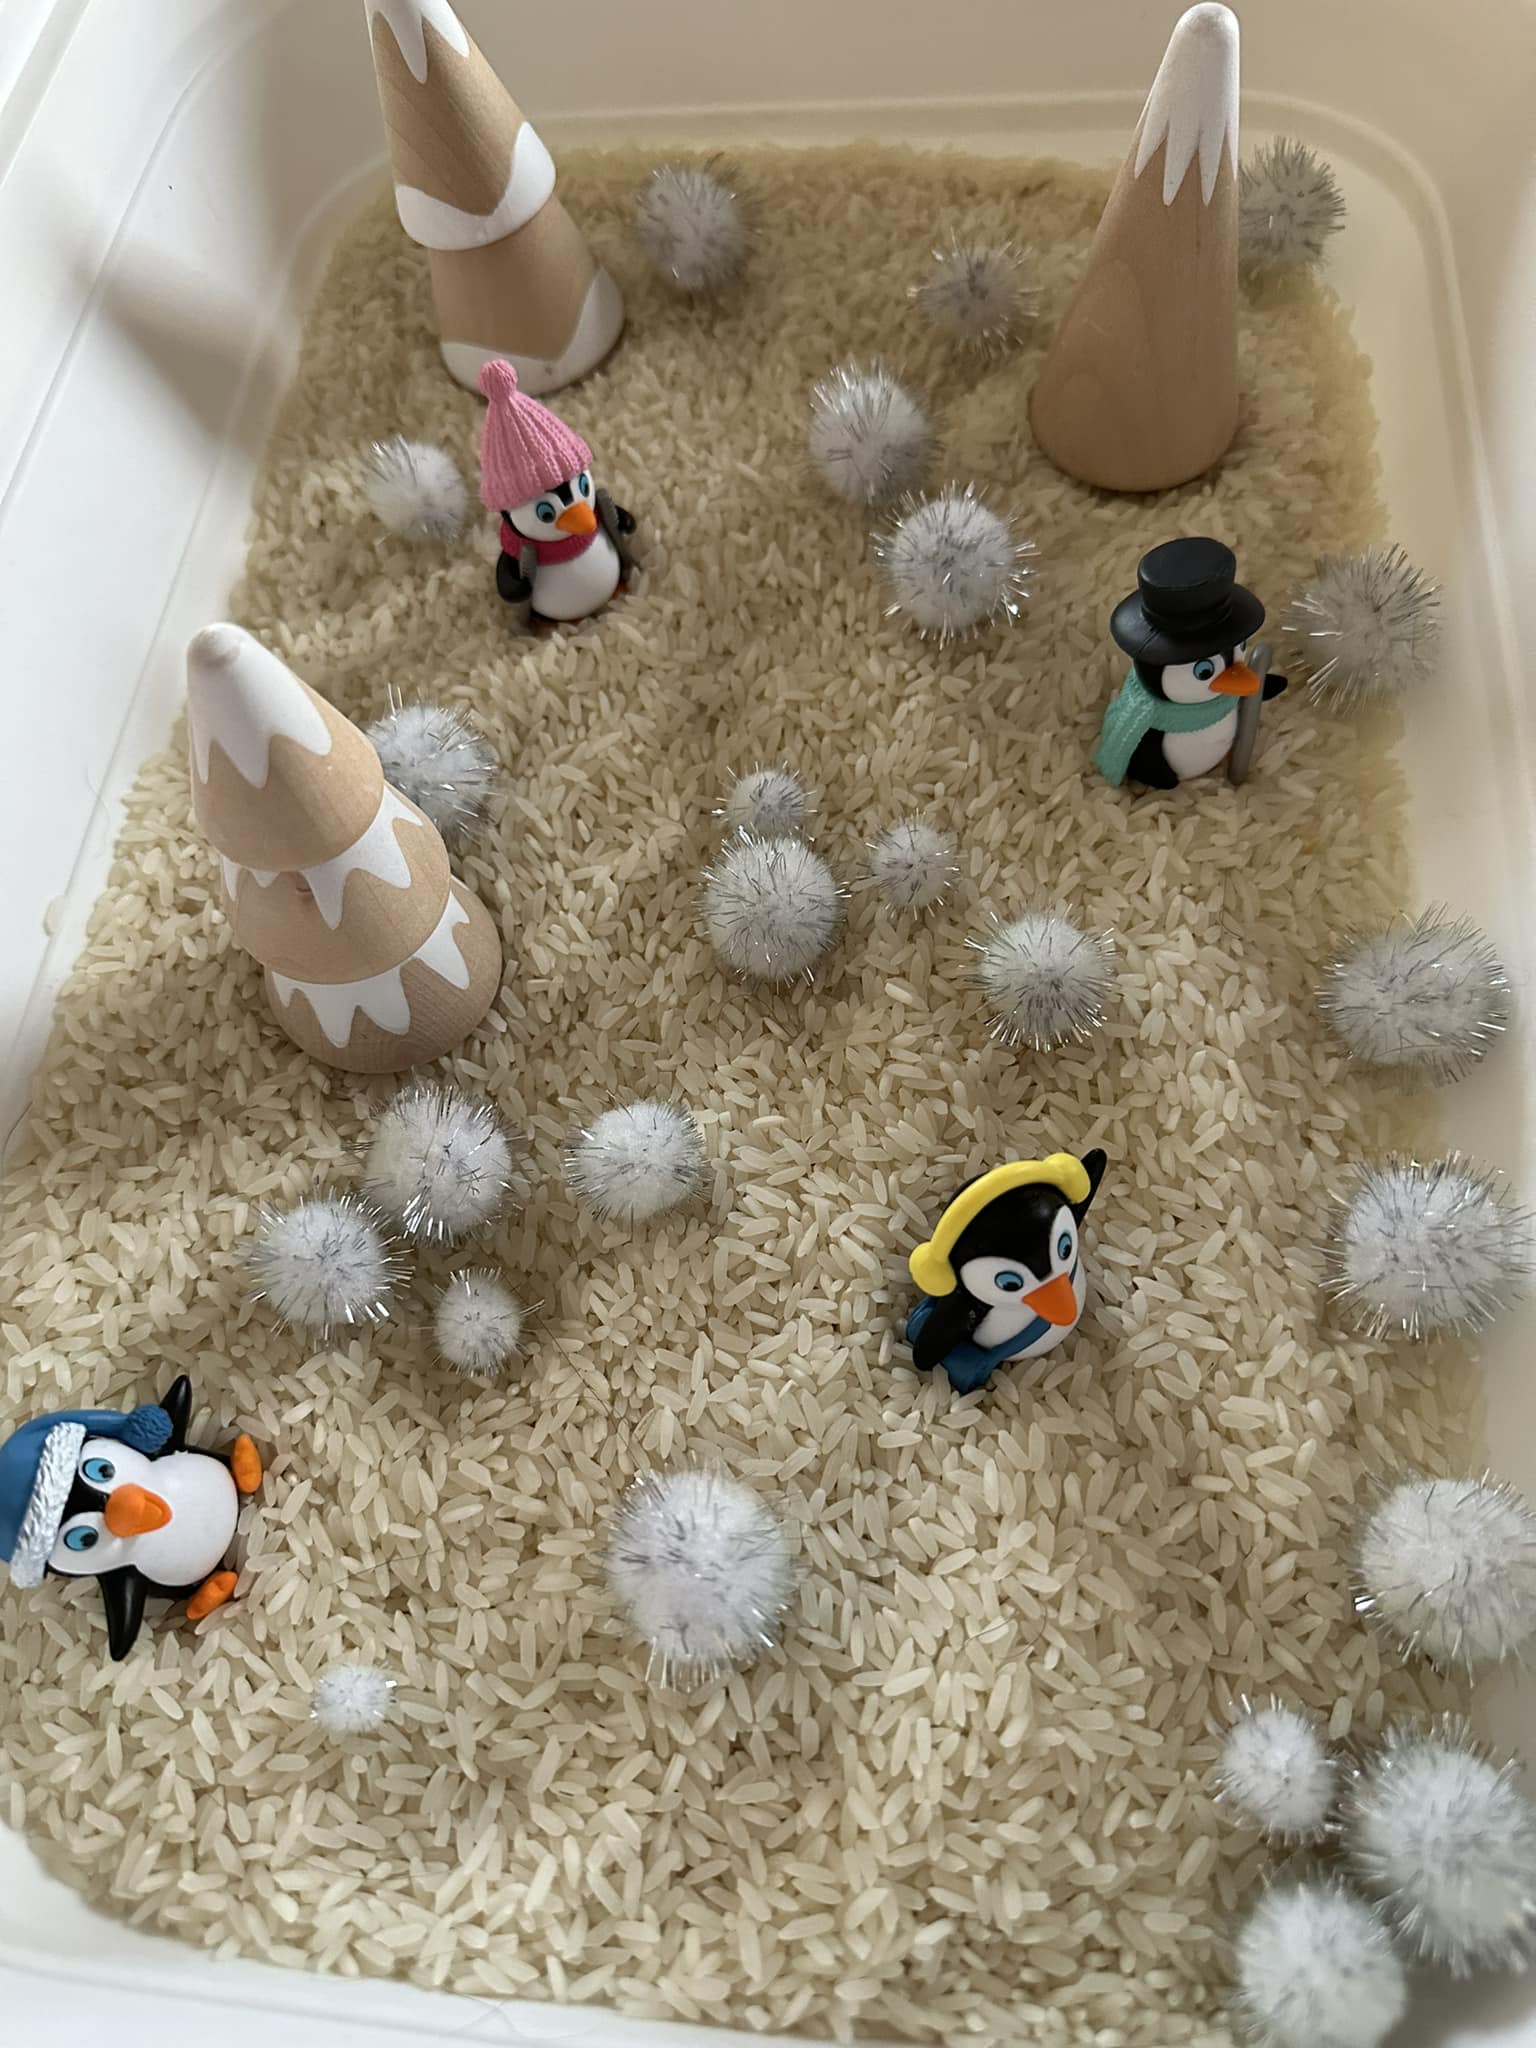
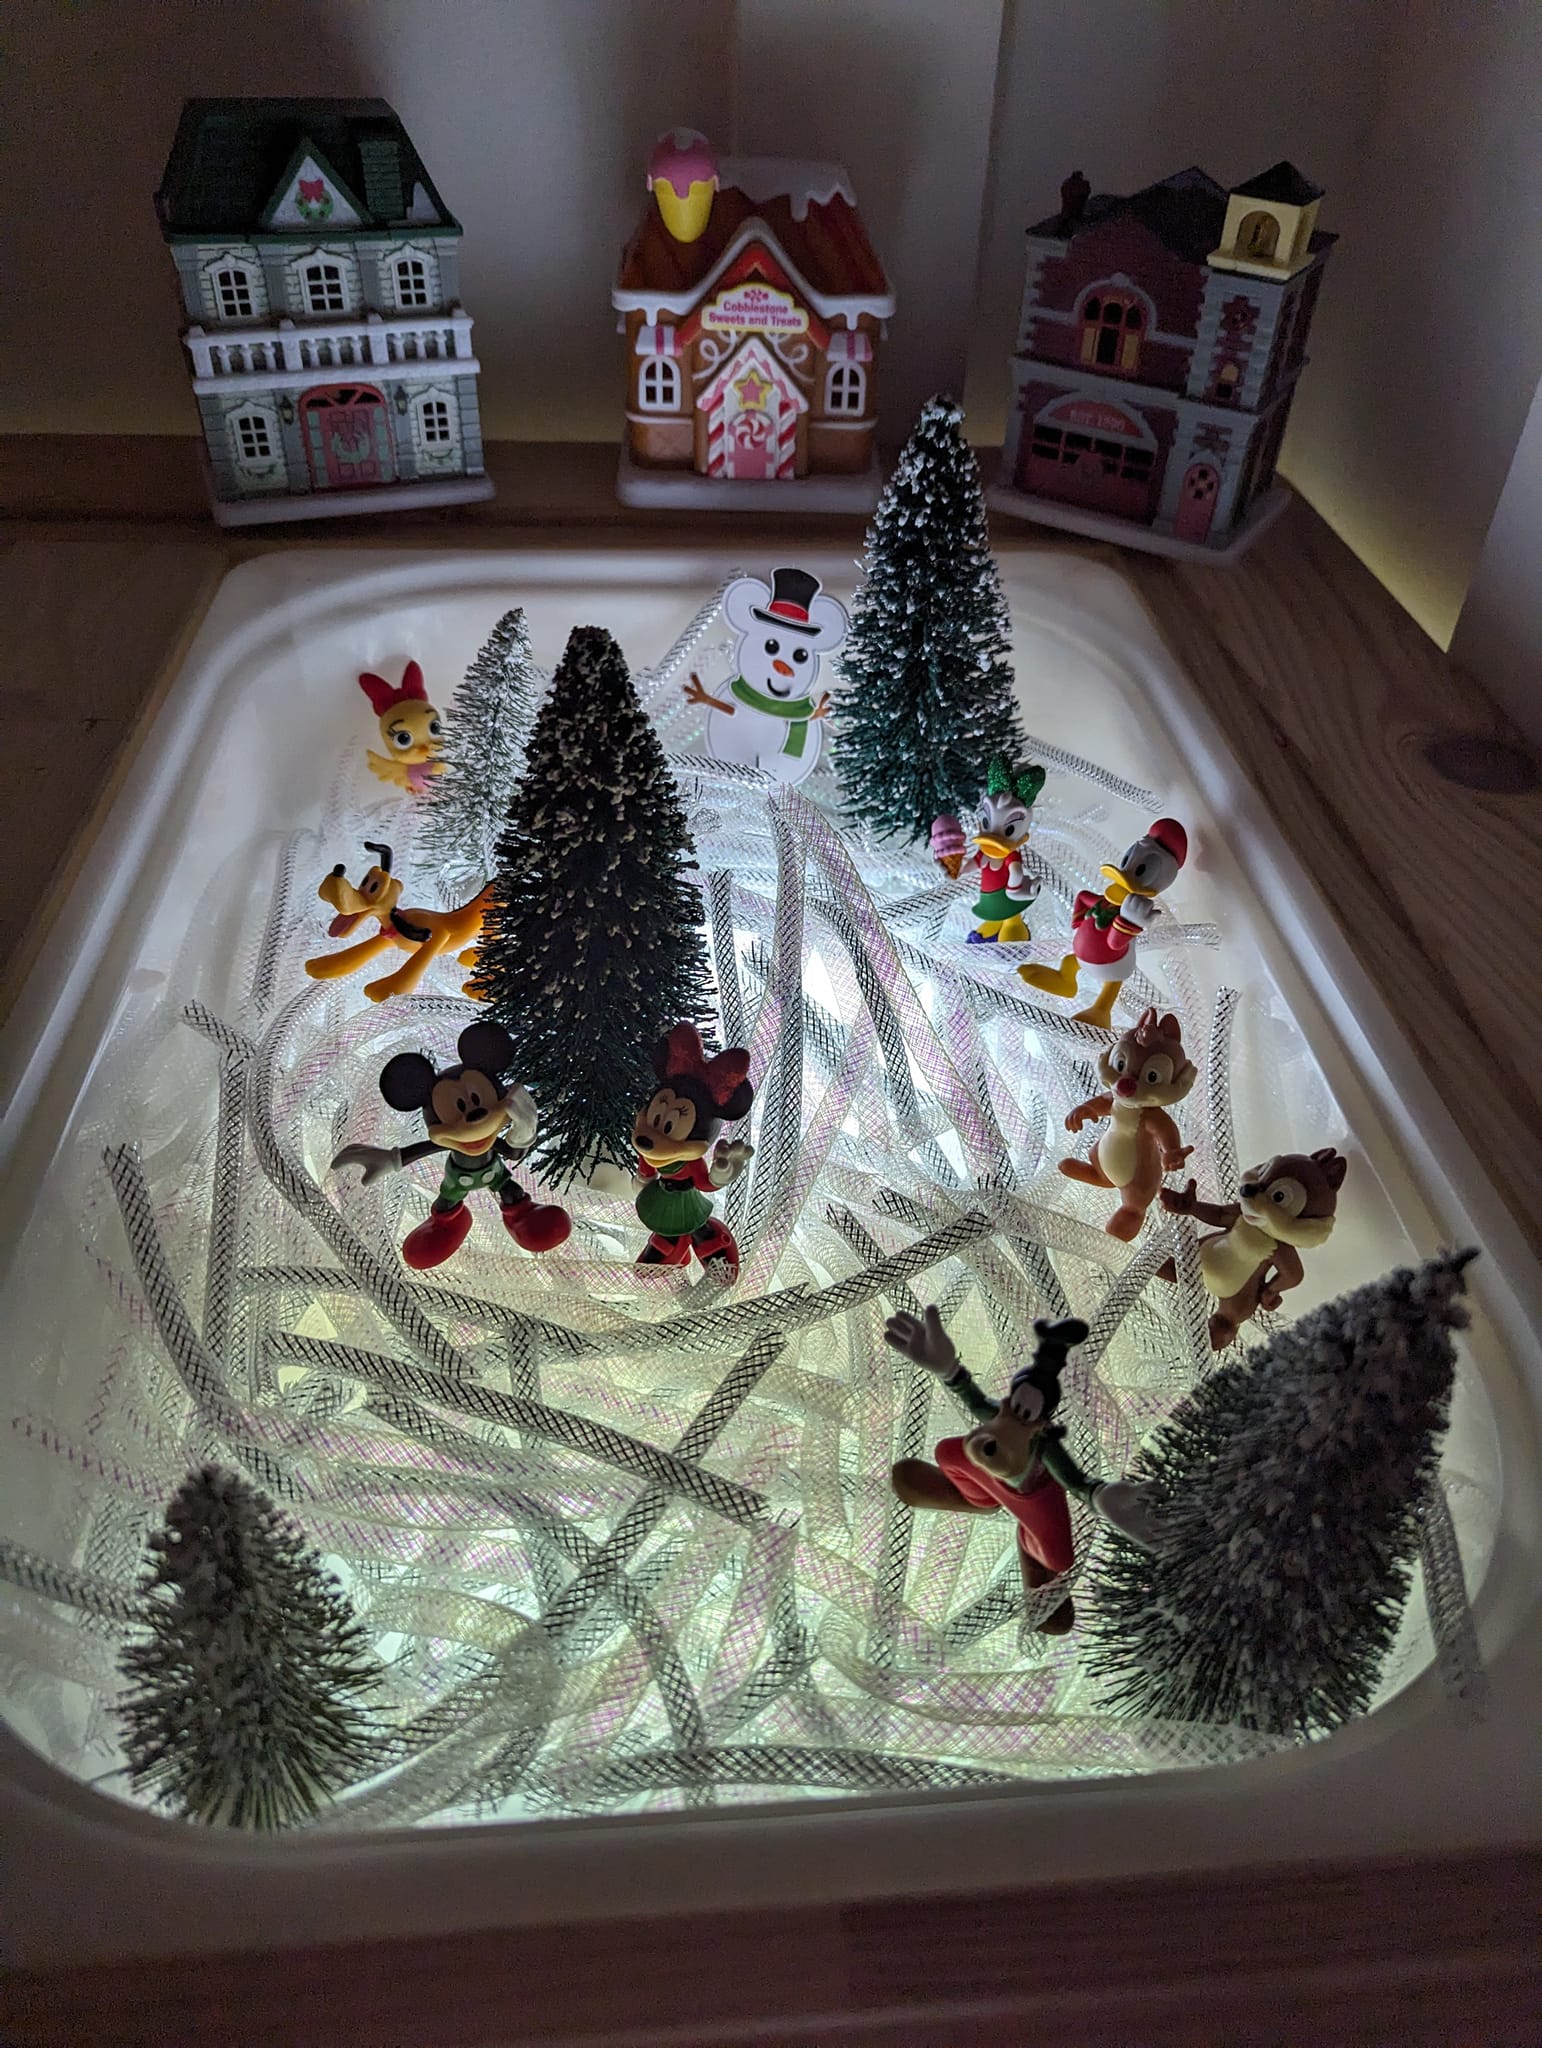
These bins with props and characters are an interesting case… IF your child loves imaginary play and will take these characters and have them talk to each other and have adventures, this could be a great fit that would engage them for a long time. My youngest did not do imaginary play at all. (This is common amongst neurodiverse kids.) So, for him, these bins would have counted as “nothing to do but move pieces around.”

So, for all the kids in my classes, even when I’m doing an imaginary play bin, I try to also include concrete actions to do. Here are some actions you could include:
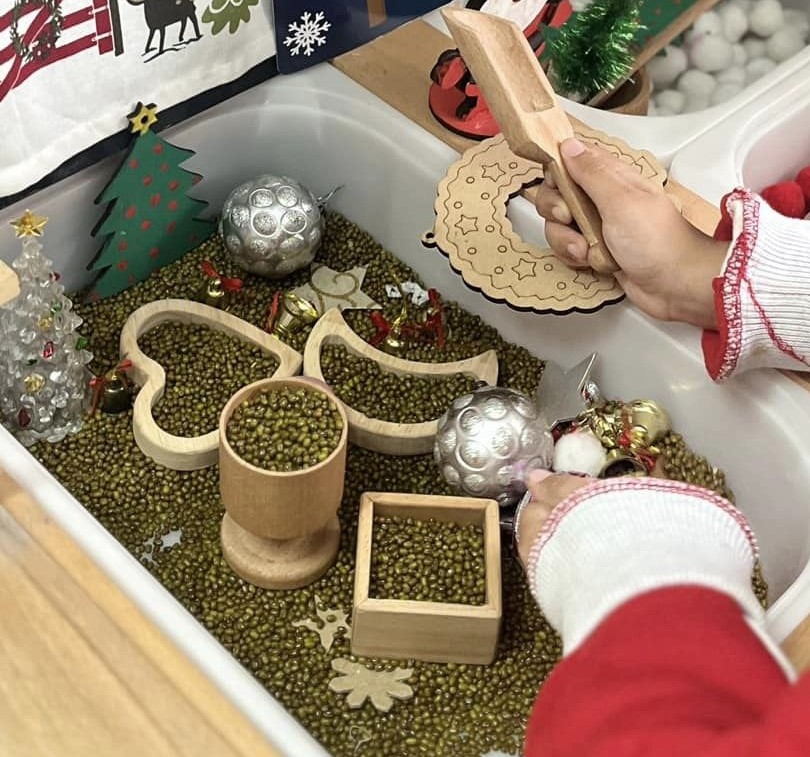
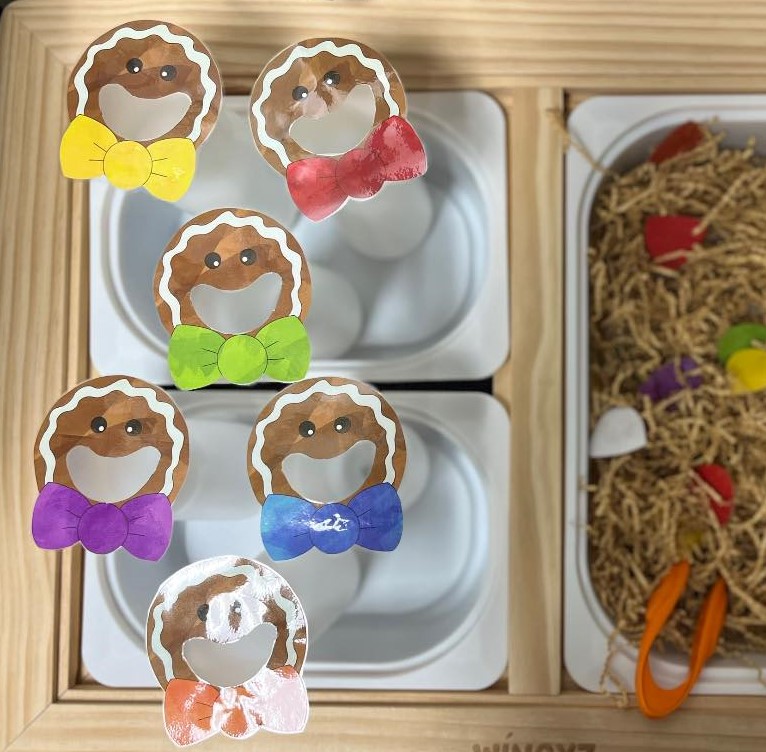
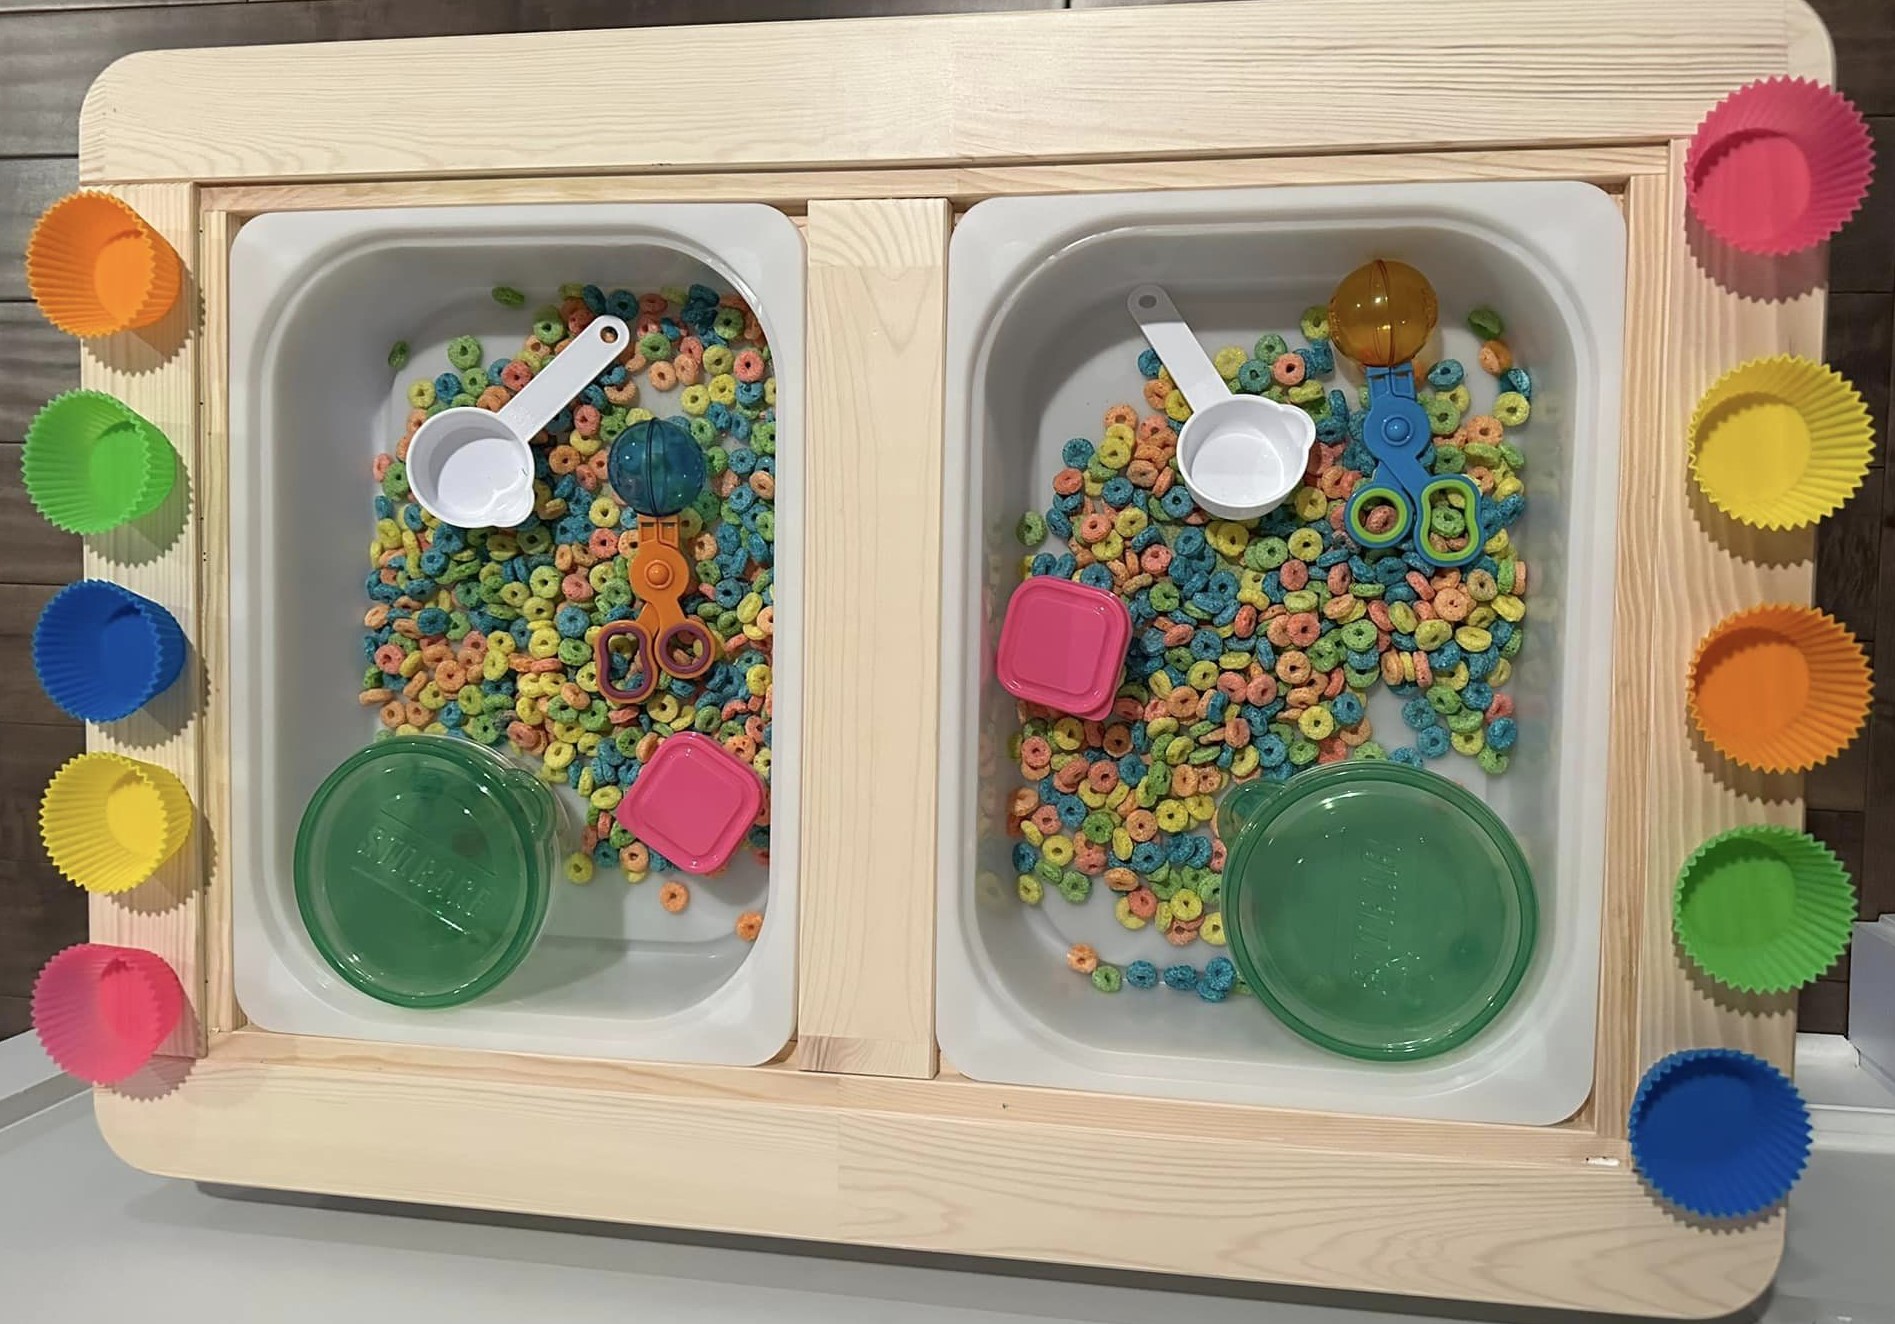
Pour into in a container
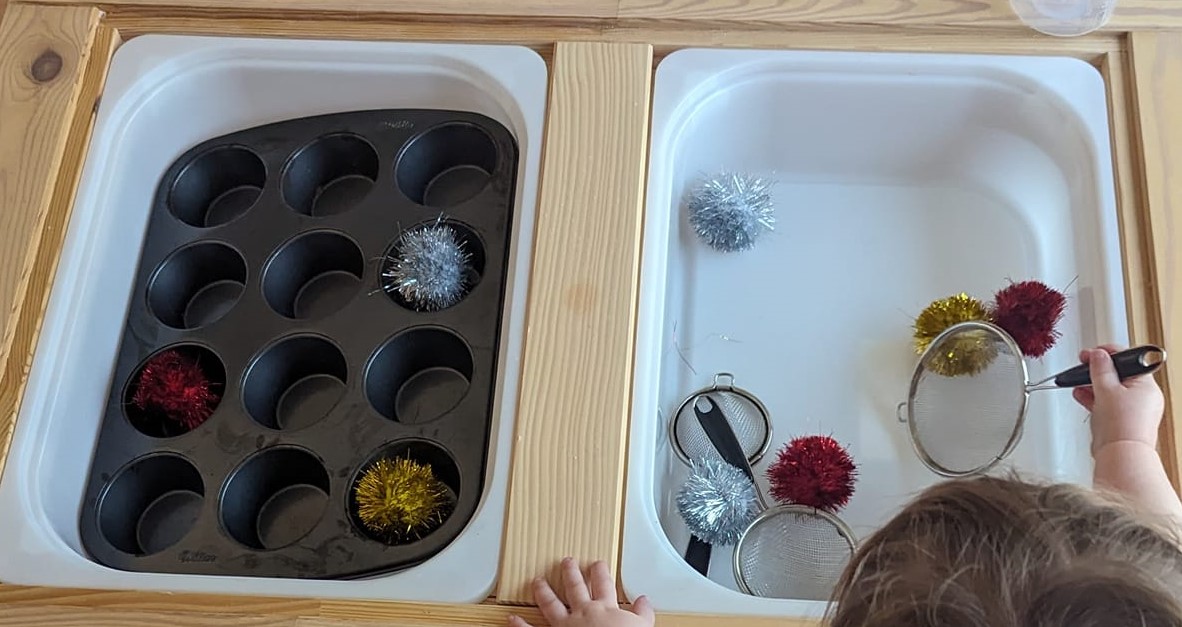
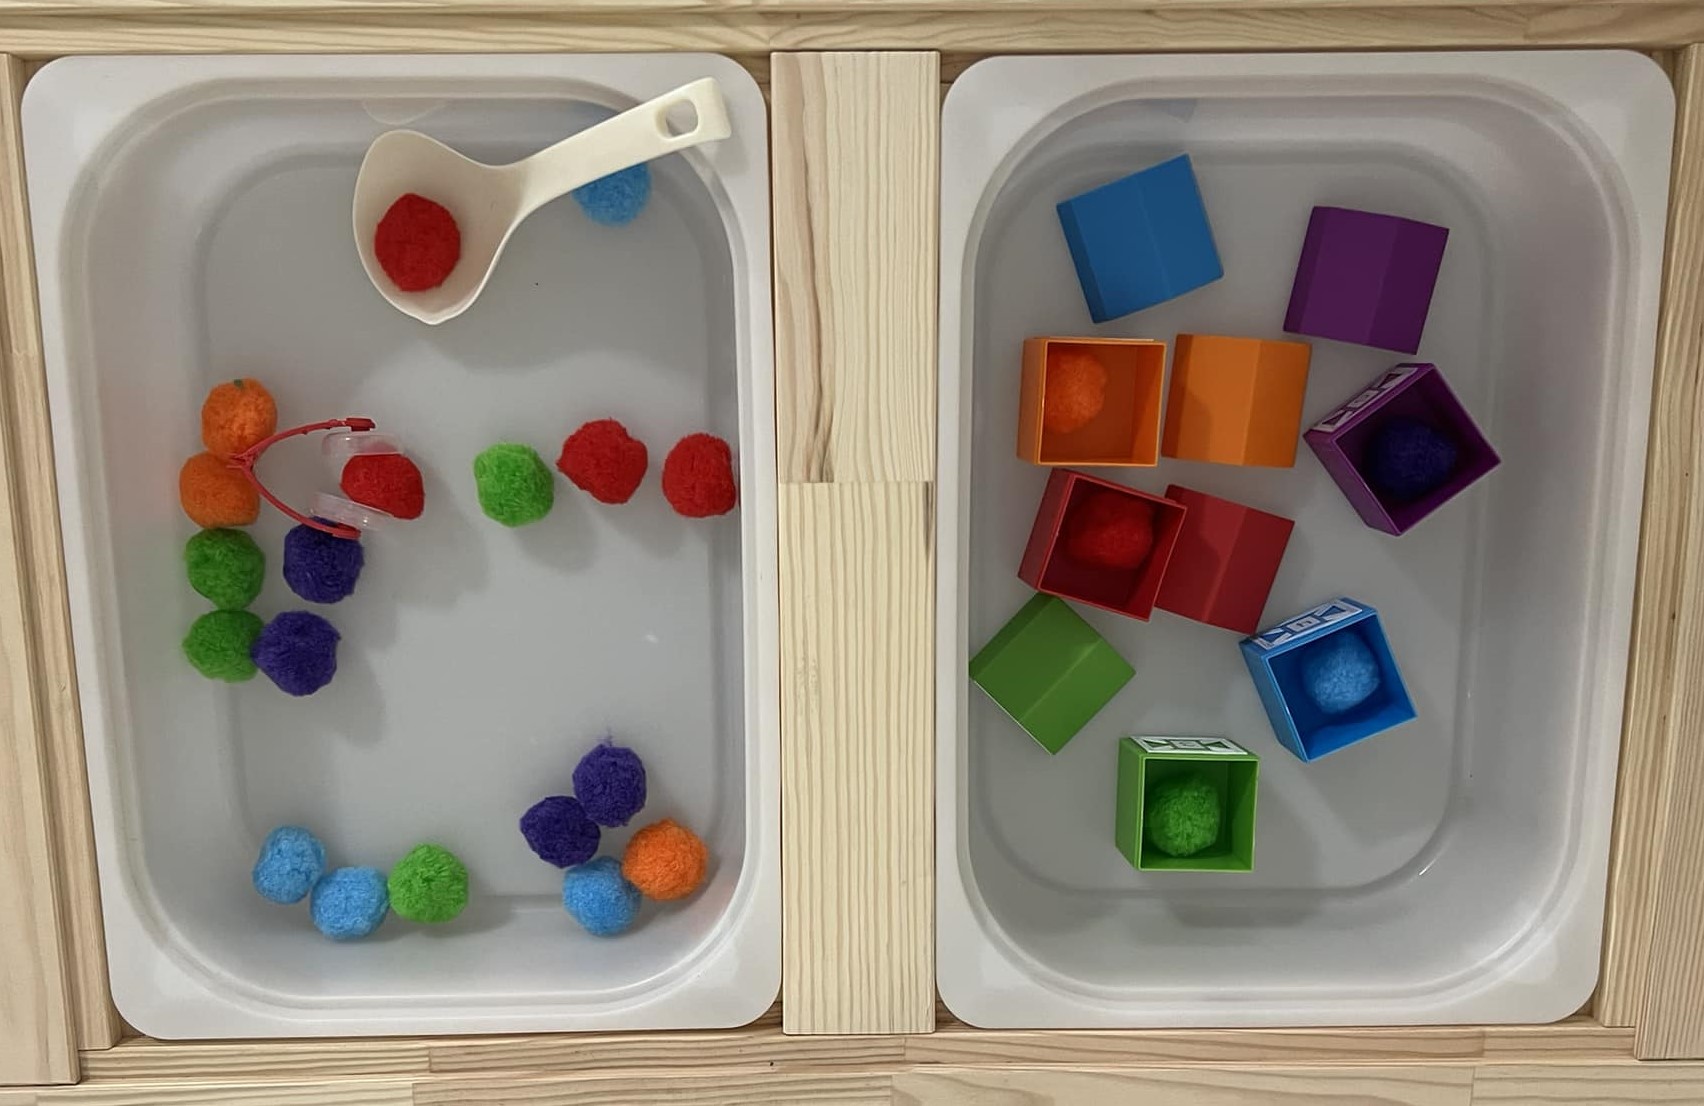
Instead of just picking up / scooping up material and pouring it back in the bin, it’s so much more satisfying to put it in a container. Here are some great examples of interesting containers: gift boxes, trays, interesting shaped bowls, muffin tins and clear ornaments. Or – feed the sheep or gingerbread men.


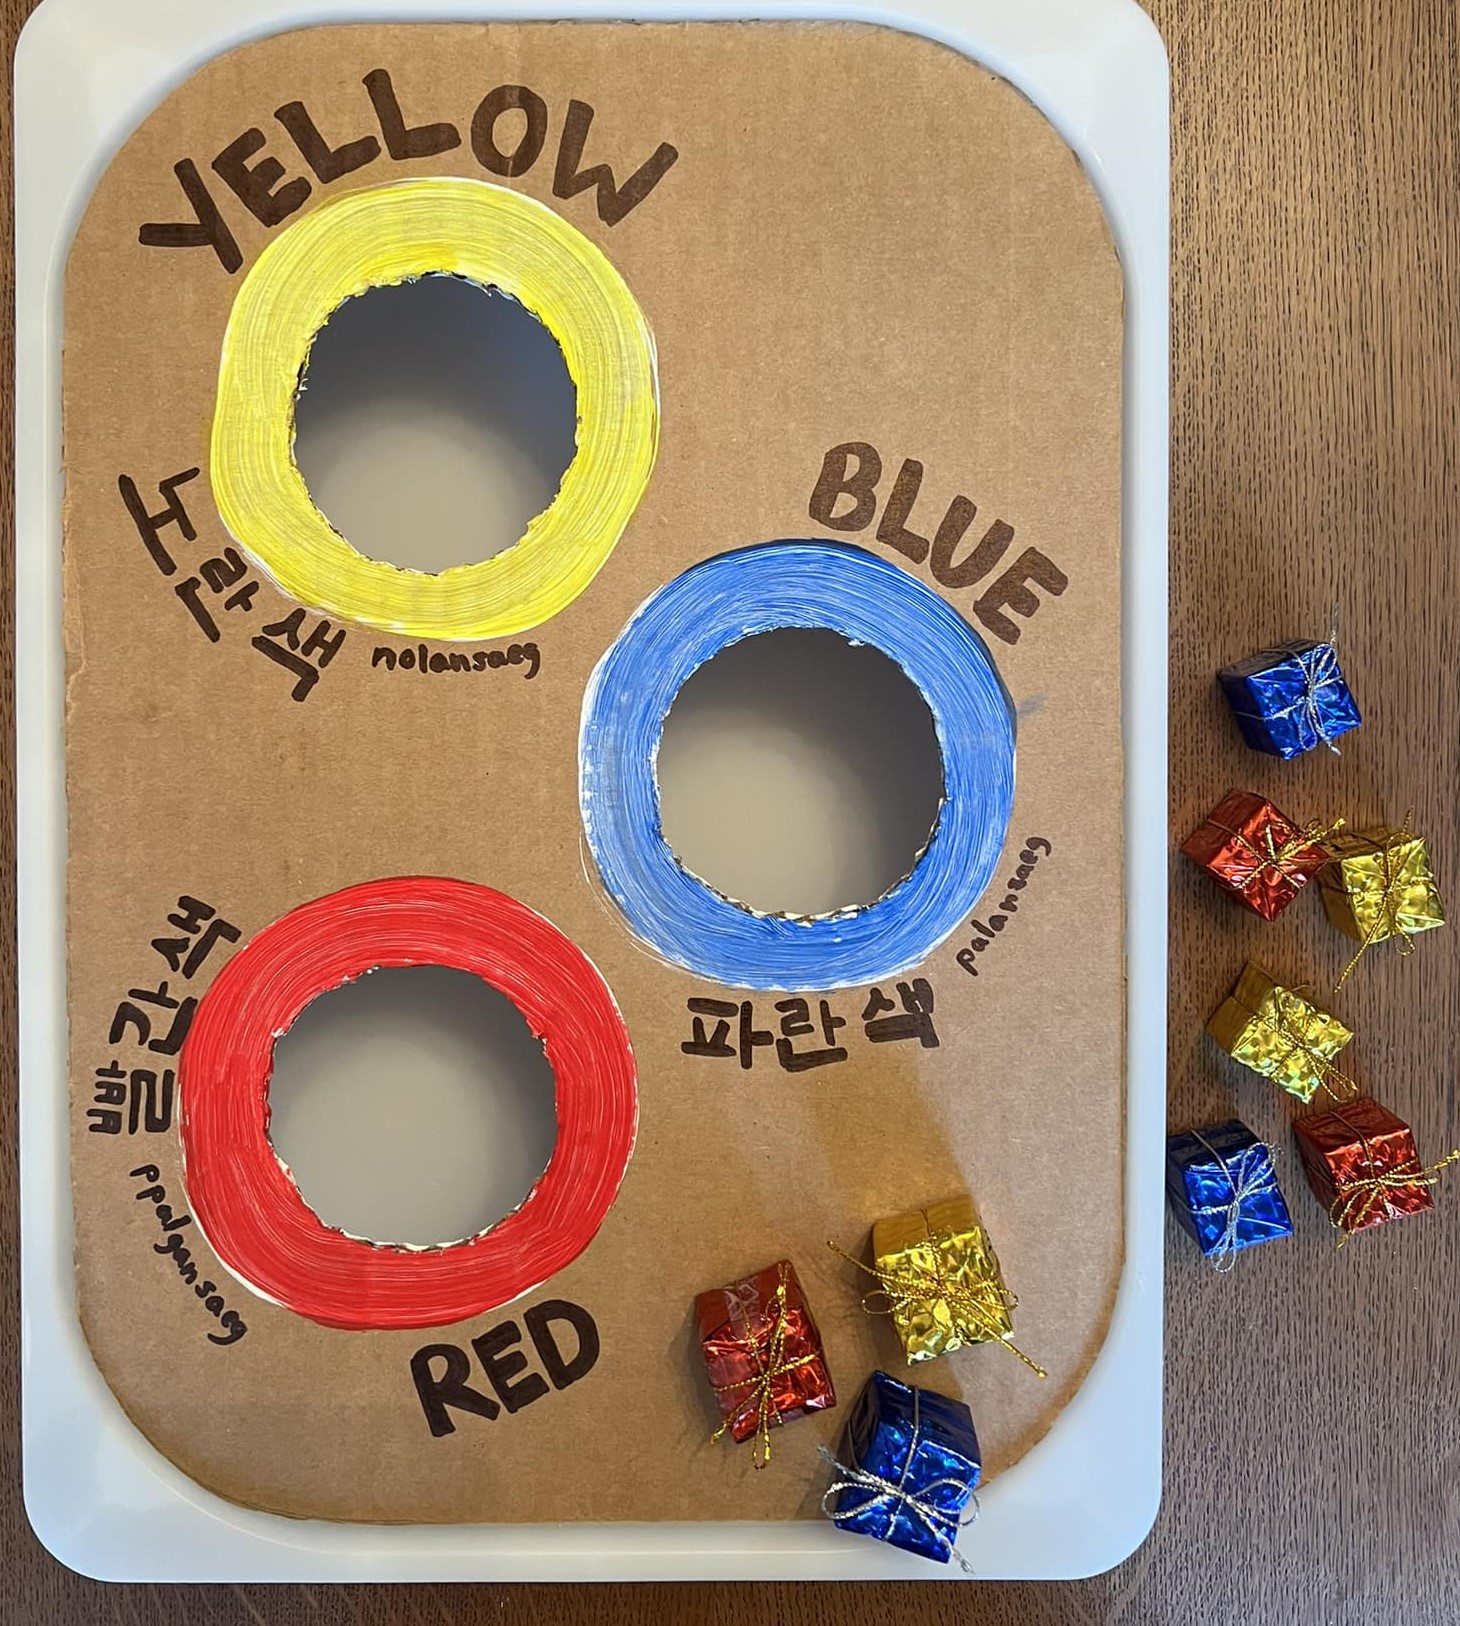
Put it in a Hole
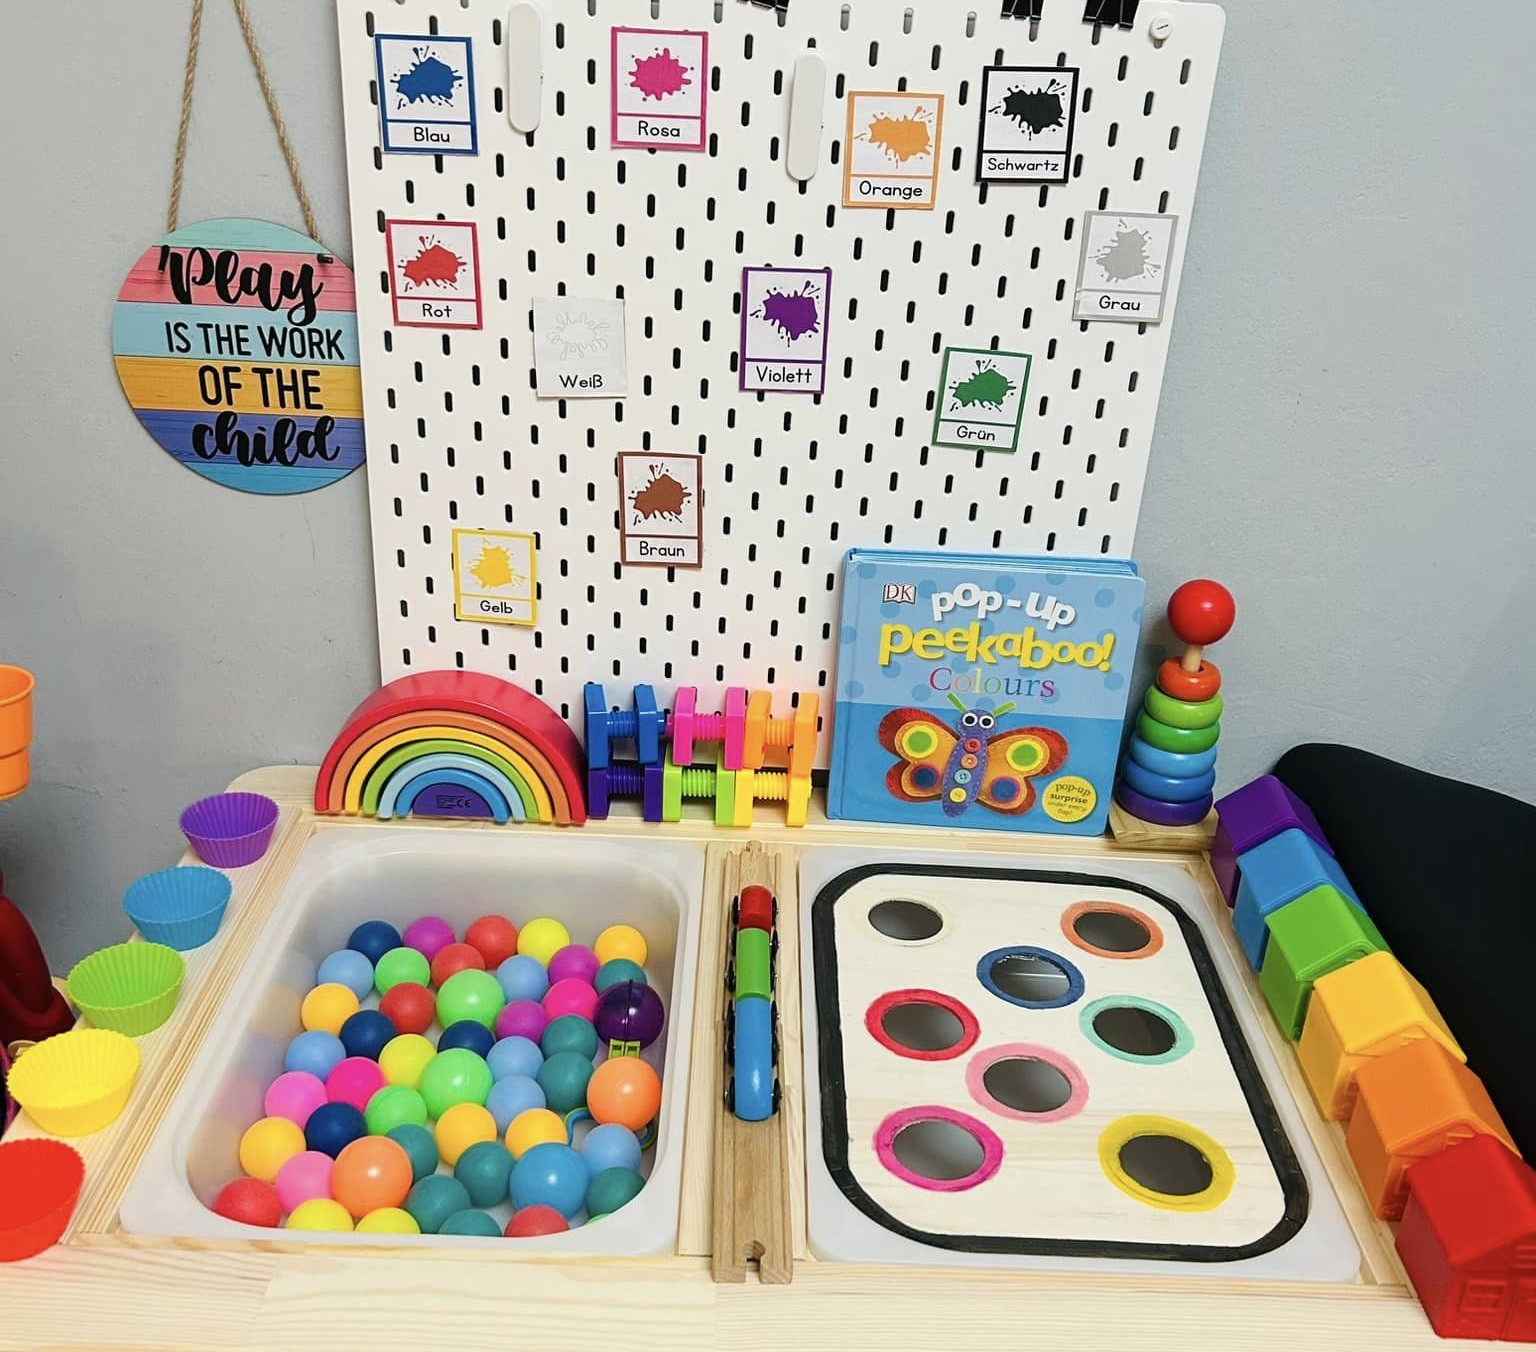
There’s also the idea of having a hole that they put things in or drop things into. Such as a pegboard, a series of holes (these also hold funnels), a hockey rink (use straws to blow pompoms into the goal), or colored holes for color sorting.


Note: those pictures are of Etsy products, but you could make similar items with cardboard. Just trace the shape of the top of your bin. (Or buy a template for the Trofast bin.) Then use that as a template to cut out cardboard bin lids and cut holes in them.
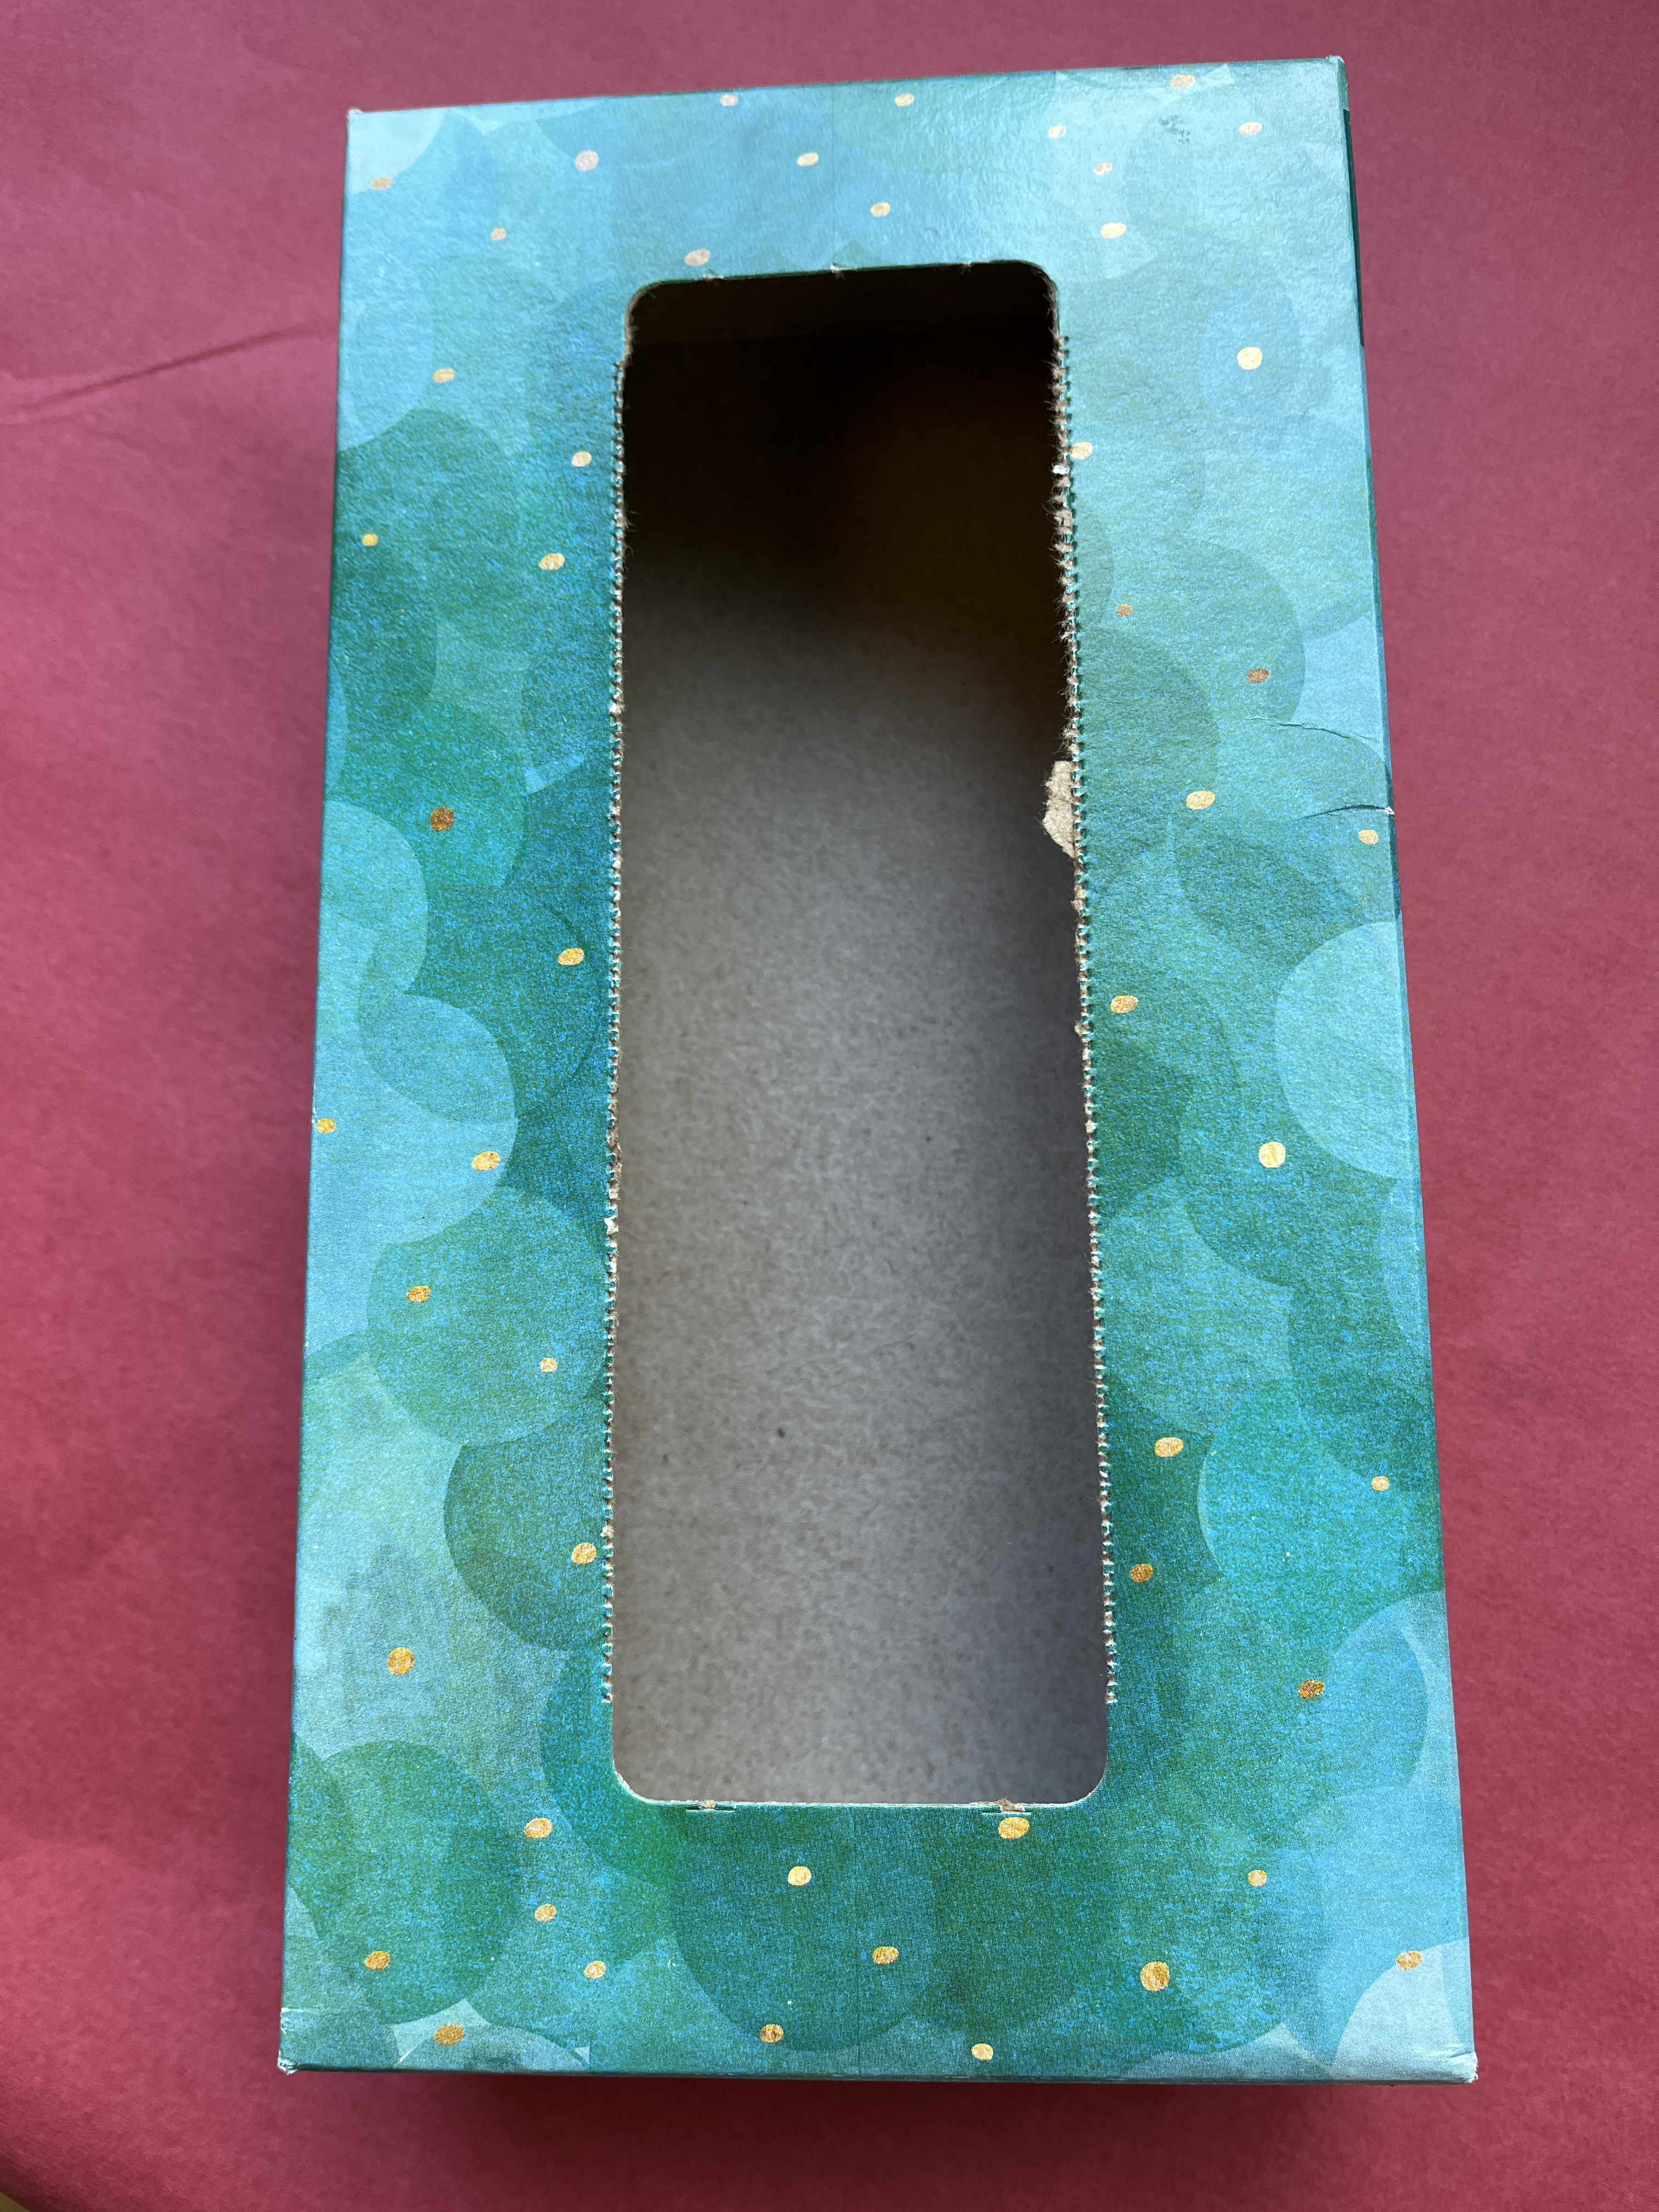
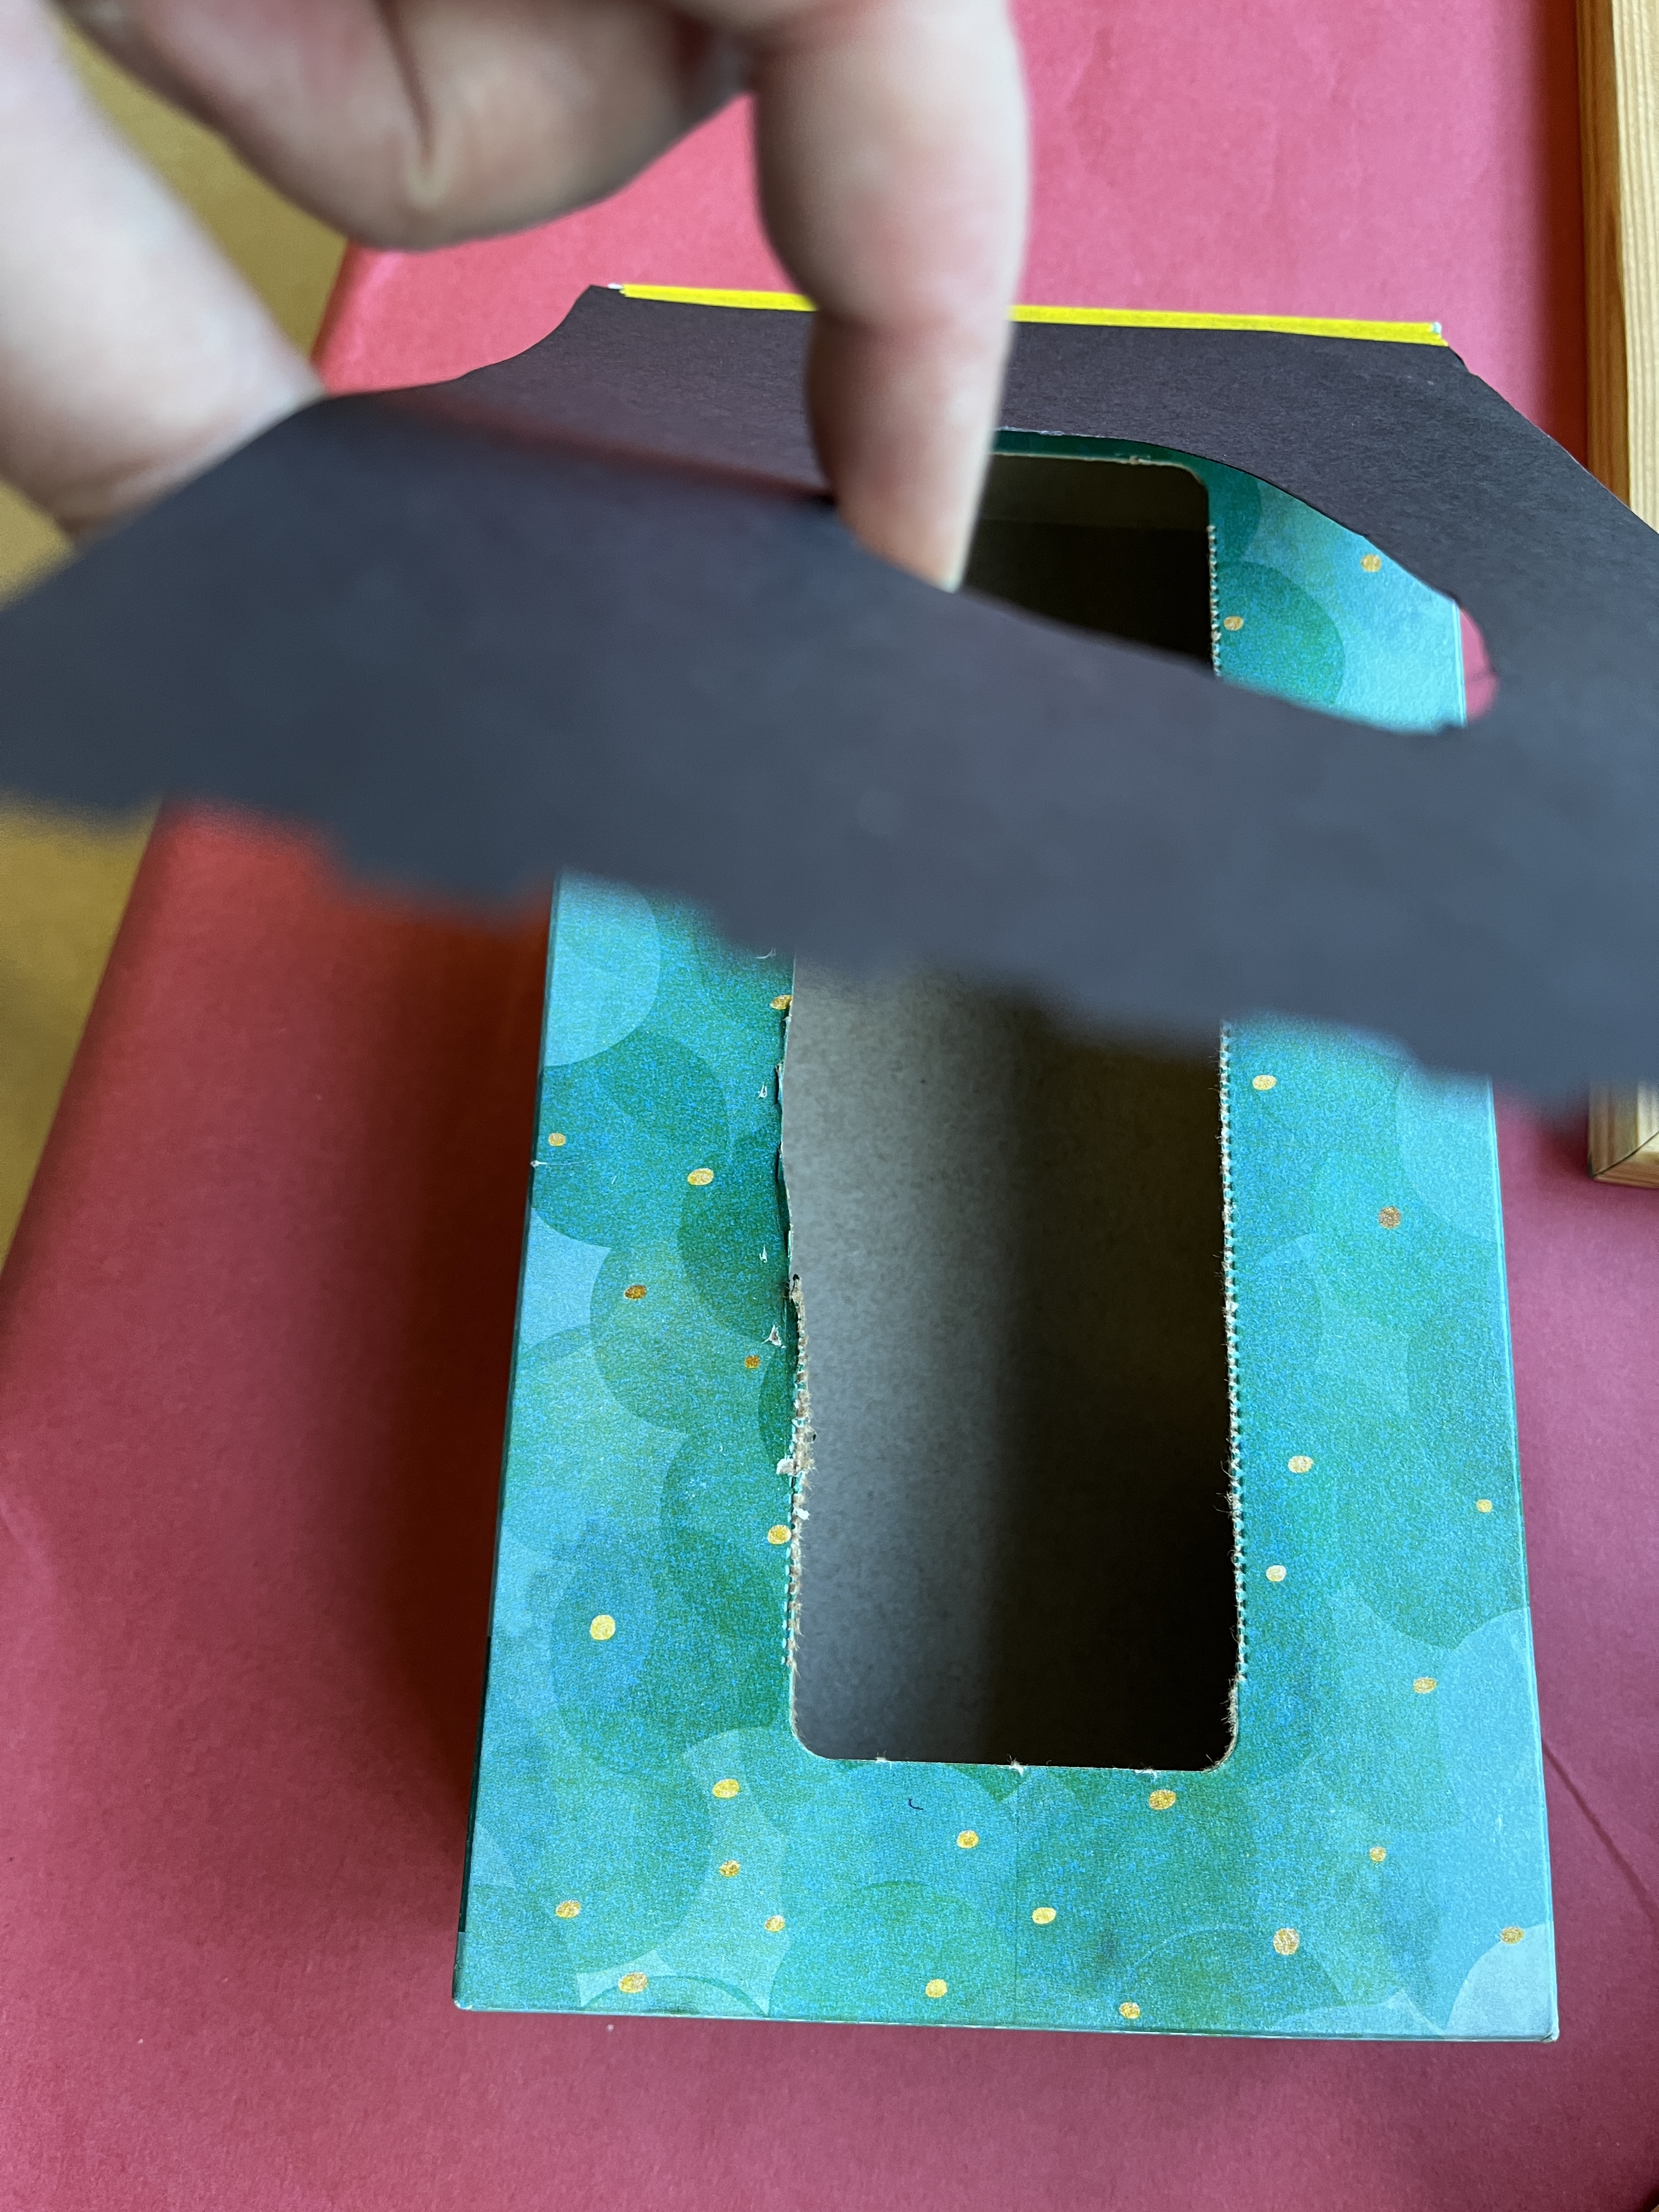
Or, you could cut a hole in the top of a cardboard box and put the box in the bin. You could add paper designs over that. (So, have an all-purpose hole box, and any time you want to change the design, draw a new picture on paper, cut the hole to match and add it.) Even something as simple as using a tissue box, and adding a cardstock cover to decorate would work – just tape it down on one side so they can lift it up to empty the box if desired.

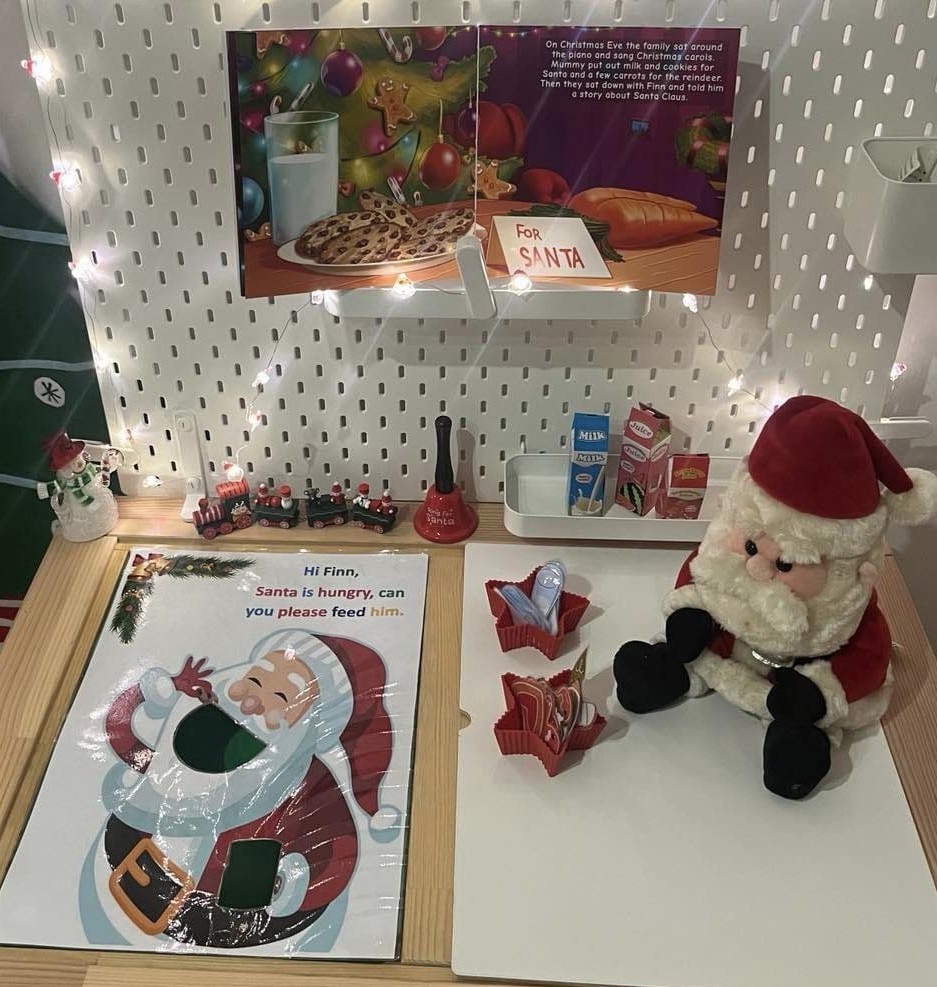
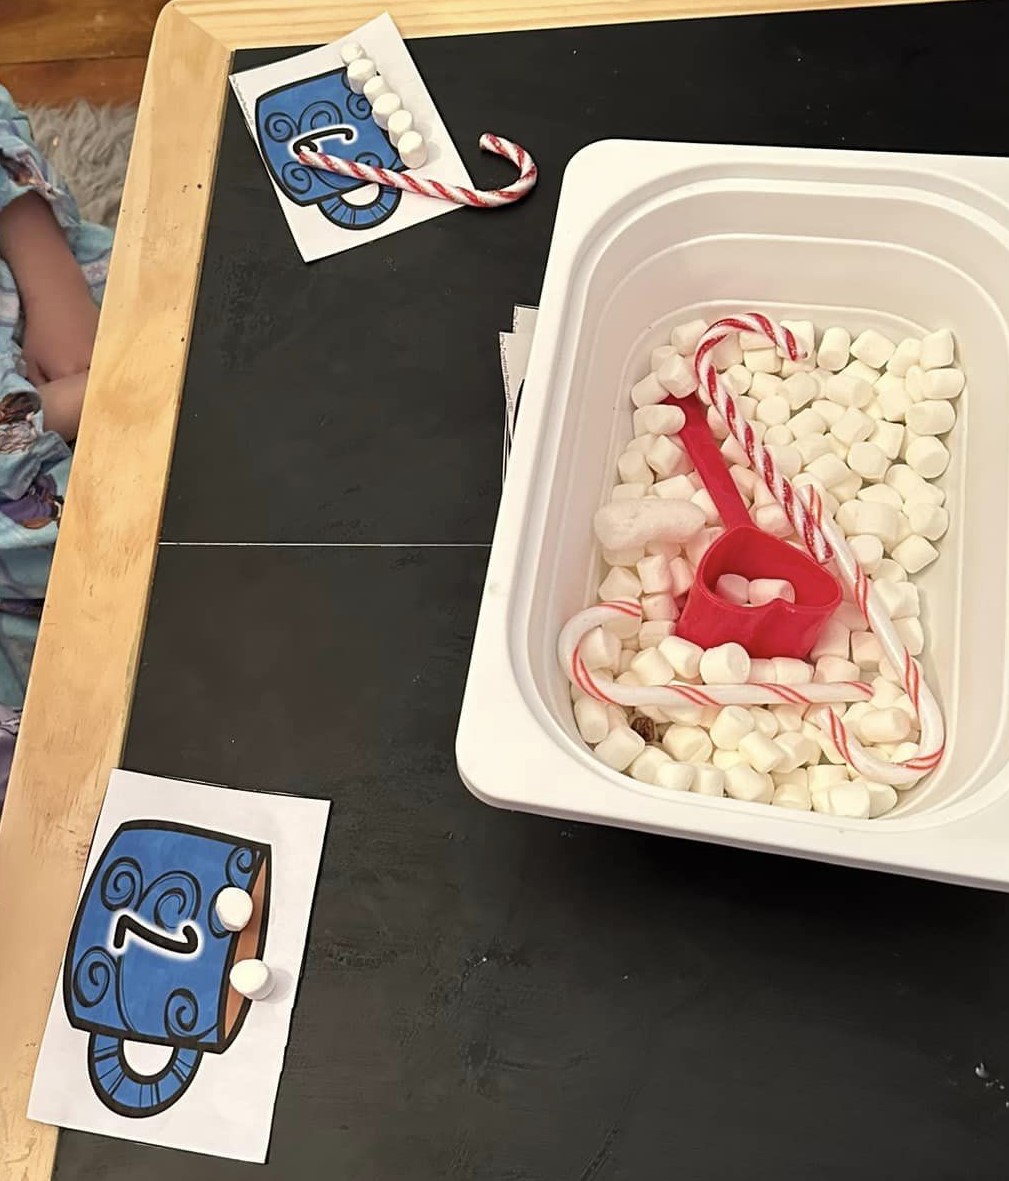
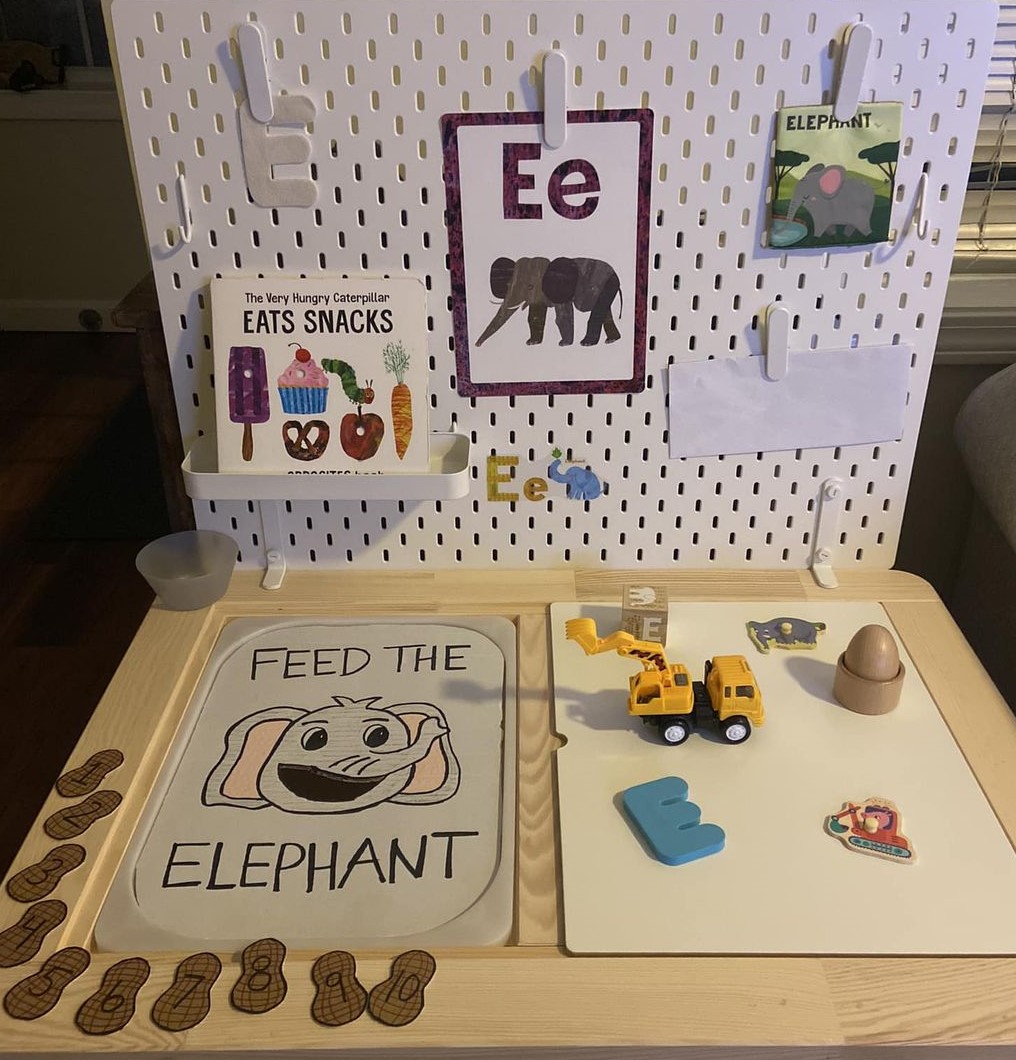
A common theme for a hole is “feed the ____” You create a cover for the bin that has a hole in it and they drop things through the hole. Feed carrots to Sven the reindeer, feed cookies and milk to Santa, feed the hungry caterpillar or shark, feed the elf, or feed the kitty.


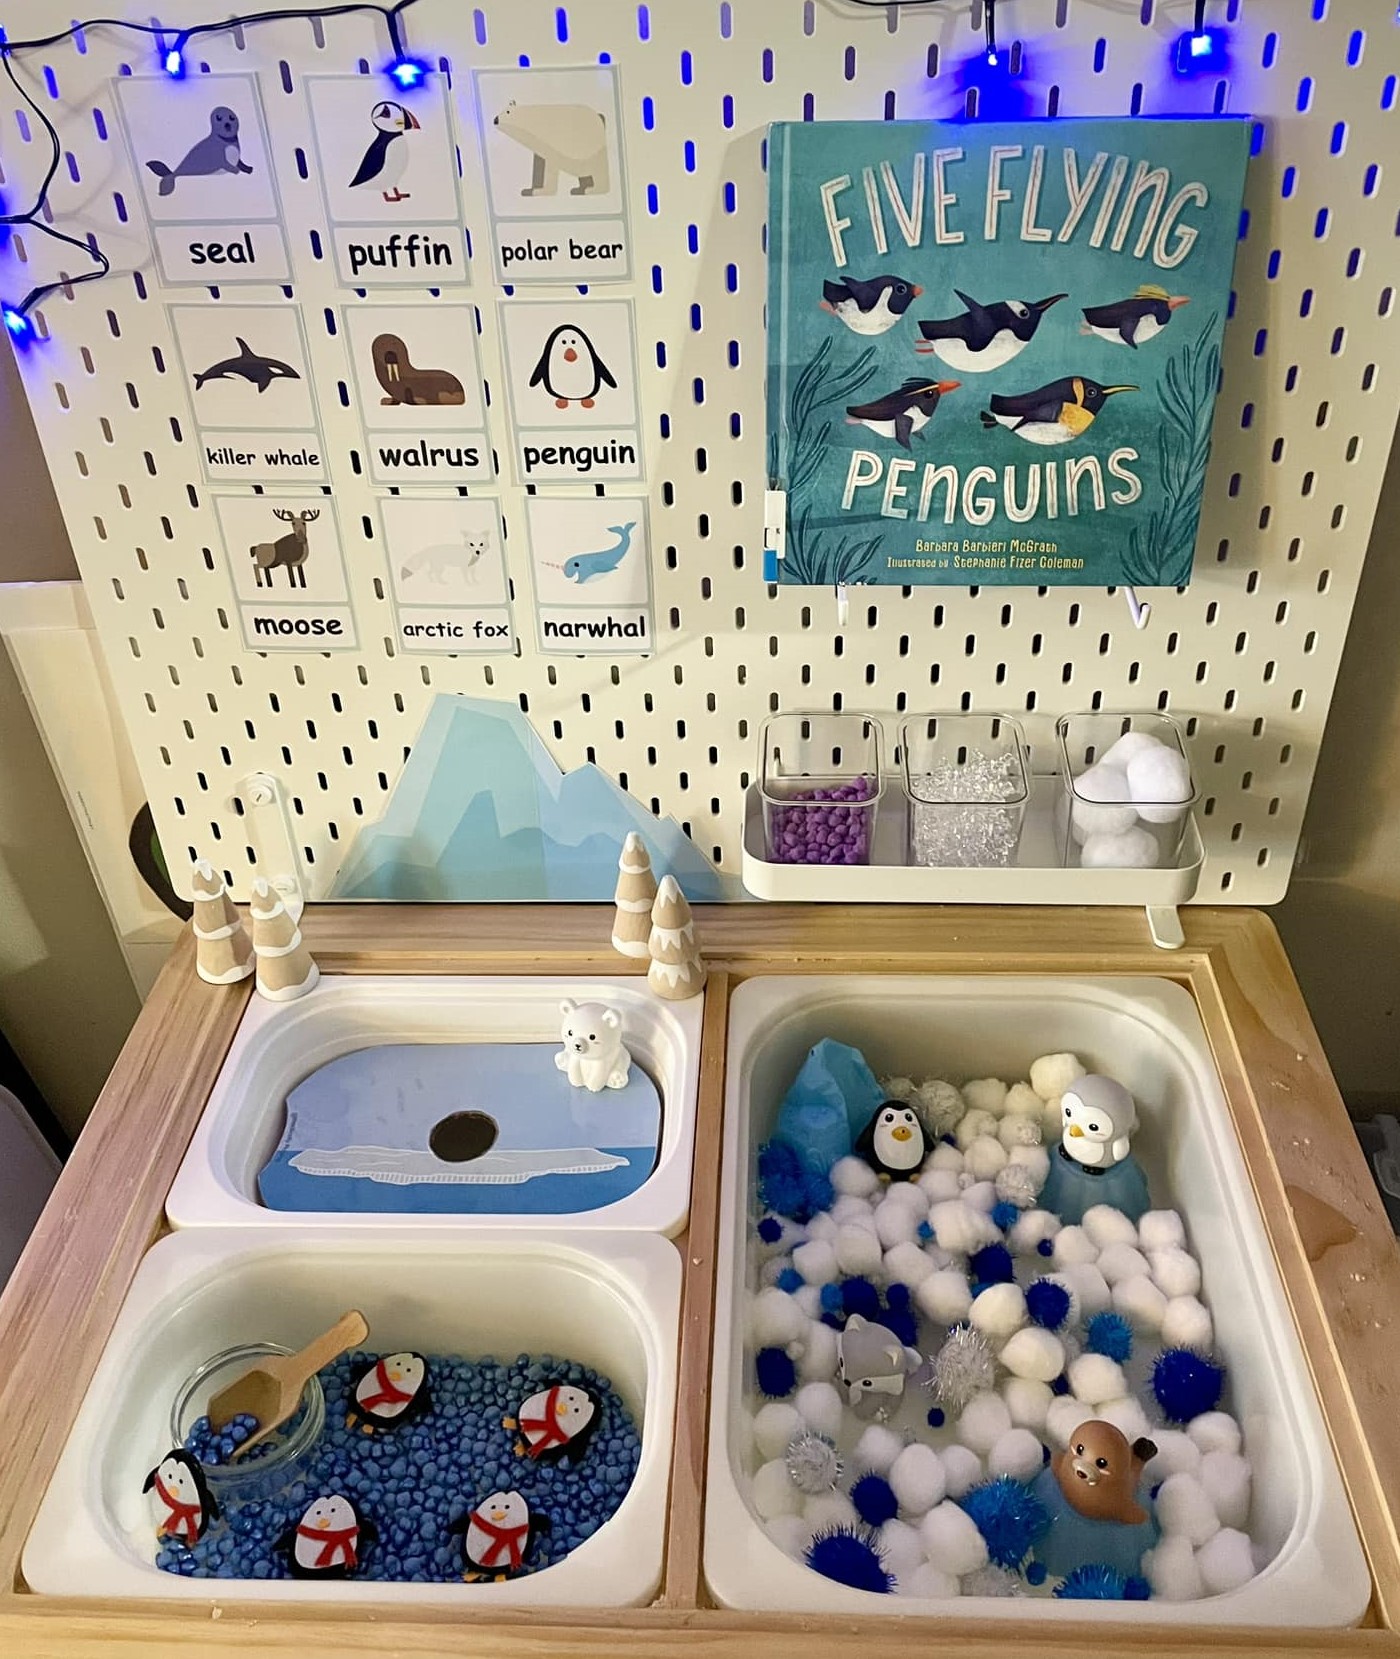
Here are three set-ups that are playing with similar ideas. You could cut a hole in cardboard “ice” and put magnet fishies underneath so kids could go ice fishing, then feed the penguin.


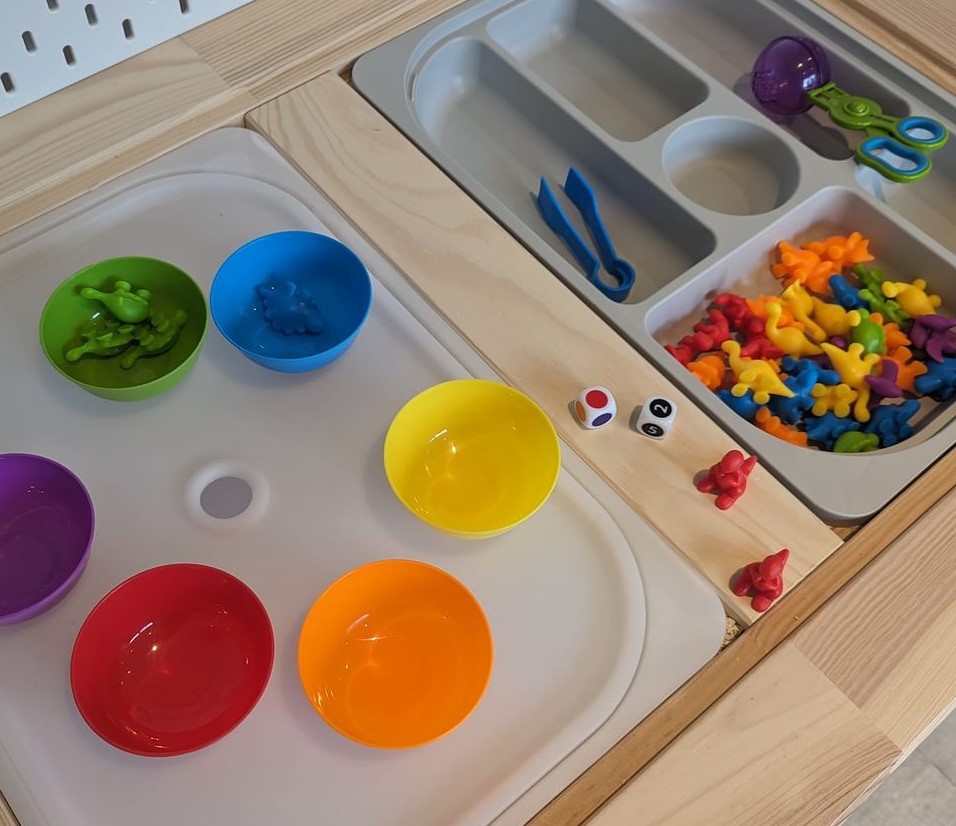
Sort
Sorting is a foundational skill for math and for science (as well as for cleaning your house and keeping things organized). Sensory bins are a great place to practice sorting! Last month in my class, I put counting bears and colorful boats in the water table, and even two-year-olds were able to quickly intuit the idea of putting green bears on the green boat, red bears on the red, and so on.
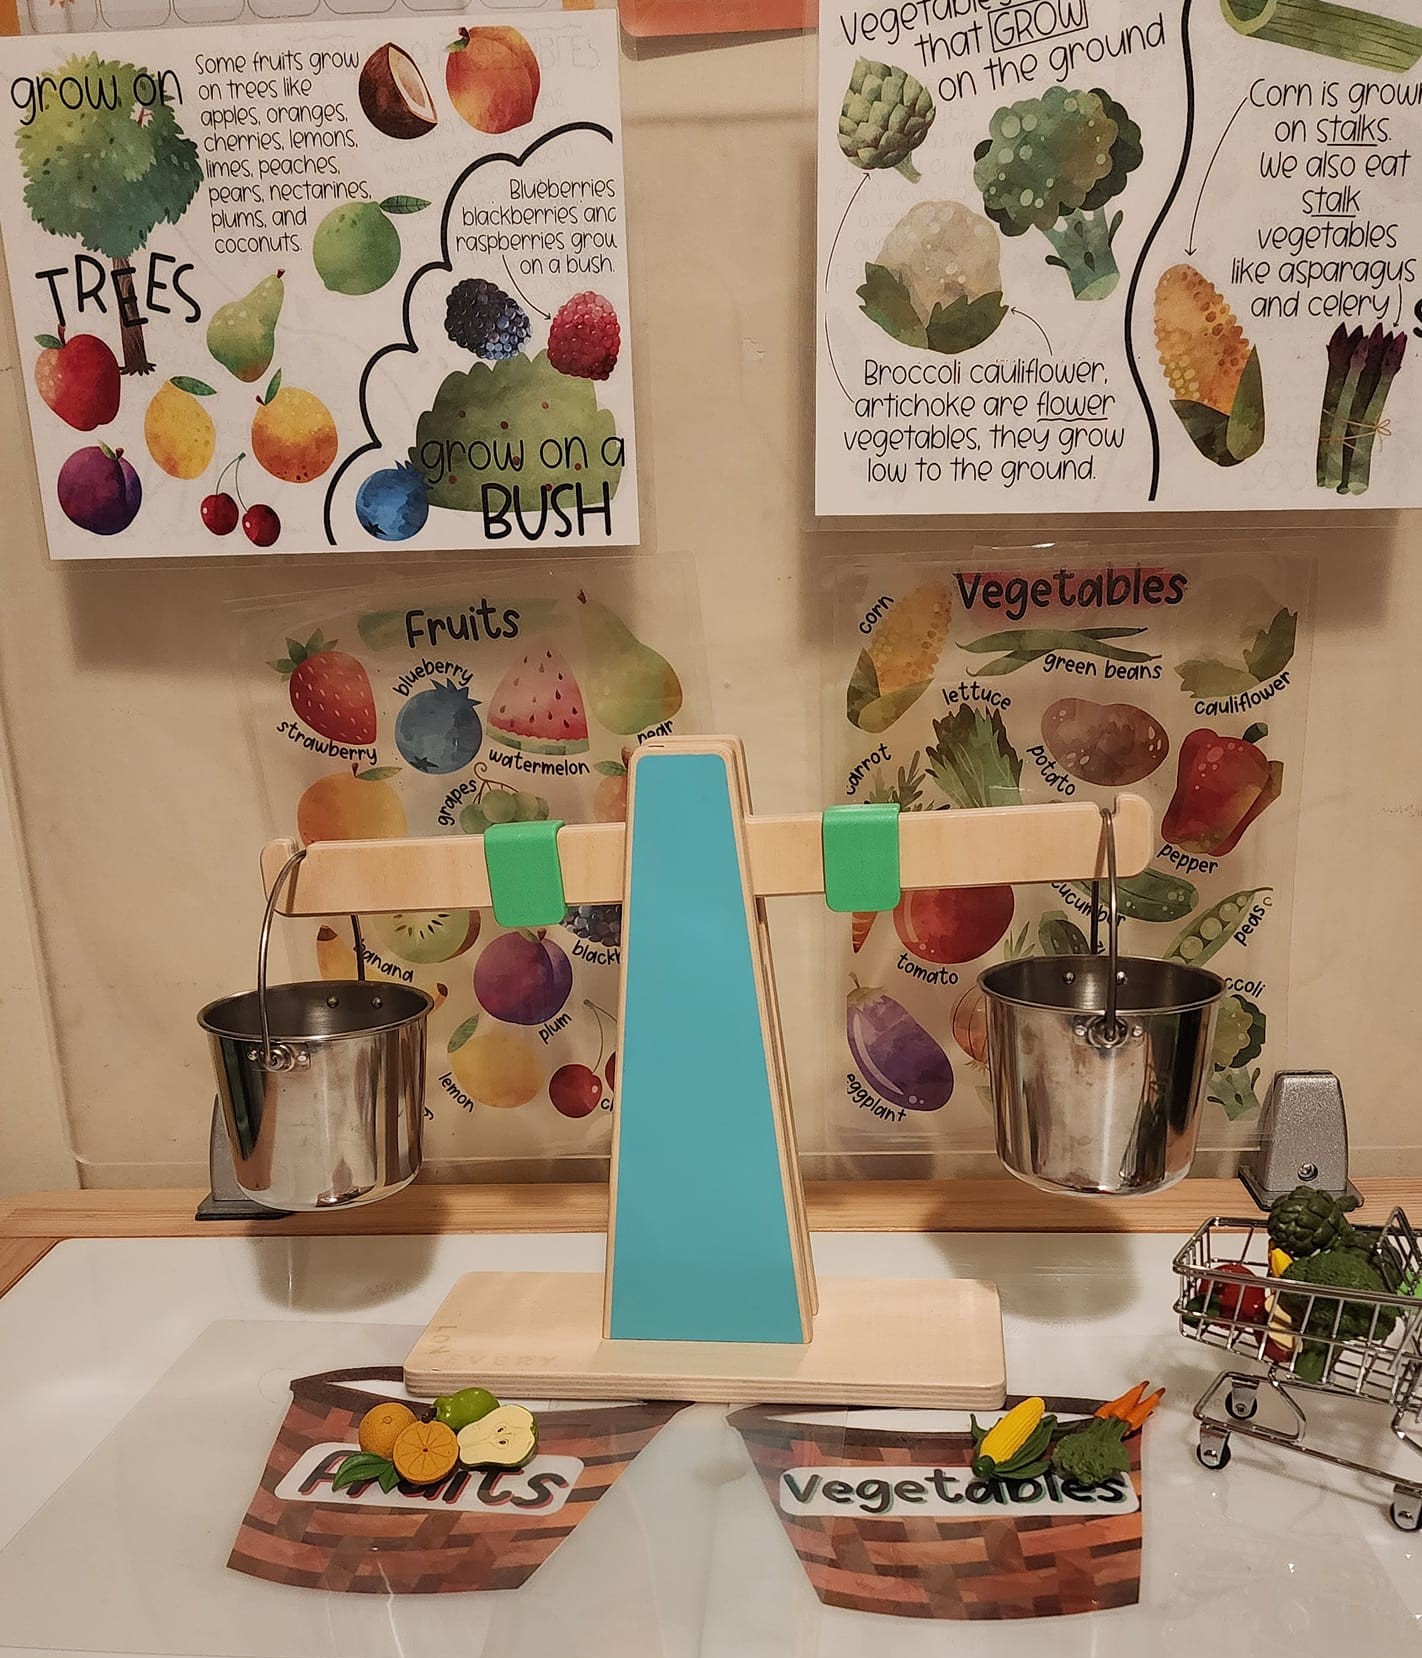
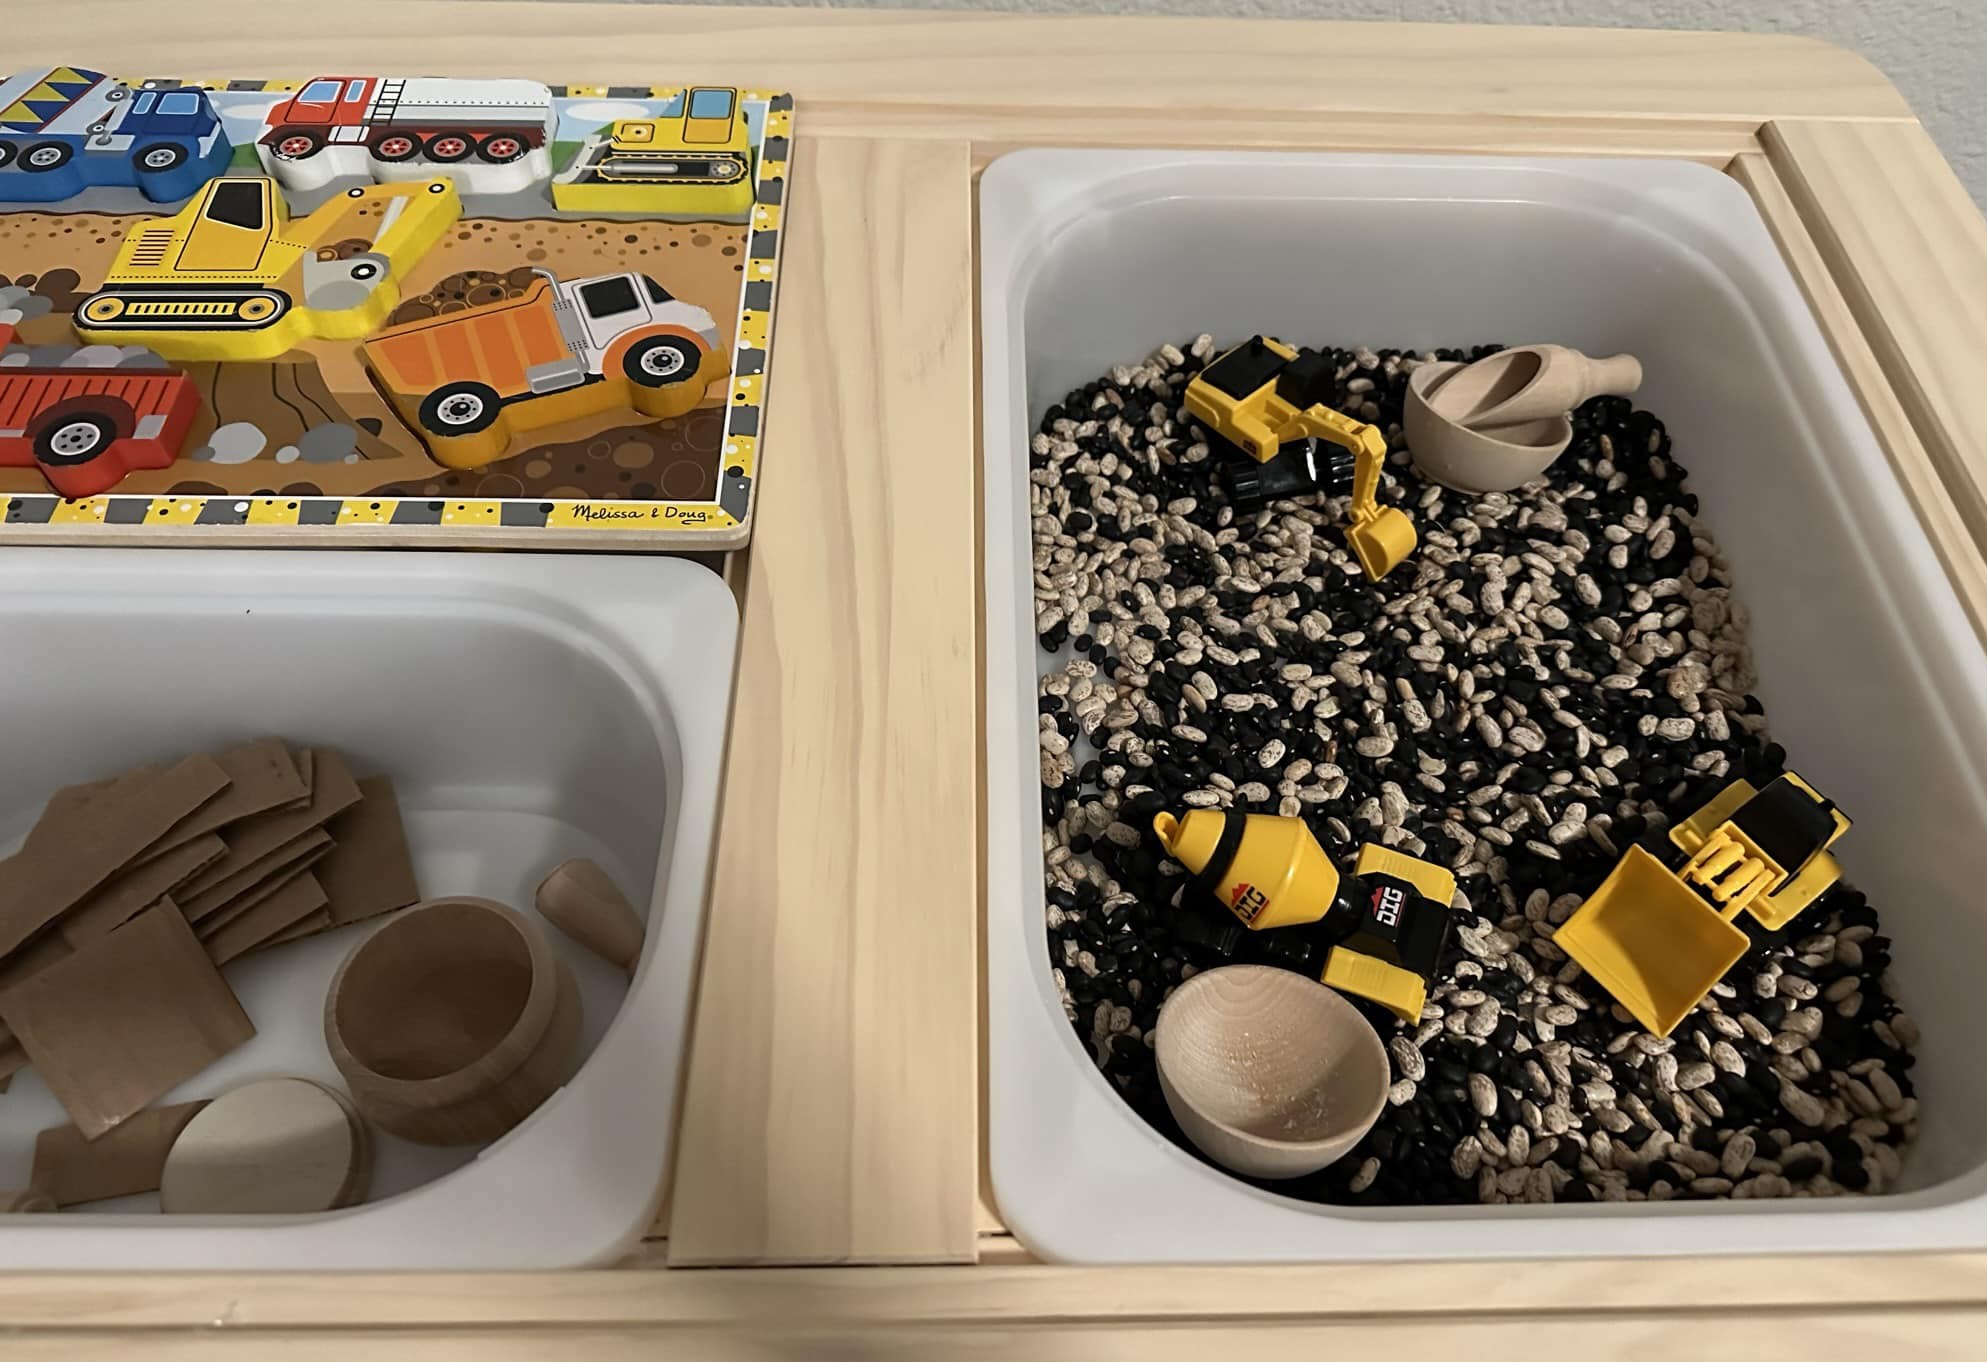
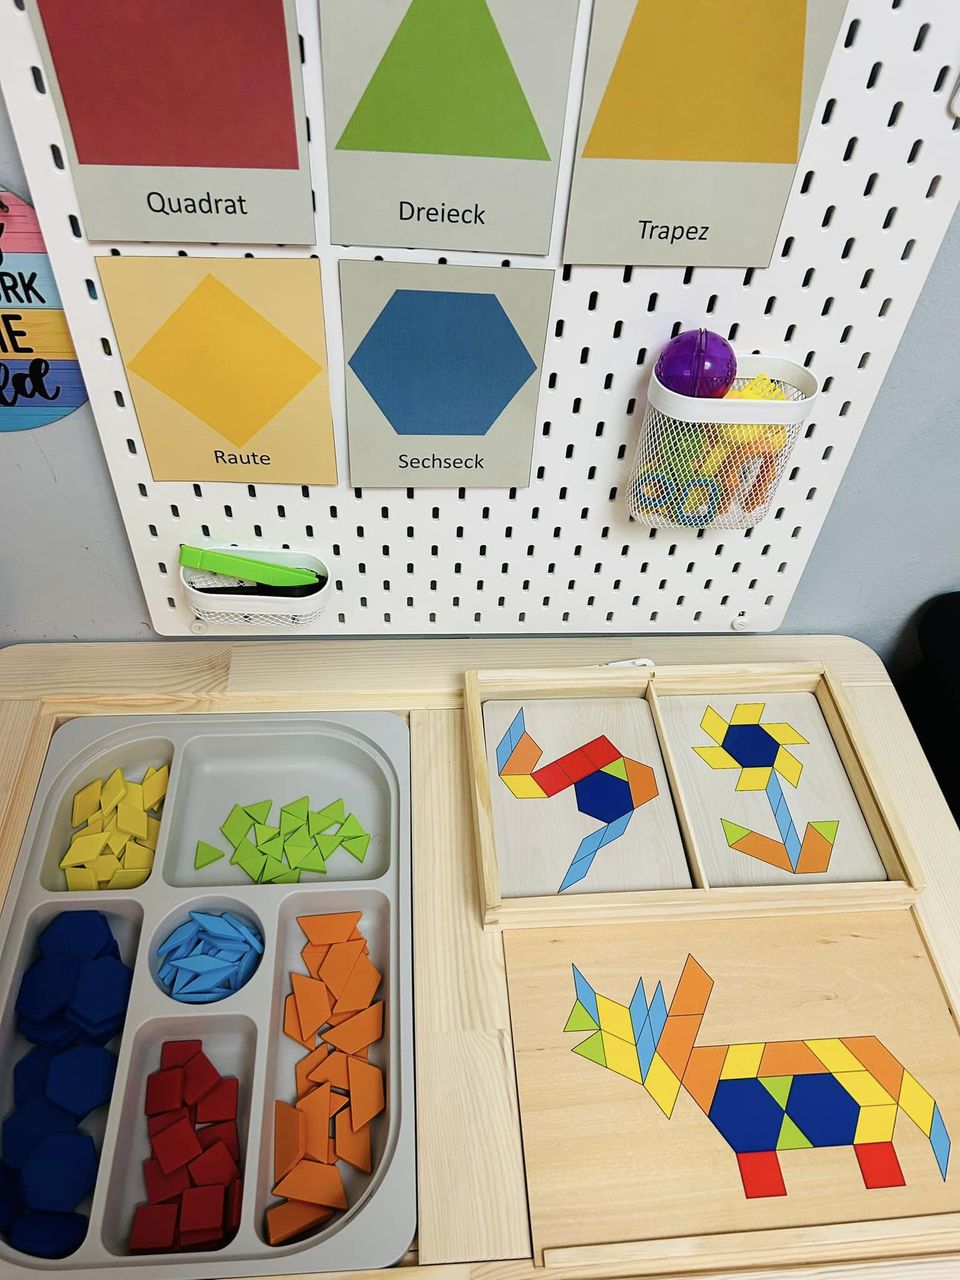
Here, you see sorting by shapes (you don’t need this special Etsy insert – just put one of your shape sorters in the bin, and then add rice or another sensory material just for fun), sorting by type of bean, or sorting fruits from vegetables and weighing them.


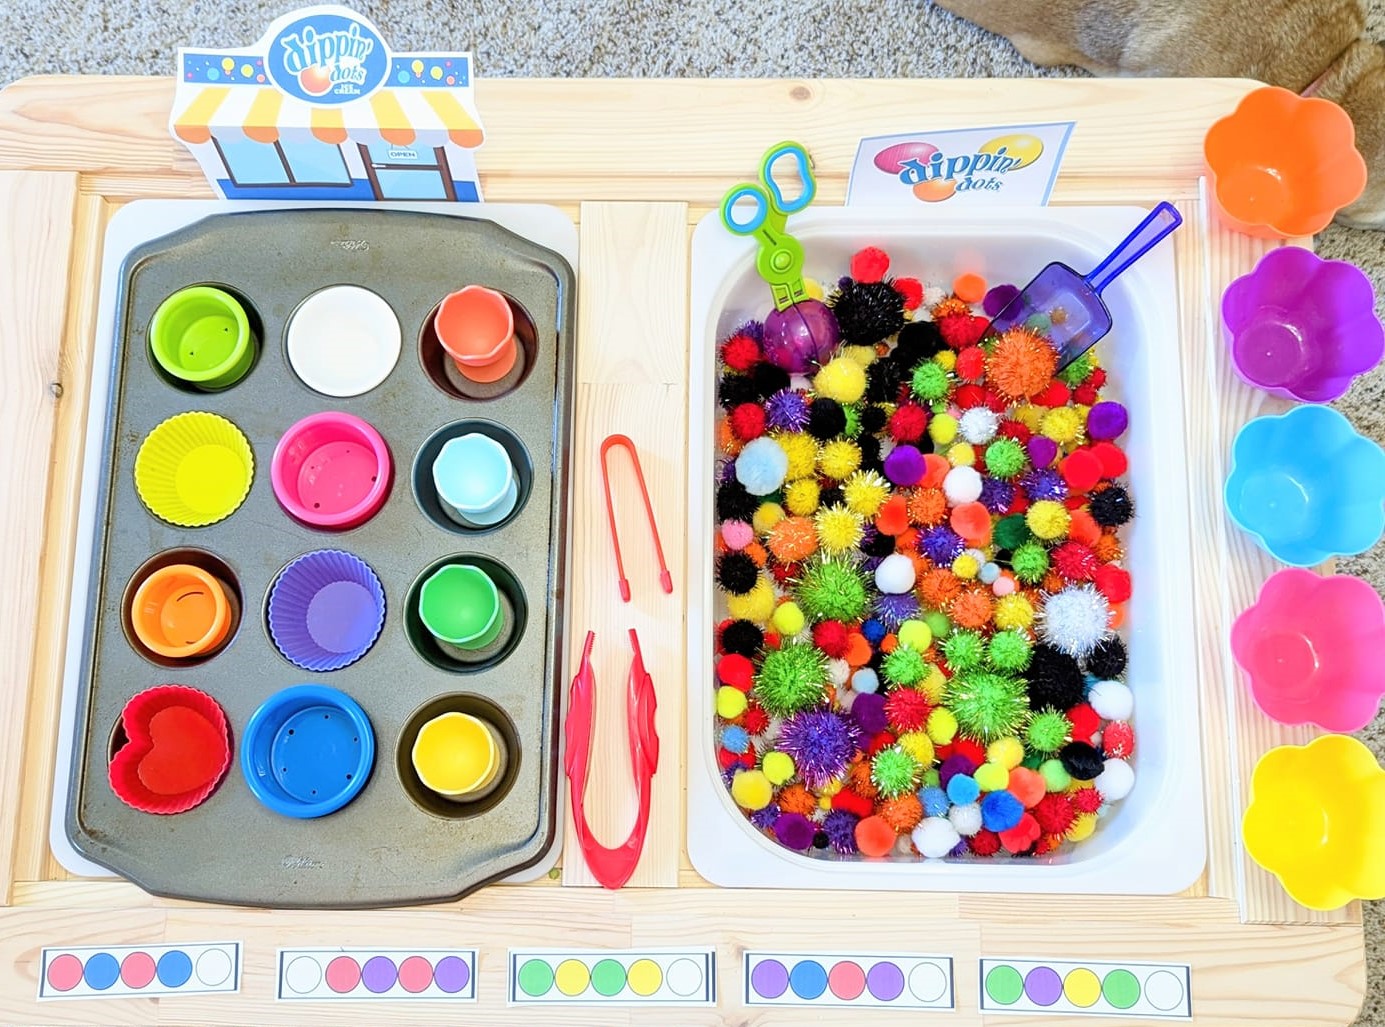
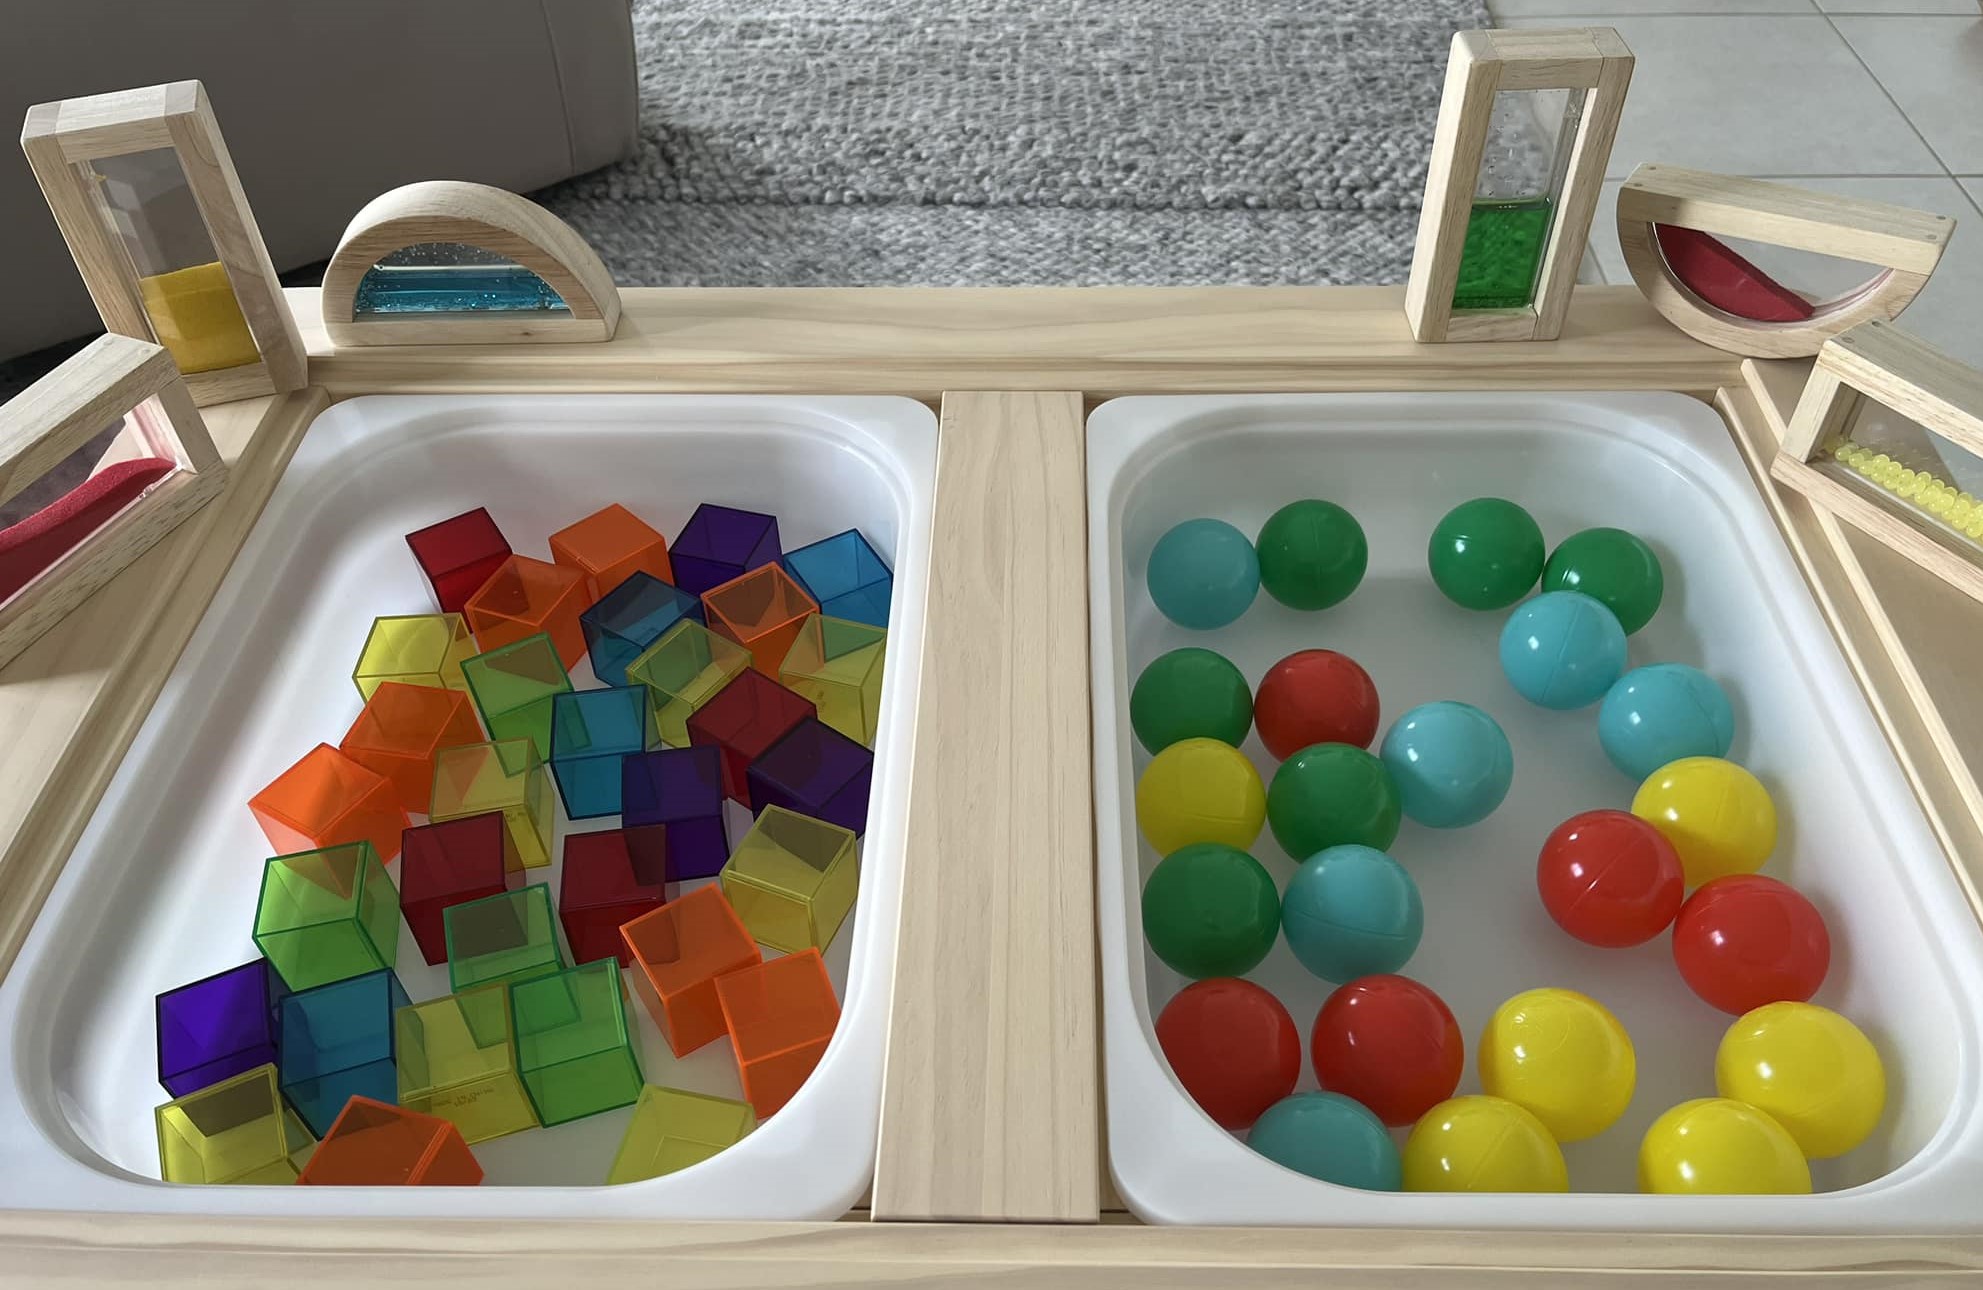
Sorting by color is another popular option.


Hunt and Learn
At a basic level, any time you mix add-ins into the sensory material, it becomes a hunt. Last month, I had a bin of rice and I threw in jingle bells, metal tins, and magnet wands with the idea that the kids would use the magnets to gather the bells and put them in the tins. I didn’t really pay attention to the fact that the rice had little fake gems in it. The children were meticulously finding and gathering all the little gems into one of the boxes.
I like this bin for how literal it is about the hunt:

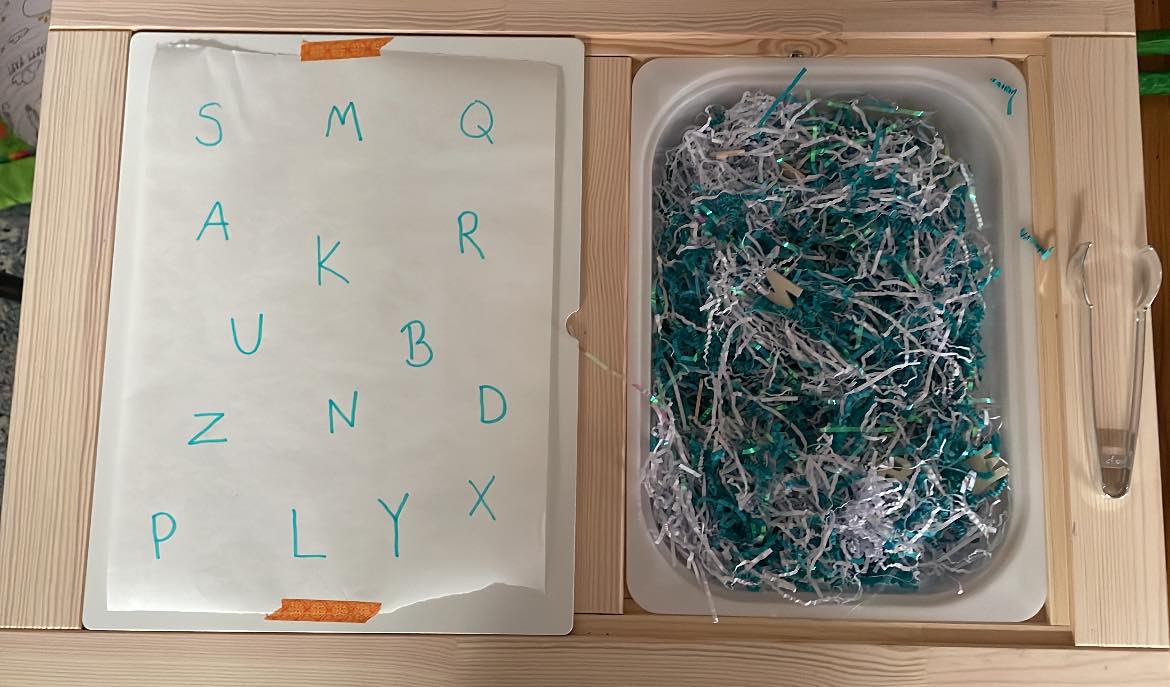
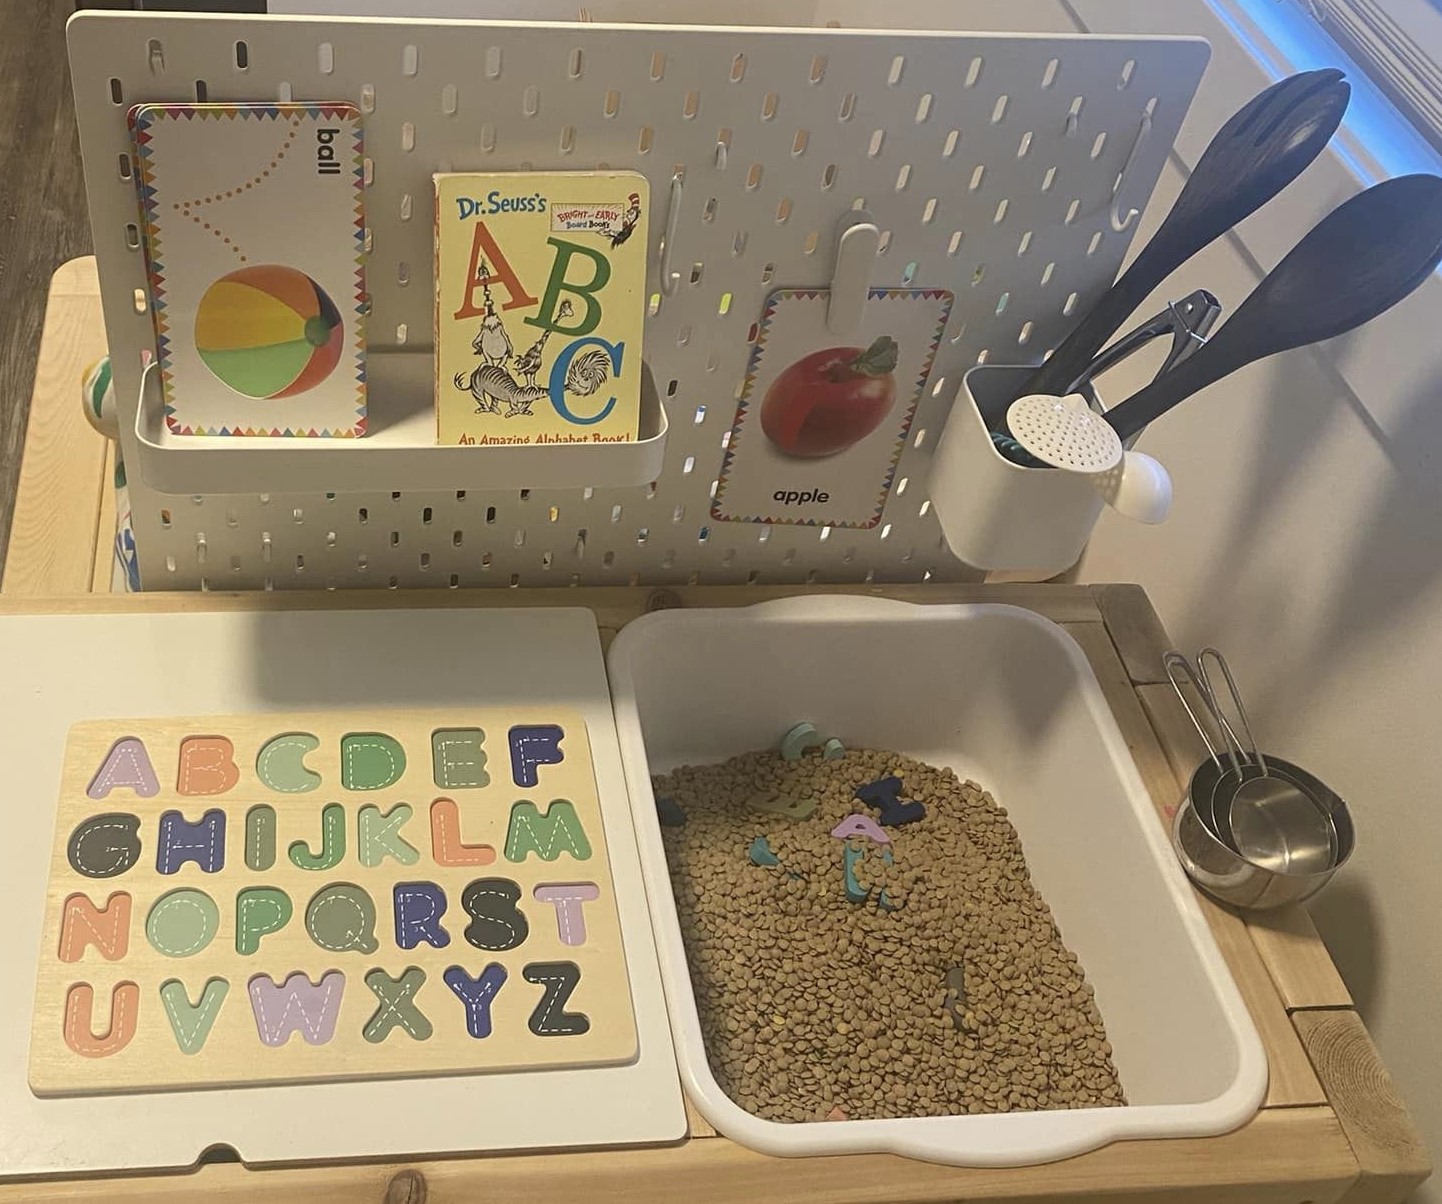
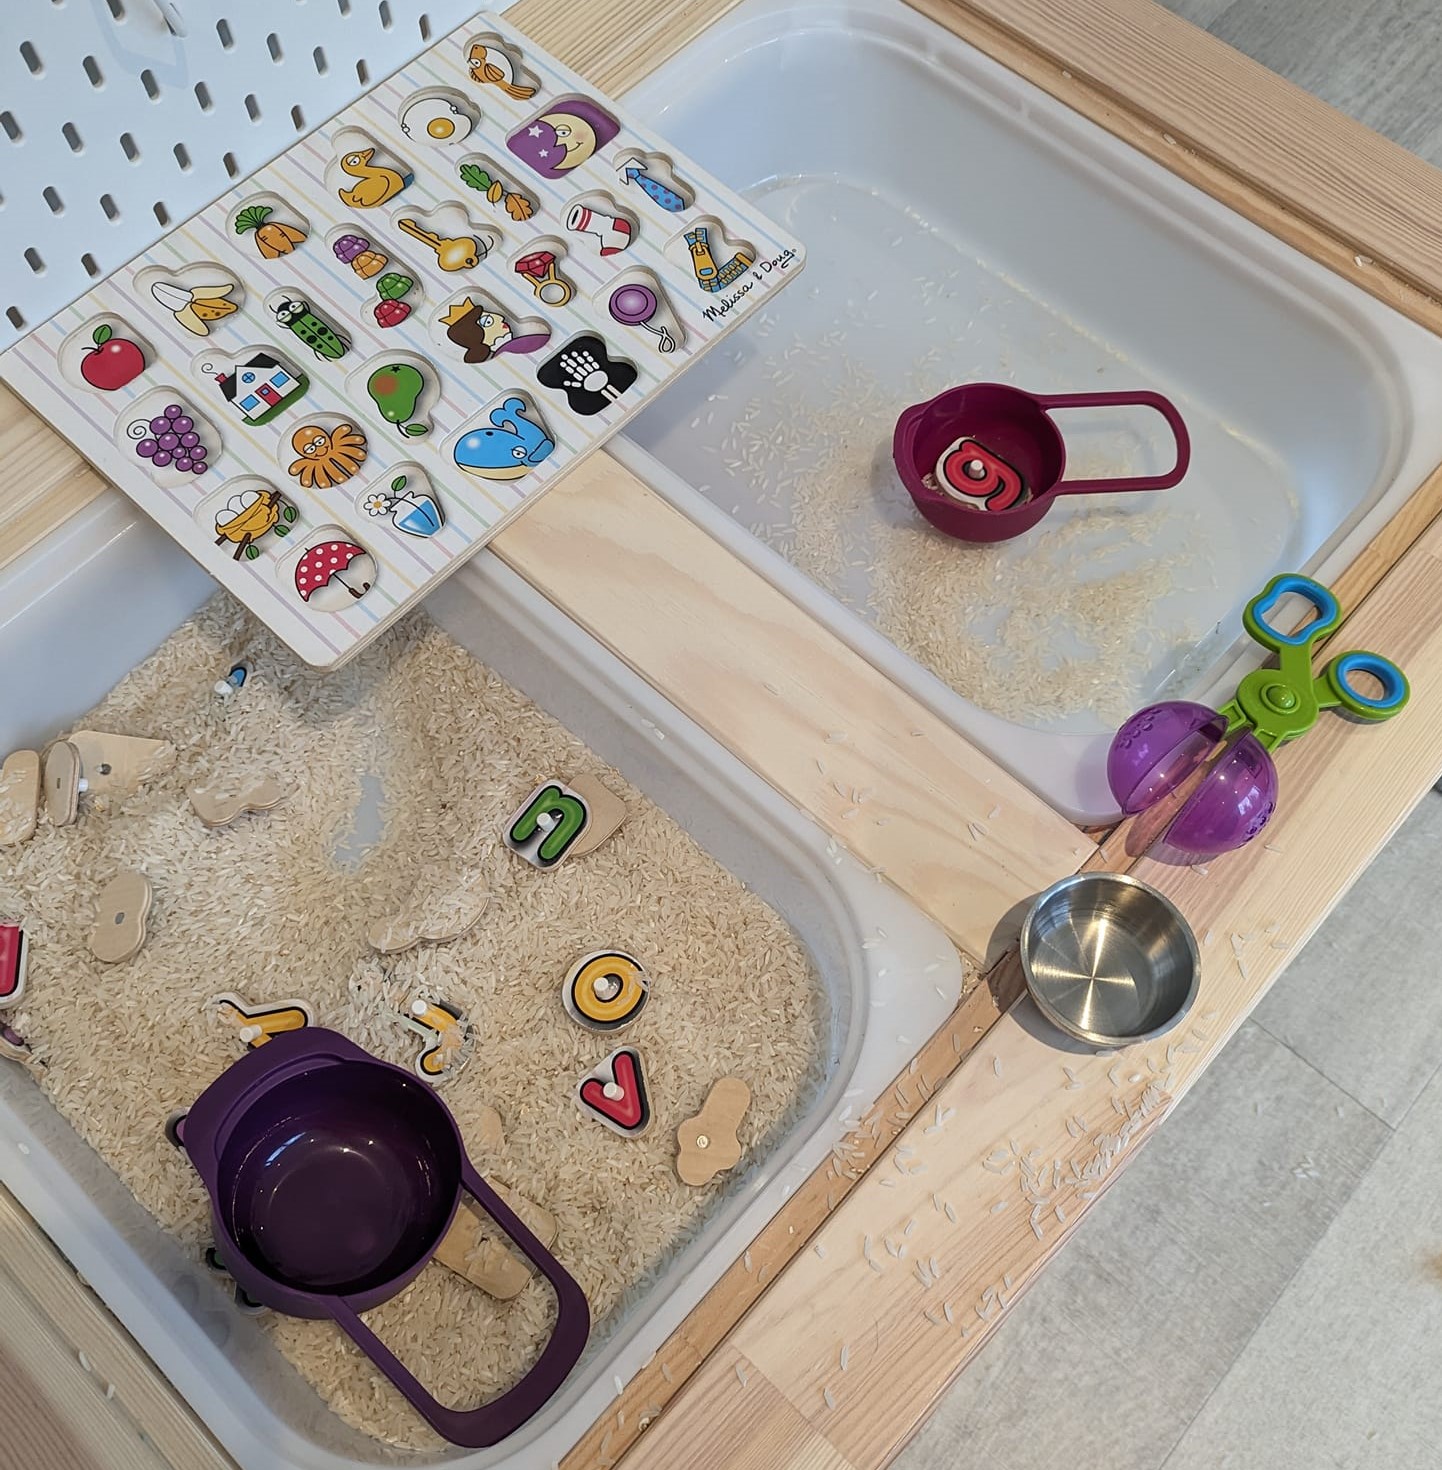
You can also use hunts as a teaching tool – they could find letters or shapes and match them to a puzzle or a diagram. Or you can do puzzle roulette, and put all their puzzle pieces in one bin!


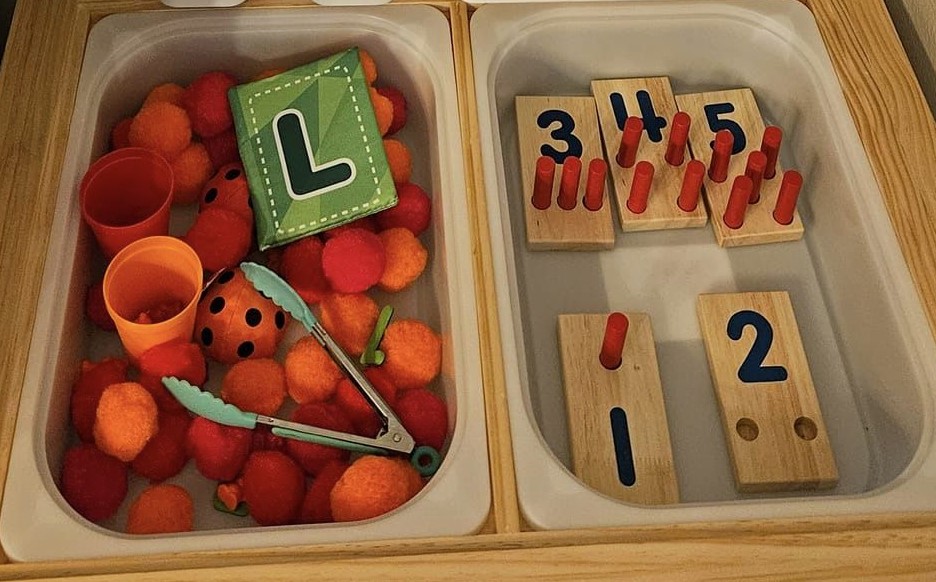
They could do counting activities – they rummage through the bins for items, and then count.


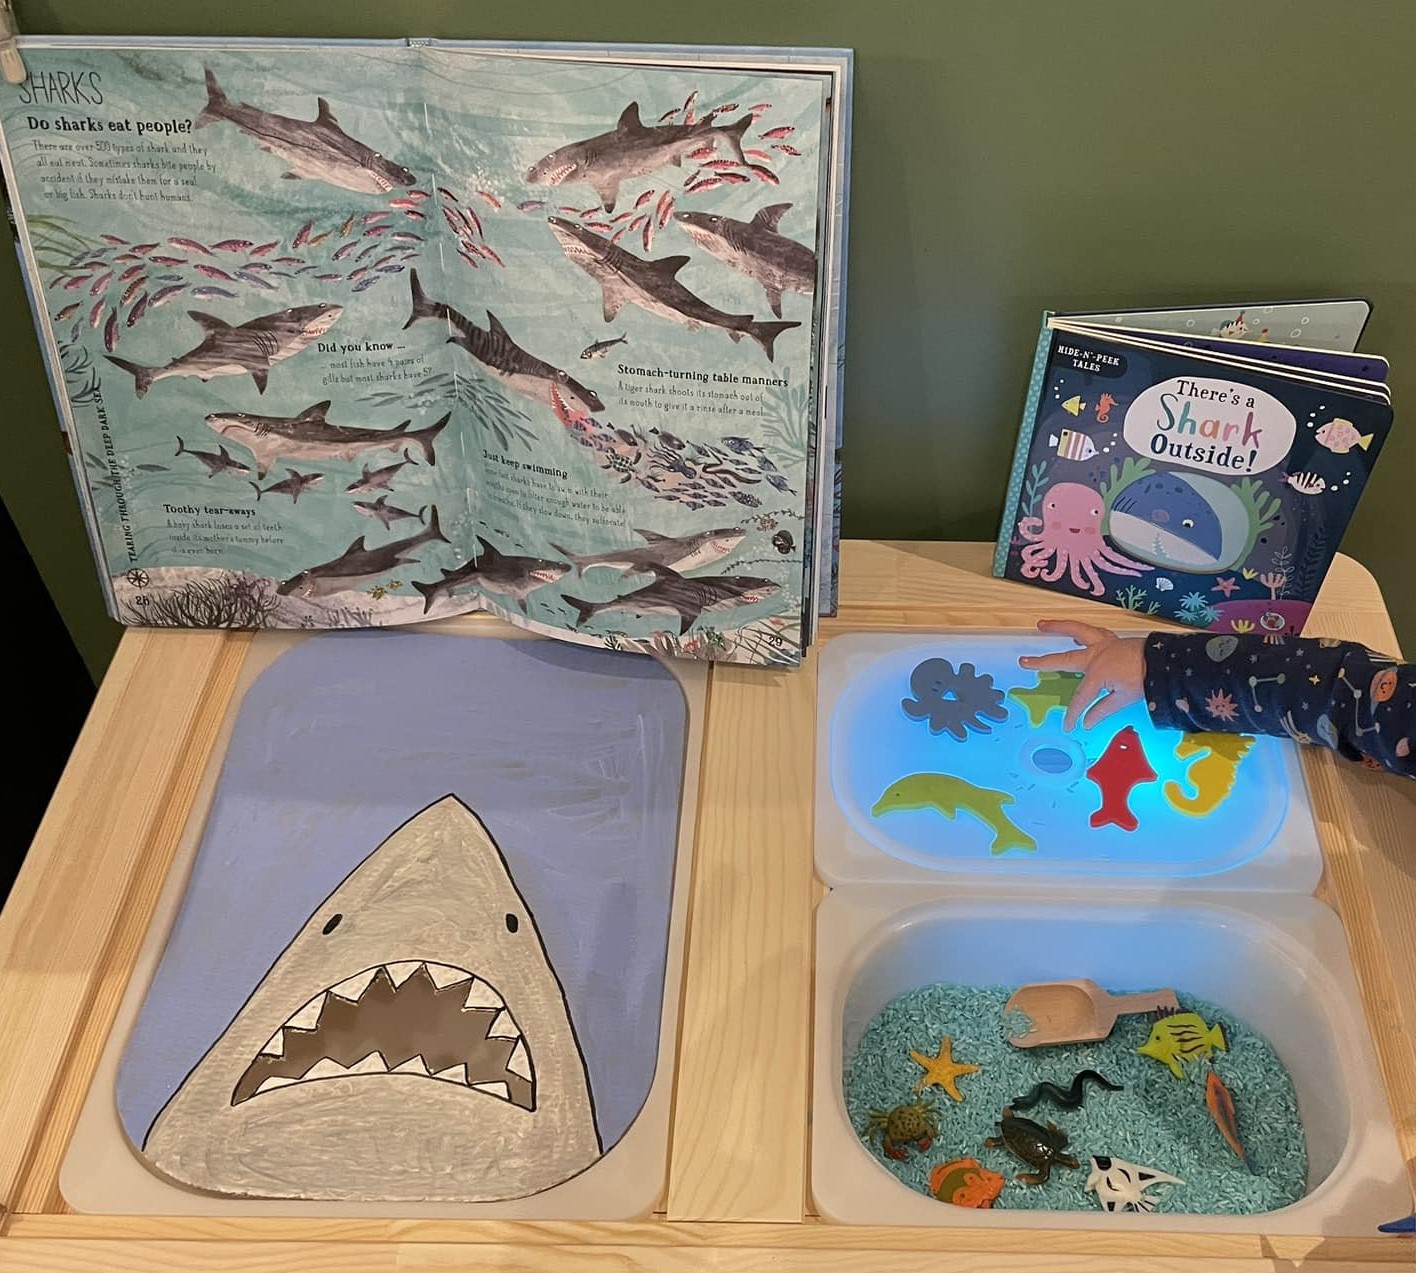
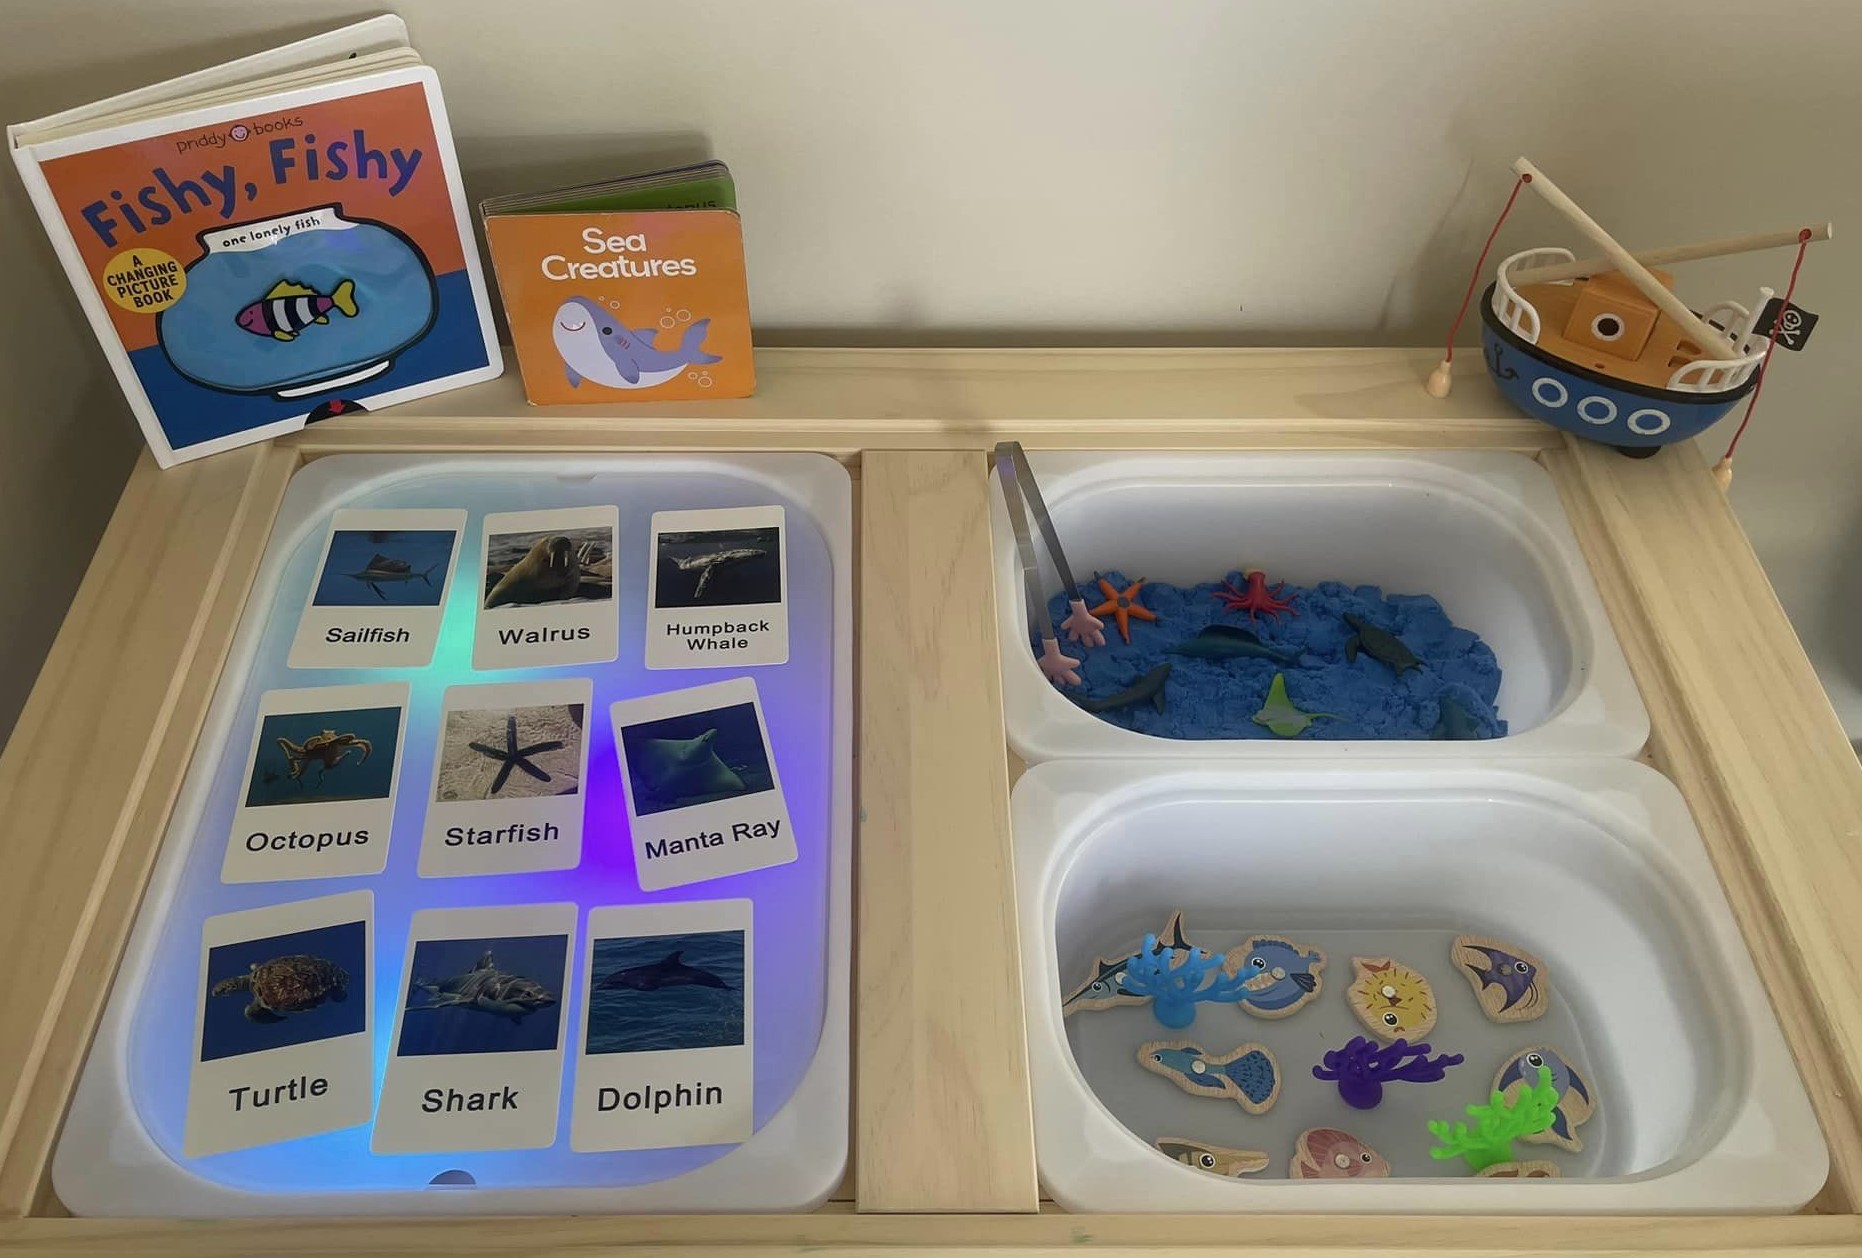
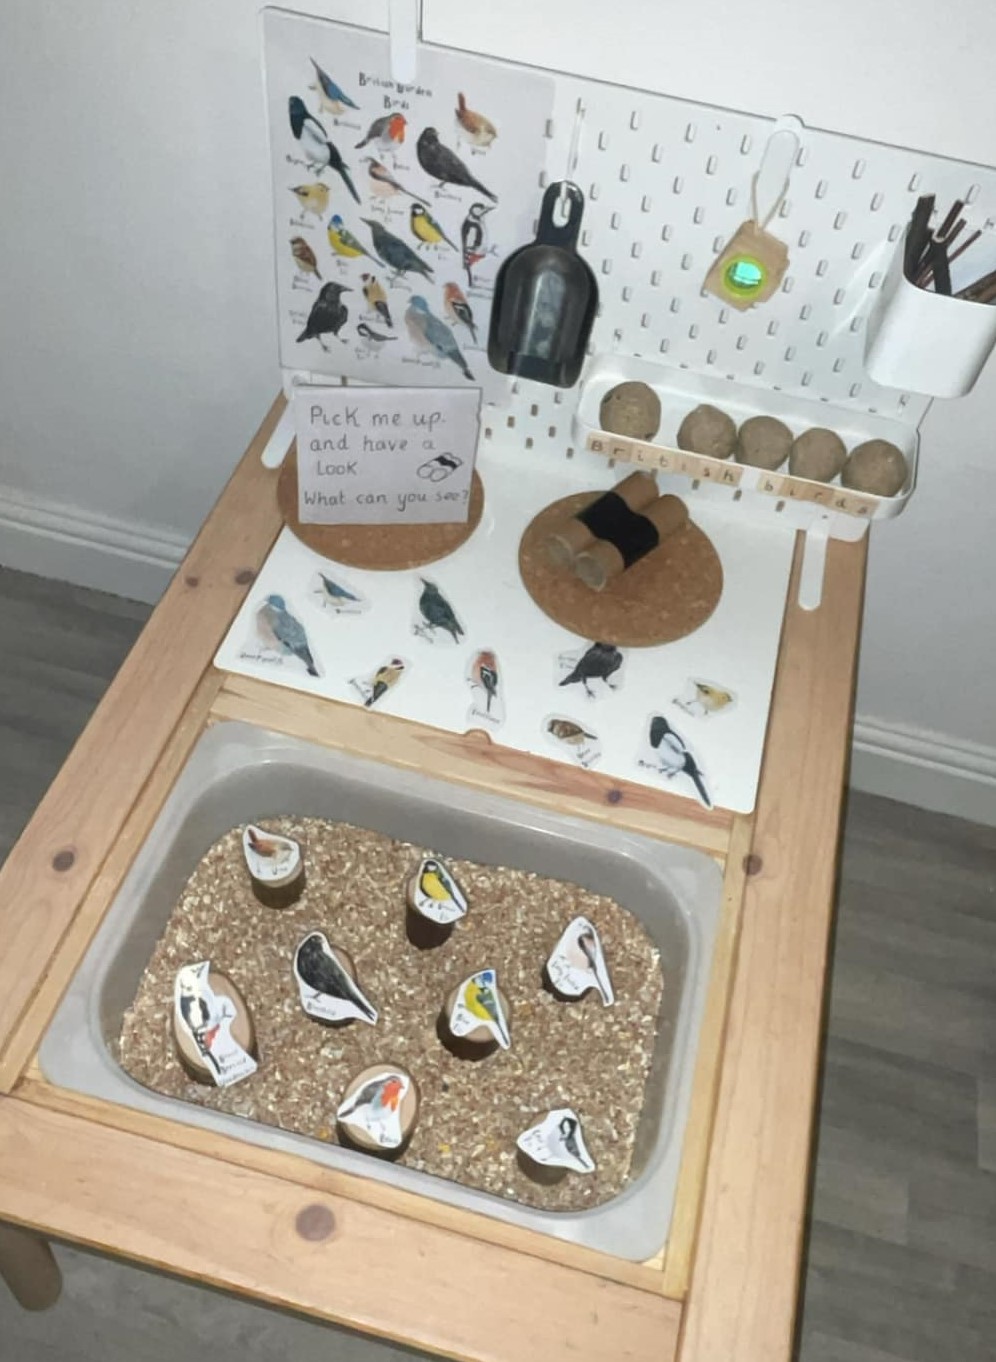
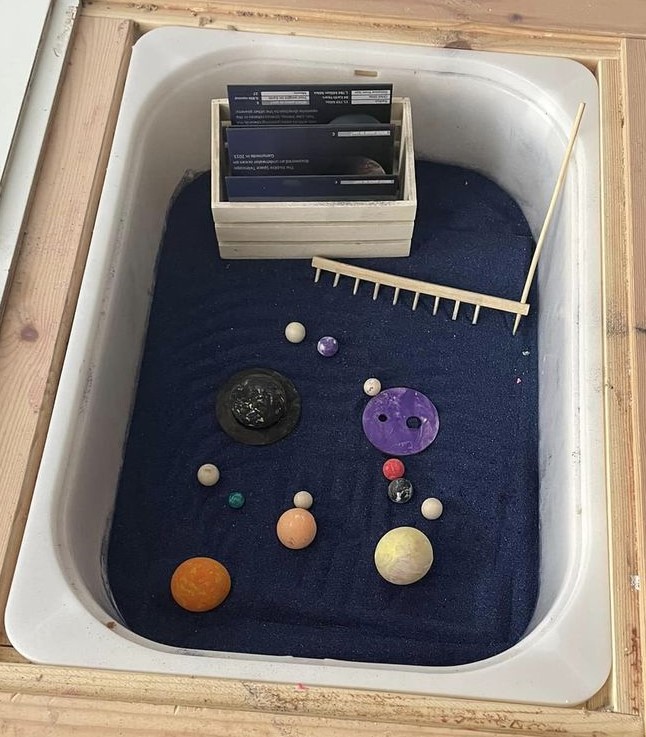
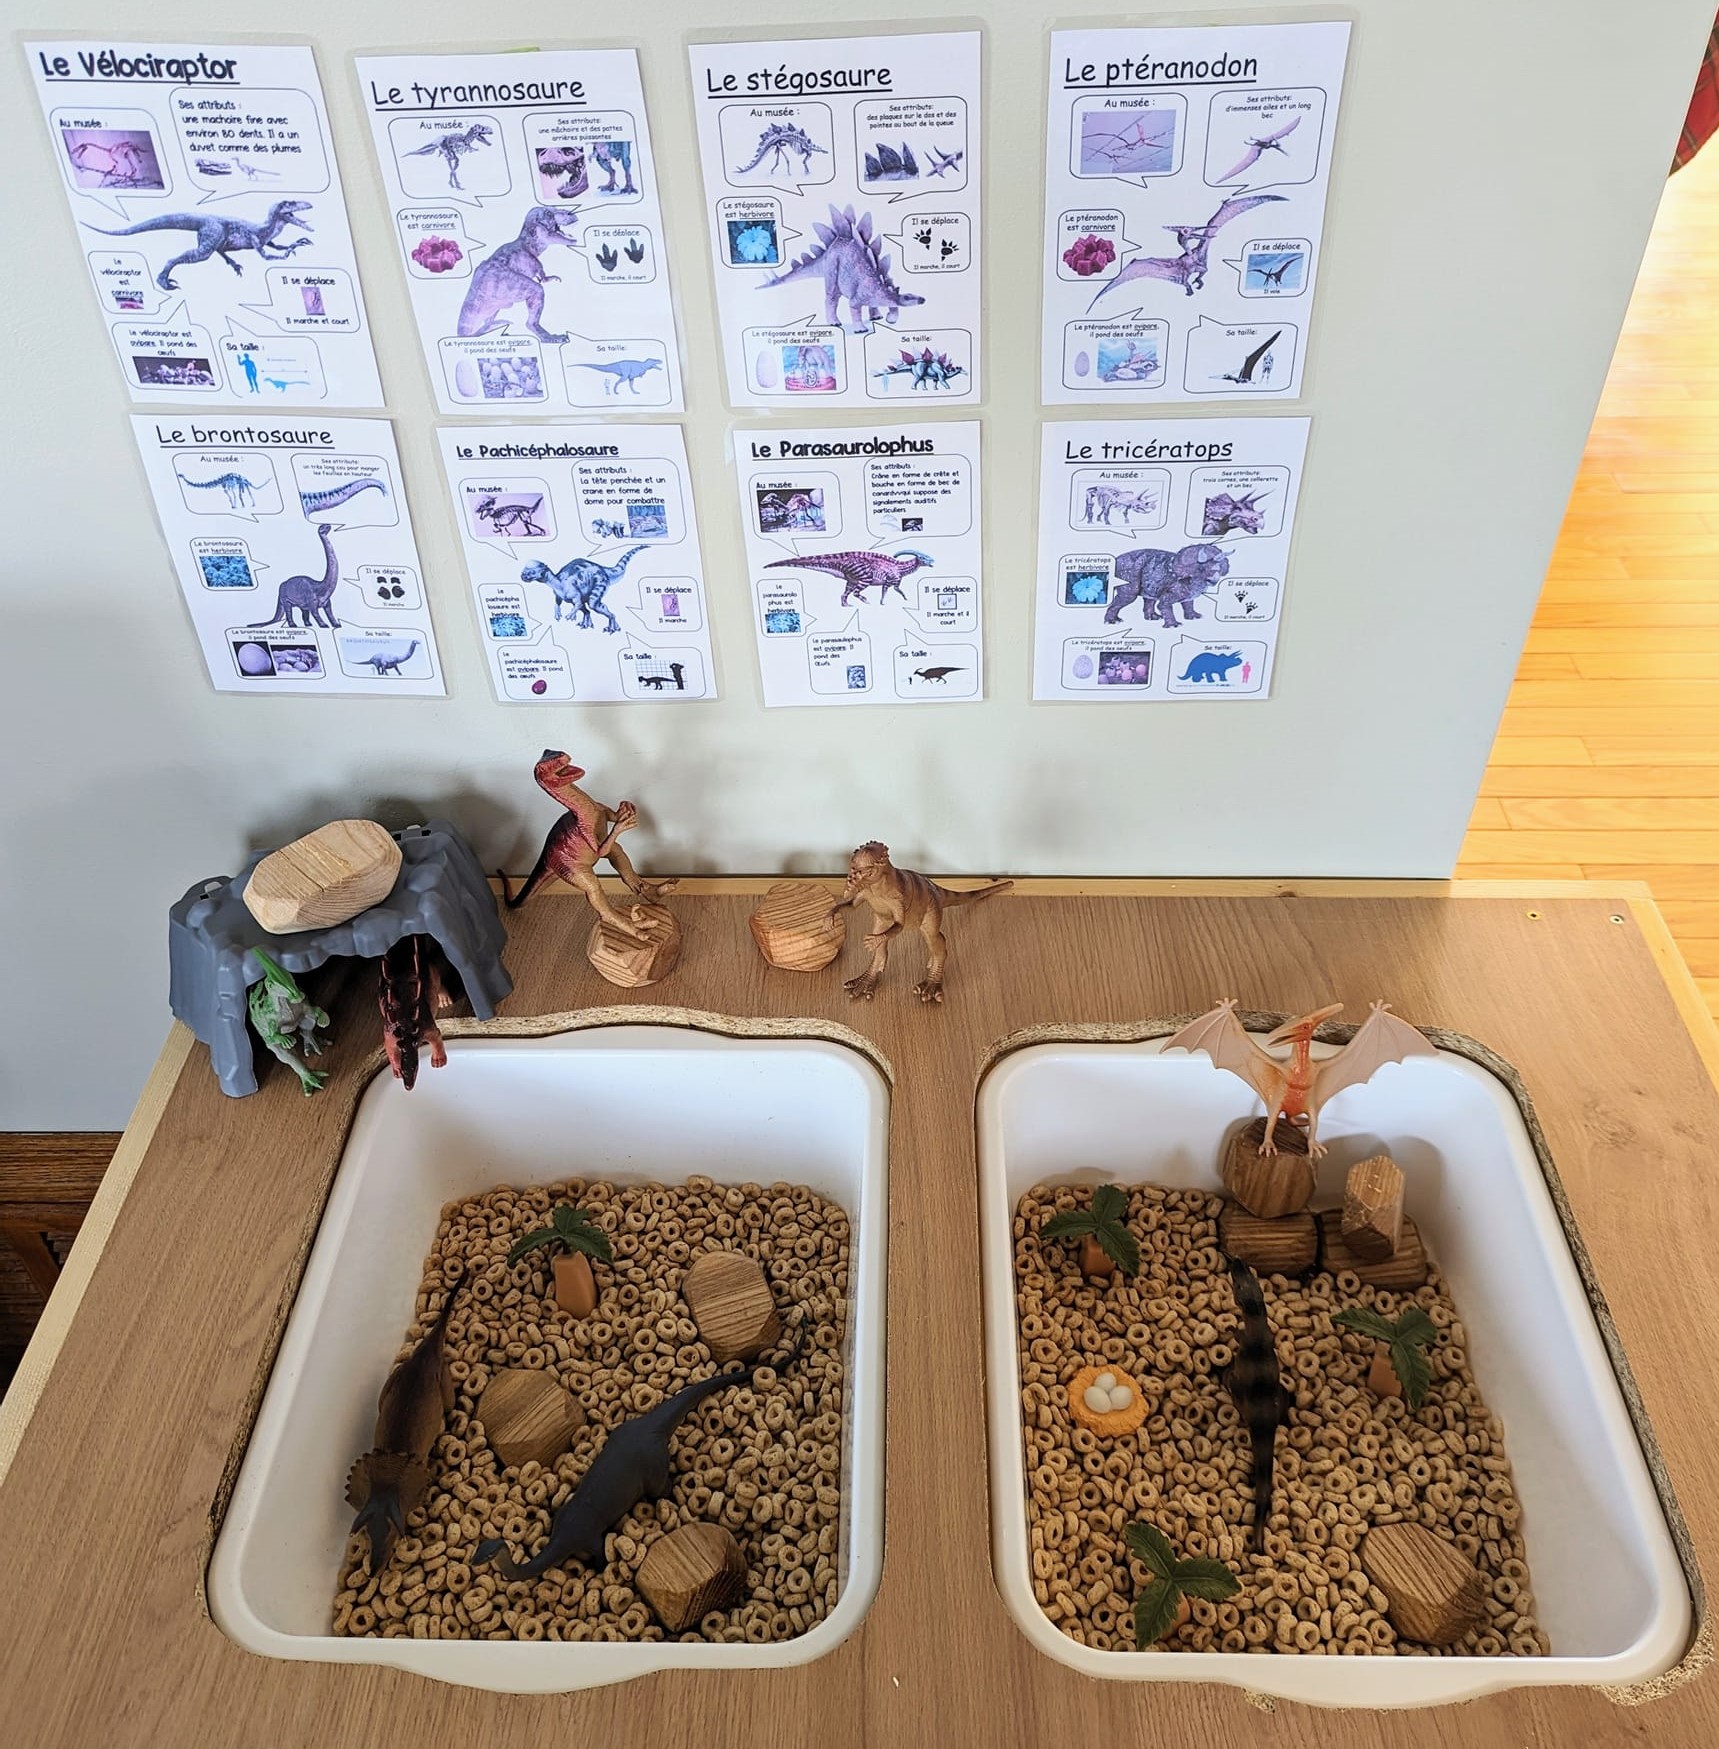
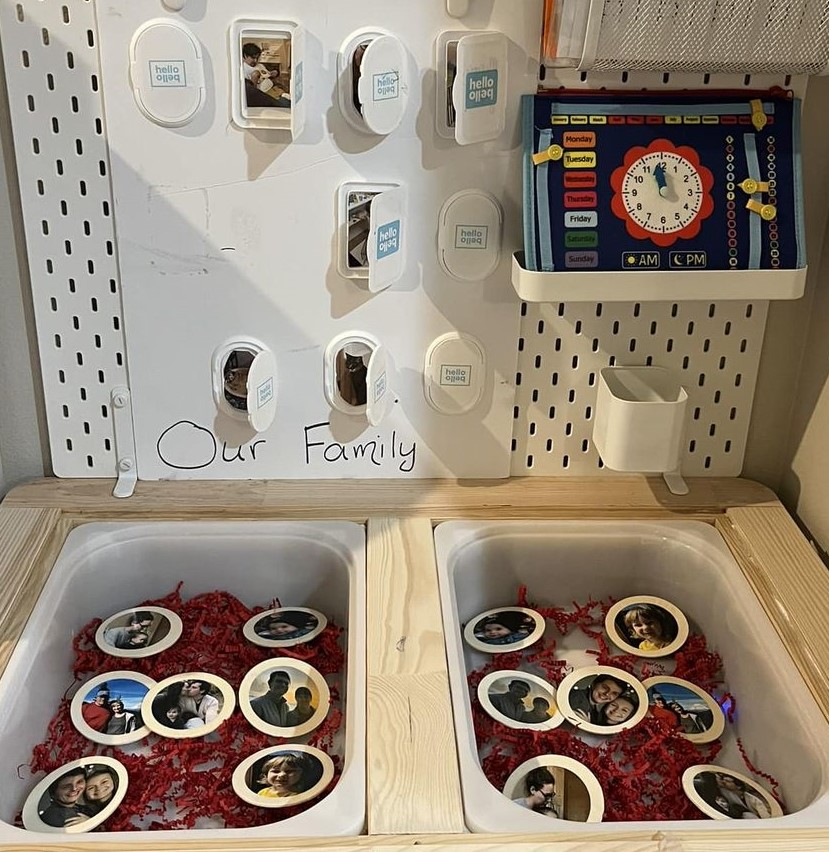
Or you can use hunts for science learning. They can find sea life that matches the pictures, pair up birds with the bird guide, find planets and learn about them, do small world play with the dinosaurs and also learn about them, or match tiles with family pictures to their family tree.
I’m reviewing my curriculum and everywhere I have a “learning activity” that is something like match the tool to the job, or match the shadow to the object, or sort these into categories, I want to consider: is there a way change this activity from moving pieces of paper around into something more tactile in the sensory bin.
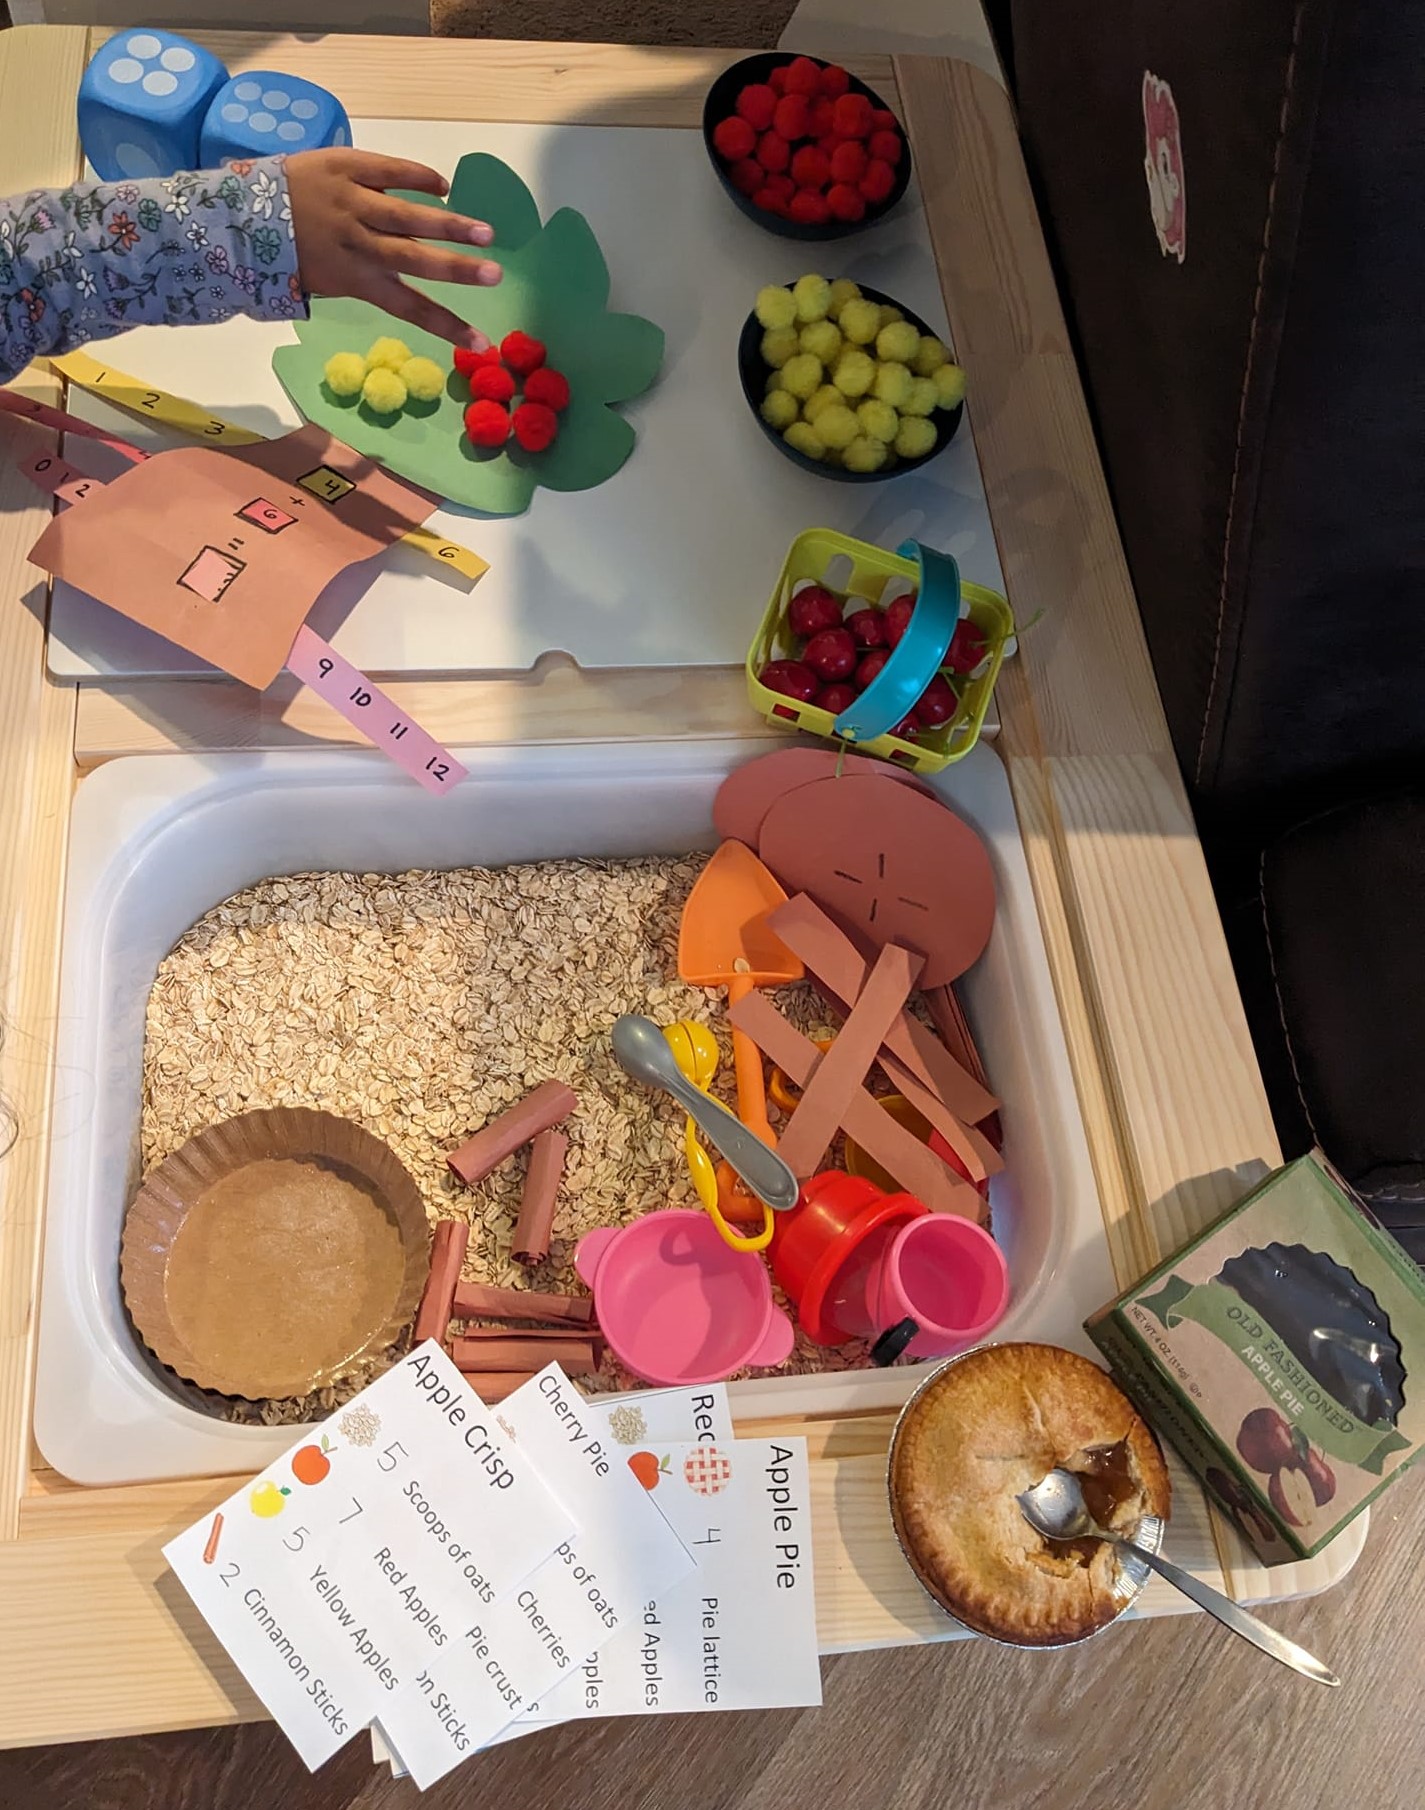
For older kids, you could give them recipe cards (or other assembly instructions) that encourage them to hunt for a certain number of each item. That blends sensory, math and literacy activities together.


Calls to Action
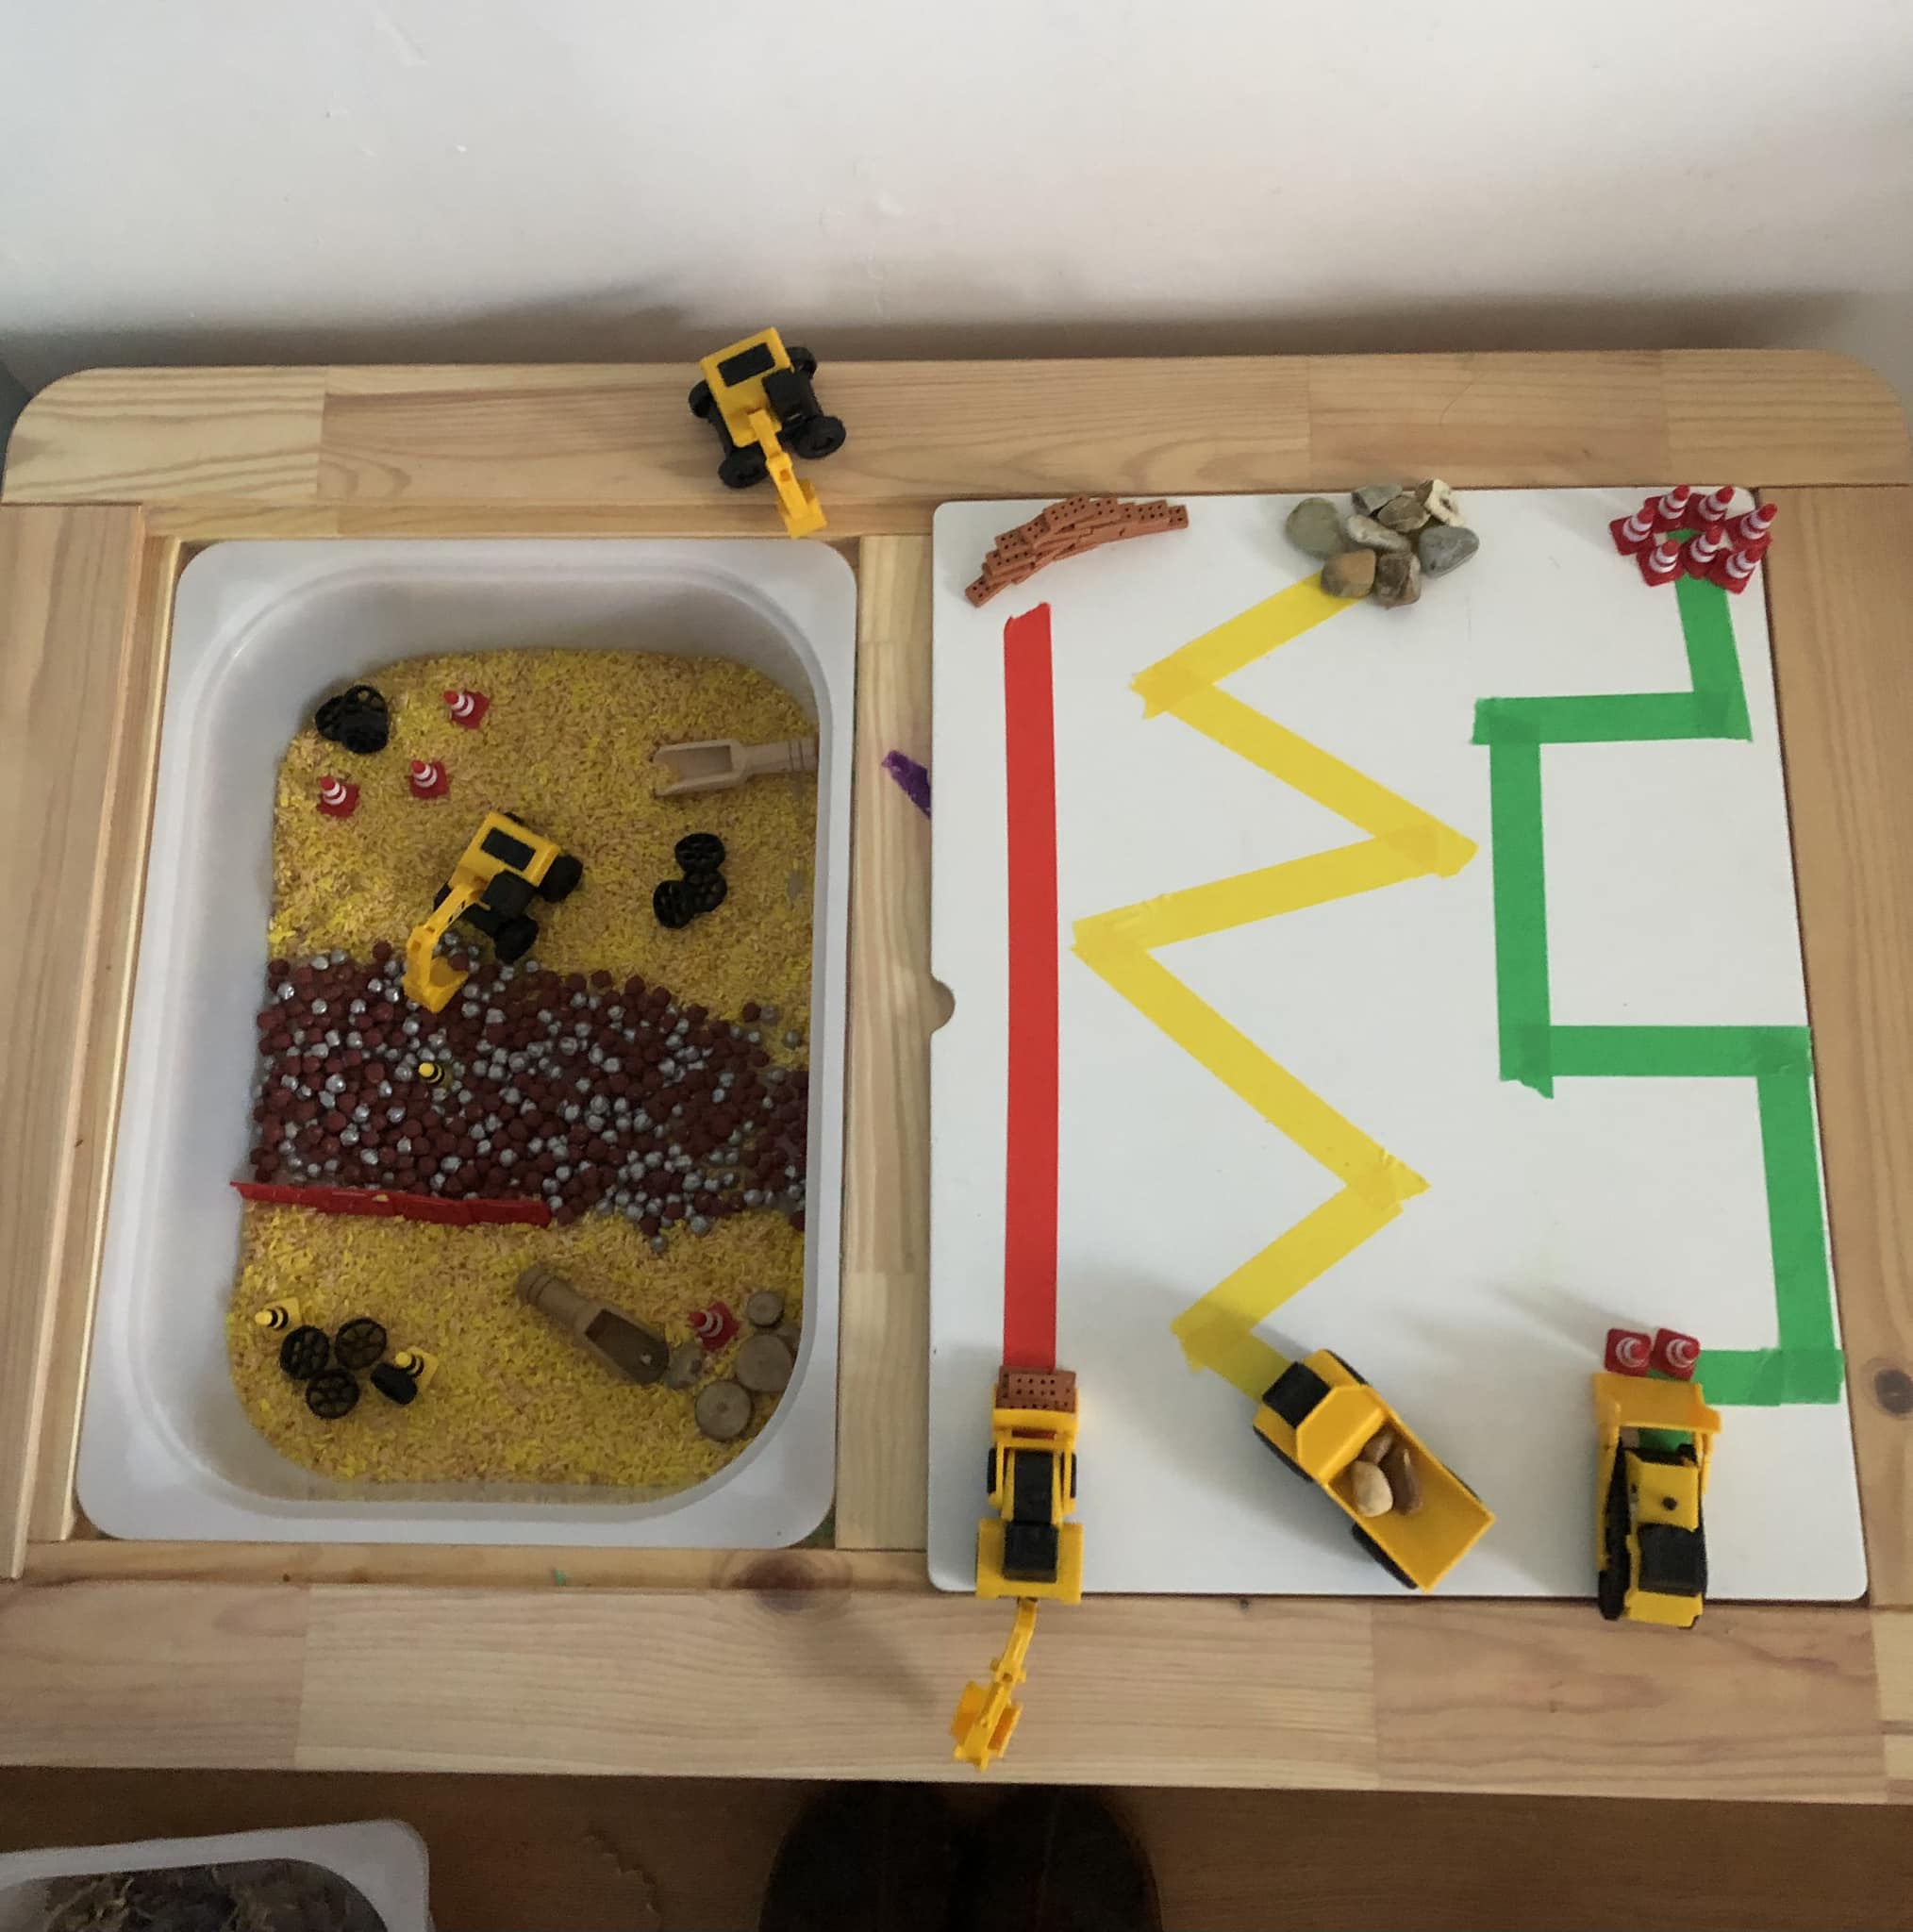
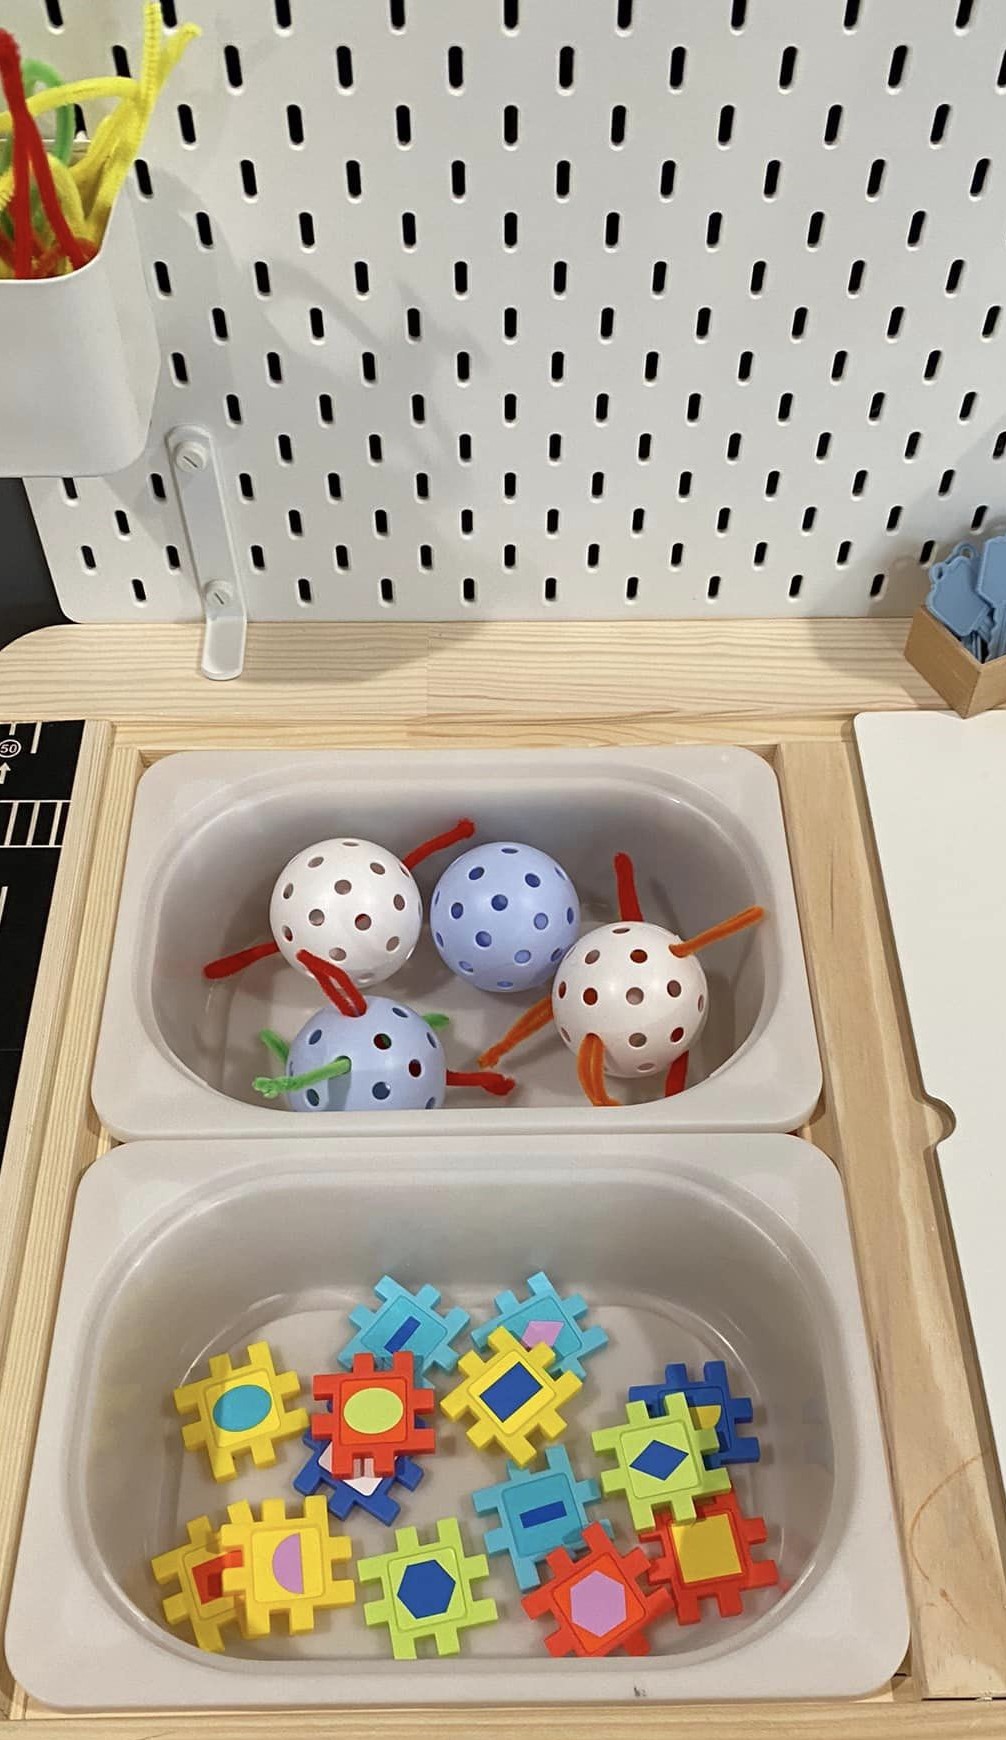
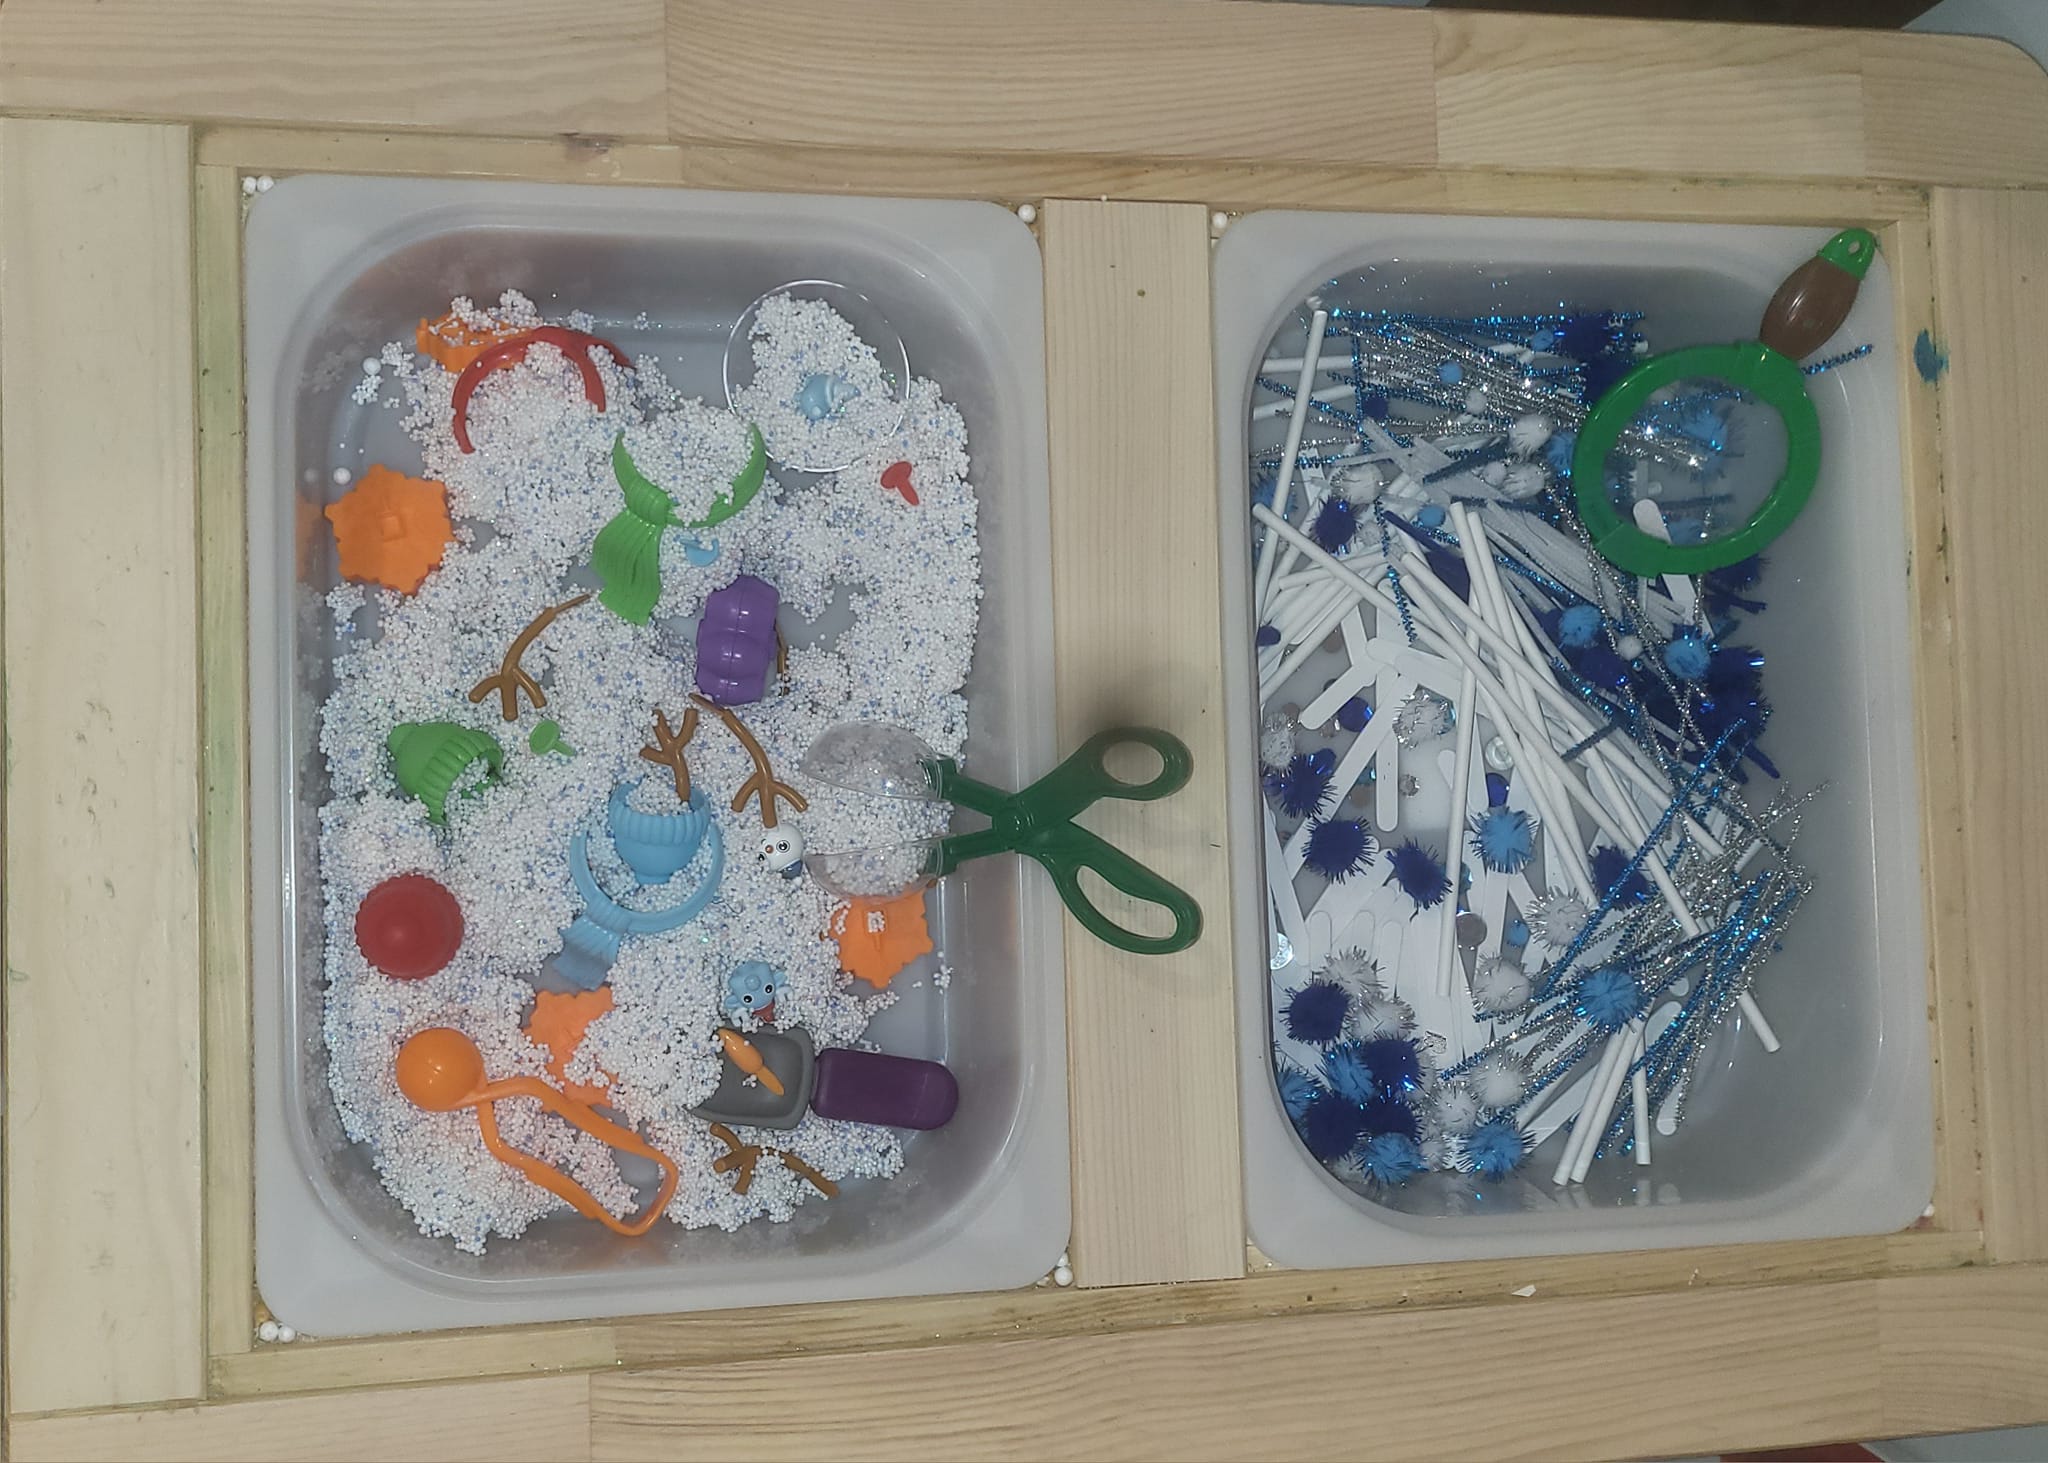
Here are examples of sensory bins with clear calls to action. When you look at them, you can see multiple ideas for what to do: both scooping and pouring and something else: assemble puzzle and drive trucks up cardboard ramps; load up trucks and drive down tape roads, decorate the tree, sort and build, assemble a puzzle and put pipe cleaners through whiffle balls; build a snowman or retrieve snowballs through the tape barrier, find mushrooms and bugs and examine them, or pour things down the ramp.
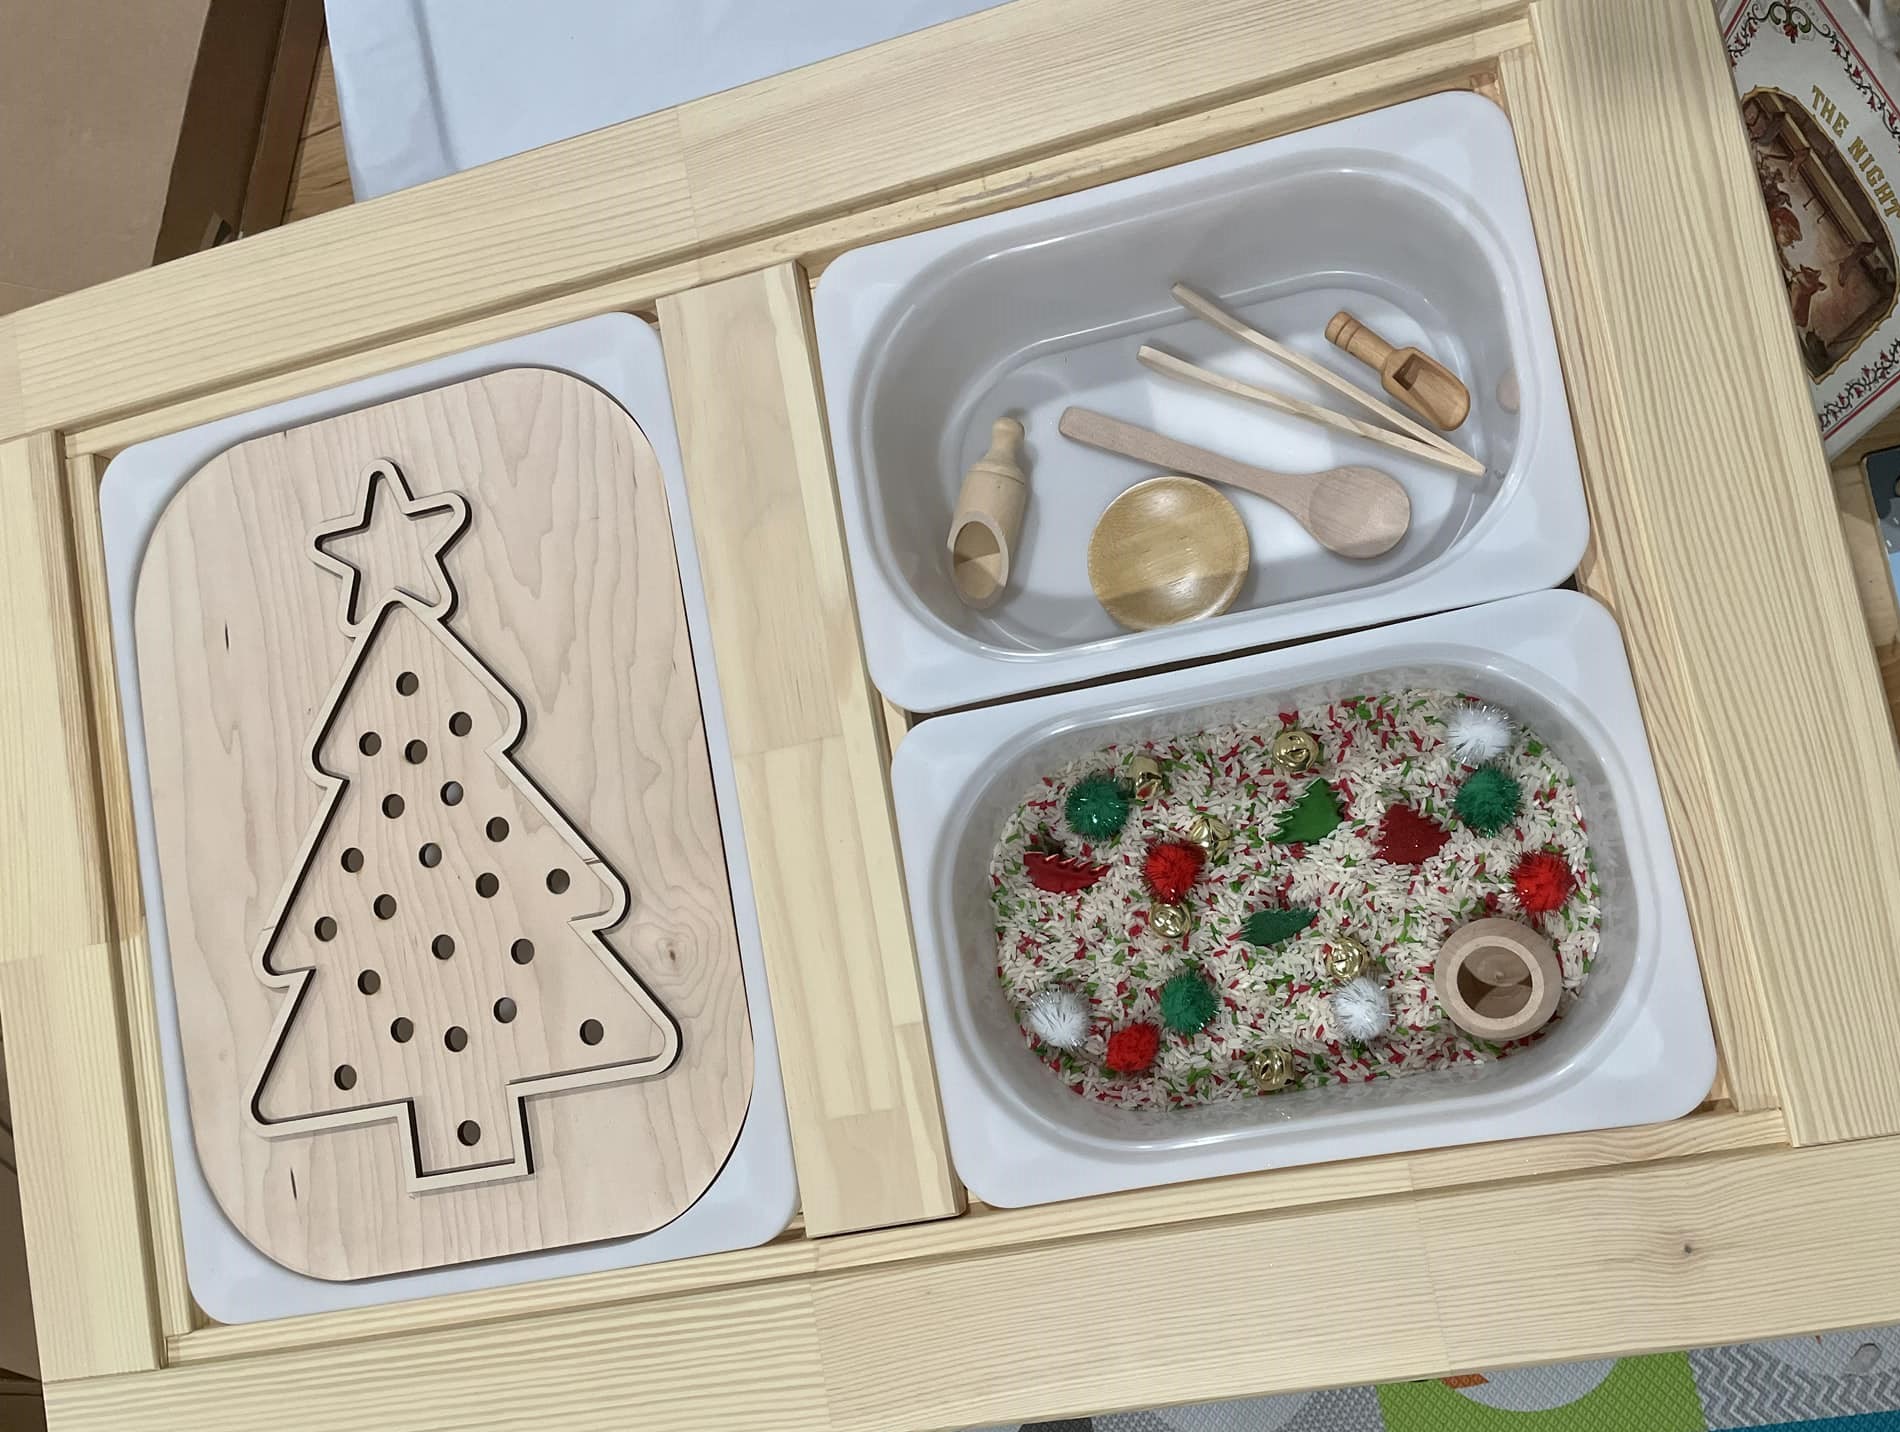

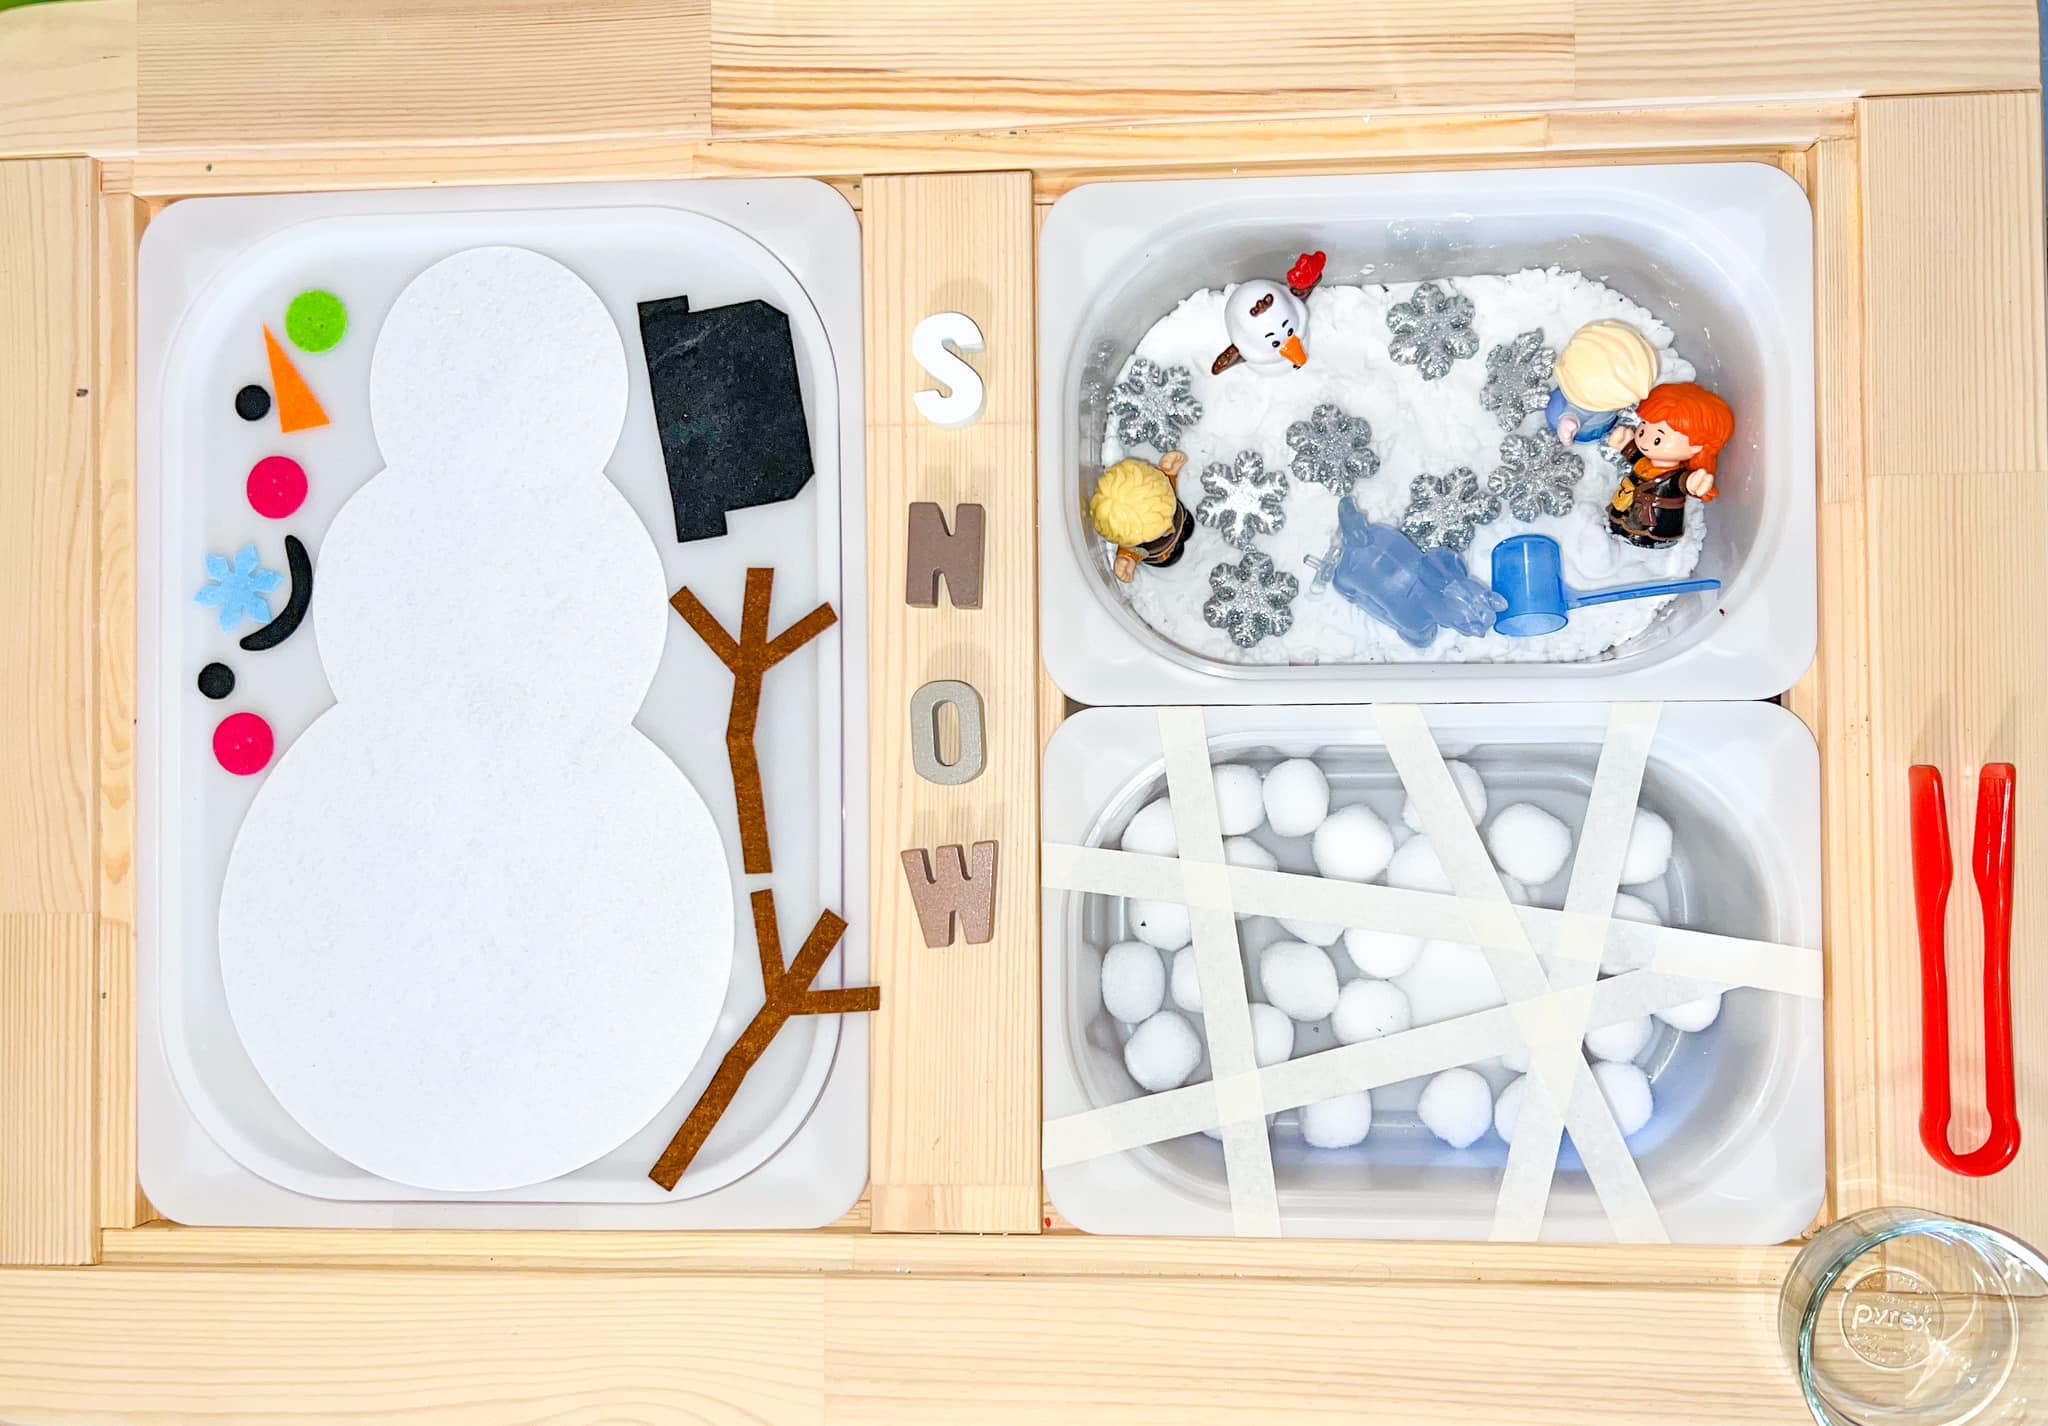

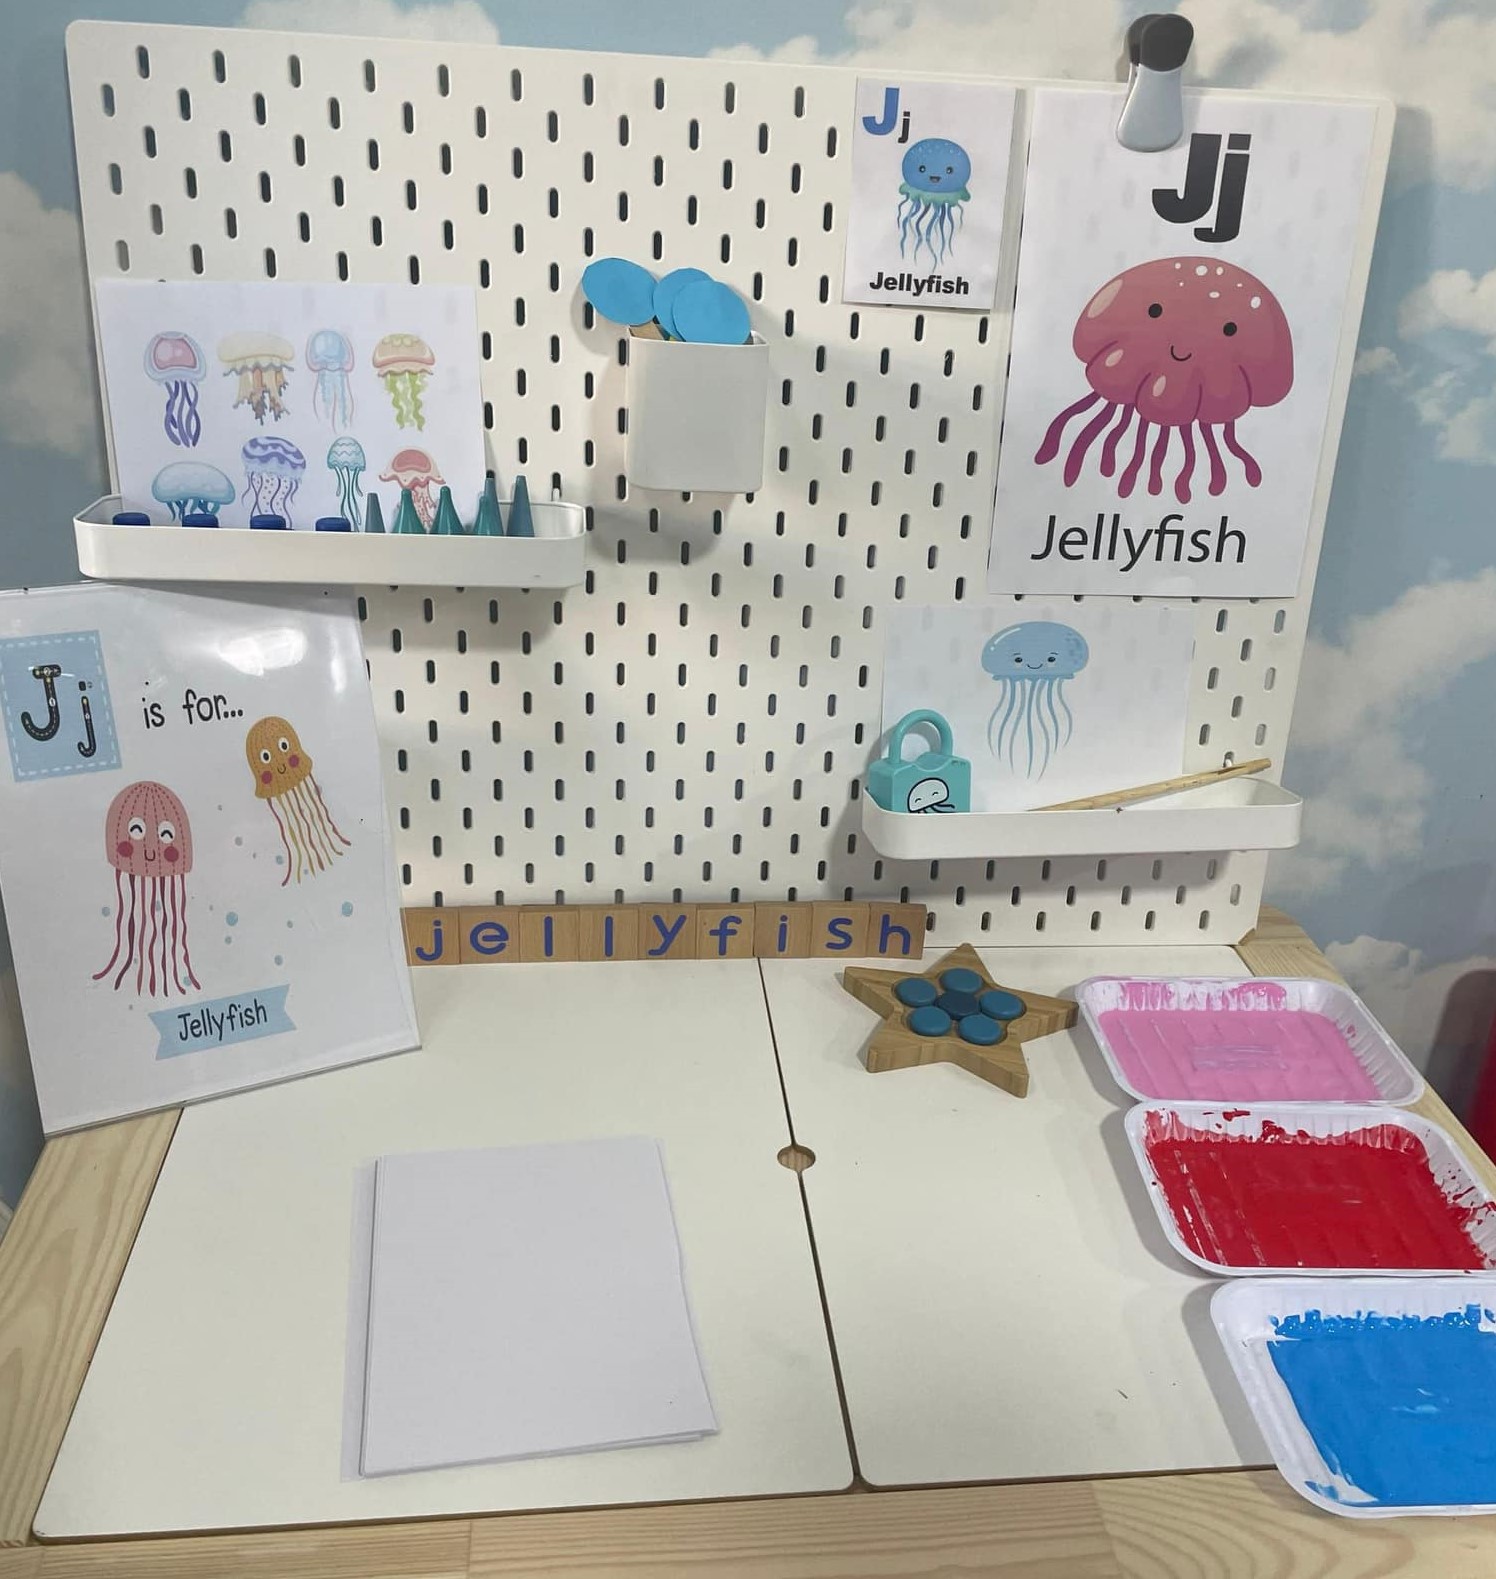
Here are some that are mixed. The first seems to imply I should paint a jellyfish, but then it looks like there’s a star stamp there, and maybe there’s a paintbrush in the bin? I might have offered a jellyfish-body shaped stamp, and then made the paintbrush for painting the legs more obvious. The second has a great feed the elephant game, but I’m not sure what the child is supposed to do with the items on the right. In the third, the left side clearly signals – make balls and then turn them into snowmen with these accessories! The right side says – look, here’s some stuff. There’s no sense of what to do with it, but in my classroom it would just get totally intermixed with the snowman activity and require more clean-up time.
Collage and Crafts
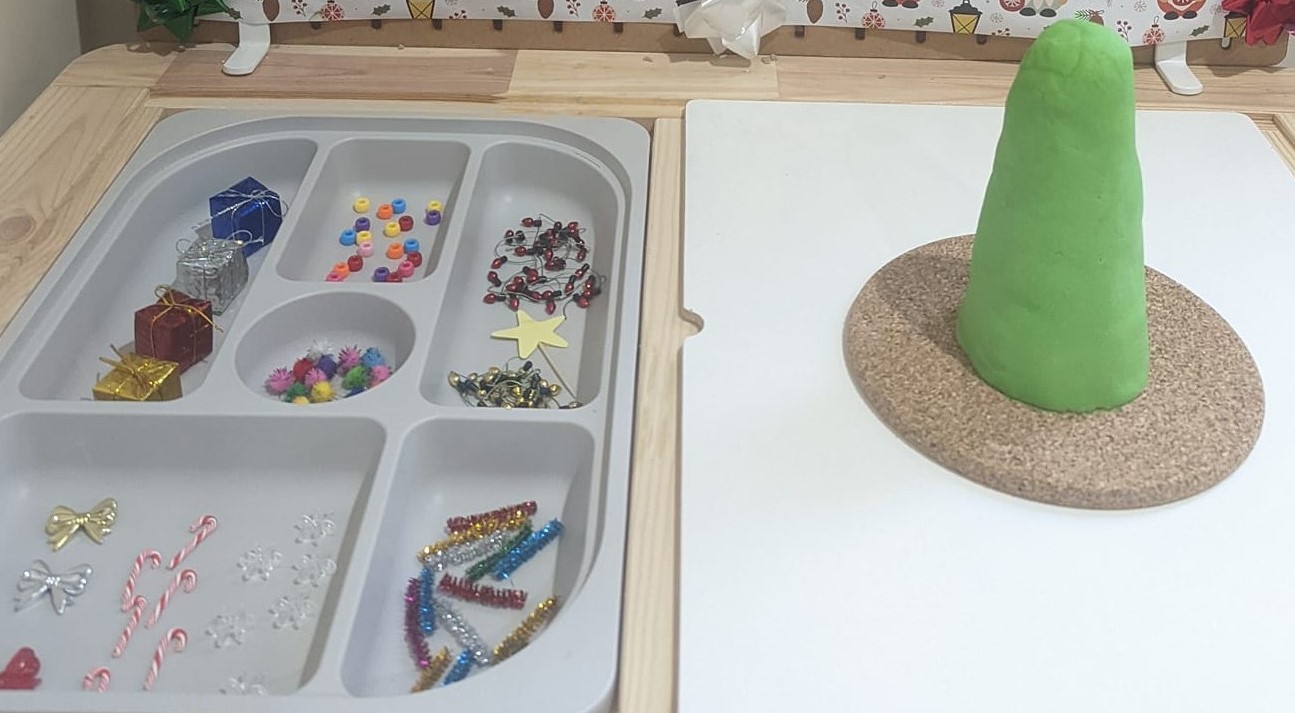
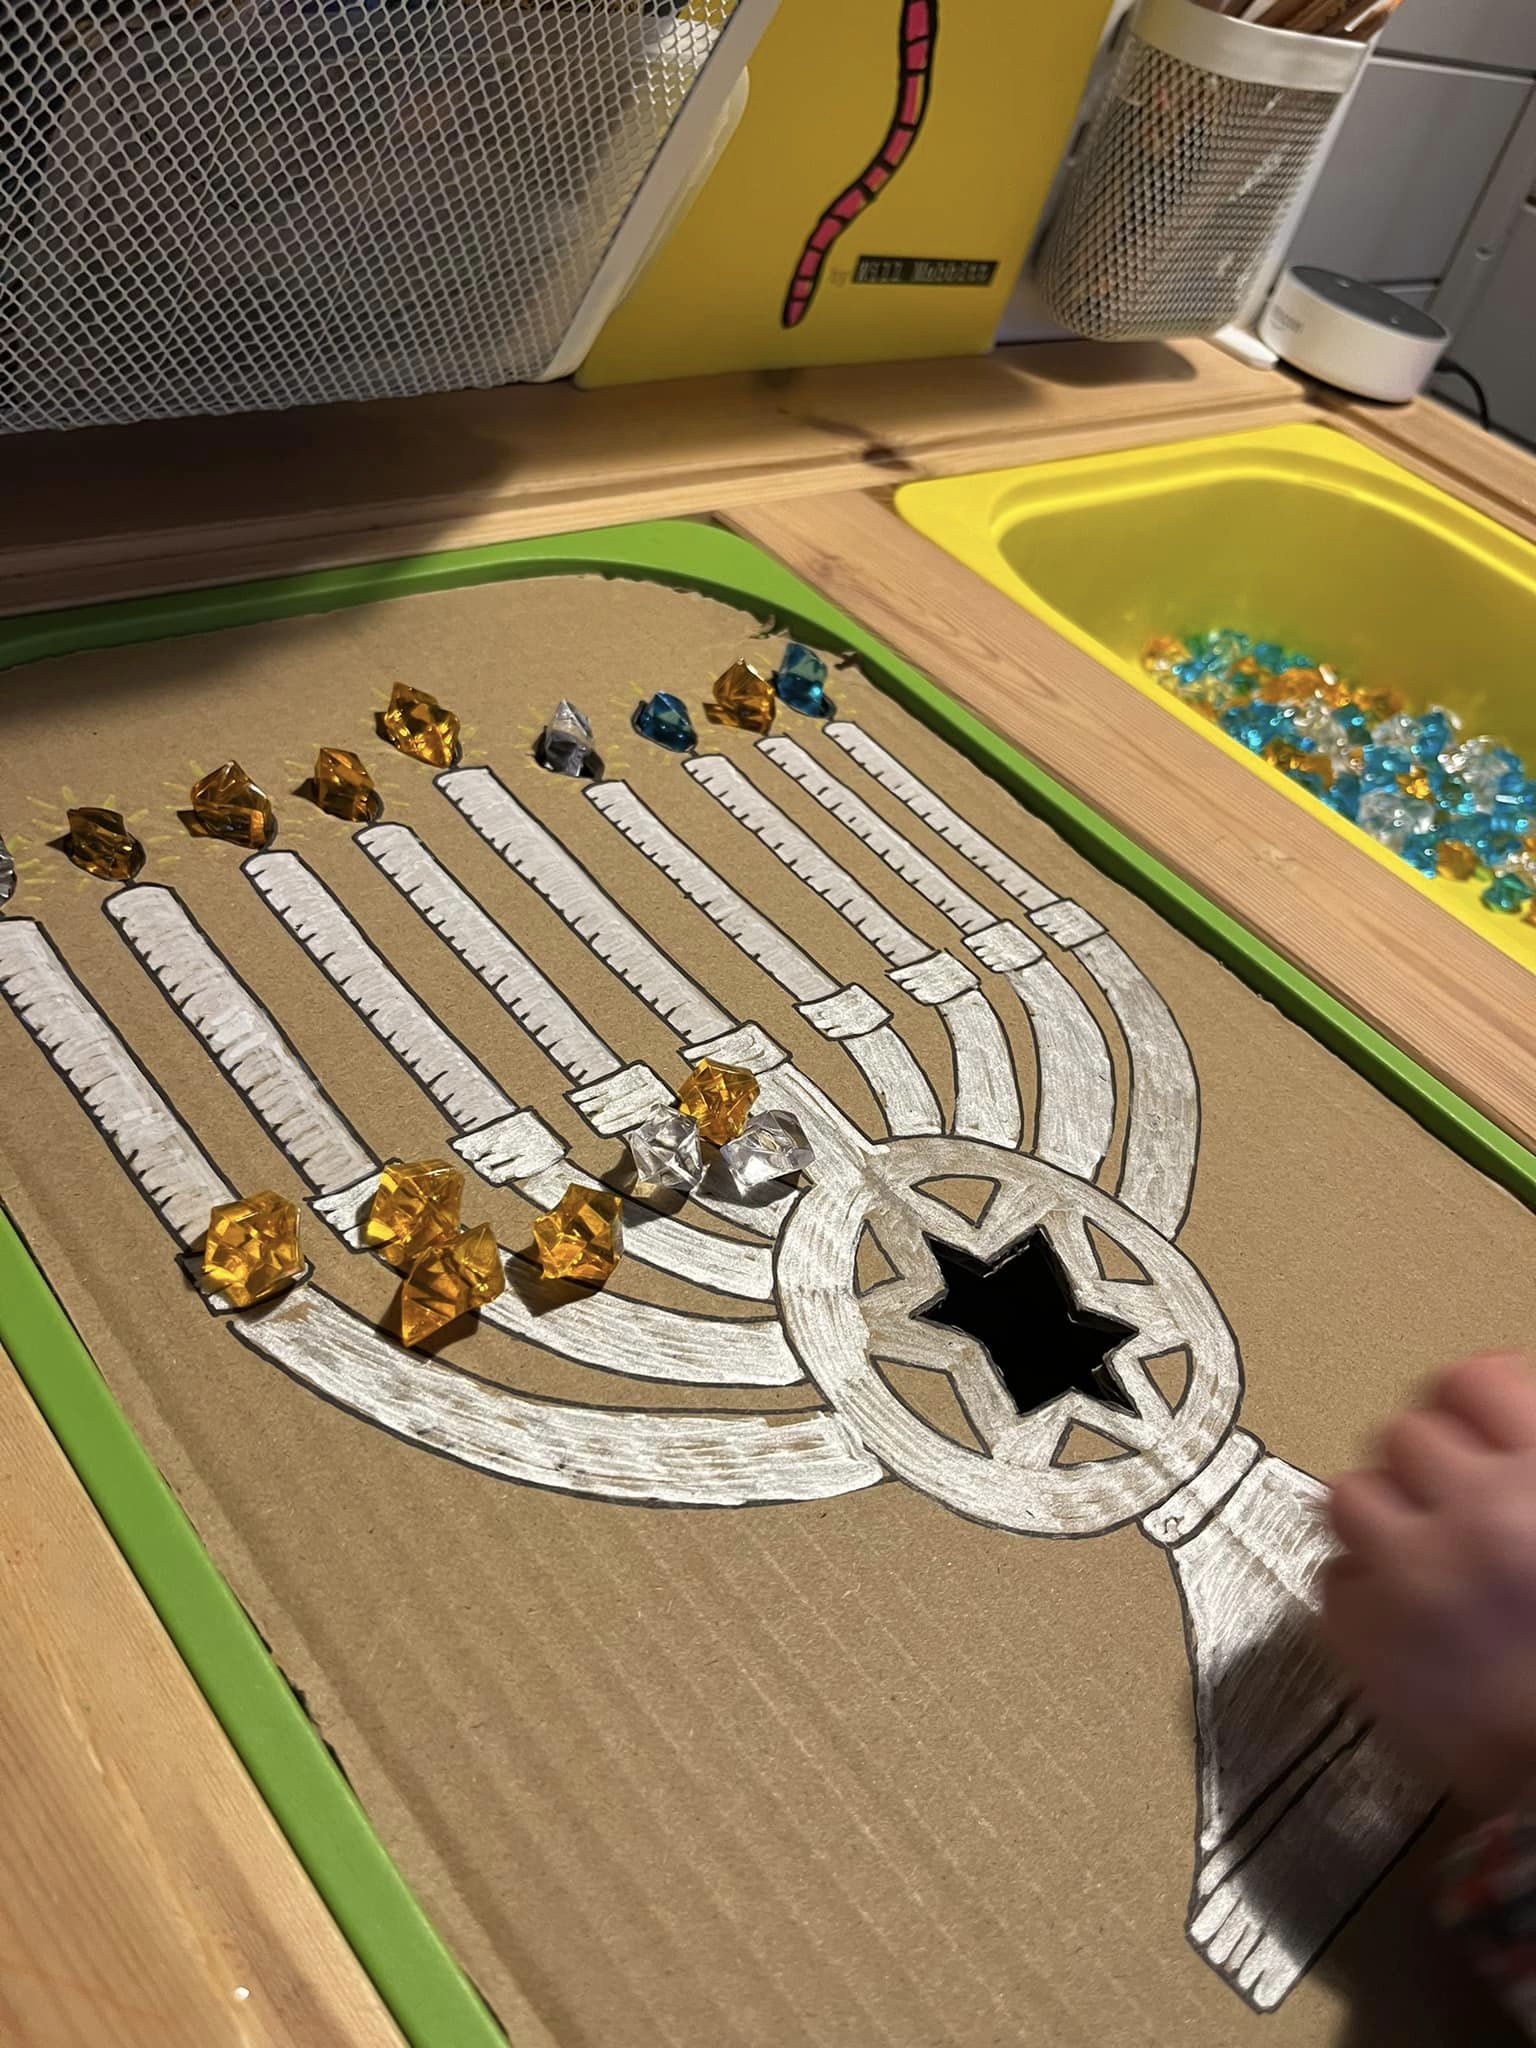
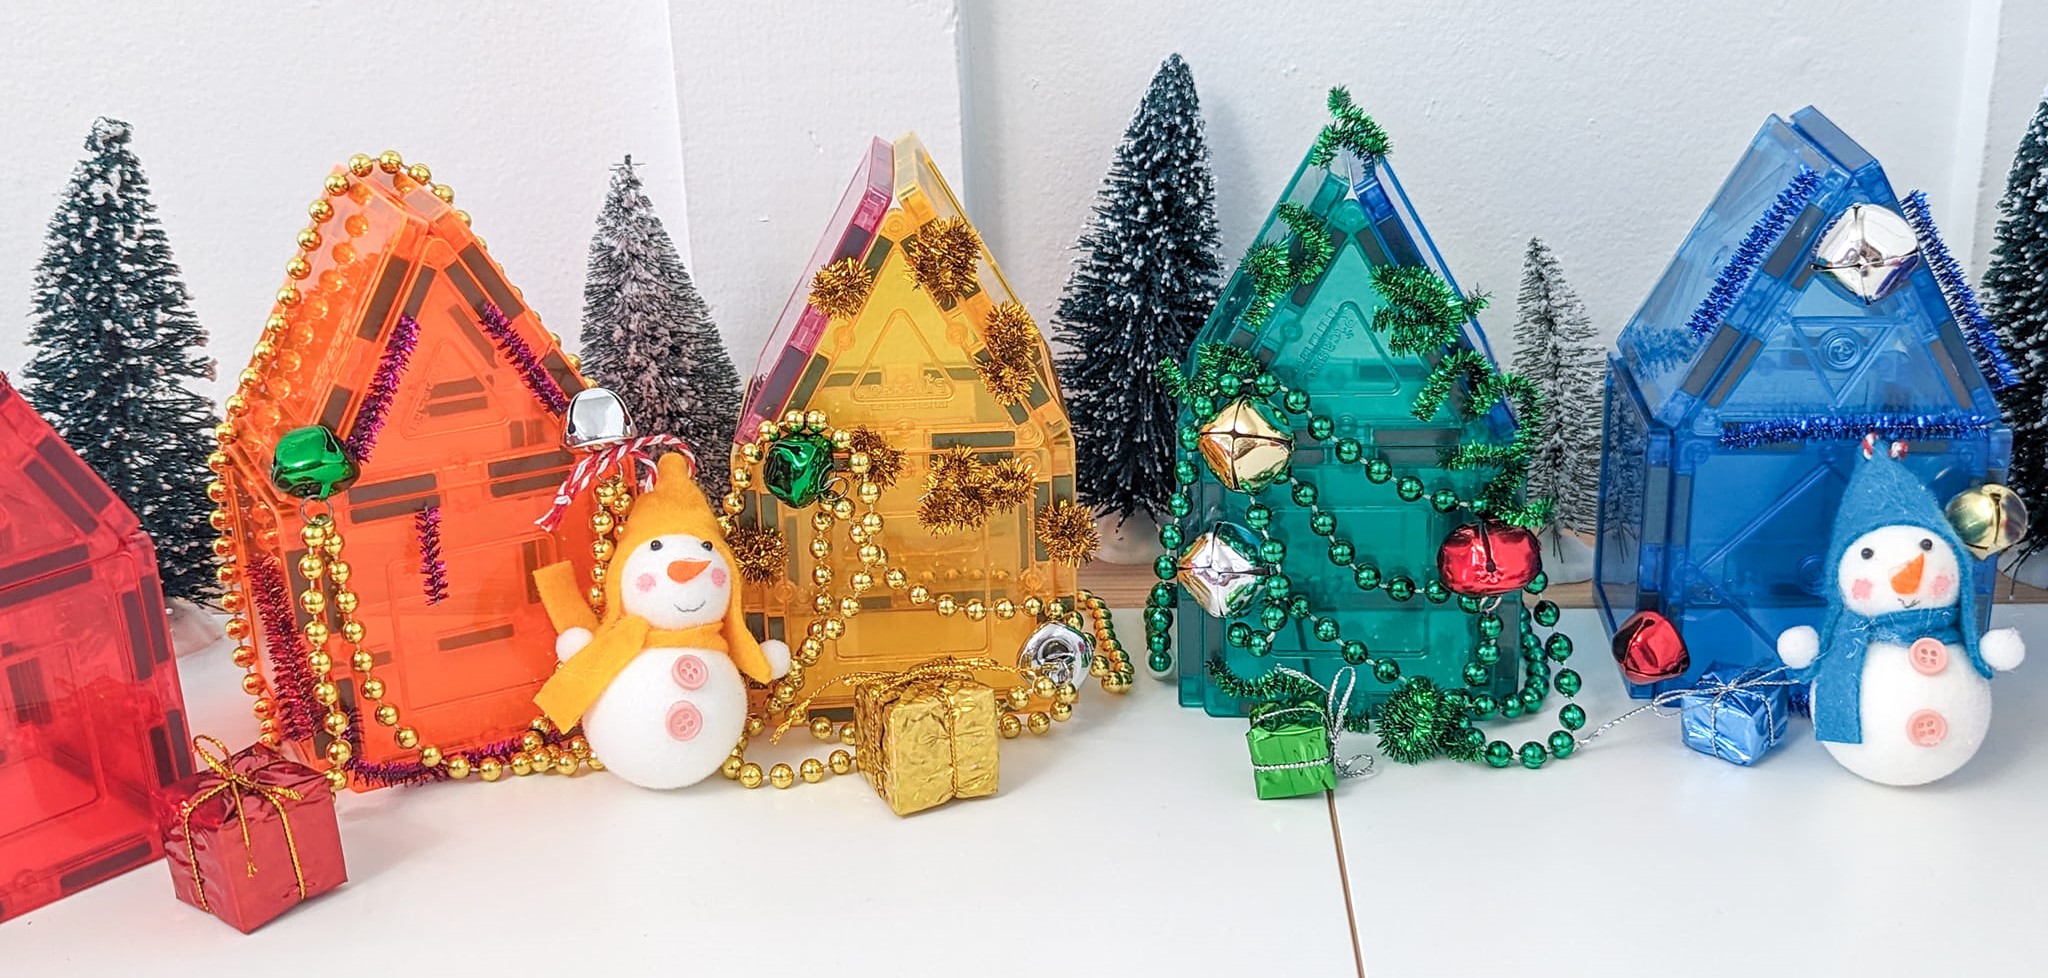
They can gather items from the sensory bin and use them to create an artwork. Here you see a playdough Christmas tree, a Hanukkah menorah to add “flames” to, and gingerbread houses from magna-tiles. (Triangle tiles make Christmas trees.)
You could also put crafts that have or create lots of little pieces into a bin. Two examples: beads and pipe cleaners to string them on, and paper with hole punches – they can punch all they want to and the little bits of paper are all in the bin – easy clean-up!


Toys in the Sensory Bin
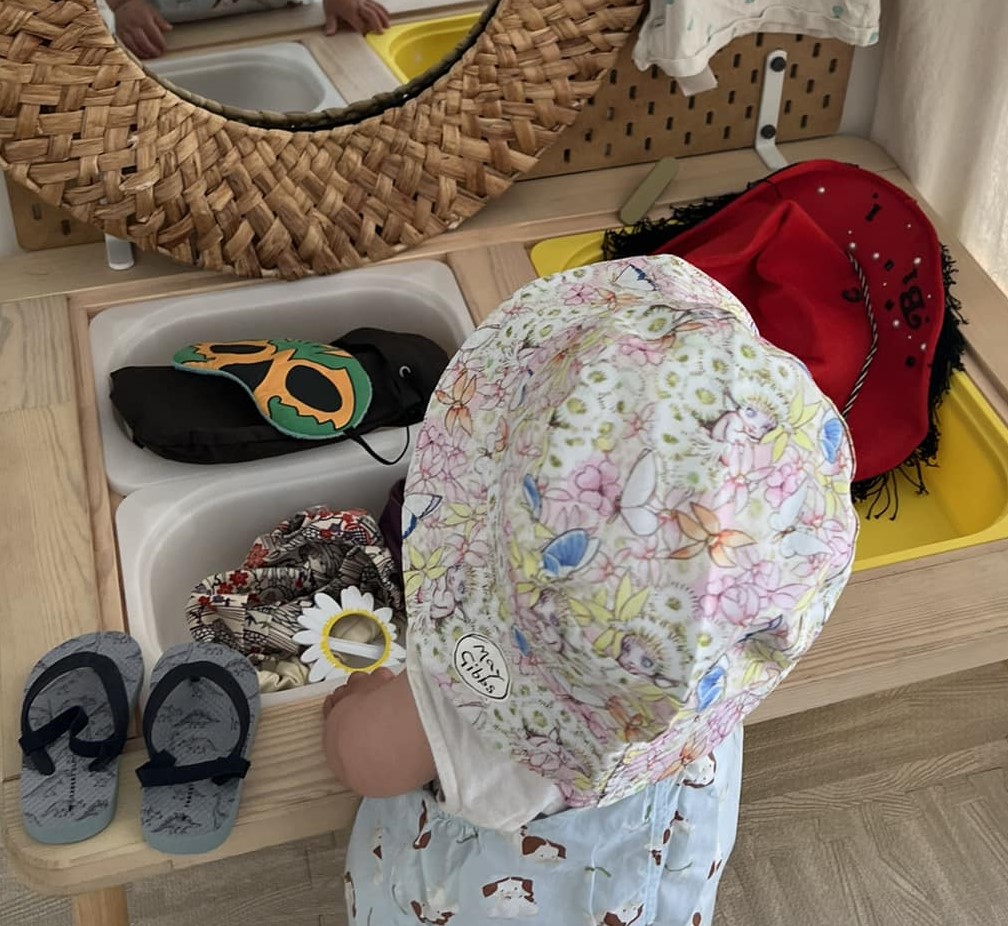
You can mix almost any toy or “manipulable” learning activity into the sensory bin. Sometimes this can give new life to a toy that your child may have become bored of. For example, when the toy horses and trains were mixed together, then rocks were added, the child then created stories of rock slides blocking the train tracks and horses coming to the rescue. When you’ve played too many times with all the fake food you have, could you move kitchen equipment to the sensory bin to explore new ideas? Building shape collages is a great learning activity, but could you mix them with sensory items to turn it into a hunt, then sort, then build? Putting toys with many parts (like this ice cream set) into the sensory bin is definitely fun, but could you add in even more fun with some whipped cream or the pompom dipping dot theme shown in the next picture? And how about putting dress-up accessories and a mirror at the sensory bin?


Vehicle toys are great in interaction with the sensory bin. I have done car washes (drive a car through “mud” paint, then into a car wash in the water table), and driven Mars rover toys in kinetic sand, or driven monster trucks in the sand so the tire treads leave tracks. Here are more examples:
Keep It Simple
If you’re working with young toddlers, you can start really simple – here are some good examples.


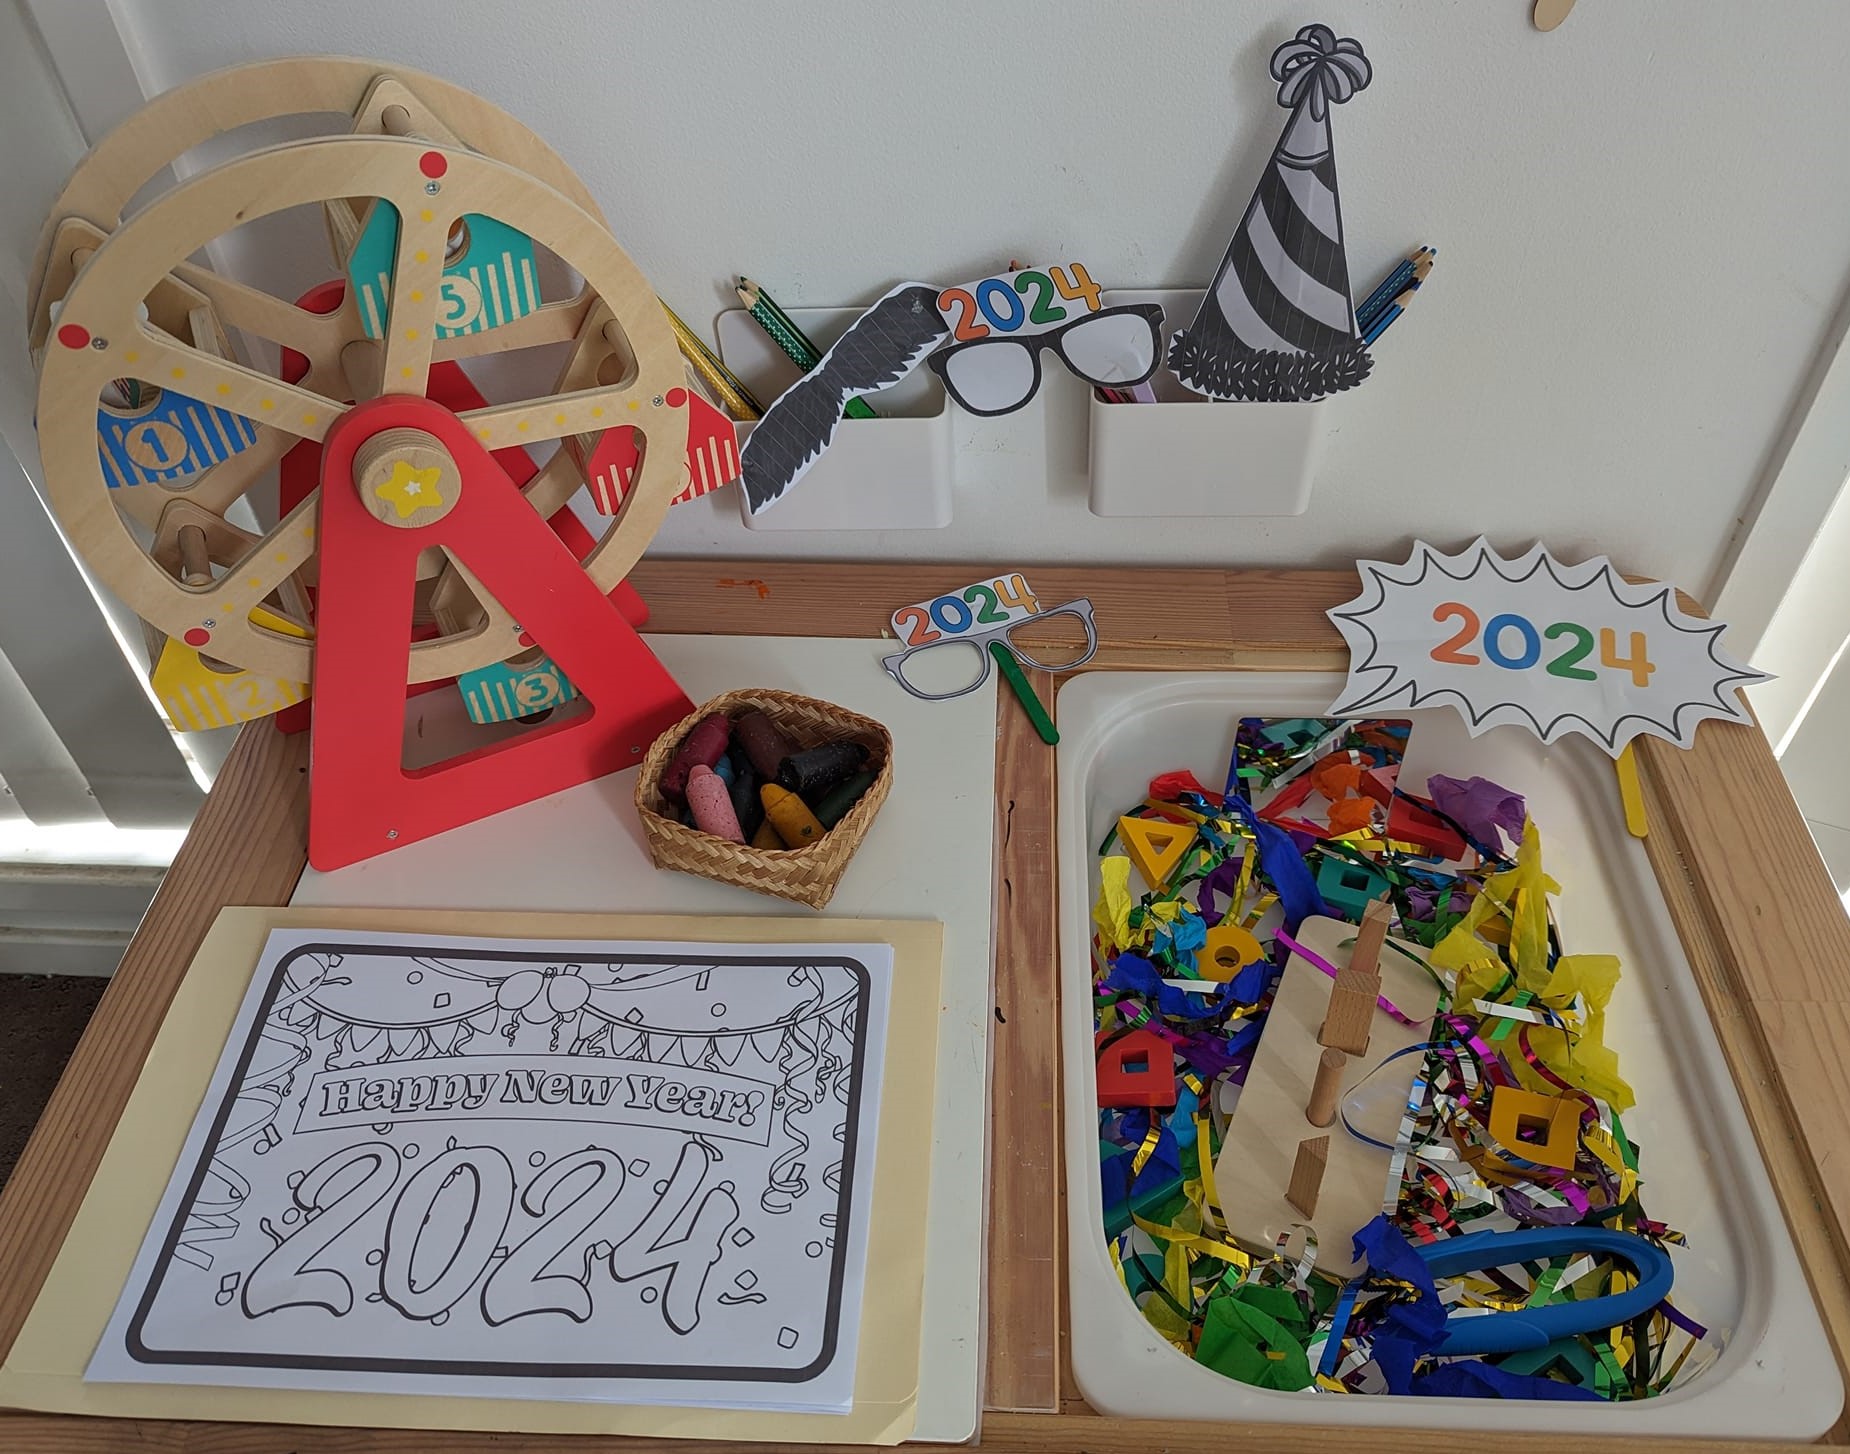
With older kids, it’s important to know when to stop. It is better to have one clear concept of play than to get overenthusiastic and keep adding ideas to the table. For example, though the ferris wheel is a lovely toy, I might put it and the coloring page elsewhere in the room and set the pegs for the shape sorter on the table, and this turns into a fun but simple hunt for shapes and sort them. The others have all got a lot going on. It would be better to step back, choose a couple of the ideas. Have a clear sense of how every item on/in the table could logically interact with every other item. Save the rest of your ideas and materials for another day.


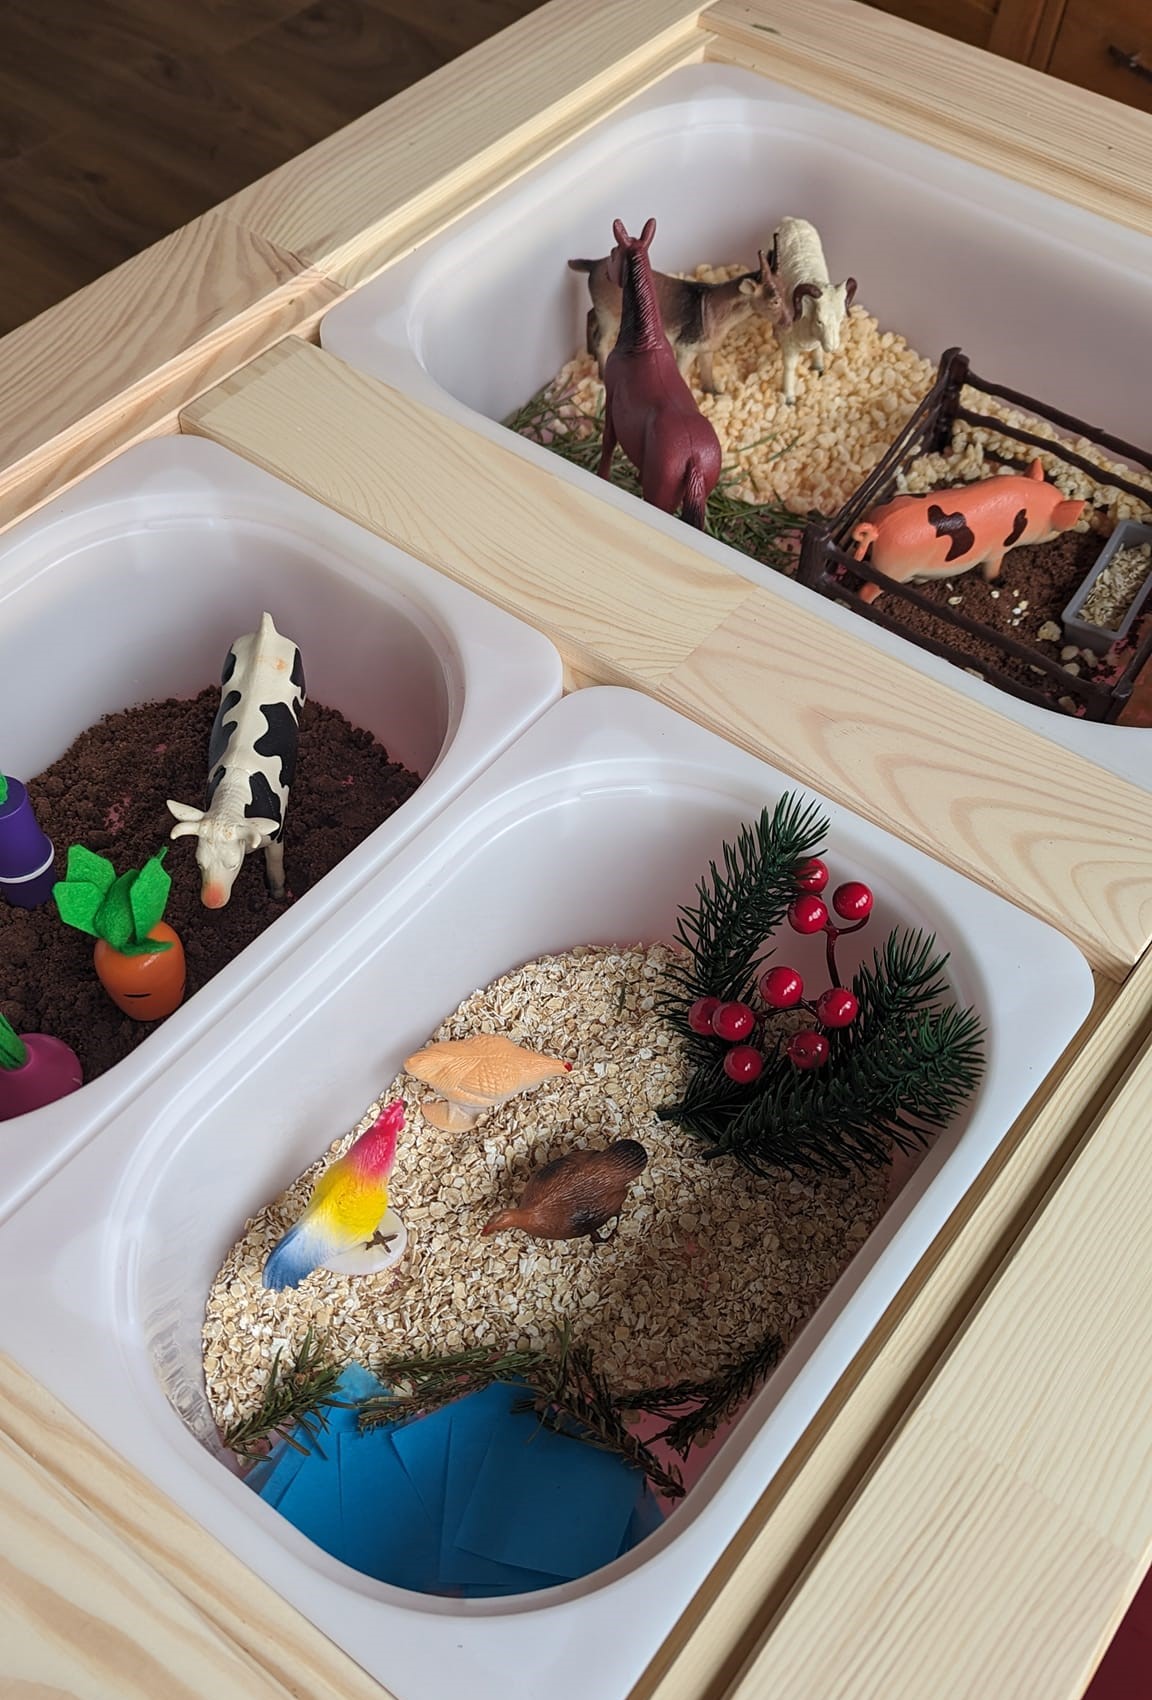
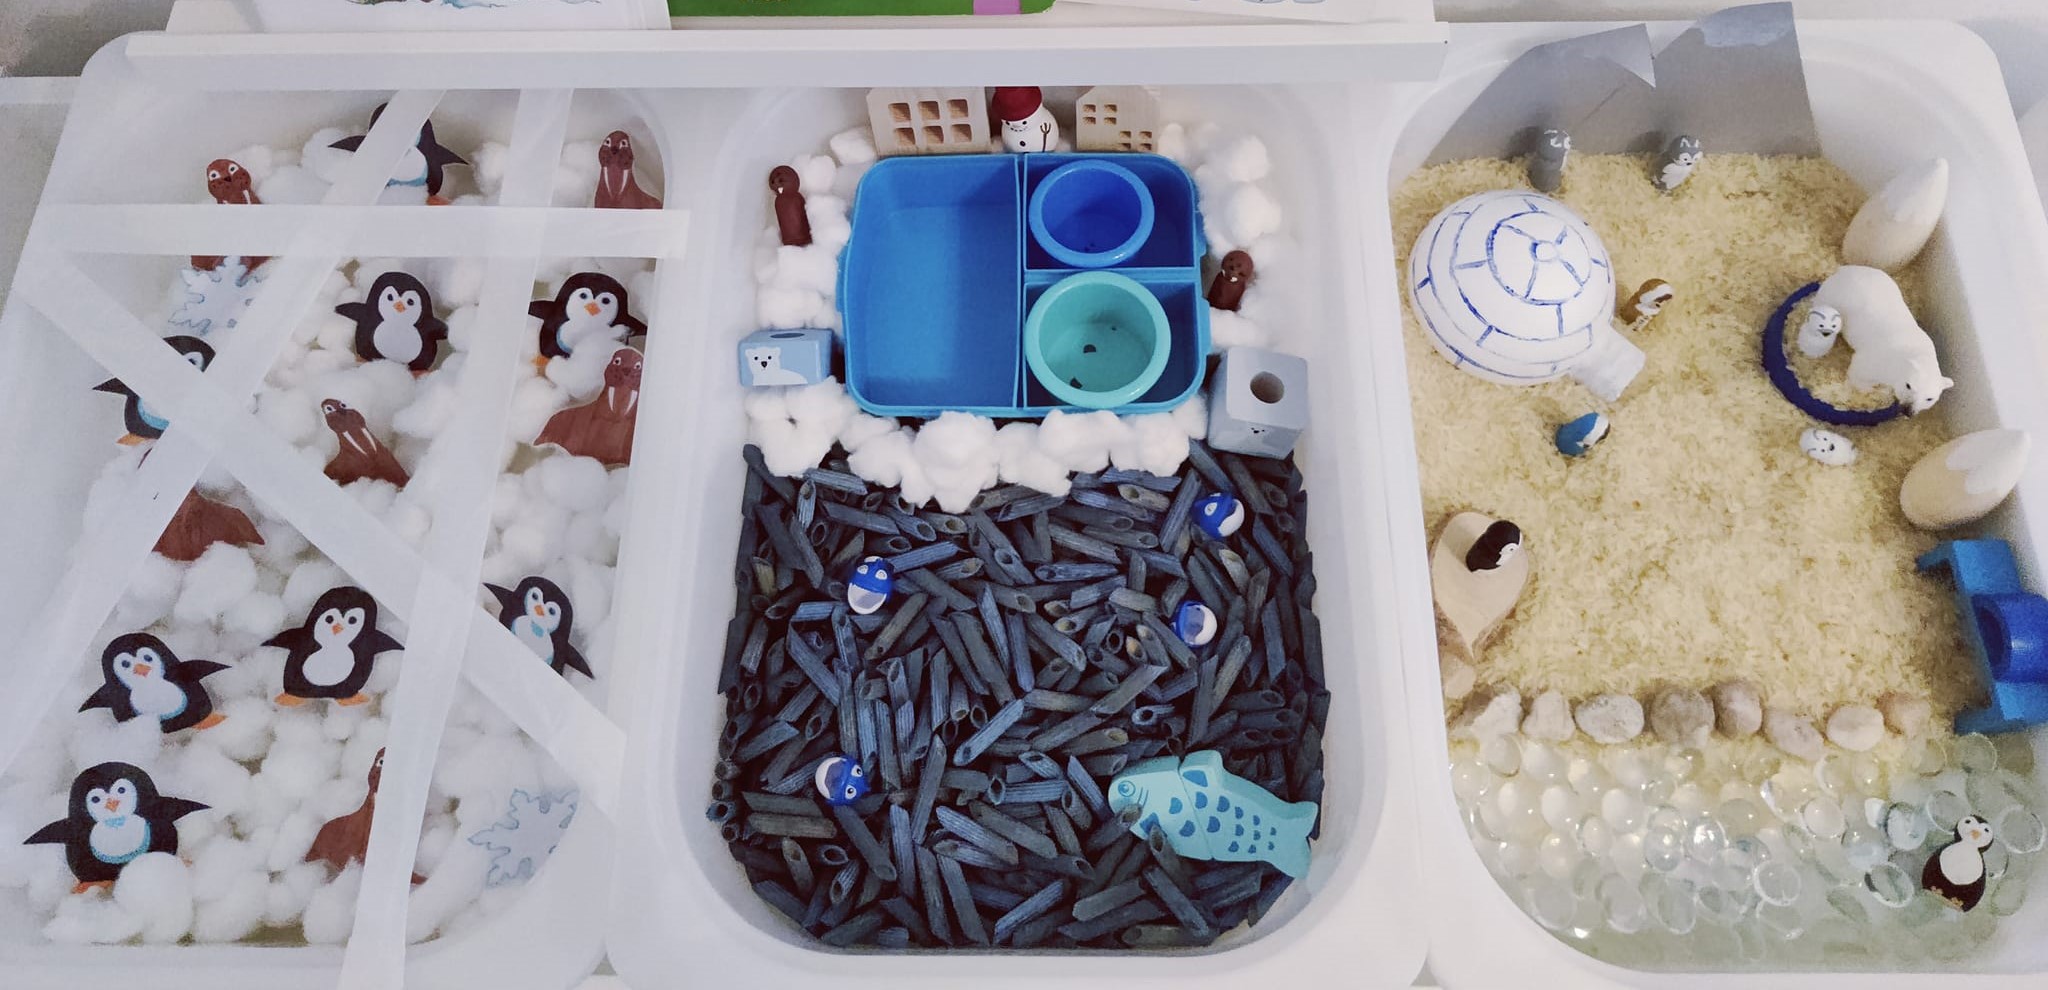
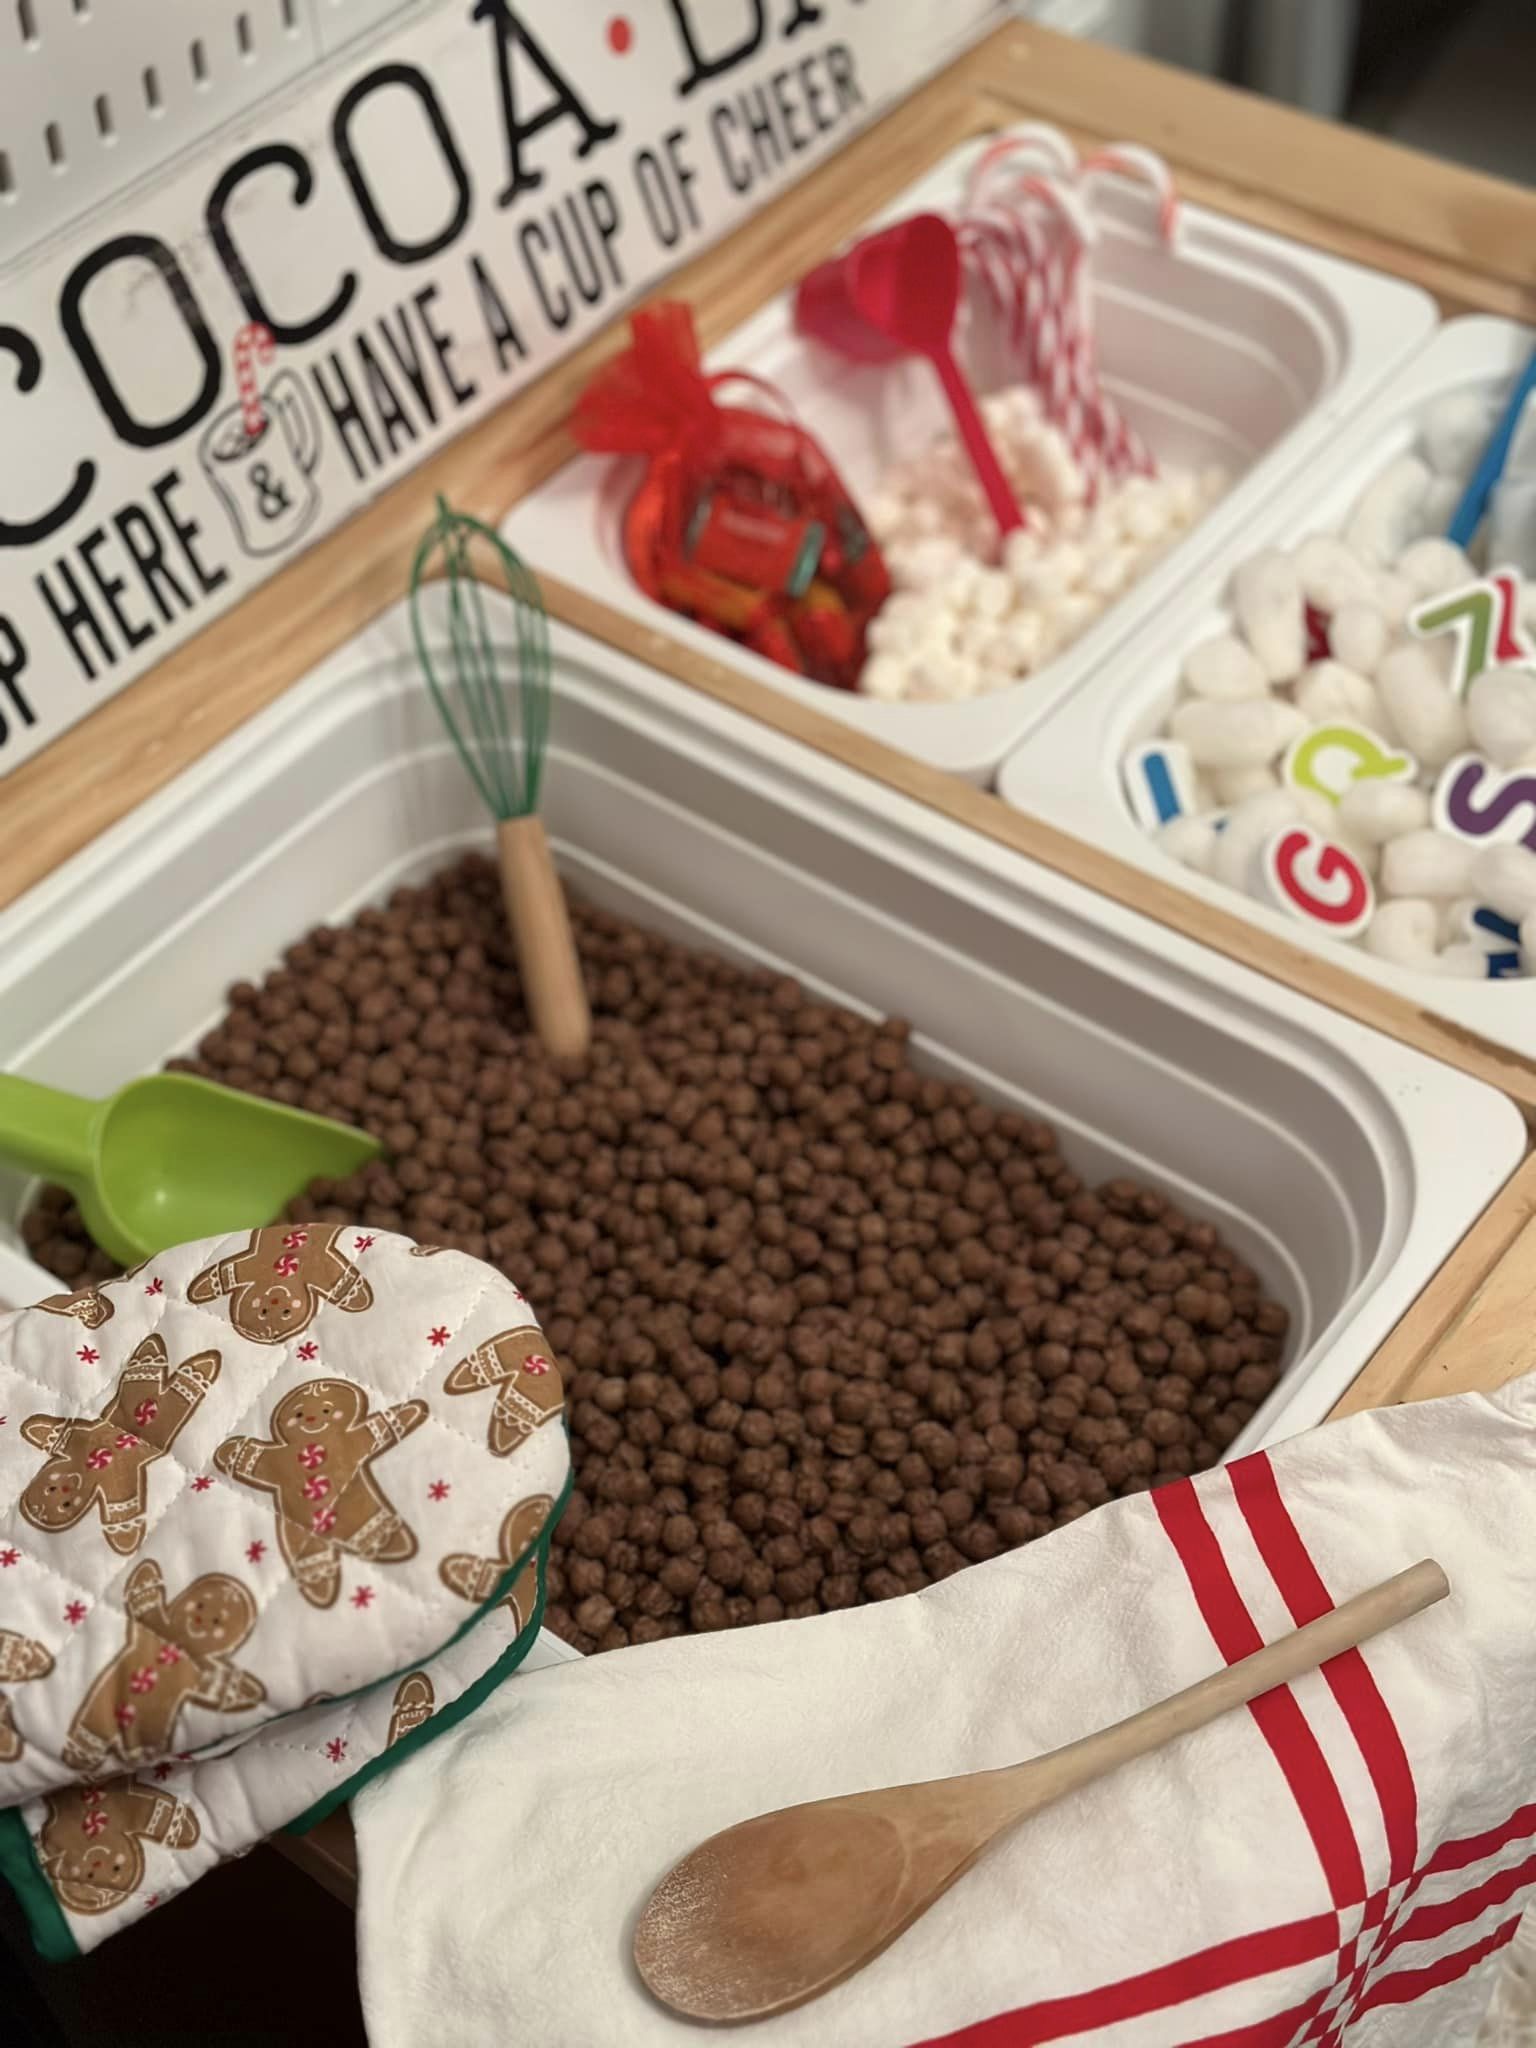
When people have a single bin, this is easier to remember, but I find that for folks who have the 3 bin Flisat setup it seems like it can be tempting to over-complicate things. Each of these examples below have great ideas! But, I would do them on separate occasions. The first has three great farm ideas – each could be their own bin on separate days. LOVE the arctic bins, especially the rescuing the penguins and polars from the tape maze, but again three separate days. And while the cocoa is a great idea, I personally feel like adding the letters overcomplicates it.
Mixing it Up
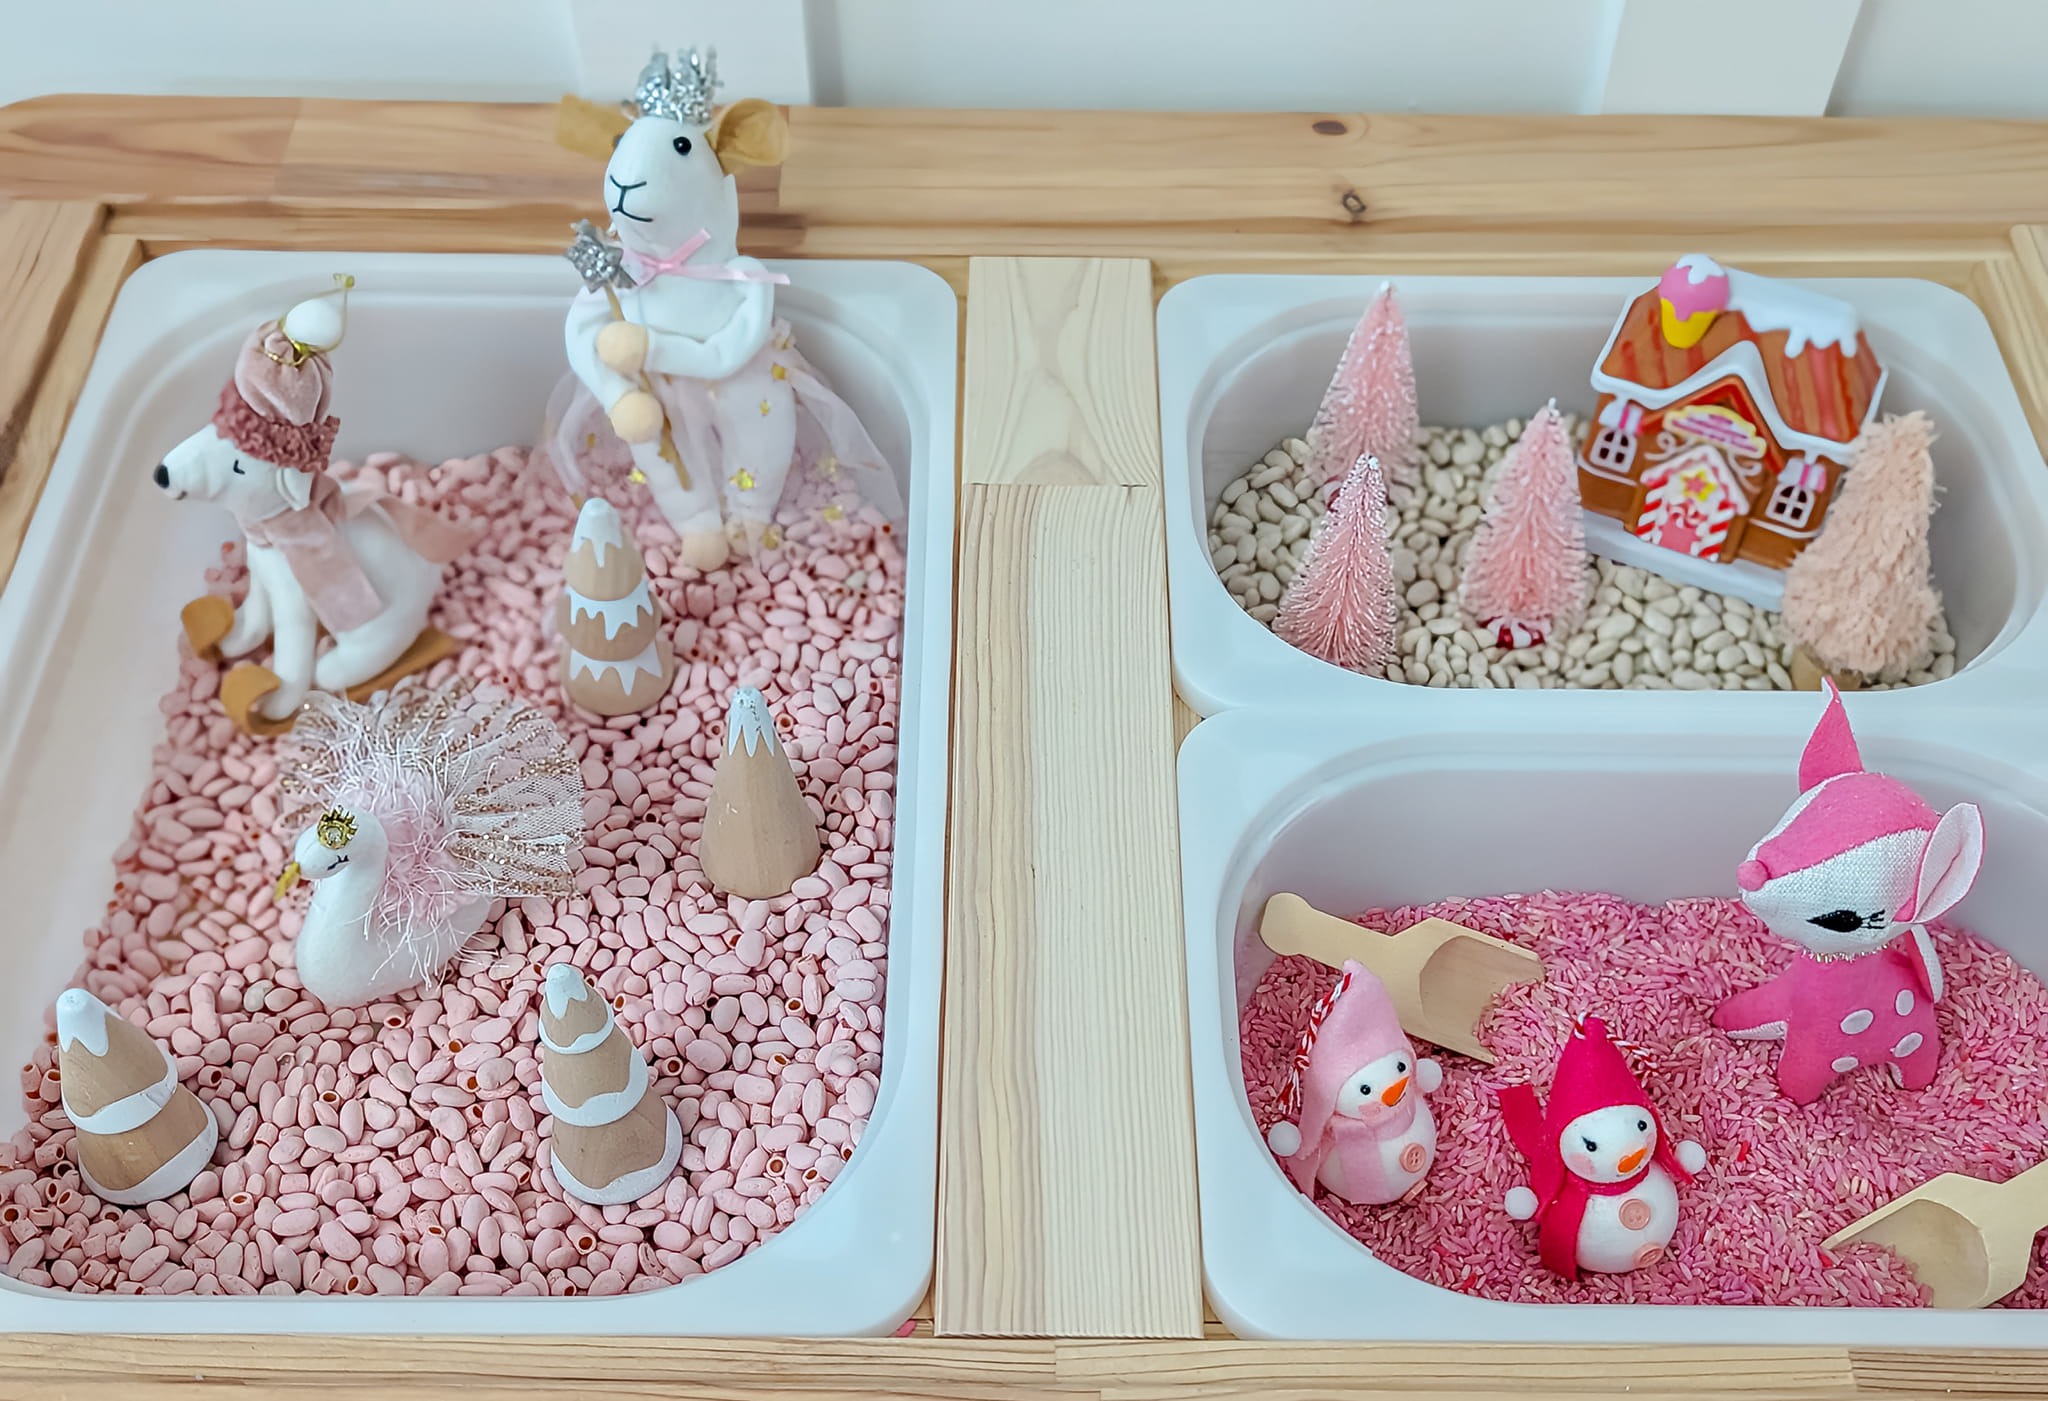
Think carefully about what materials you put in the bin. And think what the bin will look like when the kids are done with it. Sometimes I see set-ups that are beautiful collections of diverse materials. Perhaps there are some children who will not mix all the items together. But, in my classroom, I’ve never not had them not be all mixed together at the end of class. (That’s one of the reasons I’d advise against the three separate bins next to each other that we see in the pictures in the last gallery.) Or like this idea… if you’re OK with the fact that the pink and white beans and the rice will be permanently mixed up when you’re done, that’s great! If not, maybe don’t put them out together?
Our budget is limited, and we try to be environmentally sensitive, so I won’t just use things once and throw them away. So, I need to think: will I be able to separate these items at the end of class, or will I be able to continue to use them even after they’re all mixed up?
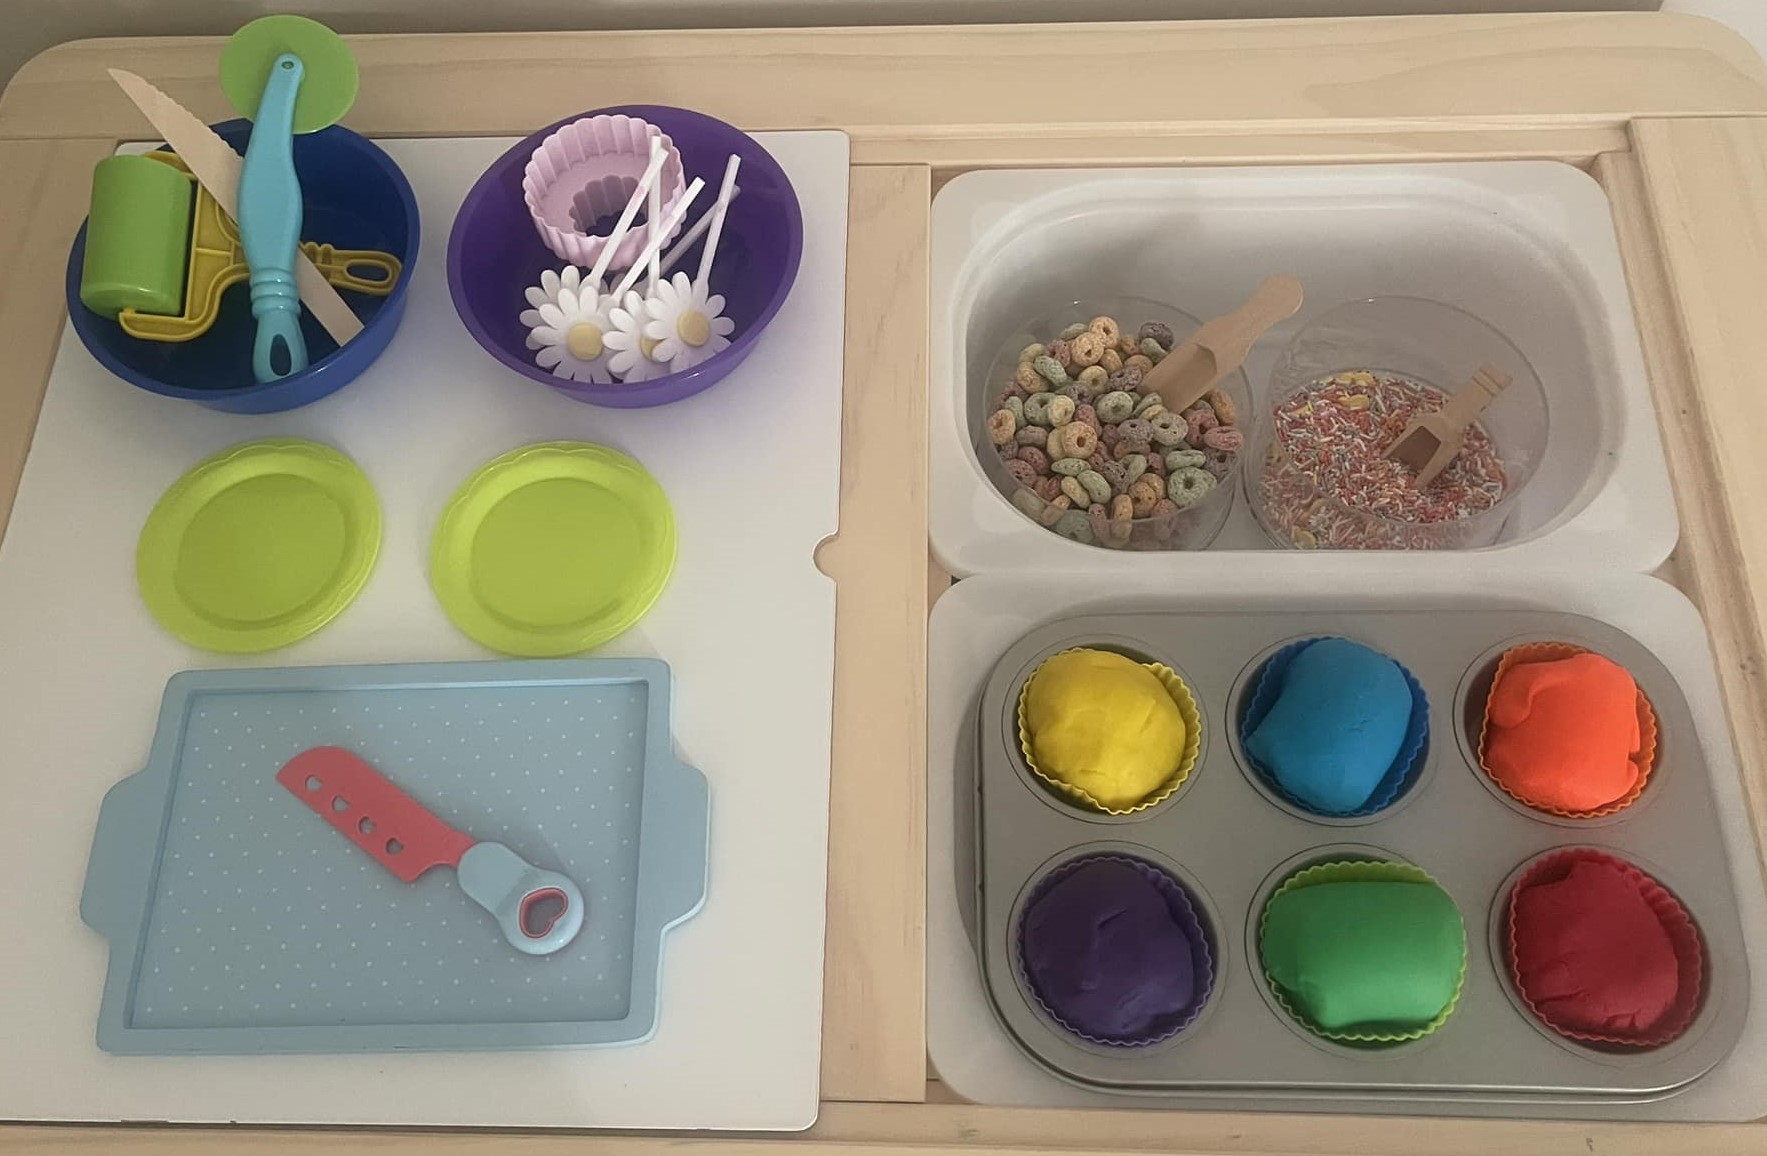
So, although any of the examples below might work for you (you know your own child / students best), I would not do them, because once these materials mix together, they could never be separated again. In my classroom, cheerios, sprinkles and 6 colors of playdough would be multi-colored blobs at the end of class; the sand and rainbow floam would be another multi-colored blob with scarves mushed in. While I LOVE the six different smell sensory ideas in the tray, I think doing them all close together would overload a child’s senses and make it hard for them to separate out the smells, AND they would all get intermixed and then be useless. And with both that one and the one below, having an actual mini pie mixed into the sensory bin would be a guaranteed gooey food-contaminated mess. Again, your mileage may vary, but that’s my experience.


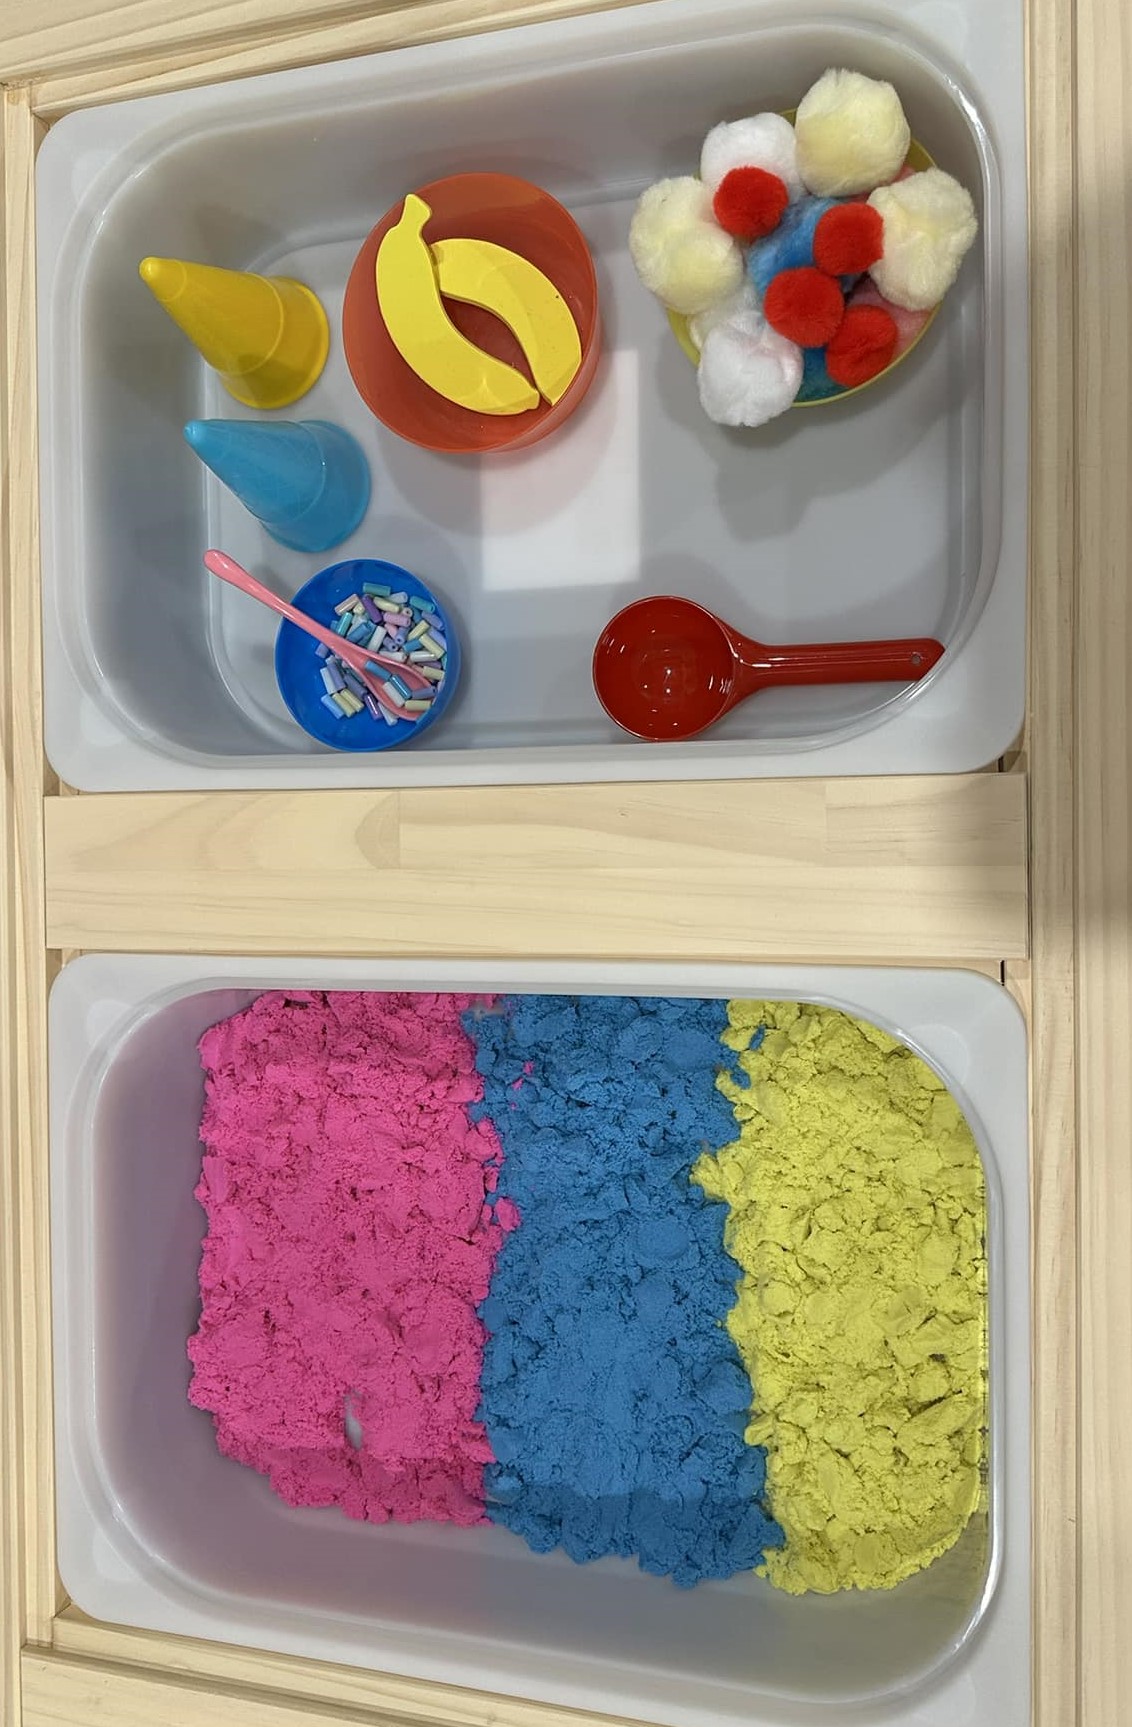
These set-ups below might work in my setting. I wouldn’t mind the red and green rice mixing, and I think I could separate out all those mix-ins, though it might take more work than I want to do. In the banana split sensory bin, I think that’s kinetic sand? Before setting this up for kids, I’d test – when I mix the three colors of sand, are they still an attractive mix or not? Can I separate out the pompoms? (And if so, are the pompoms ruined with sand or are they re-useable?) If the testing goes well, I’d offer this, but without the sprinkles.

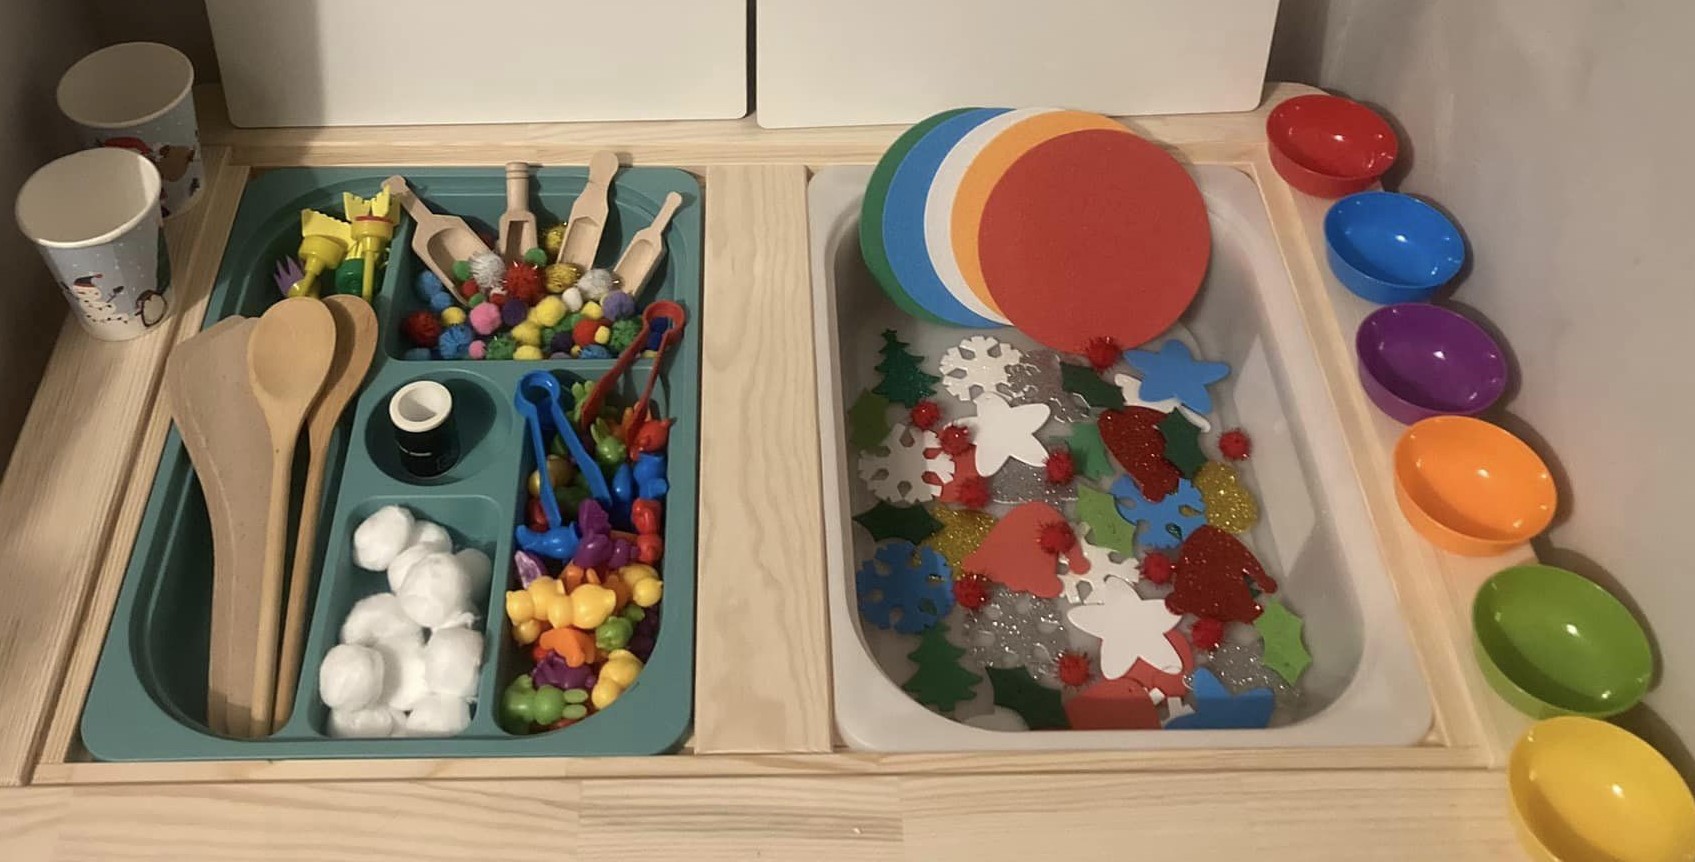
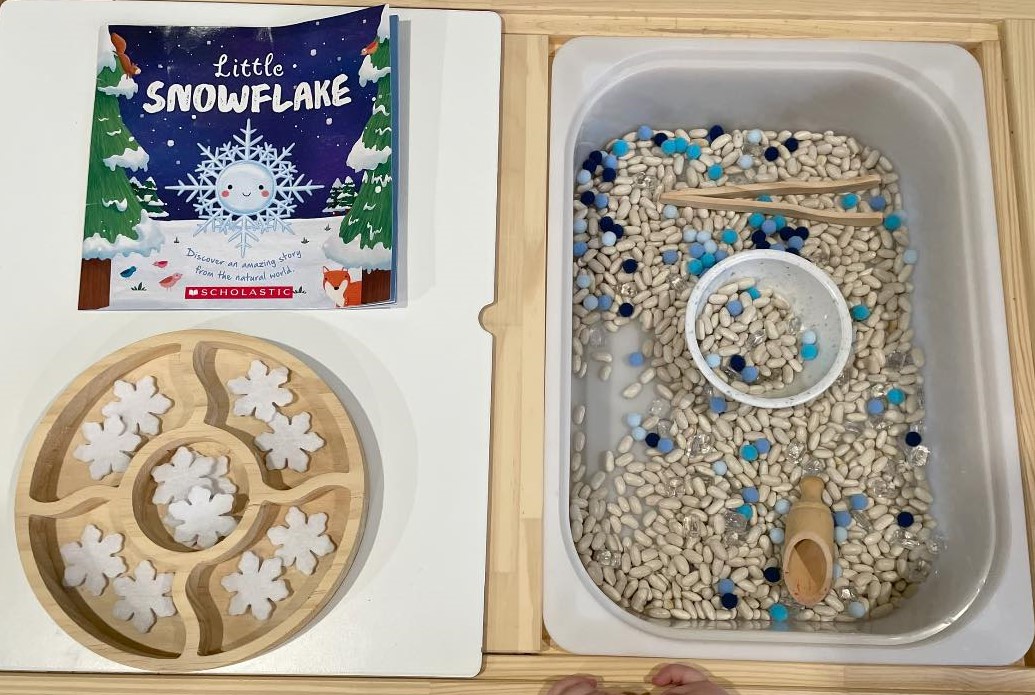
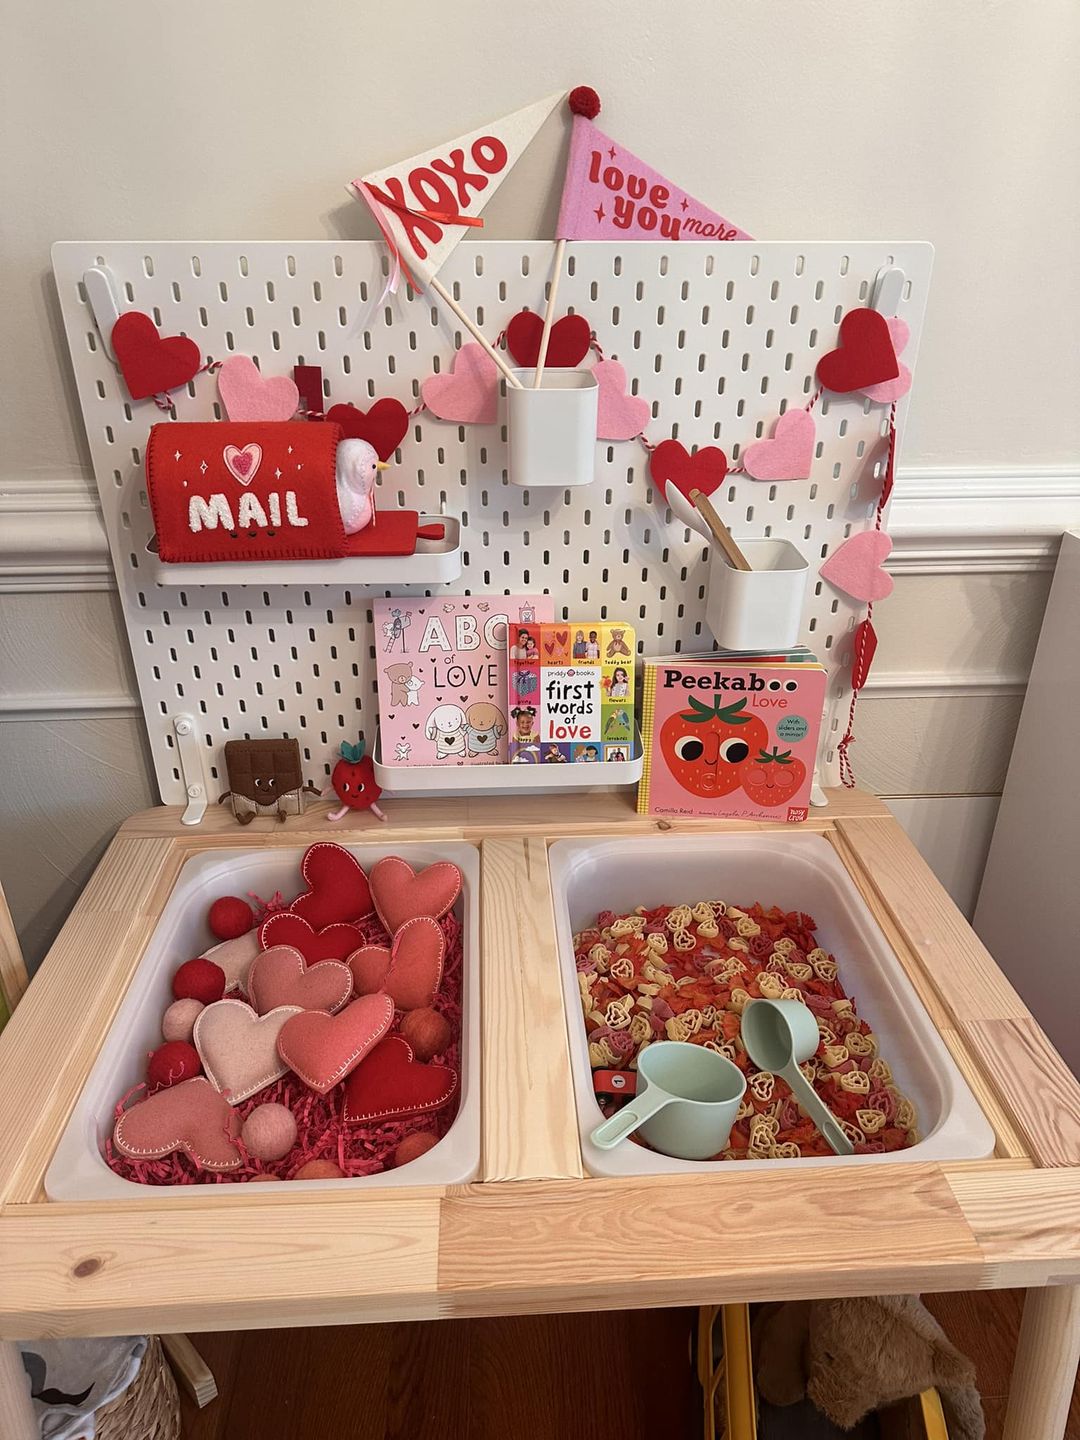
These mixes below would work for me. I could easily separate the pompoms and snowflakes from the beans, and it’s a fun mixture. Separating the balls, hearts, and pasta would be easy – the crinkled paper would be harder to separate out, but I think I could do it or maybe I’d store it with the pasta for the next time. The rice, cotton balls, ice cubes and letters would be easy to separate.

As a general rule, sensory bins can get messy! You have to have some tolerance for mess to use them at all. Here are tips for reducing the mess.
You Do You
In this post, I’ve shared what I learned from looking at lots of examples in this Facebook group, and I’ve shared my observations about whether I think it would work well in my classroom setting and with my teaching style. I don’t mean anything in here to be a criticism of any of these set-ups! If it works for the parent/teacher and the kids involved, hurray!
You are the best judge of what you like, what your child will like, what they need to learn, and what you’re willing to set up and clean up. So, as you’re looking at this post or any other sensory table ideas anywhere on the internet, I encourage you to trust your own judgment about what will work for you and be fun for you and your child / students. Sensory play is supposed to be fun for all involved.
Learn More
Be sure to check out my Ultimate Guide to Sensory Tables and my Ultimate Guide to Water Tables and reducing sensory bin mess. You might also enjoy this post on Building a Child’s 8 Senses.
* For source credits for all images in this post, click on the picture, then look at the URL. If it ends in something like craft-jane-doe, that means that Jane Doe posted it in the Flisat Facebook group. If it ends in craft-etsy-jane-doe, that means Jane Doe is the Etsy seller for that product. With an Etsy item, you could order it… or often, you could recreate the concept with cardboard or other materials you have at home – it won’t be as pretty, but will function just as well.)

[…] set up an enriching play experience, think about what the child will do with the items provided. When you have something planned, think what actions they’ll be able […]
LikeLike
[…] Sensory Table Set-Ups shares lots of examples I found online and my observations about general lessons to learn from these ideas. […]
LikeLike