

I teach a parent-child class for families with kids age 3 – 7 and this is one of my favorite projects for getting parents and children working together on a fun imagination challenge. This is also great if you have a parents’ night activity at your preschool or elementary school or a family actvitity at church.
Tutorial – How to Make a Cardboard Car for Kids’ Imaginary Play
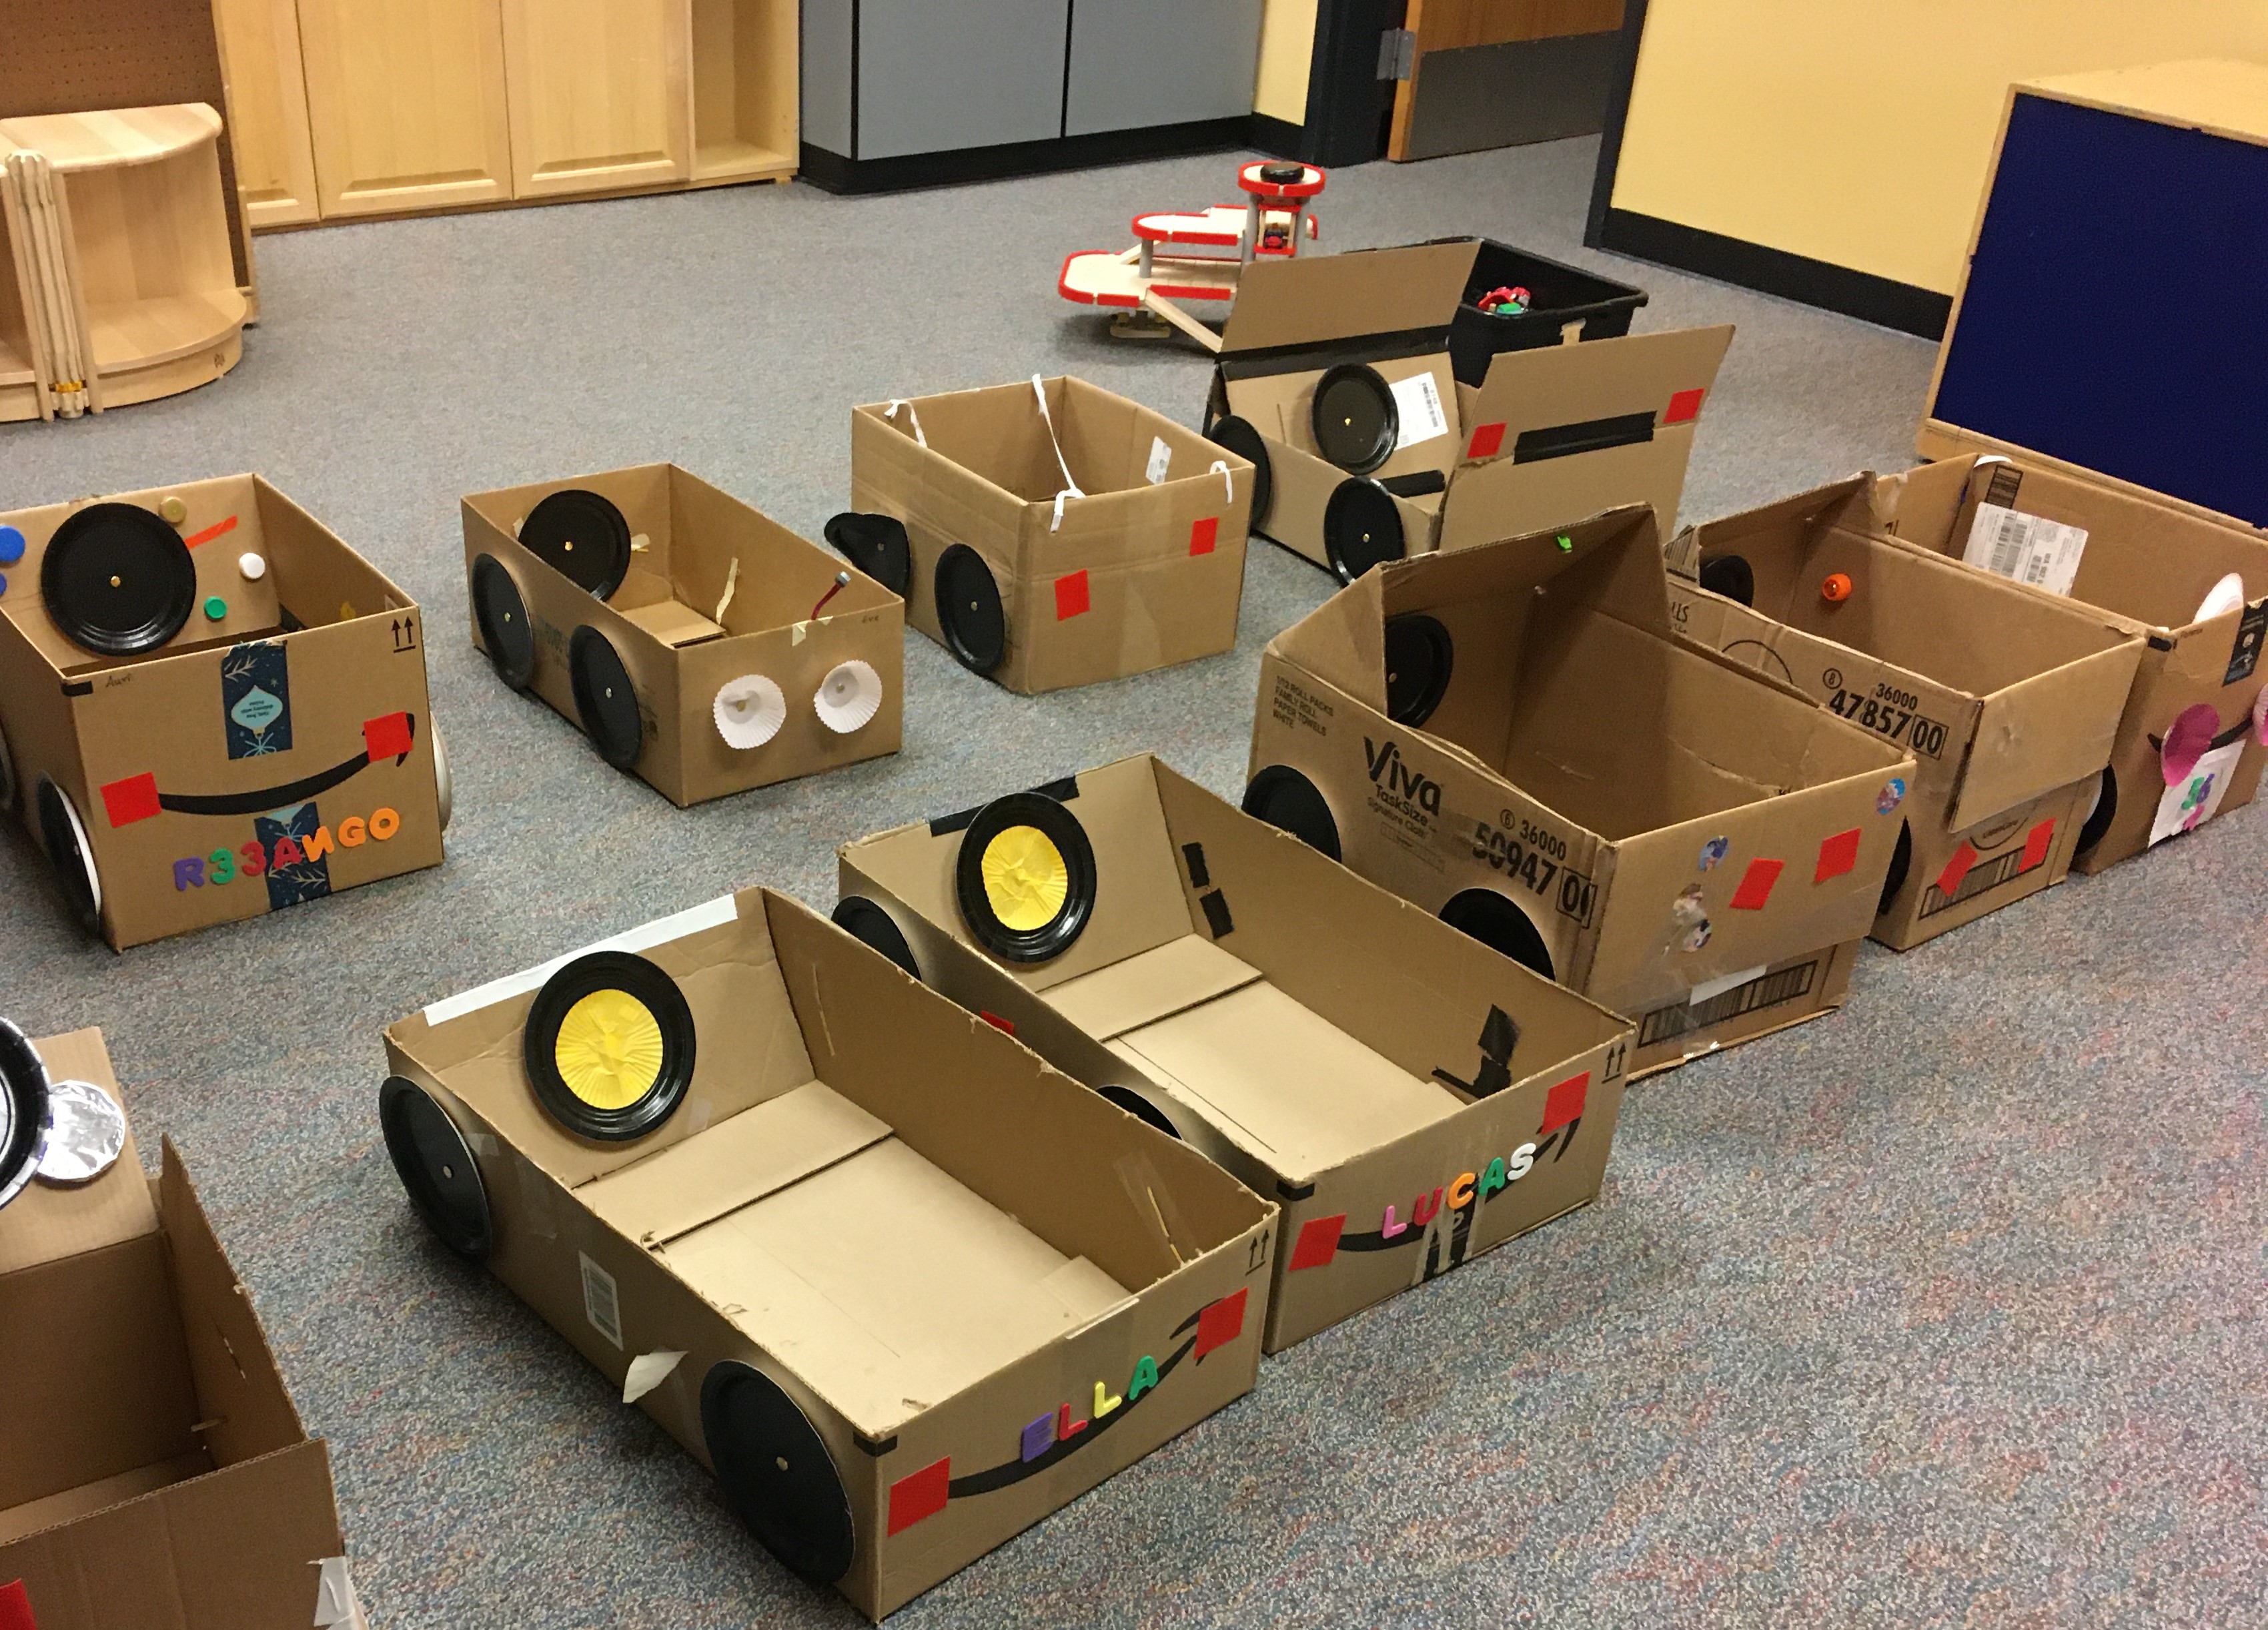
Each family is asked to bring in a large box – something big enough for their child to sit down in. They bring in things like file boxes, fruit boxes from the grocery store, small appliance boxes, moving boxes from U-Haul, and a lot of Amazon shipping boxes.
I put posters up on the walls with lots of ideas to get them started. (Here are posters of Car Design Ideas you could print and use for inspiration – note: these are all actual kid-parent creations, not Pinterest perfect items built by trained professionals.) But then I encourage them to be creative, use their imagination, and build the car any way that they choose.
I also let them know there are no required steps… It’s all about how the child wants their car to look!! If the child gets bored after they put two wheels on, I let the parent know it’s OK to choose to move on. But some kid-parent teams really stick with this projects and get truly creative. (Click on any picture for a closer view.)
Straps for Wearing It
The first thing to decide on: does the child want to just sit in their box car? (If so, skip this step and move to the next.) Or would they like to be able to wear it and walk around in it? (This is a great DIY Halloween costume!)
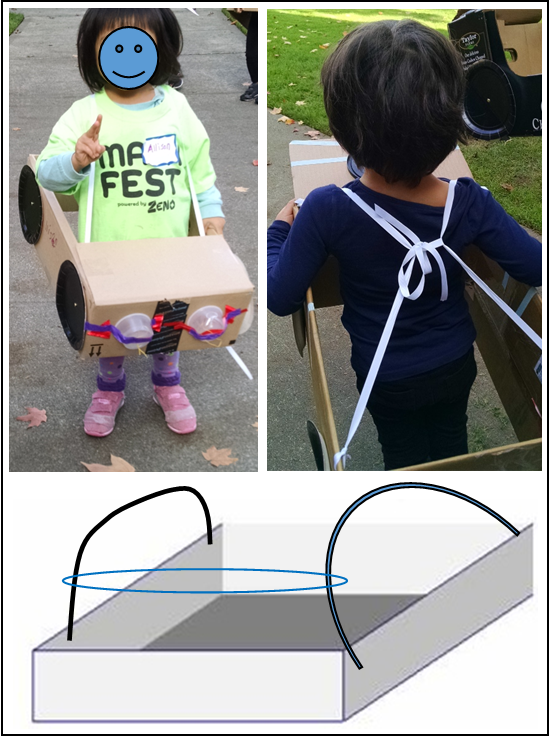
Here’s how to make this “car costume”:
- Cut off the bottom of the box. (Or if the box is large, cut a hole in the bottom that’s big enough for child to fit through but leave the rest of the bottom there for stability.)
- Poke holes and tie on strings… one on the left side, one on the right side.
- Then use a short string to tie those strings together at the top. When the child “wears’ the car, this short string is by their shoulders / back of their neck, as shown in right-hand picture above. This stops the straps from just slipping off the shoulders. (This is an essential tip that was missing from most of the Pinterest posts on car costumes!)
Doors?
To make doors that open and shut: You need a box cutter, so this job should only be done by an adult! Cut back edge of the door and bottom edge, as shown with the red lines. Then fold on the green dotted line to open. Make sure you leave enough cardboard around the door (in front, back and on the bottom) so there’s still room for the wheels, and so it’s still stable, not all wobbly. (Note: I recommend just one door for stability’s sake.)

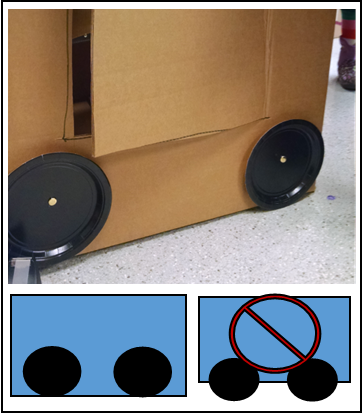
Wheels
You can cut out big circles of paper for wheels or use regular paper plates. I like using black dessert-sized paper plates. You can just tape these on, but it’s more fun if they turn.
To do this: punch holes in the center of the plates (I really like this hole punch for this job. It comes in handy anytime you need to punch holes in the middle of something big.)
Then place one plate where you want it to be on the box. (Note: paper plates aren’t strong enough to support the box, so you don’t attach them sticking out below the box to support a car like real wheels would… they’re flush with the bottom of the box.) Have a grown-up use a tool like an ice pick, awl or screwdriver to punch a hole. Put the tool through the center of the plate, into and through the wall of the box. Push an extra long brad / Paper Fastener through the hole, and fold its wings open.
Lights
Add headlights and tail-lights. Almost anything circular works! I’ve had kids tape on plastic lids, plastic snak-pak containers, CD’s, cupcake wrappers, and more.
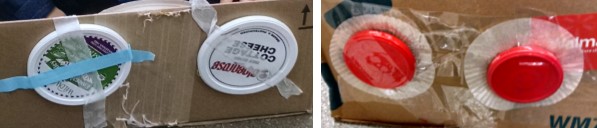
Round stickers could also work. My favorite is reflective tape circles… look what happens when you take a picture with a flash!
Note: the reflective tape I found in the past was VERY expensive, and tricky to peel the backing off of. I’ve found a new brand of reflective tape that’s much cheaper and easier to work with. (I’m including Amazon affiliate links in this post – if you click through and then buy something, I do get a small portion of the income.)
Steering Wheels, Wipers and More
Get creative and see what you can make! Families have created steering wheels, windshield wipers, mirrors, saran wrap windshields and more. They’ve even made gas and brake pedals.
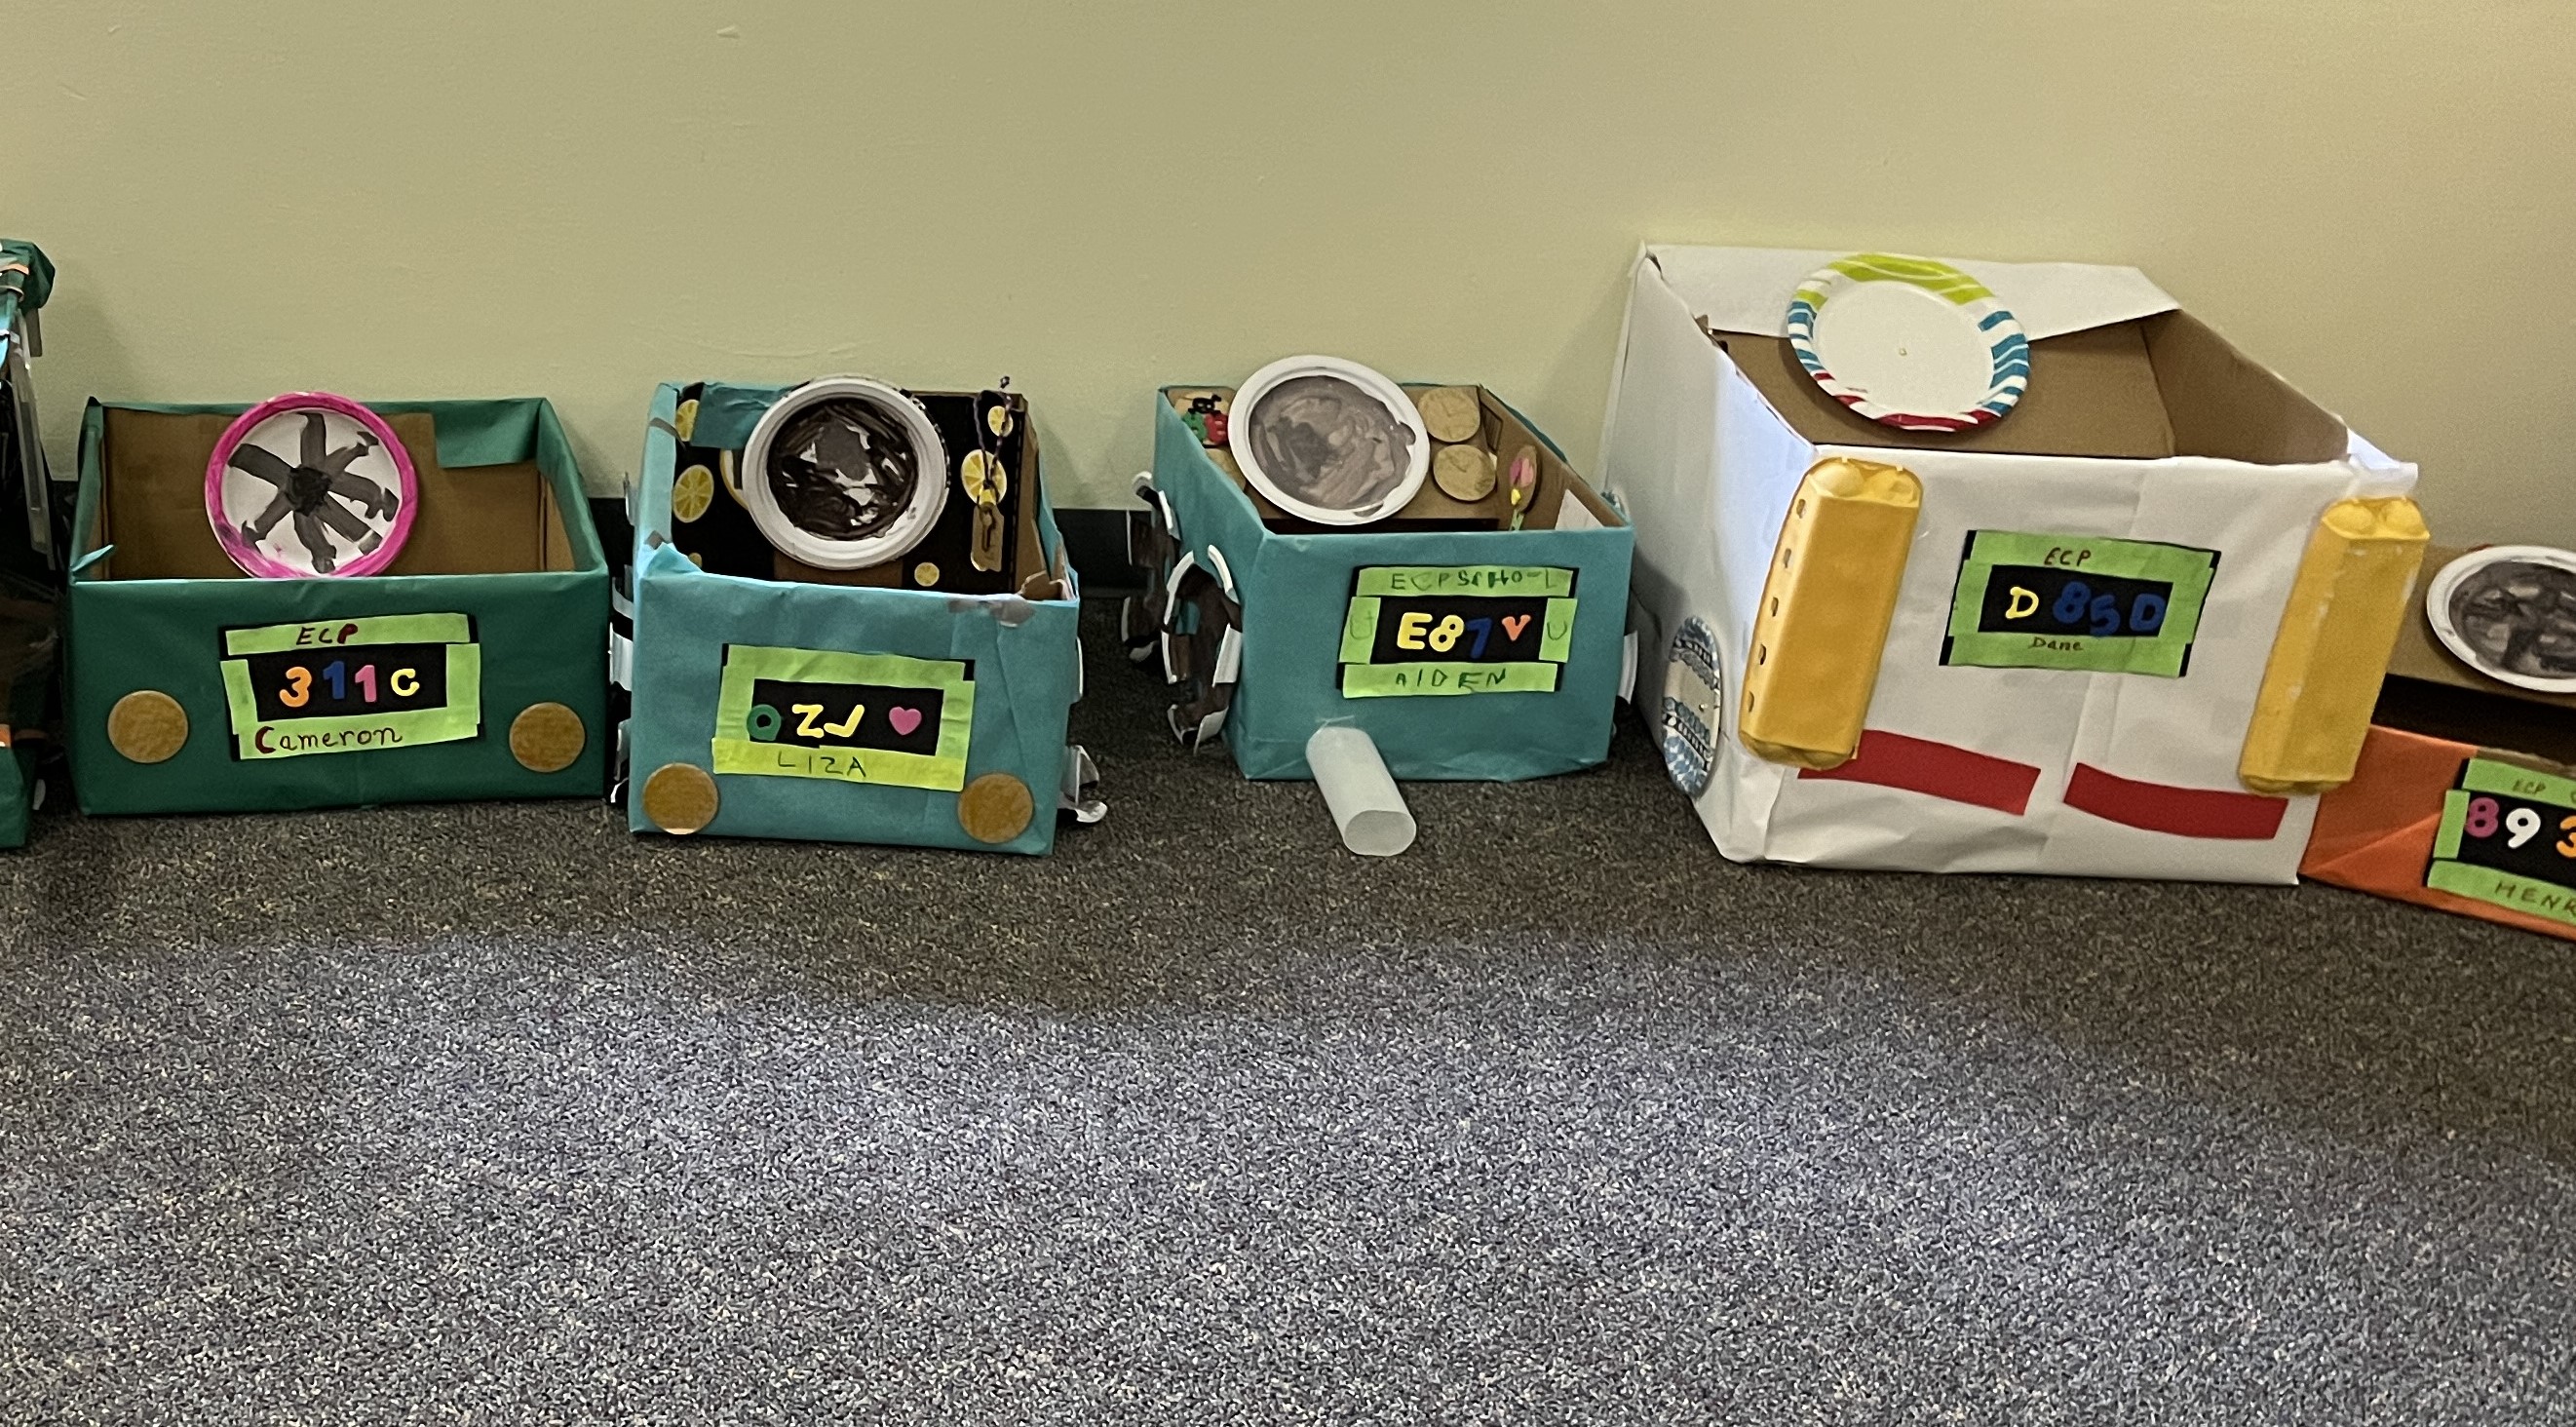
License Plates and Keychains
We include a station for designing your own license plate and bumper stickers, which is great for practicing letters and numbers.
If you have some old keys that you no longer need, it’s fun to make key chains. You could have tags that they attach with their names written on them, or they could bead a key chain.
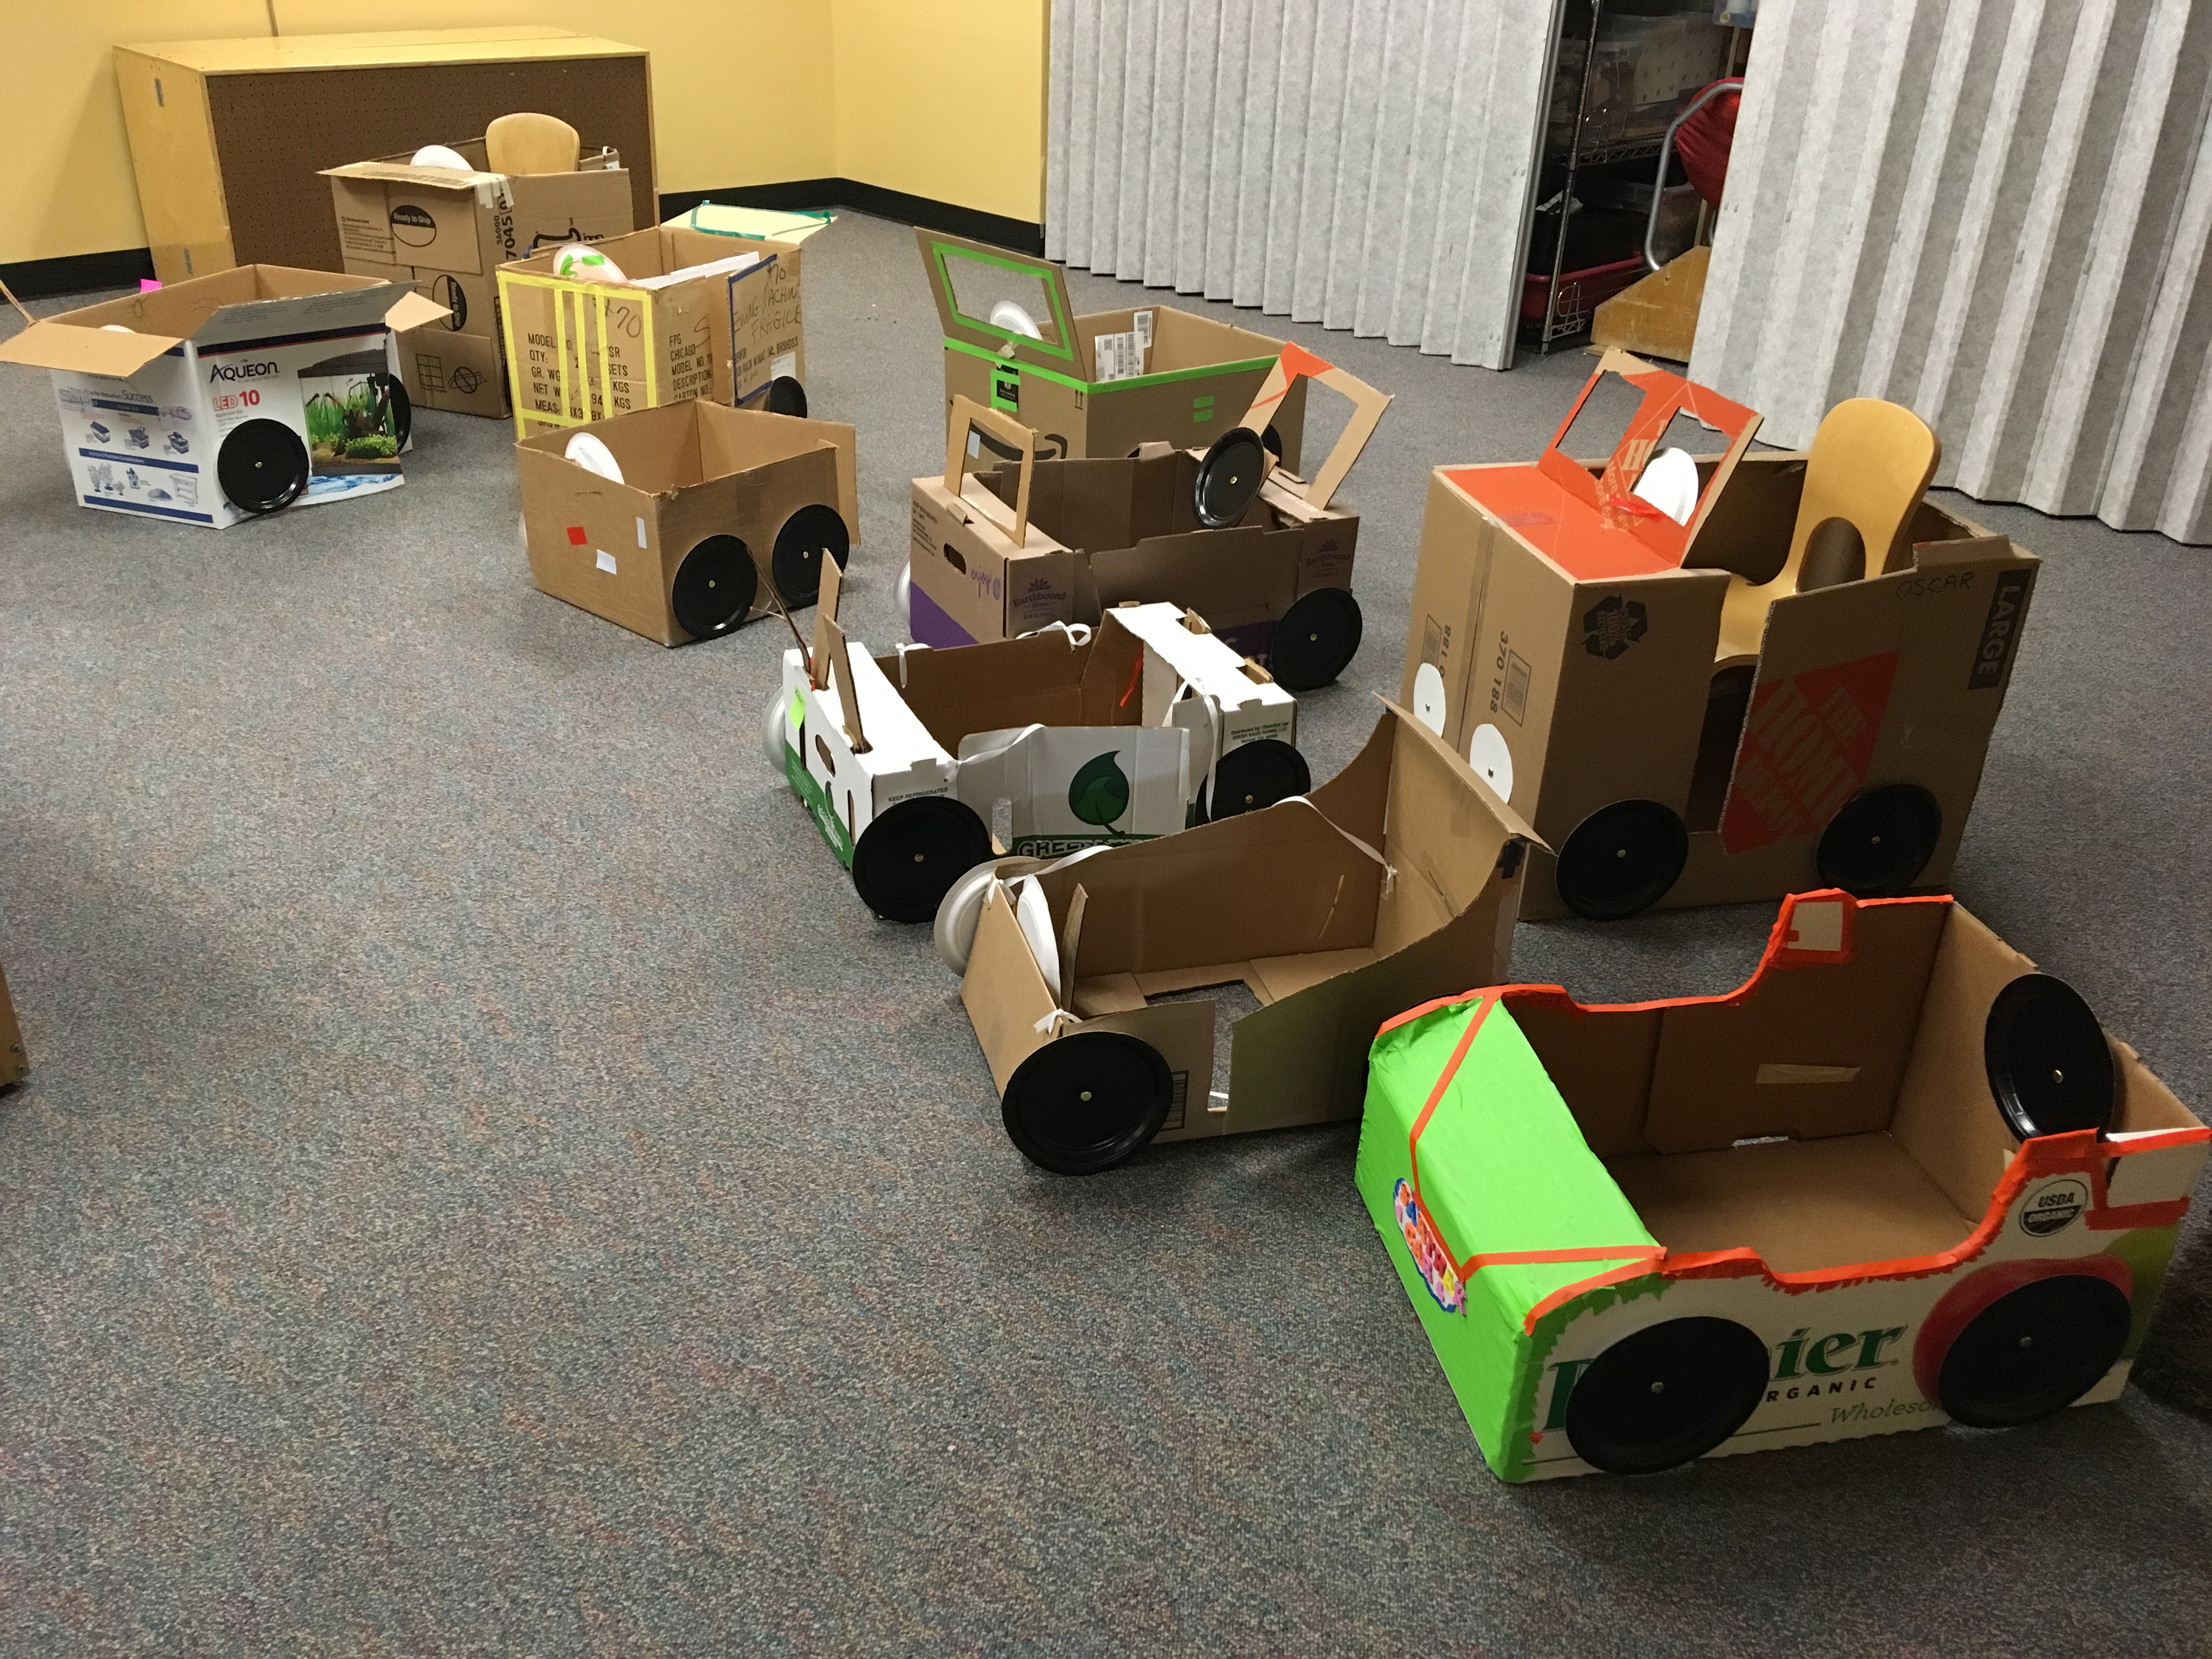
Shape
Some parents have changed the shape of their boxes to create more interesting makes and models of cars and planes.
Decoration
If you have time and can handle the mess, you could paint the boxes as your very first step. It’s not something we can do in the context of my two hour class, but it can lead to some great results. (Just search Pinterest for inspiration!) We decorate with markers, dot paints, stickers, and colorful tape.
You might also choose to cover the boxes with colorful paper. The downsides are: it takes a lot of teacher/parent time, it uses a lot of paper, and it’s harder to do structural things like doors if the boxes are papered. Upside – they do look better / more festive.
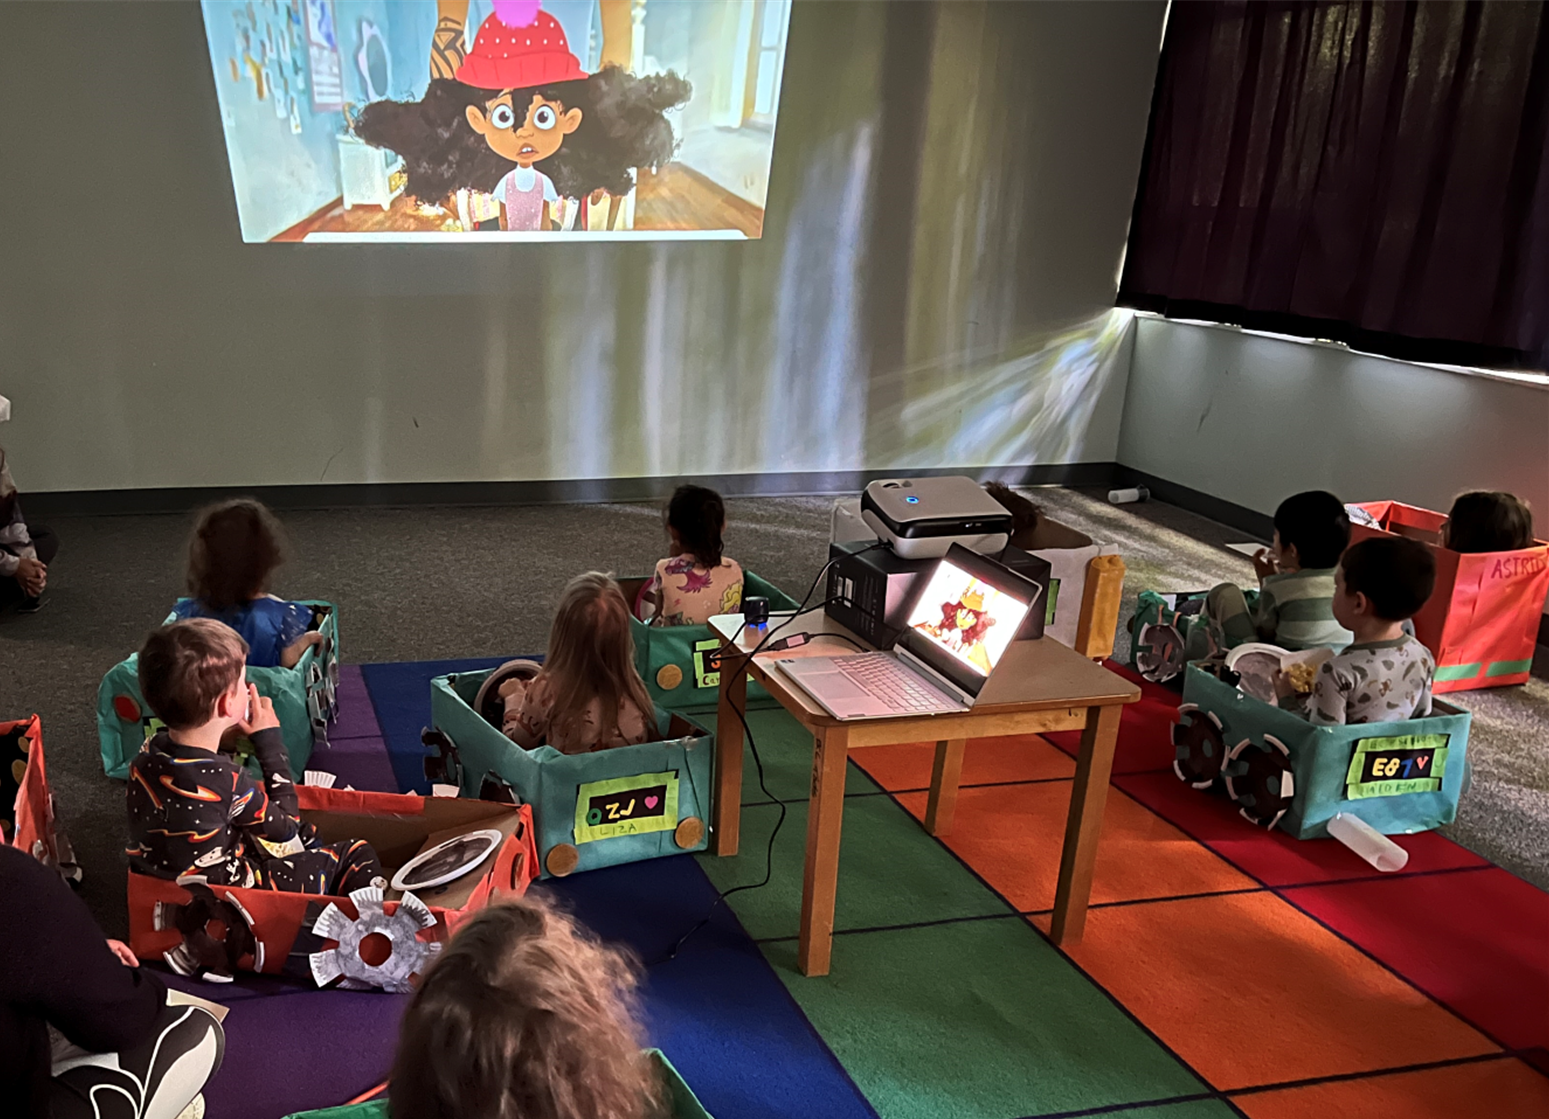
Drive-In Movie:
At the end of class, instead of our usual closing circle, we gather everyone for a “drive-in movie”. The kids sit in their cars and eat popcorn while we watch a Sid the Science Kid episode called Climb, Ignatz, Climb which is the final wrap-up episode of their simple machines unit. (At our preschool, we watched Bad Hair Day.)

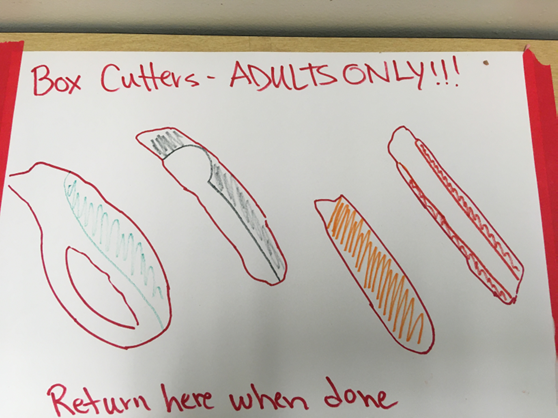
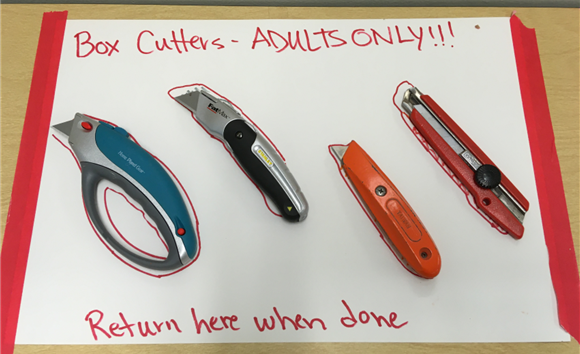
Safety Note: We have found that adults are not always great at remembering to keep dangerous toys out of reach of children. We set up a special station for the box cutters, where we trace them, and color them in so it’s really clear that is where they belong. AND the teachers keep an eye on things to make sure that they follow the two basic rules: adults only and return them here when done. (Don’t just set it down on the floor when you wander away to find some tape or whatever!)
Check out our full Cars Lesson Plan for more car-themed activities for preschool and kindergarten. Or go to the homepage to find out about the other 35+ topics that we have full lesson plans for – full of great hands-on STEM learning, crafts, imaginaty play, songs, and books.

[…] out the full Cardboard Cars post about this project, and see lots more […]
LikeLike
[…] Cardboard Cars for a Drive-in Movie […]
LikeLike